Table of Contents
Advertisement
Quick Links
Advertisement
Table of Contents

Summary of Contents for Andonstar 246
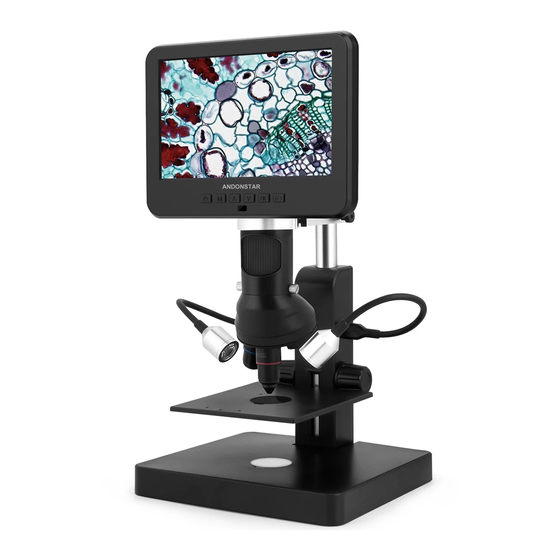
- Page 1 Digital Microscope 246 249 Users Manual (metal stand)
-
Page 2: Table Of Contents
CONTENTS Safety and maintenance .................................2 Specifications .................................... 2 Package include ..................................3 Video demonstration ................................3 Buttons&Connection ................................4 Bracket installation .................................. 4 Bracket instructions ................................. 5 Quick Start ....................................5 How to choose lens ................................ 6 Digital zoom ..................................10 Save files to micro SD card ............................10 Remote ..................................... -
Page 3: Safety And Maintenance
Safety and maintenance 1. Please read this users manual carefully before using the device. It may cause permanent damage to the device to not follow the operation guide listed in this manual. 2. This product contains tiny parts and components that are NOT edible. Please let children and teens use this device under proper guide and supervise by adults. -
Page 4: Package Include
Package include (P1 Package include) ①Microscope ②Metal bracket ③Lens A(has been fixed) ④Lens D ⑤Lens L ⑥Remote ⑦Dimmer cable ⑧Slide holder ⑨Slides kit ⑩Tweezers ⑪Bug box (P1 Package include) Video demonstration: Please find the video demo from the link(Please type all letters properly capitalized)/QR code below, ①Product installation:... -
Page 5: Buttons&Connection
Buttons&Connection (P2 Buttons&Connection) ①Power on/off ⑥Take pictures ⑨Lens fixing screws ②Mode/Menu (while the device is recording) ⑩Reset ③Up/Digital zoom in ⑦Remote signal receiver ⑪USB port ④Down/Digital zoom out (where you aim remote to) ⑫SD card slot ⑤OK/Start recording ⑧Focusing tube Bracket installation Please see the attached installation diagram. -
Page 6: Bracket Instructions
Bracket instructions (P3 Bracket instructions) ①Secondary Bracket Lift ⑦Boom Arm V-locker(lock the arm in vertical ②Boom Arm direction) ③Lower Limit Stop ⑧ Boom Arm H-locker(lock the arm in ④Monitor Fixing Screws horizontal direction) ⑤Spot Lights ⑧Spot Lights Interface ⑥Clips Quick Start 1. -
Page 7: How To Choose Lens
When the monitor image stops or froze, please pin the Reset hole (pic 2 #⑩) to reset the device first, then power on the device again. (Reset hole is very tiny, located at the back of the monitor. You may need to use the help of other tools with this process. - Page 8 (pic 5 Go with lens L) Steps:In pic 5 it marked out which parts of the microscope are involved to each step. ①Install and fix lens L to the bottom of the focusing tube. ②Bend the two goose-neck spot lights, make the field of view enough illuminated. ③Loose the Arm V-locker, locate the whole monitor part to a desire height (distance from the lens to the specimen should be around 90mm to300mm), then fix the V-locker.
- Page 9 (pic 6 Go with Lens A) Steps:In pic 6 it marked out which parts of the microscope are involved to each step. ①Install and fix lens A to the bottom of the focusing tube. ②Bend the two goose-neck spot lights, make sure the light shines on the coin. ③Loose the Arm V-locker, locate the whole monitor part to a desire height (distance from the lens to the specimen should be around 12mm to 320mm), then fix the V-locker.
- Page 10 Lens D: Working distance:4mm-5mm, Magnification:450-510x(with3 times digital zoom) Applications: Microscope slides etc. (Pic 7 Go with lens D) Steps:In pic 7 it marked out which parts of the microscope are involved to each step. ①Install and fix lens D to the bottom of the focusing tube. ②...
-
Page 11: Digital Zoom
Digital zoom Press “up” button on the monitor(pic 2 #③) to apply digital zoom in, and “down” to zoom out( pic 2# ④) Save files to micro SD card To save images and videos to a memory card, please insert a card into the TF slot at the back of the monitor before power on the device. -
Page 12: Remote
Remote *Freeze: Stop the image on the display, works in video mode, photo mode and while recording. *Illumination+ & -: exposure compensation from +2.0 to -2.0. *Sharpness up&down: three levels of sharpness: Soft/Normal/Strong. Those two buttons are both used to switch the levels, but in different orders. *Contrast up&down: same principle as Sharpness (Pic 8 Remote)... -
Page 13: Settings
Settings In any mode, press and hold M button until it shows video/photo/playback menu, press M again, get into Setting menu. For example. In video mode, press and hold M button, it would show video menu as pic 9: And then, press M again to get into settings menu as pic 10: (pic 9 video menu) (pic 10 setting menu)... -
Page 14: Warranty
3. Setting changes can’t be memorized. After changing settings, press and hold the button on the monitor to switch off the device. DO NOT cut off the power supply directly or use the dimmer cable to switch off the device. 4.The microscope reboots repeatedly.


Need help?
Do you have a question about the 246 and is the answer not in the manual?
Questions and answers