Table of Contents
Advertisement
Quick Links
Advertisement
Table of Contents

Summary of Contents for Andonstar 246
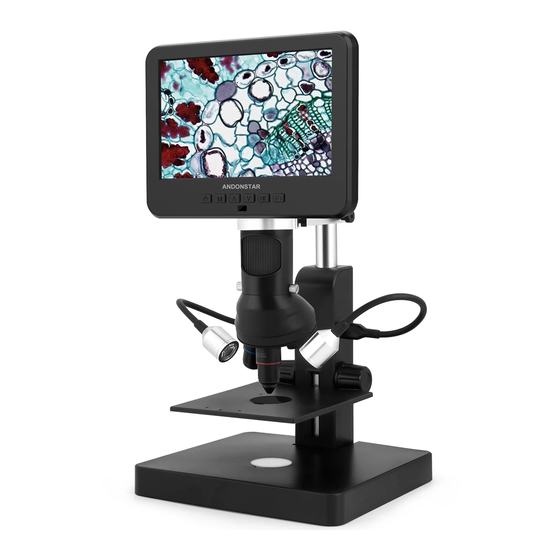
- Page 1 Digital Microscope 246、249 Users Manual (plastic stand)
-
Page 2: Table Of Contents
CONTENTS Safety and maintenance ..............................1 Specifications ..................................1 Package include ................................2 Video demonstration ..............................2 Button&Connection ................................ 3 Bracket installation ................................3 Bracket instructions .................................4 Quick Start ..................................4 How to choose lens ..............................5 Digital zoom ................................8 Save files to micro SD card ........................... 8 Remote ..................................9 Settings ..................................... -
Page 3: Safety And Maintenance
Safety and maintenance 1. Please read this users manual carefully before using the device. It may cause permanent damage to the device to not follow the operation guide listed in this manual. 2. This product contains tiny parts and components that are NOT edible. Please let children and teens use this device under proper guide and supervise by adults. -
Page 4: Package Include
Package include ①Microscope ②Plastic Stand ③Lens A ④Lens B&C ⑤USB spot lights*2 ⑥Remote ⑦Dimmer cable ⑧Screw driver ⑨Slides kit ⑩Tweezers ⑪Backdrop board*3 ⑫Bug box (P1 Package include) Video demonstration: Please find the video demo from the link(Please type all letters properly capitalized)/QR code below: ①Product installation:... -
Page 5: Button&Connection
Button&Connection (P2 Buttons&Connection) ①Power on/off ⑥Take pictures ⑨Lens fixing screws ②Mode/Menu (while the device is recording) ⑩Reset ③Up/Digital zoom in ⑦Remote signal receiver ⑪USB port ④Down/Digital zoom out (where you aim remote to) ⑫SD card slot ⑤OK/Start recording ⑧Focusing tube Bracket installation Please see the attached installation diagram. -
Page 6: Bracket Instructions
Bracket instructions (P3 Bracket instructions) ①Arm locker ⑥Clips ②Monitor Fixing Screws ⑦Loophole ③USB spot lights ⑧Bottom light ④Stage height controller ⑨light interface ⑤Mechanical stage Quick Start 1. Connect the device to power supply as followed pic 4 to power on the microscope. 2. -
Page 7: How To Choose Lens
(Pic 4 Connection) How to choose lens Lens A: Focus range:12mm-320mm, Magnification:4.5-180x(with3 times digital zoom) Applications : observe whole size or part of coins, stones/stamps collect, circuit board observe etc. - Page 8 (Pic 5 Use lens A to see a coin) Steps:In pic 5 it marked out which parts of the microscope are involved to each step. ①Install and fix lens A to the bottom of the focusing tube. ②Place the black or white backdrop board to the loophole on the stage, then place the coin on the stage.
- Page 9 Lens B&C: Lens B: Focus range: 7mm-8mm,Magnification: 390-510x (with3 times digital zoom) Lens C: Focus range: 3mm-4mm,Magnification: 690-1020x (with3 times digital zoom) Applications: Microscope slides etc. (Pic 6 go with Lens B&C) Steps:In pic 6 it marked out which parts of the microscope are involved to each step. ①Install and fix the nosepiece set with Lens B&C to the bottom of the focusing tube.
-
Page 10: Digital Zoom
distance is, the bigger magnification is. ⑤ Turn the focusing tube to get a clear image. Turn it clockwise to zoom in and the other way to zoom out. Or, we recommend users to gently adjust the stage height to get a clear image, this way causes less shake. -
Page 11: Remote
Time here shows how long a video the memory card is capable to record, and “1080FHD” shows the current video resolution. Take photos In Photo mode( ), press “OK”button to take pictures. The button marked as a camera on (pic 2 #⑥), can also take pictures, but only while the camera is recording videos. -
Page 12: Settings
*Upside down:refer to pic as follow Normal Upside down *Inverse: refer to pic as follow Normal Inverse *Black&white: refer to pic as follow Normal Black&white Settings In any mode, press and hold M button until it shows video/photo/playback menu, press M again, get into Setting menu. - Page 13 Date/Time Setting Select “Date/Time” in setting menu, press OK button to get in time setting. Use “up”and “down” button to select correct number, OK to confirm and jump to the next one. After it’s all done, press M to back to setting menu. Save Setting In order to let the microscope memorize the setting changes, please turn off the microscope by PRESSING THE POWER BUTTON ON THE MONITOR (press and hold until it switch off).
-
Page 14: Warranty
Warranty Warranty Name: Address: Phone number: Post code: Email: Model name: Purchase date: Fault details: Date: Fault description: Notice: Our warranty does not cover: If the purchaser can not provide a purchase proof, or it shows the product was bought as second hand condition If the product has been placed or used in an improper environment, such as heat, wet, wrong power supply environment etc.


Need help?
Do you have a question about the 246 and is the answer not in the manual?
Questions and answers