
Related Manuals for Candy FCNES825XL


Summary of Contents for Candy FCNES825XL
- Page 1 USER INSTRUCTIONS OVENS MANUALE D’ISTRUZIONI FORNO HASZNALATI UTASITASA SUTŐK CANDY HOOVER GROUP S.R.L. • Via Comolli 16 • 20861 Brugherio (MB) - Italy...
- Page 2 General Warnings • During cooking, moisture may condense inside • Only use the meat probe recommended for this the oven cavity or on the glass of the door. This is a oven. normal condition. To reduce this effect, wait 10- •...
- Page 3 • A long power supply failure during an occurring cooking phase may cause a malfunction of the monitor. ln this case contact customer service. • The appliance must not be installed behind a decorative door in order to avoid overheating. •...
-
Page 4: Table Of Contents
Summary General Instructions 1.1 Safety indications 1.2 Electrical safety 1.3 Recommendations 1.4 Installation 1.5 Waste management 1.6 Declaration of compliance 2.1 Overview Product Description 2.2 Accessories 2.3 First use Use of the Oven 3.1 Display description 3.2 Cooking modes Oven Cleaning and Maintenance 4.1 General notes on cleaning 4.2 Aquactiva Function 4.3 Maintenance... -
Page 5: General Instructions
1.6 Declaration of compliance Hereby, Candy Hoover Group Srl declares that the radio equipment is in compliance with Directive 2014/53/EU and with the relevant Statutory Requirements (for the UKCA market). The full text of the declaration of conformity is available at the following internet address: www.candy-group.com... -
Page 6: Product Description
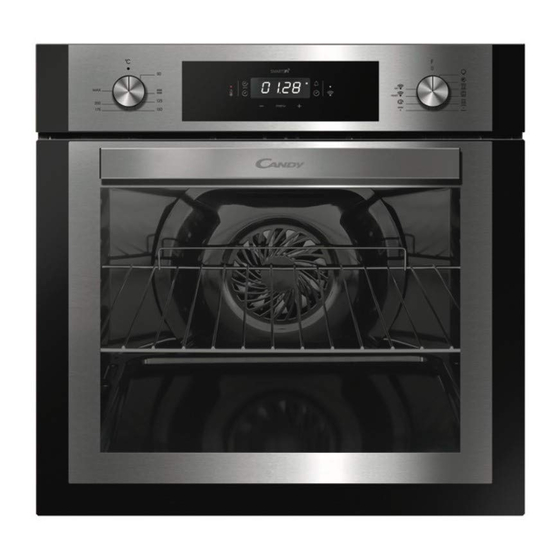
2. Product Description 2.1 Overview 1. Control panel 2. Shelf positions (lateral wire grid if included) 3. Metal grill 4. Drip pan 5. Fan (behind the steel plate) 6. Oven door 2.2 Accessories (According to model) Lateral wire grids Drip pan Collects the residues that drip during the cooking of foods on the grills. -
Page 7: Display Description
3. Use of the Oven (According to model) 3.1 Display description WARNING : the first operation to carry out after the oven has been installed or following the interruption 1. Thermostat selector knob of power supply (this is recognizable the display pulsating and showing 12:00 ) is setting the correct time. - Page 8 • Scan the QR code or insert the serial number. • The WiFi LED switches on. Hereby, Candy Hoover Group Srl declares that the radio equipment is in compliance with Directive 2014/53/EU. The full text of the EU declaration of Write here your serial number for future reference.
-
Page 9: Cooking Modes
3.2 Cooking Modes Function T °C T °C Function (Depends on the oven model) Dial Suggested Range LAMP: Turns on the oven light. DEFROST: When the dial is set to this position. The fan circulates air at room temperature around the frozen food so that it defrosts in a few minutes without the protein content of the food being changed or altered. -
Page 10: Oven Cleaning And Maintenance
4. Oven cleaning and maintenance 4.1 General notes on cleaning The lifecycle of the appliance can be extended through regular cleaning. OVEN WINDOW SEAL Wait for the oven to cool before carrying out manual cleaning operations. If dirty, the seal can be cleaned with a slightly damp sponge. Never use abrasive detergents, steel wool or sharp objects for cleaning, so ACCESSORIES as to not irreparably damage the enamelled parts. - Page 11 REMOVAL AND CLEANING OF THE GLASS DOOR 1. Open the oven door. 2.3.4. Lock the hinges, remove the screws and remove the upper metal cover by pulling it upwards. 5.6. Remove the glass, carefully extracting it from the oven door (NB: in pyrolytic ovens, also remove the second and third glass (if present)). 7.
- Page 12 CHANGING THE BULB 1. Disconnect the oven from the mains supply. 2. Undo the glass cover, unscrew the bulb and replace it with a new bulb of the same type. 3. Once the defective bulb is replaced, replace the glass cover. 5.
- Page 13 Indicazioni di Sicurezza • Durante la cottura, l'umidità può condensarsi vetro del forno, dato che possono graffiare la all'interno del vano cottura o sul vetro della porta. superficie e causare la frantumazione del vetro. Questa è una condizione normale. Per ridurre •...
- Page 14 • Questa operazione deve essere eseguita solo da un tecnico adeguatamente addestrato. Il conduttore di terra (giallo-verde) deve essere circa 10 mm più lungo degli altri conduttori. Per qualsiasi tipo di riparazione, fare riferimento unicamente al Reparto di Assistenza Cliente e richiedere l'utilizzo di ricambi originali.
- Page 15 Sommario Avvertenze Generali 1.1 Suggerimenti sulla sicurezza 1.2 Sicurezza elettrica 1.3 Raccomandazioni 1.4 Installazione 1.5 Gestione dei rifiuti 1.6 Dichiarazione di conformità 2.1 Panoramica Descrizione del Prodotto 2.2 Accessori 2.3 Primo utilizzo Utilizzo del Forno 3.1 Descrizione del display 3.2 Modalità di cottura Pulizia e Manutenzione del Forno 4.1.
-
Page 16: Avvertenze Generali 1.1 Suggerimenti Sulla Sicurezza
1.6 Dichiarazione di conformità Con la presente, Candy Hoover Group Srl dichiara che l’apparecchiatura radio è conforme alla Direttiva 2014/53/UE e possiede i requisiti normativi pertinenti (per il mercato UKC). Il testo completo della dichiarazione di conformità è disponibile al seguente indirizzo web: www.candy-group.com... -
Page 17: Descrizione Del Prodotto
2. Descrizione del Prodotto 2.1 Panoramica 1. Pannello di controllo 2. Posizioni ripiani (castelletto se previsto) 3. Griglia metallica 4. Leccarda 5. Ventola (dietro alla piastra di acciaio) 6. Porta forno 2.2 Accessori (A seconda del modello Griglie laterali a rete Leccarda Raccoglie i residui di cibo che gocciolano durante la cottura. -
Page 18: Utilizzo Del Forno
3. Utilizzo del Forno 3.1 Descrizione del display ATTENZIONE: la prima operazione da eseguire dopo l’installazione o dopo una interruzione 1. Manopola del termostato di corrente (tali situazioni si riconoscono perchè sul dispay lampeggia l’ora 12:00 ) è la 2. Spia del termostato regolazione dell’ora, come di seguito descritto. - Page 19 • Effettuare la scansione del codice QR o inserire manualmente il numero • Il LED Wi-Fi si accende. di serie. Con la presente, Candy Hoover Group Srl dichiara che le apparecchiature radio sono conformi alla Direttiva 2014/53/UE. Il testo completo della dichiarazione di conformità UE è disponibile al seguente indirizzo Internet: Scrivere qui il numero di serie per futuri riferimenti.
-
Page 20: Modalità Di Cottura
3.2 Modalità di cottura T° Intervallo Manopola Funzione (a seconda del modello) preimpostata commutatore di T° Accende la luce interna. SCONGELAMENTO: questa posizione permette di far circolare l’aria a temperatura ambiente intorno al cibo surgelato facendolo così scongelare in pochi minuti senza modificare od alterare il contenuto proteico. COTTURA MULTILIVELLO: l’aria calda viene ripartita sui diversi ripiani. -
Page 21: Pulizia E Manutenzione Del Forno
4. Pulizia e manutenzione del forno 4.1 Note generiche di pulizia La vita di servizio dell’apparecchio si allunga se questo viene pulito ad inumidita. intervalli regolari. Attendere che il forno si raffreddi prima di effettuare le ACCESSORI operazioni di pulizia manuali. Non utilizzare mai detergenti abrasivi, Pulire gli accessori con una spugna imbevuta con acqua e sapone, pagliette di ferro o oggetti appuntiti per lapulizia, per non danneggiare in sciacquarli e asciugarli : evitare di usare detergenti abrasivi. - Page 22 RIMOZIONE E PULIZIA DELLA PORTA IN VETRO 1. Aprile la porta del forno. 2.3.4. Bloccare le cerniere, rimuovere le viti e rimuovere la copertura metallica superiore tirandola verso l’alto. 5.6. Rimuovere il vetro, estraendolo con molta cura, dalla controporta del forno (NB: nei forni pirolitici, rimuovere anche il secondo e terzo vetro (se presente)).
- Page 23 SOSTITUZIONE DELLA LAMPADINA 1. Scollegare il forno alla rete. 2. Allentare la copertura in vetro, svitare la lampadina e sostituirla con una nuova dello stesso modello. 3. Una volta sostituita la lampadina difettosa, riavvitare la copertura in vetro. 5. Risoluzione dei Problemi 5.1 FAQ PROBLEMA POSSIBLE CAUSE...
- Page 24 Biztonsági javaslatok • Sütés közben a pára lecsapódhat a sütő sütőt, majd a tisztítást követően az utasítások belsejében vagy az ajtó üvegén. Ez normális szerint helyezze vissza azokat. jelenség. Kevésbé fordul elő, ha a bekapcsolás • Kizárólag az ehhez a sütőtípushoz ajánlott után vár 10-15 percet, mielőtt ételt tenne a maghőmérőt használja.
- Page 25 készülék használata veszélyessé válhat és a garancia érvényét veszítheti. • Tisztítás előtt az esetlegesen kiömlött többlet anyagot el kell távolítani. • Ha sütés közben történik áramkimaradás, akkor a monitor meghibásodhat. Ebben az esetben forduljon az ügyfélszolgálathoz. • A túlmelegedés veszélye miatt tilos a készüléket díszajtó...
- Page 26 Tartalom Általános utasítások 1.1 Biztonsági javaslatok 1.2 Elektromos biztonság 1.3 Javaslatok 1.4 Beszerelés 1.5 Hulladékkezelés és környezetvédelem 1.6 Megfelelöségi nyilatkozat 2.1 Áttekintés Termékleírás 2.2 Tartozékok 2.3 Első használat A sütö használata 3.1 A felhasználói felület leírása 3.2 Sütési módok A sütö tisztítása és karbantartása 4.1 Általános tisztítási tudnivalók 4.2 Aquactiva funkció...
- Page 27 1.6 Megfelelöségi nyilatkozat A Candy Hoover Group Srl ezúton kijelenti, hogy a rádióberendezés megfelel a 2014/53/EU irányelvnek és a hatályos törvényi követelményeknek (az UKCA piac vonatkozásában). A megfelelőségi nyilatkozat teljes szövege elérhető az alábbi internetcímen: www.candy-group.com...
- Page 28 2. Termékleírás 2.1 Áttekintés 1. Vezérlőpanel 2. Polc elhelyezkedése (adott esetben oldalsó tartókeret) 3. Fémrács 4. Csepegtetőtálca 5. Ventilátor (az acéllemez mögött) 6. Sütőajtó 2.2 Tartozékok (modell szerint) Oldalsó fémsínek Csepegtetötálca Felfogja a grillrácson való sütéskor lecsöpögő zsiradékot. Ezek tartják a csepegtetőtálcát és a fémrácsot. Fémrács A sütőtálcák és tepsik megtartására szolgál 2.3 Első...
- Page 29 3. A sütö használata (modell szerint) 3.1 A felhasználói felület leírása FIGYELMEZTETÉS a sütő beszerelését vagy ez áramellátás megszakadását követően (ez a kijelző 1. Termosztátválasztó gomb folyamatosan villogó 12:00 jelzéséről is felismerhető) először mindig állítsa be a pontos időt. Ezt az alábbi 2.
- Page 30 • Olvassa be a QR-kódot, vagy adja meg a sorozatszámot. • A WiFi LED bekapcsol. Írja ide a készülék sorozatszámát későbbi hivatkozás A Candy Hoover Group Srl kijelenti, hogy a rádióberendezés megfelel a céljából. 2014/53/EU irányelvnek. Az EU-megfelelőségi nyilatkozat teljes szövege a következő...
- Page 31 3.2 Sütési módok T °C T ° C Funkció- Funkció (A sütő modelljétől függően) javasolt tartomány választó LÁMPA: Bekapcsolja a sütő világítását. KIOLVASZTÁS: (leolvasztás) Ha a forgókapcsolót ebbe a helyzetbe állítja. A ventilátor 40 °C hőmérsékleten forgatja a levegőt a fagyasztott élelmiszer körül, így az pár percen belül kiolvad anélkül, hogy a fehérjetartalma megváltozna vagy módosulna.
- Page 32 4. A sütö tisztítása és karbantartása 4.1 Általános tisztítási tudnivalók A készülék élettartama rendszeres tisztítással hosszabbítható meg. A A SÜTŐABLAK TÖMÍTÉSE tisztítás megkezdése előtt várja meg, amíg a sütő lehűl. Ehhez soha ne A beszennyeződött tömítést enyhén nedves szivaccsal tisztíthatja le. használjon súrolószert, fémdörzsit vagy éles tárgyakat, mert azok TARTOZÉKOK visszafordíthatatlanul felsértenék a zománcozott felületeket.
- Page 33 A BELSŐ ÜVEGAJTÓ ELKÜLÖNÍTETT TISZTÍTÁSA 1. Nyissa ki a sütő ajtaját. 2.3.4. Zárja le a zsanérokat, húzza ki a csavarokat és felfelé húzva távolítsa el a felső fémburkolatot. 5.6. Óvatosan emelje ki az üveget a sütő ajtajából (N. b.: semmilyen más üveget vagy egyéb komponenst ne vegyen ki). 7.
- Page 34 ÉGŐCSERE 1. Húzza ki a sütőt a hálózati csatlakozóaljzatból. 2. Vegye le az üvegborítást, csavarozza ki az égőt, majd cserélje ki azt egy azonos fajtájú, új égőre. 3. Ha kicserélte a hibás égőt, akkor illessze vissza az üvegburkot. 5. Hibaelhárítás 5.1 F.A.Q.
- Page 35 INSTALLATION INSTALLAZIONE BESZERELÉS 560 mm Opening / Apertura / Méretű nyílás 460mm x 15 mm 580 mm 595 mm 546 mm 595 mm 22 mm If the furniture is equpped with a bottom at the back part, provide an opening for the power supply cable.
Need help?
Do you have a question about the FCNES825XL and is the answer not in the manual?
Questions and answers