Table of Contents

Related Manuals for Siemens CS958GD 1 Series


Summary of Contents for Siemens CS958GD 1 Series
- Page 1 Combi steam oven CS958GD.1 User manual and installation instructions Register your product on My Siemens and discover exclusive ser- vices and offers. siemens-home.bsh-group.com/welcome The future moving in. Siemens Home Appliances...
-
Page 2: Table Of Contents
en Safety Futher information and explanations are available on- line: Information regarding Free and Open Table of contents Source Software.......... 40 Declaration of Conformity ......... 41 How it works............ 41 INFORMATION FOR USE Safety .............. 2 INSTALLATION INSTRUCTIONS ....... 52 Preventing material damage ....... - Page 3 Safety en When the cooking compartment is hot, any al- been instructed on how to use the appliance coholic vapours inside may catch fire. The ap- safely and have understood the resulting pliance door may spring open. Hot steam and dangers. jets of flame may escape.
-
Page 4: Safety
en Safety Alcoholic vapours may catch fire in the hot WARNING ‒ Danger: Magnetism! cooking compartment, and the appliance door may spring open and may fall off. The Caution: Magnetism door panels may shatter and fragment. → "Preventing material damage", Page 5 ▶ Only use small quantities of drinks with a Caution for people with pacemakers high alcohol content in food. - Page 5 Preventing material damage en 1.7 Cleaning function WARNING ‒ Risk of burns! The outside of the appliance gets very hot when the cleaning function is in progress. ▶ Never touch the appliance door. ▶ Allow the appliance to cool down. ▶ Keep children at a safe distance. 2 ...
-
Page 6: Environmental Protection And Saving En- Ergy
en Environmental protection and saving energy Dripping liquids make the cooking compartment floor A lot of steam is produced during operation with the dirty. types of steam heating. Condensate that collects in the ▶ When steaming with a perforated cooking container, drip trough underneath the cooking compartment may always place the baking tray, the universal pan or overflow and damage adjacent units. -
Page 7: Familiarising Yourself With Your Appliance
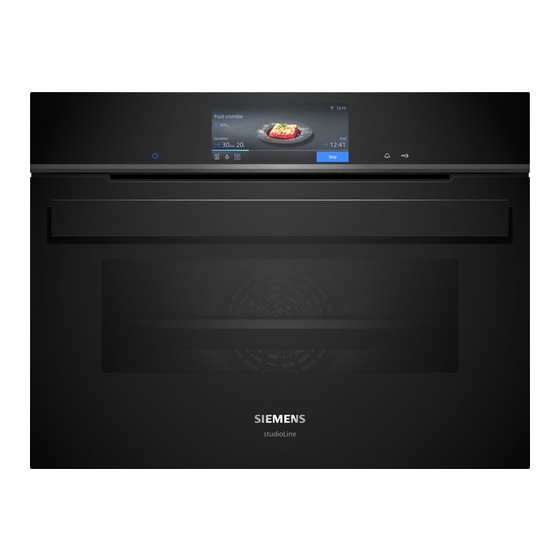
Familiarising yourself with your appliance en 4 Familiarising yourself with your appliance 4.1 Control panel Symbol Meaning WiFi signal strength for Home Connect. You can use the control panel to configure all functions The more lines of the symbol are filled, of your appliance and to obtain information about the the better the signal. - Page 8 en Operating modes 4.4 Cooking compartment The following surfaces are self-cleaning: ¡ Back wall Various functions in the cooking compartment provide ¡ Ceiling support when operating your appliance. ¡ Side walls Shelf supports Use the cleaning function regularly to help retain the cleaning ability of the self-cleaning surfaces and pre- The shelf supports in the cooking compartment enable vent damage.
-
Page 9: Operating Modes
Operating modes en 5.1 Types of heating To ensure that you always find the right type of heating When you select a type of heating, the appliance sug- to cook your food, we explain the differences and ap- gests a suitable temperature or setting. You can use plications below. -
Page 10: Accessories
en Accessories Types of steam heating This is where you can find an overview of the types of steam heating and their use. Symbol Steam heating type Temperature What it's used for and how it works range Possible additional functions Defrosting 30 - 60 °C Gently defrost frozen food. - Page 11 Accessories en Accessories Steam container, solid, size Cooking: ¡ Rice ¡ Pulses ¡ Cereals Do not place the steam container on the wire rack. Steam container, perfor- ¡ Steaming vegetables. ated, size M ¡ Juicing berries. ¡ Defrosting. Do not place the steam container on the wire rack.
- Page 12 Note: Take any accessories that you will not be using your appliance in our brochures and online: out of the cooking compartment while the appliance is siemens-home.bsh-group.com in operation. Accessories vary from one appliance to another. When purchasing accessories, always quote the exact Combining accessories product number (E no.) of your appliance.
-
Page 13: Before Using For The First Time
Basic operation en 7.2 Performing initial start-up Apply the following settings: After connecting the appliance to the power supply, Type of heating fullSteam Plus you must configure the settings for its initial start-up. It Temperature 100 °C may take a few minutes for the settings to appear on Duration 30 minutes the display. - Page 14 en Basic operation 8.3 Starting the operation Note: The most suitable type of heating for your food can be found in the type of heating description. You must start each operation. Changing the type of heating ATTENTION! If there is water on the cooking compartment floor When you change the type of heating, the other set- when operating the appliance at temperatures above tings are also reset.
- Page 15 Rapid heating en Place the food in the cooking compartment before When the operation has ended, remove the food the appliance starts to heat. from the cooking compartment. The appliance auto- Start the operation. matically switches off completely after approximately 15 to 20 minutes. a The display shows the start time.
- Page 16 en Steaming 10.2 Setting the end time Note: For operating modes that always require a cooking time, the appliance resets the time at which You can delay the time at which the cooking time for the cooking time ends to the next possible time. the operation is due to end by up to 24 hours.
- Page 17 Steaming en Proving dough You can add the steam jet for the following functions: ¡ Types of heating → Page 14 Dough proves considerably more quickly using the – 4D hot air dough proving steam heating type than at room tem- –...
- Page 18 en Meat probe Cancelling the steam jet 11.3 Setting added steam You can cancel the steam jet at any time. Requirement: Observe the information about the re- ▶ Press "Steam jet" . spective operating mode. a "Steam jet" "Off" appears in the display. → "Setting options with steam", Page 16 a The operation continues without the steam jet.
- Page 19 Meat probe en inside the food. Once the set core temperature has Thick Insert the meat probe diagonally into the been reached in the food, the appliance automatically pieces meat from above, pushing it in as far as stops heating. of meat possible.
- Page 20 en Meat probe 12.3 Setting the meat probe Press "Stop". Press . You can set a core temperature of between 30 °C and Press the type of heating that you want to use. 99 °C. Reset the operation and use "Start" to start. Requirements ¡...
- Page 21 Dishes en Other Core temperature in °C Meat loaf, all kinds of meat 80 - 90 13 Dishes The "Dishes" operating mode helps you to use your ap- Select a cooking method with the following value for pliance to prepare different meals by selecting the op- conventional cooking: timum settings automatically.
- Page 22 en Dishes If you have to open the appliance door, restart the Category Food operation afterwards without the cooking sensor or Meat Pork cancel the operation and set it manually. Monitor the Beef cooking process until the food is ready. Veal ¡...
- Page 23 Favourites en When the food is ready, use to switch the ap- a No cooking time is displayed in baking sensor ‒ pliance off. mode. The setting values and how long the appli- ance has already been in operation are shown on the display.
-
Page 24: Rapid Heating
en Basic settings 16 Basic settings You can configure the basic settings for your appliance Appliance set- Selection to meet your needs. tings Lighting ¡ On when cooking and opening 16.1 Overview of the basic settings the door ¡ Only when the door is opened Here you can find an overview of the basic settings ¡... -
Page 25: Home Connect
Home Connect en 17 Home Connect 17.1 Setting up Home Connect This appliance is network-capable. Connecting your ap- pliance to a mobile device lets you control its functions Requirements via the Home Connect app, adjust its basic settings ¡ The appliance is connected to the power supply and and monitor its operating status. - Page 26 en Cleaning and servicing 17.3 Operating the appliance with the stalling it via the Home Connect app if you are in your WLAN home network (Wi-Fi). The Home Connect app Home Connect app will inform you once installation is successful. You can use the Home Connect app to set and start Notes the appliance remotely.
- Page 27 Cleaning and servicing en Using oven cleaner in a hot cooking compartment If different cleaning agents are mixed together, there damages the enamel. may be a chemical reaction between these. ▶ ▶ Never use oven cleaner in the cooking compartment Do not mix cleaning agents. ▶...
-
Page 28: Cleaning Function Ecoclean
en Cleaning function "EcoClean" Area Suitable cleaning agents Information Shelf supports ¡ Hot soapy water Soak any heavily soiled areas and use a brush or steel wool. Note: To clean thoroughly, detach the shelf supports. → "Rails", Page 36 Pull-out system ¡ Hot soapy water Use a brush to remove heavy soiling. - Page 29 Cleaning function "EcoClean" en 19.1 Cleaning recommendation 19.3 Setting the cleaning function The appliance records the type and duration of the op- Ventilate the kitchen while the cleaning function is run- eration and, if required, recommends which cleaning ning. function to use. WARNING ‒ Risk of burns! When you switch on the appliance, a notification ap- The outside of the appliance gets very hot when the pears on the display stating that you should use the...
-
Page 30: Descaling
en Cleaning aid "humidClean" 20 Cleaning aid "humidClean" The cleaning aid "humidClean" is a quick alternative Confirm the notification. for occasionally cleaning the cooking compartment. a The cleaning aid starts and the cooking time counts The cleaning aid softens dirt by vaporising the soapy down. -
Page 31: Rinsing
Rinsing en Attach the connecting hose in the cooking compart- 21.2 Setting the descaling programme ment on the right-hand side of the socket . Requirement: → "Preparing descaling", Page 30 Press "Cleaning". Press "Descaling". The duration cannot be changed. Press "Start". a A message stating that you should carry out the ne- cessary preparatory work for descaling appears on the display. -
Page 32: Drying
en Drying Place the small tube at the end of the connection Press "Start". hose into the container. If required, secure the small a A message stating that you should carry out the ne- tube onto the container using the clip ... -
Page 33: Appliance Door
Appliance door en Open the appliance door fully. Press on the right-hand pressure surface until the hook is released. WARNING ‒ Risk of injury! When the hinges are not secured, they can snap shut with great force. ▶ Make sure that the locking levers are always either fully closed or (when detaching the oven door) fully open. - Page 34 en Appliance door Push the condensate tray until the hooks on the Close the appliance door fully . right, left and bottom click into place. a The condensate tray is installed horizontally. 24.2 Attaching the appliance door WARNING ‒ Risk of injury! The hinges on the appliance door move when the door is opened and closed, which could trap your fingers.
- Page 35 Appliance door en Push the intermediate pane upwards until it is in the WARNING ‒ Risk of injury! left- and right-hand retainers . Scratched glass in the appliance door may develop into a crack. ▶ Do not use any harsh or abrasive cleaners or sharp metal scrapers to clean the glass on the oven door, as they may scratch the surface.
-
Page 36: Rails
en Rails Close the locking levers on the left- and right-hand Close the appliance door. hinges . Note: Do not use the cooking compartment again until the door panes have been correctly fitted. a The locking levers are closed. The appliance door is secured and cannot be detached. - Page 37 Rails en Push on the side of the tab marked PUSH behind Note: the rail, and push the rail to the rear. Further information: 25.4 Attaching the pull-out rail Note: The pull-out rails only fit on the right or left. Make sure when you fit them that you can pull them out to- wards the front.
-
Page 38: Troubleshooting
en Troubleshooting Release the PUSH tab. Pull the pull-out rail out as far as it will go and slide it back in. Note: Further information: a The retainer clicks into place. 26 Troubleshooting You can rectify minor faults on your appliance yourself. WARNING ‒ Risk of electric shock! Read the troubleshooting information before contacting Incorrect repairs are dangerous. - Page 39 Adjustment values, e.g. temperature or cooking time, depend on the recipe, quantity and food. ▶ Next time, set lower or higher values. Tip: A lot of other information about the food preparation and corresponding adjustment values can be found in the Home Connect app or on our website siemens-home.bsh- group.com .
-
Page 40: Transportation, Storage And Disposal
en Transportation, storage and disposal 27 Transportation, storage and disposal 27.1 Emptying Information about current disposal methods are available from your specialist dealer or local author- When removing the appliance, e.g. when moving, ity. empty the steam system. Use the rinsing function to do this. This appliance is labelled in accord- → "Rinsing", Page 31 ance with European Directive... -
Page 41: Declaration Of Conformity
A detailed Declaration of Conformity can be found on- A detailed RED Declaration of Conformity can be found line at siemens-home.bsh-group.com/uk/ among the online at siemens-home.bsh-group.com among the ad- additional documents on the product page for your ditional documents on the product page for your appli- appliance. - Page 42 en How it works Shelf positions Roasting in covered cookware You will obtain the best results if you use the following ¡ Use a suitable lid that seals well. shelf positions. ¡ When roasting meat, there should be at least 3 cm If you are baking on one level, use shelf position 1.
- Page 43 How it works en ¡ Open the door as infrequently as possible during 31.5 Cooking instructions for ready meals steaming. Wipe the condensate drip tray after pre- ¡ The cooking result greatly depends on the quality of paration. If the condensate drip tray overflows, this the food.
- Page 44 en How it works Food Accessory/cook- Height Type of Temperature in Steam in- Cooking time ware heating °C/grill setting tensity in mins → Page 9 Pizza, fresh Baking tray 200-220 20-30 Pizza, fresh, 2 levels Universal pan 180-190 35-45 Baking tray Pizza, fresh, thin-crust, on Pizza tray...
- Page 45 How it works en Food Accessory/cook- Height Type of Temperature in Steam in- Cooking time ware heating °C/grill setting tensity in mins → Page 9 Fish, steamed, whole, Perforated steam- 80-90 15-25 300 g, e.g. trout ing tray Fish fillet, plain, steamed Perforated steam- ...
- Page 46 en How it works ¡ Place the food with the longest cooking time into the cooking compartment first. Add the rest of the food at the appropriate time. This means that all the food will be ready at the same time. ¡...
- Page 47 How it works en Recommended settings for slow cooking Food Accessory/ Height Searing Type of Temperat- Steam in- Cooking time cookware time in heating ure in °C tensity in mins mins → Page 9 Duck breast, medium Uncovered 45-60 rare, 300 g each cookware Fillet of pork, whole Uncovered...
- Page 48 en How it works ▶ Wash and disinfect your hands. WARNING ‒ Risk of scalding! ▶ Use disposable gloves, cooking tongs or grill tongs. Hot water collects on the vacuum-sealing bag dur- ▶ Take extra care when preparing critical food, such ing cooking. as poultry, eggs and fish.
- Page 49 How it works en Food Accessory/ Type of Temperat- Steam intens- Cooking time Tips for sous-vide cookware heating ure in °C in mins cooking Duck breast, 300 g Wire rack Cut into the layer of each fat, season the meat Universal pan side with a little salt and pepper, and va-...
- Page 50 en How it works Recommended settings for hygiene Food Accessory/cook- Height Type of Temperature in Steam in- Cooking time ware heating °C tensity in mins → Page 9 Sterilise clean cookware Perforated steam- 15-20 ing tray Proving dough Use the recommended settings when configuring the appliance settings.
- Page 51 How it works en ¡ Level 3: Stews and soups 31.8 Test dishes The information in this section is provided for test institutes to facilitate testing of the appliance in accordance with EN 60350‑1. Baking ¡ The setting values apply to food that is placed into a ¡...
-
Page 52: Installation Instructions
en Installation instructions Recommended settings for steaming Food Accessory/cook- Height Type of Temperature in Steam in- Cooking time ware heating °C tensity in mins → Page 9 Peas, frozen, two con- 3+2+1 tainers Steam containers, XL size Universal pan Broccoli, fresh, 300 g Steam containers, ... - Page 53 Installation instructions en ATTENTION! Carrying the appliance by the door handle could break it. The door handle cannot sup- port the weight of the appliance. ▶ Do not carry or hold the appliance by the door handle. 32.2 Appliance dimensions You will find the dimensions of the appliance here ¡...
- Page 54 en Installation instructions 32.4 Installation underneath a hob If the appliance is installed under a hob, the following The minimum worktop thickness a is based on the minimum dimensions must be adhered to (including required minimum clearance . substructure, if applicable).
- Page 55 Installation instructions en ¡ Ensure that air exchange is guaranteed in accord- ¡ Contact protection must be guaranteed by the in- ance with the diagram. stallation. ¡ If the display on the appliance remains dark, it has not been connected correctly. Disconnect the appli- ance from the mains and check the connection.
- Page 56 en Installation instructions Guide the supply hose downwards within the recess Screw the appliance into place. . Open the hose clamps and reinsert the supply hose. For handleless kitchens with vertical bar handle strips: Attach a suitable filling piece ...
- Page 60 Valid within Great Britain: Imported to Great Britain by BSH Home Appliances Ltd. Grand Union House Old Wolverton Road Wolverton, Milton Keynes MK12 5PT United Kingdom Manufactured by BSH Hausgeräte GmbH under the trademark licence of Siemens AG *9001647479* 9001647479 (020926)
Need help?
Do you have a question about the CS958GD 1 Series and is the answer not in the manual?
Questions and answers