
Related Manuals for Siemens CS956GC 1 Series


Summary of Contents for Siemens CS956GC 1 Series
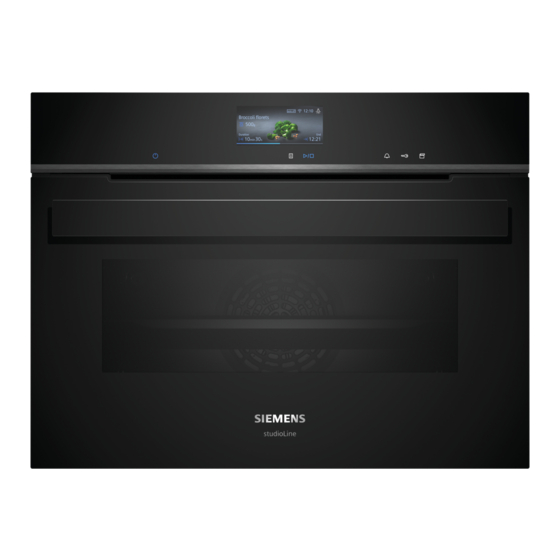
- Page 1 CS956GC.1 Combi steam oven EN User manual and installation instructions Register your appliance on My Siemens and discover exclusive services and offers. Siemens Home Appliances...
-
Page 2: Table Of Contents
en Safety Futher information and explanations are available online: Table of contents INSTALLATION INSTRUCTIONS ...... 52 30.1 General installation instructions...... 52 INFORMATION FOR USE Safety .............. 2 Preventing material damage ...... 4 1 Safety Environmental protection and saving en- ergy .............. 5 Observe the following safety instructions. Familiarising yourself with your appliance .. 6 1.1 General information Cooking Functions.......... 8... -
Page 3: Safety
Safety en The telescopic shelves become hot when the Keep children under the age of 8 years away appliance is in use. from the appliance and power cable. ▶ Allow hot telescopic shelves to cool down 1.4 Safe use before touching them. Always place accessories in the cooking com- ▶... -
Page 4: Preventing Material Damage
en Preventing material damage If the insulation of the power cord is dam- 1.5 Steam aged, this is dangerous. Follow these instructions when using a steam ▶ Never let the power cord come into contact function. with hot appliance parts or heat sources. WARNING ‒ Risk of scalding! ▶... -
Page 5: Environmental Protection And Saving En- Ergy
Environmental protection and saving energy en When the cooking compartment is hot, any water in- 2.2 Steam side it will create steam. The change in temperature Follow these instructions when using the steam func- may cause damage. tion. Never pour water into the cooking compartment ▶... -
Page 6: Familiarising Yourself With Your Appliance
en Familiarising yourself with your appliance Use dark-coloured, black-coated or enamelled baking Remove any accessories that are not being used from tins. the cooking compartment. ¡ These types of baking tin absorb the heat particu- ¡ Accessories that are not being used do not need to larly well. - Page 7 Familiarising yourself with your appliance en The individual tiles show you the current selection op- The shelf supports are equipped with pull-out rails on tions and settings that have already been implemented. one or more levels, depending on the appliance type. To select a function, press the corresponding tile.
- Page 8 en Cooking Functions The water tank is behind the control panel. Tank cover → "Filling the water tank", Page 16 Opening for filling and emptying Handle for removing and inserting 5 Cooking Functions This is where you can find an overview of your appli- Operating ance's operating modes and main functions.
-
Page 9: Cooking Functions
Cooking Functions en Symbol Type of heating Temperature What it's used for and how it works range Possible additional functions Hot air gentle 125 - 250 °C Cook selected dishes gently on one level without preheating. The fan distributes the heat from the ring-shaped heating element in the back wall evenly around the cooking compartment. - Page 10 en Accessories Note: Due to thermal inertia, the temperature that is 5.2 Temperature displayed may differ slightly from the actual temperat- With most types of heating , you can read the current ure inside the cooking compartment. temperature in the cooking compartment and the set temperature side-by-side on the display during heating, Residual heat indicator e.g. ...
- Page 11 You will find a comprehensive range of products for your appliance in our brochures and online: siemens-home.bsh-group.com Accessories vary from one appliance to another. When purchasing accessories, always quote the exact product number (E no.) of your appliance.
-
Page 12: Before Using For The First Time
en Before using for the first time 7 Before using for the first time Implement the settings for the initial configuration. Calibrate the appliance. Clean the appliance and accessories. 7.1 Determining the water hardness before switching on the appliance for the first time Malfunctions may occur when using filtered or deminer- Before using the appliance for the first time, ask your alised water. -
Page 13: Basic Operation
Basic operation en Start the operation. Temperature 100 °C Ventilate the kitchen while the appliance is heat- ‒ Duration 30 minutes ing. → "Basic operation", Page 13 a When the time has elapsed, a signal tone sounds. A Start the operation. message appears on the display confirming that the Ventilate the kitchen while the appliance is heat- operation has finished. -
Page 14: Rapid Heating
en Rapid heating If there is a lot of content in the tile, scroll using 8.6 Setting the type of heating and the . temperature If required, close the notification using . Press "Types of heating". Press the type of heating that you want to use. 8.8 Sabbath-compliant use Set the temperature using or via the adjust-... -
Page 15: Time-Setting Options
Time-setting options en Press "Rapid heating". Place the food in the cooking compartment. a "On" is in the tile. Cancelling rapid heating to start the operation. Press "Rapid heating". ▶ a Rapid heating starts. a For "Rapid heating" "Off" appears on the display. a Once rapid heating is complete, a signal tone sounds. -
Page 16: Steaming
en Steaming Press "Start" a The timer remains visible on the display if the appli- ance is switched off. a When the appliance is switched on, the display 10.3 Setting the timer shows the settings for the current operation. The The timer runs independently during the operation. You timer is displayed in the status bar. - Page 17 Steaming en Insert the full water tank . When doing so, make A chamber vacuum-packing machine is used to heat- sure that the water tank clicks into place behind the seal the food in special air-tight, heat-resistant cooking retainers . bags.
- Page 18 en Steaming Requirement: The water tank has been filled. If the wa- 11.4 Setting added steam ter tank runs dry during operation, a message appears Requirements on the display. Operation is stopped. ¡ Observe the information about the respective operat- → "Filling the water tank", Page 16 ing mode.
-
Page 19: Meat Probe
Meat probe en Note: If rapid heating is activated, the steam jet to open the control panel. can only be triggered once rapid heating is com- Remove the water tank. plete. Carefully remove the lid of the water tank. Empty the water tank, clean it with detergent and a The steam jet is triggered and the appliance adds then rinse it thoroughly with clean water. - Page 20 en Meat probe inside the food. Once the set core temperature has Thick Insert the meat probe diagonally into the been reached in the food, the appliance automatically pieces meat from above, pushing it in as far as stops heating. of meat possible.
- Page 21 Meat probe en Changing the type of heating 12.3 Setting the meat probe When you change the type of heating, the other set- You can set a core temperature of between 30 °C and tings are also reset. 99 °C. Press . Requirements Press ...
-
Page 22: Dishes
en Dishes Fish Core temperature Other Core temperature in °C in °C Fish, whole 65 - 70 Meat loaf, all kinds of meat 80 - 90 Fish fillet 60 - 65 Heating food, reheating 65 - 75 13 Dishes The "Dishes" operating mode helps you to use your ap- Cooking methods pliance to prepare different meals by selecting the op- For some dishes, you can select a preferred cooking... -
Page 23: Favourites
Favourites en Category Food Category Food Cakes Cakes in tins Reheating, Vegetables Cakes on a baking tray crisping up Menu Small baked items Baked items Biscuits Side dishes Bread, Bread Defrosting Fruit, vegetables bread rolls Bread rolls food Pizza, sa- Pizza Preserving, Preserving food voury cakes... -
Page 24: Childproof Lock
en Childproof lock To rename a favourite, you must use the Home Con- Note: nect app. If your appliance is connected, follow the Pay attention to the specifications for the various instructions in the app. operating modes: ¡ ¡ 14.2 Selecting favourites If you have saved favourites, you can use these to set 14.3 Changing favourites the operation. - Page 25 Home Connect en Device Set- Selection Personalisa- Selection tings tion Lighting ¡ On when cooking and opening Childproof ¡ Keylock only the door lock ¡ Deactivated ¡ Only when the door is opened Automatic ¡ On ¡ Always off rapid heating ¡ Off Water hard- ¡...
-
Page 26: Basic Settings
en Home Connect Follow the instructions in the Home Connect app. 17.2 Home Connect settings You can adjust the Home Connect settings and network settings in your appliance's basic settings. Which settings the display shows will depend on whether Home Connect has been set up and whether the appliance is connected to your home network. - Page 27 Cleaning and servicing en has been successfully downloaded, you can start in- 17.6 Data protection stalling it via the Home Connect app if you are in your Please see the information on data protection. WLAN home network (Wi-Fi). The Home Connect app The first time your appliance is registered on a home will inform you once installation is successful.
- Page 28 en Cleaning and servicing Appliance door Area Suitable cleaning agents Information Door panels ¡ Hot soapy water Do not use a glass scraper or stainless steel wool. ¡ Oven cleaners Tip: Remove the door panels in order to clean them thoroughly. → "Appliance door", Page 31 Door cover ¡...
- Page 29 Cleaning aid "humidClean" en 18.2 Cleaning the appliance ATTENTION! If you do not clean the self-cleaning surfaces regularly, In order to avoid damaging the appliance, you must they may become damaged. clean your appliance only as specified, and with suit- If dark stains are visible on the self-cleaning sur- ▶...
-
Page 30: Descaling
en Descaling → "Cleaning the cooking compartment after using Wipe out the remaining water in the cooking com- partment using an absorbent sponge cloth. the cleaning aid", Page 30. Clean the smooth enamel surfaces in the cooking compartment with a dish cloth or a soft brush. Re- 19.2 Cleaning the cooking compartment move stubborn food remnants using a stainless after using the cleaning aid... -
Page 31: Drying Function
Drying function en 21 Drying function To prevent residual moisture , dry the cooking compart- To use the "Drying function" function, set "Drying ‒ ment following operation with steam. function". → "Setting the drying process", Page 31 ATTENTION! If there is water on the cooking compartment floor Setting the drying process when operating the appliance at temperatures above Requirement: → "Drying the cooking compartment",... - Page 32 en Appliance door Close the appliance door fully . Grab hold of the Installing the condensate tray appliance door with both hands (on the left and Use both hands to insert the condensate tray right) and pull it upwards and out . an angle ...
- Page 33 Appliance door en Close the locking levers on the left- and right-hand Lift out the intermediate pane and set it down hinges . carefully on a flat surface. Open the appliance door and remove the door seal. a The locking levers are closed. The appliance door is secured and cannot be detached.
- Page 34 en Appliance door Open the appliance door and attach the door seal. 22.4 Fitting the door panes WARNING ‒ Risk of injury! The hinges on the appliance door move when the door is opened and closed, which could trap your fingers. Keep your hands away from the hinges. ▶...
-
Page 35: Rails
Rails en Close the locking levers on the left- and right-hand Close the appliance door. hinges . Note: Do not use the cooking compartment again until the door panes have been correctly fitted. a The locking levers are closed. The appliance door is secured and cannot be detached. - Page 36 en Rails Push on the side of the tab marked PUSH behind Note: the rail, and push the rail to the rear. Further information: 23.4 Attaching the pull-out rail Note: The pull-out rails only fit on the right or left. Make sure when you fit them that you can pull them out to- wards the front.
-
Page 37: Troubleshooting
Troubleshooting en Release the PUSH tab. Pull the pull-out rail out as far as it will go and slide it back in. Note: Further information: a The retainer clicks into place. 24 Troubleshooting You can rectify minor faults on your appliance yourself. WARNING ‒ Risk of electric shock! Read the troubleshooting information before contacting Improper repairs are dangerous. - Page 38 en Troubleshooting Fault Cause and troubleshooting The time is not dis- Basic setting has been changed. played when the ap- Change the basic setting for the time display. ▶ pliance is switched → "Basic settings", Page 24 off. Home Connect is not Different causes are possible. working properly.
-
Page 39: Disposal
Next time, set lower or higher values. ▶ Tip: A lot of other information about the food preparation and corresponding adjustment values can be found in the Home Connect app or on our website siemens-home.bsh- group.com . 25 Disposal 25.1 Disposing of old appliance... -
Page 40: Source Software
A detailed Declaration of Conformity can be found on- A detailed RED Declaration of Conformity can be found line at siemens-home.bsh-group.com/uk/ among the online at siemens-home.bsh-group.com among the ad- additional documents on the product page for your ditional documents on the product page for your appli- appliance. -
Page 41: How It Works
¡ The recommended settings are for fridge-temperat- found in the Home Connect app or on our website ure food and unstuffed, oven-ready poultry. siemens-home.bsh-group.com . ¡ Place the poultry onto the cookware breast-side or skin-side down. 29.1 General cooking tips ¡... - Page 42 en How it works The "Grill" type of heating is good for cooking thinner ¡ Larger food items require a longer heat-up time and pieces of poultry, meat and fish such as steaks, drum- a longer cooking time. sticks and burgers. It is also excellent for toasting ¡...
- Page 43 How it works en Food Accessory/cook- Height Type of Temperature in Steam in- Cooking time ware heating °C/grill setting tensity in mins → Page 8 Shortcrust tart with moist Universal pan 160-180 60-80 topping Yeast cake with moist Universal pan 180-190 30-45 topping Swiss roll Baking tray 190-210...
- Page 44 en How it works Food Accessory/cook- Height Type of Temperature in Steam in- Cooking time ware heating °C/grill setting tensity in mins → Page 8 Joint of pork without rind, Uncovered cook- 180-190 120-140 e.g. neck, 1.5 kg ware Joint of pork with rind, Uncovered cook- 1.
- Page 45 How it works en After making the yoghurt, leave it to cool in the refri- gerator for at least 12 hours. Recommended settings for desserts and compote Food Accessory/cook- Height Type of Temperature in Steam in- Cooking time ware heating °C tensity in mins → Page 8 Crème brûlée...
- Page 46 en How it works Sear the meat on all sides on the hob at a very high Issue heat. You want to slow ¡ Place the cold duck breast Immediately place the meat into the pre-warmed cook a duck breast. into a pan. cookware in the cooking compartment.
- Page 47 How it works en – Acidic ingredients such as lemon juice or vinegar To catch any drops of condensate, slide the univer- make food firmer. sal pan in at level 1. – Alcohol and garlic give the food an unpleasant ATTENTION! after-taste. Risk of damage to kitchen units To fill the vacuum-sealing bag, fold over the edge of Do not fill the water tank a second time for the...
- Page 48 en How it works Food Cooking tips Food Cooking tips Fish ¡ Season the fish and coat with hot Vegetables ¡ Sear the vegetables briefly to give butter. them the flavours you would ex- ¡ To give the fish a nice crust and pect from frying.
- Page 49 How it works en Food Accessory/ Type of Temperat- Steam intens- Cooking time Tips for sous-vide cookware heating ure in °C in mins cooking Apples, peeled, in Wire rack 15-25 Recipe tip: Vacuum- 0.5 cm slices, 2-4 seal along with Universal pan some caramel sauce.
- Page 50 en How it works Reheating ¡ Place the cookware on the wire rack. ¡ Place food that you are not reheating in cookware Gently warm up food with added steam. The food (e.g. bread rolls) directly onto the wire rack at tastes and looks as though it has been freshly cooked.
- Page 51 How it works en Food Accessory/cook- Height Type of Temperature in Steam in- Cooking time ware heating °C tensity in mins → Page 8 Shortbread Baking tray 140-150 25-40 Shortbread, 2 levels Universal pan 140-150 30-40 Baking tray Small cakes Baking tray 25-35 Small cakes Baking tray 25-35...
-
Page 52: Installation Instructions
en Installation instructions 30 Installation instructions 30.1 General installation instructions Follow these instructions before you start with the installation of the appliance. ¡ The safe operation of this appliance can only be guaranteed if it has been installed ¡ For appliances that have a hinged switch to a professional standard in accordance panel, make sure that the switch panel with these installation instructions. - Page 53 Installation instructions en 30.2 Appliance dimensions 30.3 Installation below a worktop You will find the dimensions of the appliance here Observe the installation dimensions and the installation instructions when installing below a worktop. ¡ To ventilate the appliance, the intermediate floor must have a ventilation cut-out. ¡...
- Page 54 en Installation instructions ¡ Ensure that air exchange is guaranteed in accord- 30.5 Installation in a tall unit ance with the diagram. Observe the installation dimensions and the installation instructions when installing in a tall unit. ¡ Only fit appliances up to a height that allows ac- cessories to be easily removed.
- Page 55 Installation instructions en ¡ Contact protection must be guaranteed by the in- Screw the appliance into place. stallation. ¡ If the display on the appliance remains dark, it has not been connected correctly. Disconnect the appli- ance from the mains and check the connection. Electrically connect the appliance with the protective contact plug Note: The appliance must only be connected to a pro-...
- Page 56 en Installation instructions Secure the appliance using a suitable screw. 30.11 Removing the appliance Disconnect the appliance from the power supply. Undo the fastening screws. Lift the appliance slightly and pull it out completely.
- Page 60 EN Manufactured by BSH Hausgeräte GmbH under the trademark licence of Siemens AG Valid within Great Britain: Imported to Great Britain by BSH Home Appliances Ltd. Grand Union House Old Wolverton Road Wolverton, Milton Keynes MK12 5PT United Kingdom BSH Hausgeräte GmbH Carl-Wery-Straße 34...
Need help?
Do you have a question about the CS956GC 1 Series and is the answer not in the manual?
Questions and answers