Advertisement
Quick Links
•
Enregistreur LAN 500 Gb 4/8/16 caméras avec gestion centralisée sur PC
•
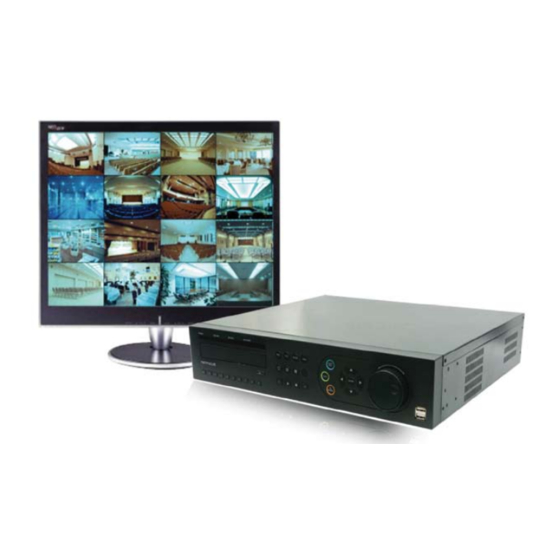
4/8/16-camera 500 GB LAN recorder with centralized management on PC
•
Grabador LAN 500 Gb 4/8/16 cámaras con gestión centralizada en PC
•
Gravador LAN 500 Gb 4 câmaras com gestão centralizada por PC
Rejestrator LAN 500 GB, 4 kamery, z zarządzaniem scentralizowanym na PC
•
430 557/558/559
MANUEL D'UTILISATION
Manuale di istruzioni
USER MANUAL
User manual
430 557
430 558 - 430 559
Advertisement

Subscribe to Our Youtube Channel
Related Manuals for LEGRAND 430 557


Summary of Contents for LEGRAND 430 557
- Page 1 Grabador LAN 500 Gb 4/8/16 cámaras con gestión centralizada en PC • Gravador LAN 500 Gb 4 câmaras com gestão centralizada por PC Rejestrator LAN 500 GB, 4 kamery, z zarządzaniem scentralizowanym na PC • 430 557/558/559 430 557 430 558 - 430 559 Manuale di istruzioni MANUEL D’UTILISATION...
-
Page 2: Table Of Contents
CONTENTS Software installation ............3 CHAPTER 1 Display Mode ............... 4 CHAPTER 2 CMS Setup Mode ..............16 CHAPTER 3 DVR Remote Setup .............. 30 Remote Search Mode ............37 CHAPTER 4 E-Map Mode ................. 47 CHAPTER 5 Remote Update ..............67 CHAPTER 6... -
Page 3: Chapter 1 Software Installation
Chapter 1 Software installation Compatible operating systems: Windows 2000, XP , VISTA. • Please insert the CD-Rom included in the DVR box. • Go to Program / CMS folder. • Start CMS software installation: • Chose your language • Chose the style of screen display •... -
Page 4: Chapter 2 Display Mode
Chapter 2 - Display Mode... - Page 5 • Login • Click on “ start “, and “ Log in “. • Enter User name and Password: Default User ID : administrator Default password : 1234 Ask administrator or Bticino customer support if you forgot ID or password.
- Page 6 • User Interface Search : search saved image on local or network drives. Setup : setup on CMS system. E-Map : Monitor DVR sites, Camera, Sensor, and Control through E- MAP . Log Viewer : can check or print ‘Log file’ in the CMS system. Log out : Log in/out Start : can execute overall CMS functions such as log in/out, Setup, Search.
- Page 7 • Display screen E-Map, Print, Snapshot button shown on one division screen. ¢— E-Map, Print, Snapshot button shown on one division screen. • #1 [CAM01] : It represents DVR name, screen number, and camera name. • “R” is present if this image is saved on CMS software. •...
- Page 8 • How to switch from multi screens to one screen? Double click on one image: • It will show the selected screen: Right click on the image will enlarge it back to multi screens. • Double click on the screen will switch back to multi screens.
- Page 9 • PTZ Controller : can control PTZ from the remote site of CMS via network - Click ICON of PTZ as the left image. Can control up , down, left & right direction of PTZ. Can Zoom IN / OUT of PTZ. Can control speed of Zoom IN &...
- Page 10 - ScanPoint Setting: This function will allow you to switch from one Preset position to another. For example: Preset 1 Preset 2 Preset 3 (5 secondes) (3 secondes) (4 secondes) - after selecting ScanPoint , click SET Button: According to the order of the left image menu, select Preset number &...
- Page 11 • Connection list & sensor/control & screen division • Connection list There are two ways which are ‘Pre-Memorize’ and ‘DVR list’ on the connection list. • Pre-Memorize: Shows the video for each page, previously customized (several DVR). • DVR list: Shows the video for each page of one DVR.
- Page 12 • DVR list Monitor all cameras of each DVR . • Single / Multiple Mode : Click the button to activate single or multiple mode as pre memorize access. • Connection : Click the button to connect or disconnect to DVR. •...
- Page 13 The button will switch automaticaly to If you want to switch back to ‘Pre-Memorize’ screen, click on button.
- Page 14 Sensor/Control - Select the registered DVR name, then, click each button of sensor and control to activate. Click on the arrow to view this menu. Screen division - Various surveillance modes available through division buttons Click on the arrow to view this menu. •...
- Page 15 • Save Disk List : Select the drive to setup save disk for the data from each DVR. Save Disk List : Free space and status of each drive can be checked. • 2WAY AUDIO: Audio communication between CMS and DVR available. Click ‘AUDIO CHAT’...
-
Page 16: Chapter 3 Cms Setup Mode
Chapter 3 - CMS - Setup Mode • To enter in this menu • Click on ‘start’ • Click on ‘Setup’... - Page 17 • Setup • USER : make the user group with different privilege. Default is ‘ADMINISTRATOR’. • Registered user list : It represents the group of registered users. • Register new user : Register new user : click this button to add new user, and click ‘Apply’. •...
- Page 18 • DVR Setup : how to add a new DVR Click on : Add DVR Fill the information and click on • DVR name: has to be the same as registered in the DVR (see menu NETWORK – CLIENT of the DVR) •...
- Page 19 • DVR Setup : information you will find for all registered DVR • Registered DVR list : represents all registered DVR. • IP address of my computer : represents IP address of the computer. • DVR Info : shows the information of Network connection as DVR is registered.
- Page 20 • Delete : click it to remove the registered DVR. • Edit DVR : edit setup information. You can make changes (ex: IP address), and then click on ‘Edit DVR’ to save changes. • Conn. Setting : it is for modem connection setup. You should setup ‘Modem’ on OS, click on ‘Edit DVR’, and this button will be enabled.
- Page 21 • Show versions : shows the version of CMS sofware. • DVR Info : Shows the information of connected DVR, program version, board version, board type and the number of sensors and controls.
- Page 22 • Display This menu is useful to define the different pages you can access with the ‘Pre-Memorize’ button: You can definie different pages Selected screens for this page For each screen, you can select the DVR and the camera • Pre-Memorize : you can add a new page by clicking “+”...
- Page 23 • PTZ info : check the information of PTZ SETUP OF EACH DVR...
- Page 24 • SCHEDULER • DVR list : shows the list of registered DVR. • Recording Schedule : setup save schedule for the selected DVR from the DVR - Select the DVR to save from DVR List. - Drag or click to select the date/time to change the schedule. - Click ‘R’...
- Page 25 • SAVE DISK • Install drive(s) list: shows drives that can be used for recording. • Save drive: shows the list of drives where the files will be saved. Setting up ‘Local Drive’ 1) Select a drive to save data from ‘Installed drive(s) list’. Your local computer disk (C:) can’t be selected. 2) Click ‘Add Disk’...
- Page 26 • EMC (Emergency Management Center) • EMC mode : when the emergency event happens on the site, the event image is sent to CMS system automati- cally with multiple or single screen. • Enable EMC : checkmark to enable EMC. Select the event mode either by motion or by sensor or control. •...
- Page 27 EMC icon will be generated on the right corner of the button. When EMC mode is activated by motion or sensor/control, the event screen will automatically pop-up, and the icon will be turned in red. When there is an event, you can click with right button on the icon You will have 3 possibilities:...
- Page 28 • Setting up OTHERS • Tool Tip : shows function explanation if you put the mouse on the function key. • Digi-Clock display format : select display format of digi-clock. • Motion Detection Setup: shows the motion detected area if the transmitted dada is motion Event •...
- Page 29 • Backup Log : creates a file containing all the actions made by the CMS software. It is useful for technical assi- stance. This file is saved in the folder C:\ CMS_2KV3 \ LOG. To read this file, you have to open the Log Viewer software: •...
-
Page 30: Dvr Remote Setup
• DVR Remote Setup This feature allows you to configure any connected DVR. You have first to choose a DVR in ‘DVR List’ And after to click on remote setup button: • Camera settings 1) Camera list : shows camera list installed on the DVR. You can make the setup on the network. Select a camera to setup. - Page 31 • Record speed 1) Image size : select image size for recording. 2) Individual camera recording setup : select image quality, frame rates for each camera. • SCHEDULER...
- Page 32 - First, choose the requested camera(s):. Then, choose recording mode: - None: no recording. - Continue: will record continuously in this period. - Event: will record only if an event occurs. - Intensive: will record continuously in low quality, and with a higher quality if an event occurs. Click on ‘Select All’...
- Page 33 • SENSOR Connect the sensors to the DVR, and setup SENSOR TYPE: Normally Open or Normally Closed. When a sensor is activated, the videos from selected cameras will be recorded.
- Page 34 • SYSTEM 1) DVR info : shows the connected DVR information such as DVR name, program version. 2) UPDATE: allows you to update the firmware of the DVR, or to import or export the setup configuration file. So, you can export the setup file from one DVR and export it on an other DVR. 3) Network info : shows network connection information such as IP address, subnet mask, gateway.
- Page 35 • LOG LIST This function allows you search all the events registered in the installation. 1) Choose the date. 2) Choose the type of event. 3) Click on ‘Search’. 4) You will see the events list. 5) You can export this list: click on ‘Export Log’. The file will be saved in the folder C:\ CMS_2KV3 / LogExport.
- Page 36 1) Click on ‘Login’ and input your password. Default password is 1234. 2) Click on ‘Browser’ to find the folder C:\ CMS_2KV3 / LogExport. 3) Choose the file, and click on ‘Display’ button. 4) You can print this file. Click on ‘Print’ button. 5) You can also change the password for Log Viewer.
-
Page 37: Chapter 4 Remote Search Mode
Chapter 4 - Remote Search Mode • To enter in this menu 1) Choose the DVR 2) Click on ‘Remote Search’... - Page 38 Clock Clock Clock Calendar Calendar Calendar Playback Playback Playback screen screen screen Events Events Events Settings Settings Settings Time table Time table Time table Watching Watching Watching mode mode mode Screen description • Playback screen : displays playback images. • Time table : recording period is shown in red for each camera.
- Page 39 • PLAYBACK SCREEN • #5 : camera number. • [MAIN ENTRANCE]: camera title. • C 09:35:33: time of recorded video. • CLOCK/CALENDAR • Clock : displays current date and time of the system. • Calendar : the days with recorded videos are shown in orange color. Present day is highlighted. Date of videos shown on the screen...
- Page 40 • TIME TABLE • When you click on ‘Remote Search’ button , the system is loading the saved videos, shown on the time table with red color. Hour zone : select hour from Minutes zone : select minute 00 to 23 from 00 to 59 Videos are available in this Camera zone :...
- Page 41 Information message : This message comes out when Central Management Software is getting the information from DVR side. This message is displayed especially when the DVR has big data storage. • SYSTEM UTILITY BUTTONS • Speed, Zoom in/out, Brightness : Speed level (forward playback only) Zoom size level Brightness level (available only with...
- Page 42 • CMS REMOTE BACKUP • You can backup DVR videos, and record them on your PC or on an external drive. 1) Click on ‘Remote search’ button...
- Page 43 2. Select the date, and click on ‘Data Backup’ button...
- Page 44 3. Select the file you want to copy on the disk Click if you want to copy the viewer on the disk Select the file Select the folder Start the backup...
- Page 45 4. How to see the recorded videos ? 1. Click on ‘start’, and ‘Search’ 2. Input your password. Default password is 1234. 3. Click on OK. 4. Select the file you want to see. Default folder is C:\ CMS_2KV3.
- Page 46 5. Chose the file, and open it: Refer to the DVR Manual to use the ‘Backup Viewer’’.
-
Page 47: Chapter 5 E-Map Mode
Chapter 5 - E-Map Mode Display Mode QuickTime™ et un décompresseur Graphismes sont requis pour visionner cette image. Setup Mode E-Map Mode This function allows you to manage the different DVR and cameras on cities and buildings maps. To enter in this menu : - Click on ‘start’... - Page 48 There are 2 types of maps that can be managed: • CMS Map : it’s for example a city map, where you can see the different sites to be controlled. Here are examples: CMS maps are saved in C:\CMS_2KV3\emap folder, in CMS.emp file. A maximum of 16 CMS maps can be added.
- Page 49 1. CMS Map creation and editing First, put all your map files in C/CMS_2KV3/Emap folder. 1.1. Click ‘start ->E - Map’ When E - Map executes, default CMS map file (CMS.emp) will be opened : If there is no CMS.emp file or if Site name and Site Map name don’t not match, a warning message will pop up as below :...
- Page 50 1.2. Click on ‘Editor’ : You can destroy existing maps. But you always have to keep minimum one registered map. 1.3. Destroy existing maps 1. Select the map 2. Delete the map...
- Page 51 1.4 Save your work after to have destroyed the maps : Click on FILE / SAVE 1.5 Add a new map Click on ‘EDIT / ADD MAP’ and select a BMP file to create a new map. Maximum image size is 1024 x 768 pixels.
- Page 52 Your new image will appear on the screen: Click on ‘Site’, and click on the map to place the DVR location:...
- Page 53 After, double click on the logo, to enter the ‘SITE NAME’, and press ‘Enter’. It has to be the same as the DVR name : Finally, give a name to the map: click on EDIT / Edit Map Name This map name will appear in this menu You can insert several DVR on each map.
- Page 54 1.6 Save your work Click on FILE / SAVE. This new CMS map will be saved into C:\CMS_2KV3\emap\CMS.emp file. CMS.emp file will contain all the maps you want to see on the main screen: To see the new maps, it is necessary to close completely E-map function, and to start it again: Click on ‘start’...
- Page 55 2. Site Map: creation and editing 2.1. Add a new building map Click on START / E-map, and on ‘EDITOR’ (same as CMS E-map creation) Click on ‘FILE / NEW’, and choose a BMP or JPG file: You will see the map on the screen:...
- Page 56 2.2. Select ‘Site Map’ mode : Product symbols will appear 2.3 Add products on the map Click on one symbol (camera…), and after click on the location on the map. Click right on one symbol to change the angle of the camera...
- Page 57 2.4. Enter DVR information Click on ‘Site Info’, and fill ‘SITE Name’, and ‘SITE IP’: Must be the same as DVR name Click on ‘OK’. 2.5 Save the map Click on ‘FILE / SAVE AS’ to record the file. The map has to be recorded in CMS_2KV3 folder, with the name of related DVR (ex : C\CMS_2KV3\emap\DVR BUILDING 1.emp) Click on ‘FILE / SAVE’.
- Page 58 The map is shown: Click on one camera. The video will be displayed for this camera:...
- Page 59 3. ‘Pre-memorize’ page ‘Pre-memorize’ page is usefull if you want to manage several DVR without to connect and disconnect the DVR stream for each DVR. If you want to manage only one DVR, you can use ‘DVR list’, select the requested DVR, and click on ‘Connect stream’ button.
- Page 60 Click on the first line, and select also the following lines related to the first DVR. In this example, the first DVR has 4 channels: 1. Click on the first line 2. Select following lines (Shift + Select the first DVR:...
- Page 61 The name of the cameras will be automaticaly filled (Cam 01, Cam 02…): Select the lines related to the second DVR, and select the DVR name. In this example, the second DVR has 16 channels: Continue for all DVR you want to supervise.
- Page 62 The name of the cameras will be automaticaly filled (Cam 01, Cam 02…): Give a name to this page (ex: E-map)
- Page 63 4. Menus for Editor function: • File NEW : Find NEW BMP files. OPEN : Open BMP files or EMAP files. SAVE : Save files. SAVE AS : Save as another name. CLOSE : Close EMAP or BMP files. EXIT : exit EMAP Editor. •...
- Page 64 5. How to use E-map function ? 5.1. Select the page related to E-map function 1. Click on ‘Pre-memorize ’ or ‘DVR List ’ option 2. Select ‘E-map ’ page (see previous chapter to define it ) 3. Click on ‘Connect stream ’ button All the related images will be displayed.
- Page 65 5.3. The main window will appear 5.4. Double click on the CMS map you are interested in: A double click on the CMS map will show again the main window.
- Page 66 5.5 Click on the DVR you are interested in. The building map will be displayed: Click on the camera you are interested in. The video will be displayed.
-
Page 67: Chapter 6 Remote Update
Chapter 6 - Remote Update • Firmware Update - You can remotely update DVR programs, for DVR connected through the network, using CMS software. • Check points before use 1) check the DVR version : you cannot use ‘firmware update’ function if you want to install an earlier version. * How to check the version on the DVR: please refer to DVR manual. - Page 68 6) Click ‘Browse’ button from ‘Firmware Upload’ window. 7) Search the file, provided from supplier or dealer. Click ‘Open’ button. 8) Click ‘Update’ button from ‘Firmware Upload’ window. Then it will start uploading the update file to the selected DVR. 9) After uploading, the ‘INFO’...
- Page 69 • Firmware Upload window 1) display the name of updated DVR. 2) display the update file folder that you selected. 3) display uploading status of update file. 4) display the uploading progress of update file by %. 5) display the update DVR IP information. 6) select update file location.
- Page 70 • Setup import and export - You can import or export the setup values of one DVR connected to network by CMS. So, it is easy to save the parameters of one DVR (use export function), and to copy them to another one (use import function).
- Page 71 5) Click ‘Browse’ button from ‘Firmware Upload’ window. 6) Select the saved NS DVR setup value from ‘Open’ window. Click ‘Open’ button. 7) Click ‘Update’ button from ‘Setup Upload’ window. Then it will start uploading the DVR setup value to the selected DVR. 8) After uploading, the ‘INFO’...
- Page 72 • w to use Setup export function 1) Connect DVR that you want to export setup values. 2) Select DVR that you want to setup upload, download from DVR list. 3) Click ‘REMOTE SETUP’ button ( 4) In ‘SETUP’, go to ‘SYSTEM’ and select ‘Setup’ from Update options, click ‘Export’ button. 5) Click ‘Browse’...
- Page 73 7) Click ‘Download’ button from ‘Setup Download’ window. Then it will start downloading DVR. 8) After downloading, the ‘INFO’ window will pop up. click ‘OK’ button.
Need help?
Do you have a question about the 430 557 and is the answer not in the manual?
Questions and answers