Table of Contents
Advertisement
Available languages
Available languages
Quick Links
•
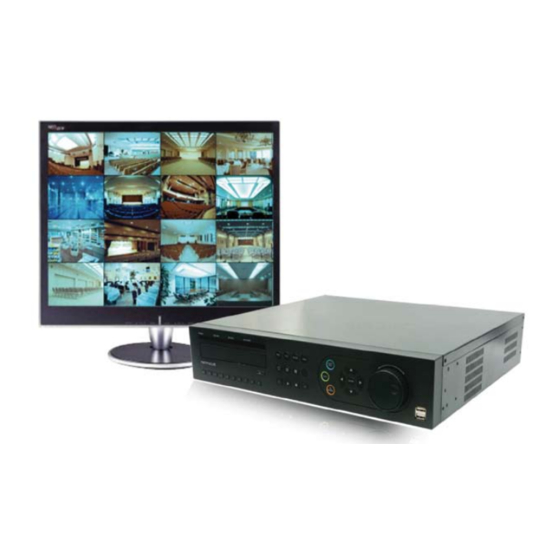
Enregistreur LAN 500 Gb 4/8/16 caméras avec gestion centralisée sur PC
•
4/8/16-camera 500 GB LAN recorder with centralized management on PC
•
Grabador LAN 500 Gb 4/8/16 cámaras con gestión centralizada en PC
•
Gravador LAN 500 Gb 4 câmaras com gestão centralizada por PC
Rejestrator LAN 500 GB, 4 kamery, z zarządzaniem scentralizowanym na PC
•
430 557/558/559
MANUEL D'INSTRUCTION`
Manuale di istruzioni
MANUAL INSTRUCTION
User manual
430 557
430 558
430 558
Advertisement
Table of Contents

Related Manuals for LEGRAND 430 557


Summary of Contents for LEGRAND 430 557
- Page 1 Grabador LAN 500 Gb 4/8/16 cámaras con gestión centralizada en PC • Gravador LAN 500 Gb 4 câmaras com gestão centralizada por PC Rejestrator LAN 500 GB, 4 kamery, z zarządzaniem scentralizowanym na PC • 430 557/558/559 430 557 430 558 430 558 Manuale di istruzioni MANUEL D’INSTRUCTION`...
-
Page 2: Informations Concernant Le Produit
électrique ou d’incendie. Avant d’effectuer l’installation, lire la notice, tenir compte du lieu de montage spécifique au produit. Ne pas ouvrir, démonter, altérer ou modifier l’appareil sauf mention particulière indiquée dans la notice. Tous les produits Legrand doivent exclusivement être ouverts et réparés par du personnel formé... -
Page 3: Installation
INSTALLATION... - Page 4 • MISE SOUS TENSION/HORS TENSION Prise pour câble d’alimentation Interrupteur Marche/Arrêt [R5] 0 (Arrêt) / 1 (Marche) switch [R5] (Off) / (On) • Mise sous tension Branchez le câble d’alimentation, puis mettez l’interrupteur marche/arrêt [R5] en position “ON” (Marche). • Mise hors tension Sélectionnez “ARRÊT”...
- Page 5 • MODE (Configuration de l’écran) Appuyez sur la touche “OSD” - [M5] ou [RC9] -, pour faire apparaître ou disparaître les icônes et indications d’état du canal. Touche OSD OSD button [R [RC9] ou [M5] [M5] • CLIQUEZ sur le bouton droit de la souris •...
- Page 6 Si vous appuyez sur la touche de numéro d’un canal non affiché, alors l’écran divisé en 4 qui s’affiche, inclut le canal sélectionné (uniquement pour les modèles 8/16 canaux) • Mode écran divisé en 9 ( ou [F13] ou [RC25] _uniquement pour les modèles 8/16 canaux). •...
- Page 7 • ZOOM NUMERIQUE • Appuyer sur la touche “Zoom” en mode Plein écran pour activer le zoom numérique • Les zones agrandies peuvent être déplacées à l’aide des touches fléchées - [F10] ou [RC10] - ou en cliquant. • La taille des zones agrandies augmente et diminue à chaque fois que vous appuyez sur la touche ZOOM (uniquement sur les modèles 8/16 canaux).
- Page 8 PTZ (FUNCTION) [M6.1] • Fonction PTZ Appuyer sur la touche “PTZ” - [F3] ou [RC6] ou [M6.1] - pour afficher l’image en mode plein écran et commander les caméras PTZ. Appuyer sur la touche “ENTRÉE/OK” en mode PTZ pour accéder au menu “PTZ-AVANCÉ”. •...
- Page 9 RECHERCHE (si autorisé) • Appuyer sur la touche “RECHERCHE” - [F12] ou [RC12] ou [M3] - pour accéder au menu Recherche illustré ci-dessous. • Recherche par heure • Recherche par date • Recherche par événement 0000 • Aller aux premières images •...
- Page 10 • Affichage du journal (FONCTION) M6.4] • Permet de consulter le journal des événements du système. • type d’événement – permet de sélectionner le type d’événements à rechercher • de – permet de saisir la date et l’heure de début des données à rechercher •...
-
Page 11: Product Informations
Before carrying out the installation, read the instructions and take account of the product’s specific mounting location. Do not open up, dismantle, alter or modify the device except where specifically required to do so by the instructions. All Legrand products must be opened and repaired exclusively by personnel trained and approved by Legrand. - Page 12 INSTALLATION...
- Page 13 • POWER ON/OFF • Power on Press the power switch to be “ON”. • Power off Select “SHUTDOWN” Select “ENTER/OK” button after the message “ System will shutdown switch [R5] (Off) / (On) ! ”. Press the power switch to be off.
-
Page 14: Screen Setup
SCREEN SET UP Press “OSD” button - [M5] or [RC9] -, icons and channel status phrases will appear or disappear. OSD button [R [M5] CLICK right Mouse button, screen mode window will appear. • Full screen mode or [F13] or [RC22]) Shifts to next channel each time you press these buttons. - Page 15 If you press another channel number that is not being displayed in the current quad screen, it turns another quad screen including the channel you selected (only for 8ch/16ch product) • 9 division screen mode ( or [F13] or [RC25] _only for 8ch/16ch products). •...
-
Page 16: Audio Function
• DIGITAL ZOOM Press “ZOOM” button in full screen mode to active digital zoom • press “ZOOM” button [RC7]. • zoomed area moves as you press arrow buttons - [F10] or [RC10] - or where you click. • size of zoomed area gets bigger and smaller every time you press “ZOOM” button (only for 8/16CH).. •... - Page 17 PTZ (FUNCTION) [M6.1] • PTZ operation Press “PTZ” button -[F3] or [RC6] or [M6.1] - to display in full screen and operate PTZ cameras Press “ENTER/OK” button in PTZ mode, you will see “PTZ-ADVANC” menu. • PTZ general movement (1) Moves pan/tilt camera from up/ down and right/ left using arrow keys [F8] or [RC10]. (2) Enlarge or reduce the screen size by Z- /Z+ buttons while using zoom camera.
- Page 18 SEARCH (if rights greated) Press “SEARCH” button • Search by time • Search by calendar • Search by event 0000 • Go to first • Go to last • Playback • press “PLAYBACK” button to start playback from the recent part of recording. Rewind - Rewind during playback.
- Page 19 • Log View (FUNCTION) [M6.4] • Search the system event log. event type – select types of event to search from – input date/time to start searching to – input date/time to finish searching • Select “SEARCH” and press “ENTER/OK” button -[F9] or [RC11]- to start log search...
Need help?
Do you have a question about the 430 557 and is the answer not in the manual?
Questions and answers