LXE MX8 User Manual
Microsoft windows ce 5.0 equipped
Hide thumbs
Also See for MX8:
- Reference manual (298 pages) ,
- Programming manual (380 pages) ,
- Reference manual (267 pages)

Related Manuals for LXE MX8


Summary of Contents for LXE MX8
- Page 1 MX8 User’s Guide (Microsoft® Windows® CE 5.0 Equipped) Copyright © 2008 by LXE Inc. All Rights Reserved E-EQ-MX8OGWW-C...
-
Page 2: Revision Notice
The Bluetooth® word mark and logos are owned by the Bluetooth SIG, Inc. and any use of such marks by LXE, Inc. is under license. Hand Held® is a registered trademark of Hand Held Products, Inc., located in Skaneateles Falls, NY. -
Page 3: Table Of Contents
Back View ... 7 Scanner / Imager Aperture... 8 Trigger Handle... 8 Handstrap... 9 I/O Port and Cables... 10 MX8 AC Adapter ... 11 UICK TART In Brief ..13 Troubleshooting... 14 Related Manuals for Startup ... 14 Inserting Fully Charged Battery ... - Page 4 Alpha Mode LED... 46 Standard Keys... 47 Function Keys... 47 Sticky Keys ... 47 Ctrl (Control key) ... 47 Alt (Alternate key)... 47 Shft (Shift key) ... 47 Orange and Blue Keys... 48 MX8 User’s Guide Table of Contents E-EQ-MX8OGWW-C...
- Page 5 CapsLock Mode Function ... 48 Batteries ... 49 Main Battery ... 49 Backup Battery ... 50 Battery Hotswapping ... 50 MX8 Battery Multi-Charger ... 51 Charge a Main Battery Pack ... 51 MX8 Cradles (Optional) ... 53 PPENDIX Introduction... 55 32-Key Triple-Tap Keypad ...
- Page 6 Illustrations Figure 1 CDRH / IEC 825 Caution Label Location – MX8, Back ... 5 Figure 2 Caution Label – Class 2 Laser Scanner ... 5 Figure 3 Front of MX8 with Triple-Tap Keypad ... 6 Figure 4 Back... 7 Figure 5 Beam Aperture...
-
Page 7: Introduction
Overview The LXE® MX8 is a rugged, portable, hand-held Microsoft® Windows® CE 5.0 equipped mobile computer capable of wireless data communications. The mobile device can transmit information using an 802.11 network card and it can store information for later transmission through an RS- 232 or USB port. -
Page 8: Mx8 Features
RFTerm® JAVA® AppLock The MX8 has one mini SD card interface for storage of User data. Use only LXE-qualified SD Cards (see Accessories). The MX8 does not have a Bluetooth managed LED. The MX8 is not approved for use in Hazardous Locations. -
Page 9: Important Battery Information
• When the MX8 is connected to AC power and the main battery is being hotswapped, do not disconnect AC power from the MX8 until a main battery is secured in the battery well. • Ni-MH backup battery replacement must be performed by qualified service personnel. -
Page 10: Document Conventions
8 kV air, 4kV contact 32.8 feet (10 meters) Direct line of sight only. The CF Bluetooth Radio in the LXE MX8 is Bluetooth Special Interest Group (SIG) Qualified and is listed as EPLs (End Product Listings) and with QDID: B013455. -
Page 11: Laser Warnings And Labels
• Do not stare directly into the laser beam. • Do not remove the laser caution labels from the MX8. • Do not connect the laser barcode aperture to any other device. The laser barcode aperture is certified for use with the MX8 only. -
Page 12: Components
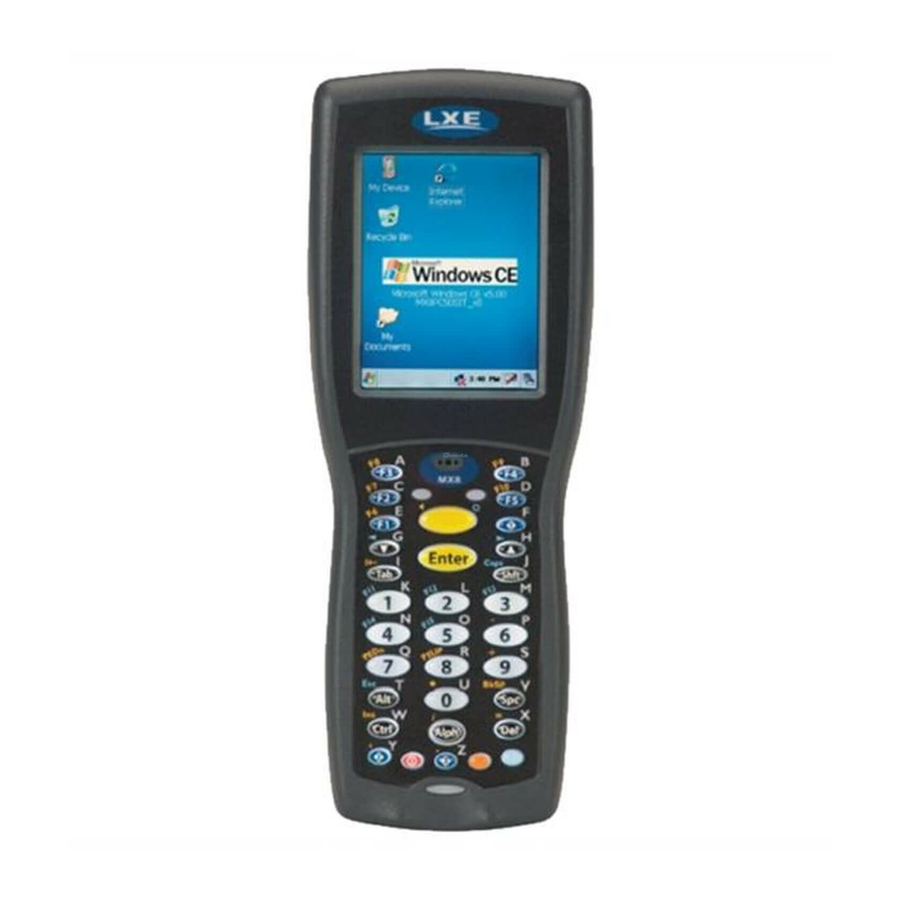
Components Front View MX8 User’s Guide Figure 3 Front of MX8 with Triple-Tap Keypad Imager/Scanner Aperture Speaker System Status LED Scan Button Orange Key (Sticky Key) Blue Key (Sticky Key) Scan Status LED Cable Port On / Off Button Alpha Mode LED... -
Page 13: Back View
Note: The touch screen stylus is tethered to the handstrap or the trigger handle. E-EQ-MX8OGWW-C Figure 4 Back Imager/Scanner Aperture Trigger Handle Attach Points Handstrap Retainer Bracket Attach Points Main Battery Battery Fastener Cable Ports (I/O Port) MX8 User’s Guide... -
Page 14: Scanner / Imager Aperture
Scanner / Imager Aperture CAUTION: Never stare directly into the beam aperture. Read the previous section “Laser Identify the type of integrated imager or laser scanner installed in the MX8 by looking at the type of plastic lens covering the Beam aperture. -
Page 15: Handstrap
Handstrap Note: Either the trigger handle is attached to the MX8 or the handstrap is attached, not both. LXE recommends that, in the absence of a trigger handle, the handstrap be used at all times. The stylus is tethered to the handstrap or the trigger handle. LXE pre-installs the handstrap when the MX8 is purchased without a trigger handle. -
Page 16: I/O Port And Cables
I/O Port and Cables Note: There is no IR port on the MX8. Tethered scanners are not supported on the MX8. Cable: Multipurpose RS-232 and Power MX8A055MULTICBLDA9F Cable: Multipurpose USB and Power MX8A052MULTICBLUSB Adapter/Cable : Audio MX8A060ADPTCBLVOICE MX8 User’s Guide... -
Page 17: Mx8 Ac Adapter
Components MX8 AC Adapter The MX8 AC Power Adapters (MX8A301CRDLPSAC and MX8A302CRDLPSACWW) are only intended for use with the MX8 multi-purpose cables and the MX8 Desktop Cradle. E-EQ-MX8OGWW-C AC Adapter and AC Power Cable Figure 9 5V AC Adapter - Assembled... -
Page 18: Figure 10 Mx8 Cabling Options
Components Note: Tethered scanners connected to the MX8 I/O port are not supported by LXE. Figure 10 MX8 Cabling Options MX8 User’s Guide E-EQ-MX8OGWW-C... -
Page 19: Quick Start
Note: When your mobile device is pre-configured, the client, keypad and scan aperture configurations are assembled by LXE to your specifications. The desktop will display a Summit Client Utility icon. This section’s instructions are based on the assumption that your new device is pre-configured and requires only accessory installation (e.g. -
Page 20: Troubleshooting
MX8 Multi-Charger User’s Guide – contains user, technical and troubleshooting information for the MX8 battery Multi-Charger. MX8 Cradle Reference Guide – contains user, technical and troubleshooting information for the MX8 docking cradles. MX8 User’s Guide AppLock is installed and running on the mobile device. AppLock restricts User access to running programs. -
Page 21: Inserting Fully Charged Battery
– this process takes up to five hours in an MX8 Multi-Charger. The MX8 Battery Compartment is located at the bottom of the back of the computer. The main battery functions as the battery well cover. -
Page 22: About Lithium-Ion Batteries
MX8. Important: The Power key is located at the bottom of the keypad. When a battery is inserted in the MX8 for the first time press the Power key. Tapping the Power key places the MX8 immediately in Suspend mode. -
Page 23: Tapping The Touchscreen With A Stylus
A “right mouse click” function must be programmed by the customer to accept a Tap and Hold function. An application can choose to interpret this function as a right mouse click. LXE does not support non-LXE application programming. Keypad Shortcuts Use keyboard shortcuts instead of the stylus: •... -
Page 24: Calibrating The Touchscreen
Set Time Zone (Optional) Note: The first time it is powered up, or the device returns from a Cold Reset, the MX8 resets the Time Zone to the factory default values (GMT-05:00 Eastern Time). To set the Time Zone, tap the Start | Settings | Control Panel | Date/Time icon. -
Page 25: Entering The Applock Activation Key
Entering the AppLock Activation Key Hotkey (Activation Hotkey) If the mobile device uses LXE’s AppLock to allow the user to switch between applications, the default Activation key is <Ctrl>+<Spc>. The key sequence switches the focus between one application and another. Data entry affects the application running in the foreground only. Note that the system administrator may have assigned a different key sequence to use when switching applications. -
Page 26: Optional Accessory Installation
5. Fold each end of the the strap over so that the closed loop fastener surfaces mate evenly. 6. Test the strap's connection making sure the MX8 is securely connected to each end of the strap connectors. -
Page 27: Connecting An External Power Supply (Optional)
MX8 I/O port until it clicks. The click means the connector is seated firmly. The System LED above the Scan key illuminates when the MX8 is charging the main battery pack using external power through the power cable. The backup battery is always being trickle charged by the main battery pack. -
Page 28: Assembling The 5V Ac Power Adapter
Assembling the 5V AC Power Adapter If the 2-prong AC power cable is not included with the Adapter, please contact your LXE representative for assistance. To cradle -- Firmly press the cradle end of the power cable into the female connector on the back of the cradle. -
Page 29: Connecting The Multipurpose Usb / Power Cable
Align the RS-232 serial cable end carefully to an appropriate serial port on a desktop/laptop computer for ActiveSync communication. Press the ends together and hand tighten the screws on either side of the serial cable until the MX8 is securely connected to the serial device. -
Page 30: Connecting The Audio Cable And A Headset
Squeeze the clips on the connector cable to open the catches in the connector assembly. Firmly press Connector A into the connector at the base of the MX8. Release the clips in the connector cable. Test the connection for stability before continuing. -
Page 31: Voice Case
3. Do not put the belt on yet. 4. Attach the audio adapter/cable to the base of the MX8. Do not connect the headset to the cable yet. -
Page 32: Figure 24 Audio Cable In Cable Retaining Clip
7. Slide the audio cable upward under the cable retaining clips on the left side, leaving a small amount of slack between the cable retaining clip and the MX8. Do not pull it tight. 8. The MX8 in the voice case is ready for use. -
Page 33: Using The 32-Key Triple-Tap Keypad
Using the 32-Key Triple-Tap Keypad Using the 32-Key Triple-Tap Keypad The keypad is installed and configured by LXE to your specifications. • When using a sequence of keys that require an alpha key, first press the Alph key. Use the Shft sticky key or the Caps key sequence (Blue+Tab) for upper case alphabetic characters. -
Page 34: Using The 32-Key Alpha-Mode Keypad
Using the 32-Key Alpha-Mode Keypad The keypad is installed and configured by LXE to your specifications. • When using a sequence of keys that require a lowercase alpha key, first press the Alph key. Use the Shft sticky key for upper case alphabetic characters. -
Page 35: Entering Data
The keypad is used to manually input data that is not collected otherwise. Almost any function that a full sized computer keyboard can provide is duplicated on the MX8 keypad but it may take a few more keystrokes to accomplish a keyed task. Please refer to Appendix A – Key Maps for instruction on the specific keypresses to access all keypad functions. -
Page 36: Using The Stylus
Using the Stylus Note: This section is directed to the MX8 daily user. The assumption is that the mobile device has been configured and the touch panel calibrated by the System Administrator prior to releasing the MX8 for daily use. The touch screen should be calibrated before initial use. -
Page 37: Using The Integrated Barcode Scanner Or Imager
Scan button. You will see a bracketed crosshair strike the barcode. Align the brackets so that the center of the barcode is covered by the crosshair. Move the MX8 towards or away from the barcode until a response is received by the MX8 (beep, tactile response, etc) or the bracketed crosshair times out and disappears. -
Page 38: Scan Status Led
The Scan Status LED (oval shaped LED below keypad) turns red when the laser beam is on. Following a barcode scan and read the Scan Status LED turns green for two seconds and the MX8 beeps or vibrates, indicating a successful scan. If the scan was unsuccessful, the Scan Status LED turns off and a different beep sequence is heard. -
Page 39: Bluetooth Devices
MX8 is out of range of all paired Bluetooth device(s). Connection is inactive. Note: When an active paired device, not the MX8, enters Suspend Mode, is turned Off or leaves the MX8 Bluetooth scan range, the Bluetooth connection between the linked device and the MX8 is lost. -
Page 40: Getting Help
LXE ServicePass website. Contact your LXE representative to obtain the LXE Manuals CD. You can also get help from LXE by calling the telephone numbers listed on the LXE Manuals CD, in the file titled “Contacting LXE”. This information is also available on the LXE website. - Page 41 MX8 Charge/Comm Interface Cable, RS-232 Serial ActiveSync, D9 Female with power connector MX8 RS-232 Serial Adapter cable, 6in, for use with printers that provide their own source of power. MX8 Headset coiled adapter cable, includes quick disconnect headset connector.
- Page 42 (large and small) Li-Ion Spare Battery for LXE Bluetooth Ring Scanner Module LXE Bluetooth Ring Scanner 8-bay battery charger with US power cord LXE Bluetooth Ring Scanner single-bay charger with US wall plug PowerScan 7000BT Scanner RS-232 with pointer PowerScan 7000BT Base Station, RS232, without universal power supply.
- Page 43 Universal Desktop Power Supply 90-264VAC, 9VDC, 2A, EPS 9-60VDC Forklift Power Supply (For Use with Forklift Cradles) Power Cable: Connects DC Power Supply to Forklift Cradle Forklift Rugged Scanner Holder with RAM mount (all metal with cloth padding) E-EQ-MX8OGWW-C 8800A051POWERCORD 8800A301ACPS 8800A302DCPS 8800A052DCPWRCABLE 8800A005STAND MX8 User’s Guide...
- Page 44 Getting Help MX8 User’s Guide E-EQ-MX8OGWW-C...
-
Page 45: The Mx8 Hand Held Computer
Application panel changes are saved when OK is tapped on an application properties panel. Suspend / Resume Quickly tapping the Power key places the MX8 in Suspend mode. Quickly tapping the Power key again, pressing any key, pressing the trigger (on the trigger handle), or tapping the touchscreen, returns the MX8 from Suspend. -
Page 46: Reset To Default Settings
LXE recommends that this process be used only as an emergency procedure Two different resets are provided on the MX8. User registry settings can be reset to factory defaults using ClearHive.exe or all settings, which includes registry and the persist keys in Launch.reg, can be reset using Coldboot.exe. -
Page 47: Touchscreen Display
Suspend mode or when both batteries have expired and the unit is Off. See section titled Calibrating the Touchscreen in the Quick Start section for touchscreen calibration instruction. See the MX8 Reference Guide for full instruction. Cleaning the Glass Display/Beam Aperture Note: These instructions are for components made of glass. -
Page 48: Adjusting The Display Backlight
2 minutes. The backlight will remain on all the time when both checkboxes are blank. The display backlight timer dims the backlight at the end of the specified time. MX8 User’s Guide Figure 32 Setting the Display Backlight Timer Adjusting the Display Backlight... -
Page 49: Setting The Power Schemes Timers
Setting the Power Schemes Timers Setting the Power Schemes Timers Note: Refer to the section titled Power Modes in the “MX8 Reference Guide” for information relating to the power states of the mobile device. Select | Settings | Control Panel | Power | Schemes tab. Change the parameter values and tap OK to save the changes. -
Page 50: Setting The Audio Speaker Volume
The speaker is located on the front of the device above the MX8 logo. The audio volume can be adjusted to a comfortable level for the listener. The volume is increased or decreased one step each time the volume key sequence is pressed. -
Page 51: The Keypads
The Keypads The Keypads The keypad is installed and configured by LXE to your specifications. Triple-Tap See Appendix A – Key Maps for instruction on the specific keypresses to access all keypad functions. LED Indicators E-EQ-MX8OGWW-C Figure 34 The 32-key Keypad... -
Page 52: System Status Led
When the LED is . . . Blinking Red Steady Red Blinking Green No Color Scan Status LED The Scan Status LED is located below the MX8 keypad. When the Scan Status LED is . . . Steady Green Steady Red Amber No Color Alpha Mode LED The Alpha Mode LED is located next to the <F5>... -
Page 53: Standard Keys
-- when CAPS is On alpha characters are capitalized. For example, when CAPS is On and the Shft key and the G key are pressed, a lower case g is displayed. E-EQ-MX8OGWW-C MX8 User’s Guide... -
Page 54: Orange And Blue Keys
To enter a string of letters in a text field, tap the <Alph> key to toggle it On. It remains active until it is tapped again and toggled off. To enter a string of numbers in a text field, make sure the <Alph> key is toggled off. MX8 User’s Guide The Keypads E-EQ-MX8OGWW-C... -
Page 55: Batteries
MX8 Multi-Charger or the mobile device. A new main battery pack can be fully charged in 5 hours when it is in an MX8 connected to AC power and 5 hours when it is in the MX8 Multi-Charger. -
Page 56: Backup Battery
Important: When the backup battery power is Low or Very Low ( Power | Battery tab) connect the AC adapter to the MX8 before replacing the main battery pack. Replace the main battery pack after first pressing the Power key and placing the MX8 in Suspend Mode. -
Page 57: Mx8 Battery Multi-Charger
The MX8 Multi-Charger is not approved for use in a Hazardous Location. Charge a Main Battery Pack The main battery pack can be charged while it is in the MX8 (connected to an AC power supply) or while it is in the LXE MX8 Multi-Charger. -
Page 58: Figure 39 Insert Battery Pack In Charging Pocket
Do not "slam" the battery into the charging cup or drop it into the cup. Failure to follow these instructions can result in damage to the main battery or the charger. Please refer to the MX8 Multi-Charger User’s Guide for technical information and operating instructions. -
Page 59: Mx8 Cradles (Optional)
Bluetooth device connection and use, while the MX8 is docked, are managed by the MX8 Control Panel Bluetooth program, not the cradle. The cradles are designed to secure an MX8 with or without a protective boot, a handstrap and/or a trigger handle. - Page 60 The MX8 Passive Vehicle Cradle does not have connectors that can accept an external power source or tethered scanner. It is designed to secure the MX8 in a vehicle. Please refer to the MX8 Cradle Reference Guide for installation, technical specifications and user instruction.
-
Page 61: Appendixa Key Maps
When using a sequence of keys that do not include the Alph key but does include a sticky key, press the sticky key first then the rest of the key sequence. Refer to Reboot Sequences earlier in this guide for warmboot and coldboot key sequences. To Get This MX8 Key / Function Power / Suspend... - Page 62 To Get This MX8 Key / Function Display Backlight Brightness Adjust Mode Toggle Blue Mode Toggle Orange Mode Toggle Shift Mode Toggle Alpha Mode Alt Mode Control Mode Scan Mode Space Enter CapsLock (Toggle) Back Space BackTab Up Arrow Down Arrow...
- Page 63 32-Key Triple-Tap Keypad To Get This MX8 Key / Function E-EQ-MX8OGWW-C Press These Triple-Tap Keys and Then … Blue Orange Shft Press This Key Alpha 7777 9999 MX8 User’s Guide...
- Page 64 To Get This MX8 Key / Function 0 (zero) . (period) < MX8 User’s Guide Press These Triple-Tap Keys and Then … Blue Orange Shft 32-Key Triple-Tap Keypad Press This Key Alpha 7777 9999 E-EQ-MX8OGWW-C...
- Page 65 32-Key Triple-Tap Keypad To Get This MX8 Key / Function > * (asterisk) : (colon) ; (semicolon) . (period) ` (accent) _ (underscore) , (comma) ‘ (single quote) “ (double quote) ~ (tilde) “ E-EQ-MX8OGWW-C Press These Triple-Tap Keys and Then …...
- Page 66 To Get This MX8 Key / Function & MX8 User’s Guide Press These Triple-Tap Keys and Then … Blue Orange Shft 32-Key Triple-Tap Keypad Press This Key Alpha Ctrl Diamond 2 Diamond 3 0 (zero) E-EQ-MX8OGWW-C...
-
Page 67: 32-Key Alpha-Mode Keypad
When using a sequence of keys that do not include the Alph key but does include a sticky key, press the sticky key first then the rest of the key sequence. Refer to Reboot Sequences earlier in this guide for warmboot and coldboot key sequences. To Get This MX8 Key / Function Power / Suspend... - Page 68 To Get This MX8 Key / Function Enter CapsLock (Toggle) Uppercase Alpha Back Space BackTab Up Arrow Down Arrow Right Arrow Left Arrow Insert Delete Home Page Up Page Down MX8 User’s Guide Press These Alpha-Mode Keys and Then …...
- Page 69 32-Key Alpha-Mode Keypad To Get This MX8 Key / Function E-EQ-MX8OGWW-C Press These Alpha-Mode Keys and Then … Blue Orange Shft Press This Key Alpha Diamond 1 Down Arrow Up Arrow Shft Diamond 2 Diamond 3 MX8 User’s Guide...
- Page 70 To Get This MX8 Key / Function . (period) < > MX8 User’s Guide Press These Alpha-Mode Keys and Then … Blue Orange Shft 32-Key Alpha-Mode Keypad Press This Key Alpha Diamond 1 Down Arrow Up Arrow Shft Diamond 2...
- Page 71 32-Key Alpha-Mode Keypad To Get This MX8 Key / Function * (asterisk) : (colon) ; (semicolon) ` (accent) _ (underscore) , (comma) “ (double quote) ‘ (single quote) ~ (tilde) “ & E-EQ-MX8OGWW-C Press These Alpha-Mode Keys and Then …...
- Page 72 32-Key Alpha-Mode Keypad MX8 User’s Guide E-EQ-MX8OGWW-C...
-
Page 73: Appendixb Regulatory Notices And Safety Information
Warning: Changes or modifications to this device not expressly approved by LXE, Inc., could void the user’s authority to operate this equipment. - Page 74 This is a Class A product. In a domestic environment this product may cause radio interference in which case the user may be required to take adequate measures. Notice: The long term characteristics or the possible physiological effects of radio frequency electromagnetic fields have not been investigated by UL. MX8 User’s Guide E-EQ-MX8OGWW-C...
-
Page 75: Rf Notices
Information to User A label on the exterior of the device should resemble one of the labels shown below (the label contains the LXE part number of the installed radio card). The labels shown below and affixed to the device, identify where the device may be used and where its use is restricted. -
Page 76: Mx8 Approvals/Standards
Lithium Ion Battery When disposing of the MX8 main battery, the following precautions should be observed: The battery should be disposed of promptly. The battery should not be disassembled or crushed. The battery should not be heated above 212°F (100°C) or incinerated. - Page 77 Index A/C Power Supply Safety Statement – MX8 Optional A/C Power Supply: Outside North America, this unit is intended for use with an IEC certified ITE power supply with output rated as stated at the top of this page. (US) Alimentation c.a.
-
Page 78: Laser Light Safety Statement
Este producto usa luz de láser. Las etiquetas se proveen en la máquina exploradora. Por favor, lea detenidamente la explicación para las precauciones. (ES) Waarschuwing: Dit product gebruikt laserlicht. Een van de volgende labels is op de scanner aangebracht. Lees a.u.b. de waarschuwing onder Oppassen. (NL) MX8 User’s Guide E-EQ-MX8OGWW-C... - Page 79 Lütfen Dikkat ifadesini okuyun. (TR) (KR) (CN) 雷射光 本產品使用雷射光掃描條碼,請勿正視雷射光或以 雷射光照射眼睛。(Taiwan, ROC) E-EQ-MX8OGWW-C Laser Light Safety Statement Legend: Chinese-CN; Danish-DK; Dutch-NL; English-US; Finnish-FI; French-FR; German-DE; Greek-GR; Italian-IT; Japanese-JP; Korean-KR; Norwegian-NO; Portuguese-PT; Republic of China-ROC; Spanish-ES; Swedish-SE; Turkish-TR; (GR) (JP) MX8 User’s Guide...
- Page 80 MX8 Approvals/Standards Labels – MX8 Hand Held Computer [Summit Client] MX8 User’s Guide E-EQ-MX8OGWW-C...
-
Page 81: Revision History
Introduction -- Added Continuous Scan Mode. • Quick Start -- Added installation instruction for the MX8 Voice Case. Added Mobile Bluetooth Accessories after Bluetooth Devices section that contains brief pairing instruction. Accessories: Added Back of Hand Bluetooth Ring Scanner. Added Voice Pouch. - Page 82 Revision History MX8 User’s Guide E-EQ-MX8OGWW-C...
-
Page 83: Index
Data entry imager ...31 keypad...29 laser scanner...31 stylus ...30 virtual keyboard ...29 Data entry ...29 Display...41 Display and scanner aperture cleaning ...41 Display backlight timer...42 Enter key function...47 Entering Data ...29 Environmental Specifications ...4 External PS ...21 MX8 User’s Guide... - Page 84 Reboot, How to...39 Recalibrate ...18 Regulatory Notices ...67 Reset all MX8 configuration to factory defaults...40 the MX8 registry to factory defaults ...40 Reset to Factory Default, How to ...40 ResetAll ...39, 40 Safety Information ...67 Saving Changes to the Registry ...40...
- Page 85 Input panel ...29 Voice Accessories ...34 Voice case...25 Voice data ...32 Volume adjust audio volume ...44 Warm Boot ...39 Warnings and Labels Laser Scanner...5, 31 When the backup battery power is Low or Very Low...50 Wireless communication...53 MX8 User’s Guide...
- Page 86 Index MX8 User’s Guide E-EQ-MX8OGWW-C...
Need help?
Do you have a question about the MX8 and is the answer not in the manual?
Questions and answers