
Related Manuals for Gaggenau AH 590-120


Summary of Contents for Gaggenau AH 590-120
- Page 1 Operating and assembly instructions AH 590-120 AH 592-120 Freely Suspended Insular Hood...
-
Page 2: Table Of Contents
AH 590-120 AH 592-120 Preface 1. Important notes Page 3-4 1.1 For your safety Page 3 1.2 Operating for the first time Page 4 1.3 About use Page 4 Page 5 2. Features 3. Operation Page 6-8 4. Cleaning and care Page 9-10 5. -
Page 3: Preface
Preface With your new extractor hood, working in the kitchen will be even more fun. The appliance offers you a number of advantages: – a good extraction capacity with low noise level, – a large number of control functions, – optimum illumination of the cooking surface by a dimmable halogen light. -
Page 4: Important Notes
1. Important notes 1.1 For your safety – Damaged appliances must not be operated. – Isolate the appliance from the mains during every maintenance operation. To do this, remove – The appliance must only be connected by an the mains plug or actuate the corresponding authorised specialist, paying attention to fuse. -
Page 5: Operating For The First Time
Gaggenau after- – Conscientiously read through the operating and sales service. assembly instructions before operating the appliance for the first time. -
Page 6: Features
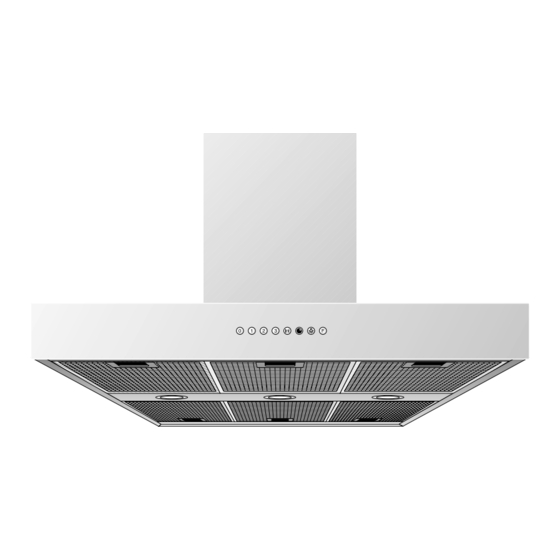
2. Features 1 Outgoing air ducts 2 Control panel 3 Grease filter 4 Lighting Fig. 2 Installation accessories: Stainless steel-design ventilation duct: LK 590-010 for ceiling heights of 2.39 - 2.64 m LK 590-020 for ceiling heights of 2.64 - 2.89 m LK 590-030 for ceiling heights of 2.89 - 3.14 m Grease filter saturation display... -
Page 7: Operation
3. Operation After they have been pressed, all functions selection keys except 0 (“Motor off”) are backlit in green. Light The lighting can be switched on or off, regardless of whether the extractor hood is in operation, by pressing the key (see Fig. - Page 8 The Int key for the intensive level should be pressed when browning and frying in an open pan (see Fig. 6). If you have switched on the hood by selecting the intensive level, it will be switched off again automatically after 5 minutes. Fig.
- Page 9 Special functions: Intensive time You can set and store the intensive level running time to 3, 5 or 10 minutes by simultaneously pres- sing the Int key and the 1, 2 or 3 key (see Fig. 9). The appliance is set at the factory to five minutes, i.e.
-
Page 10: Cleaning And Care
4. Cleaning and care Cleaning the grease filters The grease filter saturation display F flashes after an operating time of 30 hours to indicate that you should clean the grease filters (see Fig. 3). The grease filters can of course be cleaned at any time, even if the grease filter saturation display has not started to flash. - Page 11 Cleaning the extractor hood Clean the extractor hood and the aluminium- design ventilation ducts (LK 590-011/021/031) with a soft cloth and mild detergent solution only. Clean the stainless-steel design ventilation ducts (LK 590-010/020/030) with mild detergent solution and apply stainless steel care agent to the metal surface using a soft cloth.
-
Page 12: Maintenance
If the power supply is in proper working order, but the appliance is nevertheless not functioning, then please contact your specialist dealer or your responsible Gaggenau after-sales service. Specify the appliance type (see rating plate). Repairs must only be carried out by authorised specialists, thus ensuring the safety of the appliance. - Page 13 6. Assembly instructions 6.1 Technical data 6.2 Installation Weight without support frame and LK: The applicable regulations of the energy supply AH 590: 35 kg companies and the regional construction regula- AH 592: 33 kg tions must be observed when installing the hood. The minimum distance from the worktop to the Weight with support frame and LK: bottom edge of the hood is for electrical appliances...
- Page 14 Flexible aluminium pipes, corrosion-protected As standard, the blow-out opening of the extractor sheet metal pipes and exhaust air pipes whose hood is in the upward direction. material conforms to fire B1 in accordance with To pass exhaust air through the outer wall, we re- DIN 4102 can be used.
- Page 15 The extraction function is realised by an external fan module. We recommend the fan modules Gas appliances may only be used under the GB 032-107 or GB 052/053-140 from our Gaggenau extractor hood when pots and pans are placed on range; the extractor's electronic circuitry is them! optimised for these fan modules.
- Page 16 Note: the extractor hood is to be installed to a kitchen ceiling or suspended ceiling. Ensure that the ceiling is capable of providing a firm hold for a maximum weight of hood and accessories of 60 kg. Before marking the securing holes, make sure that no electricity wires or water pipes or other wires/ pipes are laid at the drilling points in the ceiling.
- Page 17 6. Adjust the support frame to the desired height and secure with 8 screws. The length of the support frame can be adjusted in steps of 20 mm from 386 mm to 646 mm (Fig. 21). Note: ensure that the minimum distance between the hob and the extractor hood is maintained - 600 mm for an electric hob and 700 mm for a gas hob...
- Page 18 11. Adjust the hood to the final position and attach it with all 4 screws to the ceiling (Fig. 23). 12. Connect the air outlet pipe. 13. Connect the hood to the electricity supply. 14. Pull the top duct unit up into its final position. Secure the top duct unit with 4 screws on the support frame (Fig.
Need help?
Do you have a question about the AH 590-120 and is the answer not in the manual?
Questions and answers