Table of Contents
Advertisement
Quick Links
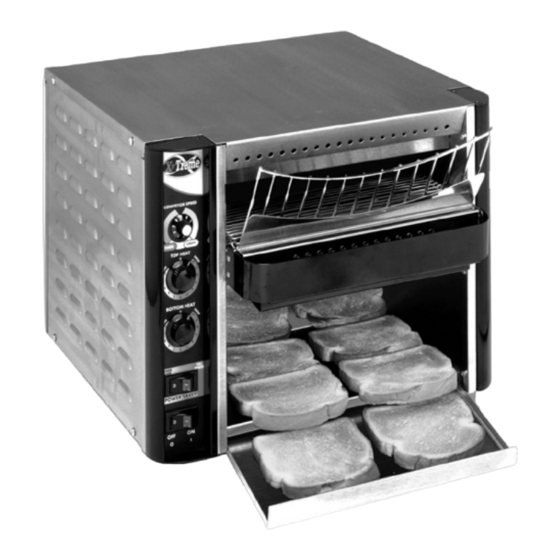
X*TRM-2
WARNING: California Residents Only. This product can expose you to chemicals including
chromium which is known to the State of California to cause cancer and birth defects or
other reproductive harm. For more information go to www.P65Warnings.ca.gov.
FOR YOUR SAFETY: Do not store or use gasoline or other flammable vapors and
liquids in the vicinity of this or any other appliance.
WARNING: Improper installation, operation, service or maintenance can cause
property damage, injury or death. Read and understand these instructions thoroughly
before positioning, installing, maintaining or servicing this equipment.
Initial heating of appliance may generate smoke or fumes and must be done in a well ventilated area.
Overexposure to smoke or fumes may cause nausea or dizziness.
APW Wyott
cooking equipment has been engineered to provide you with year-round dependable service
®
when used according to the instructions in this manual and standard commercial kitchen practices.
This manual includes material related to installation, use , cleaning, and care. Exploded view[s], as well as any
available parts list[s] and wiring diagram[s] pertaining to the unit[s] covered by this manual are also included.
This manual must be read and understood by all persons using or installing this appliance. Contact your APW Wyott
dealer if you have any questions concerning installation, use, or maintenance of this equipment.
DO NOT DISCARD THIS MANUAL.
DESIGNED SMART. BUILT SOLID.
RADIANT CONVEYOR TOASTER
X*TRM-2, X*TRM-3, X*TRM-2H, X*TRM-3H
OWNERS MANUAL
X*TRM-3
APW Wyott Food Service Equipment Company
265 Hobson St. • Smithville, TN 37166
(800) 527-2100 • apwwyott.com
is a registered trademark of APW Wyott®, A Middleby Company. All rights reserved.
®
MODELS:
2M-Z25093 REV - (10-22)
Advertisement
Table of Contents

Related Manuals for APW Wyott X TRM-2


Summary of Contents for APW Wyott X TRM-2
- Page 1 This manual must be read and understood by all persons using or installing this appliance. Contact your APW Wyott dealer if you have any questions concerning installation, use, or maintenance of this equipment.
-
Page 2: Table Of Contents
APW Wyott takes pride in the design and quality of our products. When used as intended and with proper care and maintenance, you will experience years of reliable operation from this equipment. To ensure best results, it is important that you read and follow the instructions in this manual carefully. - Page 3 Some aftermarket or generic replacement parts do not have the characteristics that will allow them to operate safely in APW Wyott equipment. It is essential to use APW Wyott Replacement Parts when repairing APW Wyott equipment. Failure to use APW Wyott Replacement Parts may subject operators of the equipment to hazardous electrical voltage, resulting in electrical shock or burn.
- Page 4 You may take this unit to the APW Wyott Authorized Service Distributor. List of same is included with each product. If the problem is covered under warranty the unit will be repaired at no cost to you.
-
Page 5: General Information
NOTICE: Do not use toppings (butter, etc.) on product as product is inverted during normal operation. NOTICE: Operating toaster without legs invalidates any warranty claims. NOTICE: Neglecting to keep fan opening clean could result in toaster failure. 3 . GENERAL INFORMATION XTRM-2 3”: 1. - Page 6 2. Toaster Placement A. Locate toaster near a grounded receptacle of the proper configuration (see below). Plug the cordset directly into receptacle (DO NOT USE AN EXTENSION CORD). 1. In the U.S.: 208, 230/240V uses NEMA 6-20R. B. Place toaster on flat surface providing following minimum clearances: 1.
- Page 7 Step 1: Remove (1) screw from Screws circled in red in Fig. A Fig. A Fig. B Step 2: Remove all (4) legs from upper unit. Legs circled in red in Fig. B Step 3: Use (4) 1/4-20 bolts and (4) washers to attach the frame HC-Z24538 to the bottom side of the upper unit by aligning the holes in the frame with the...
- Page 8 Lorem ipsum Step 4: Remove (2) screws from Fig. D top rear of lower unit and add (1) #10 2C-89059 washer to each. on top of lower unit aligning slots Lorem ipsum in frame with screw holes on rear of lower unit and reinstall screws and washers.
-
Page 9: Operations Instructions
5 . OPERATION INSTRUCTIONS 1. Preparation A. Clean toaster thoroughly before first use (See cleaning instructions). B. Controls Familiarity 1. Main Power Switch (located on very bottom of control panel): There are two rocker switches. The bottom switch powers the unit “ON”. It also turns on the bottom element. top switch is a standby switch that runs the top element. -
Page 10: Specifications
7. SPECIFICATIONS DIMENSIONS – X*TRM ® DIMENSIONS – X*TRM ®... - Page 11 DIMENSIONS – X*TRM ® DIMENSIONS – X*TRM ®...
-
Page 12: Wiring Diagram
8 . WIRING WIRING DIAGRAM... - Page 13 9 . PARTS LISTS & EXPLODED VIEWS EXPLODED VIEW – X*TRM -2 & 2H ® *Dependent on voltage of unit ITEM NO. PART NO. X2 & X2H SERVICE PARTS LIST QTY. 38130 ASSY, CLIP BEARING 38125 BEARING FLANGED POLYMER 93000206 BELT, WIRE 27x.05 3 SEG.
- Page 14 PARTS LIST CONTINUED – X*TRM -2 & 2H ® 85149 MOTOR, AT'S 208/240V 60HZ VARIABLE 85144 MOTOR, AT'S 230V 60HZ VARIABLE 93302017 ELEMENT; 1400W 208V 93302053 ELEMENT; 240V 1400W 93300058 SPACER, CONVEYOR SHAFT 83209 SPROCKET, 23 TOOTH 1/4 PITCH, 5/16 DIA BORE 82918 CHAIN, 1/4"...
- Page 15 EXPLODED VIEW – X*TRM -3 & 3H ® *Dependent on voltage of unit ITEM NO. PART NO. X2 & X2H SERVICE PARTS LIST QTY. 38130 ASSY CLIP BEARING 38125 BEARING, FLANGED, POLYMER 93200070 SHAFT; IDLER XTRM 83880 CONVEYOR BELT ASSY (76 LINKS) 93303013 TRAY REFLECTOR 93303077...
- Page 16 93303017 ELEMENT; 1650W 93303057 ELEMENT; 240V 1650W XTTRM 93300058 SPACER, CONVEYOR SHAFT 2P-83209 SPROCKET, 23 TOOTH 1/4 PITCH, 5/16 DIA BORE 82918 CHAIN, 1/4’ DRIVE 70 LINK 83261 SPROCKET, 12 TOOTH 1/4 PITCH 3/8 BORE 93300057 BRACKET, BEARING 83976 REAR SHAFT & SPROCKET W/A 83277 CORDSET, ASSY 208/240V (CORD 85640) 85287...
- Page 17 Date Purchased Notes APW Wyott takes pride in the design and quality of our products. When used as intended and with proper care and maintenance, you will experience years of reliable operation from this equipment. To ensure best results, it is important that you read and follow the instructions in this manual carefully.
-
Page 18: Warranty
LIMITED EQUIPMENT WARRANTY WARRANTY EXCLUSIONS APW warrants to the original purchaser of new APW's products to be THE FOLLOWING WILL NOT BE COVERED UNDER WARRANTY. free from defects in material or workmanship, under normal and proper APWs’ sole obligation under this warranty is limited to either repair use and maintenance service as specified by APW and upon proper or replacement parts, subject to the additional limitations installation and start-up in accordance with the instructions... - Page 19 APW Wyott • www.apwwyott.com/ Printed in the U.S.A. • 2M-Z25093 REV - (10-22) Specifications are subject to change without notice. 265 Hobson St. • Smithville, TN 37166 is a registered trademark of APW Wyott®, A Middleby Company. All rights reserved. Telephone: (800) 527-2100...
Need help?
Do you have a question about the X TRM-2 and is the answer not in the manual?
Questions and answers