Table of Contents
Advertisement
Quick Links
Advertisement
Table of Contents

Subscribe to Our Youtube Channel
Related Manuals for FRENCH FITNESS FF-T800


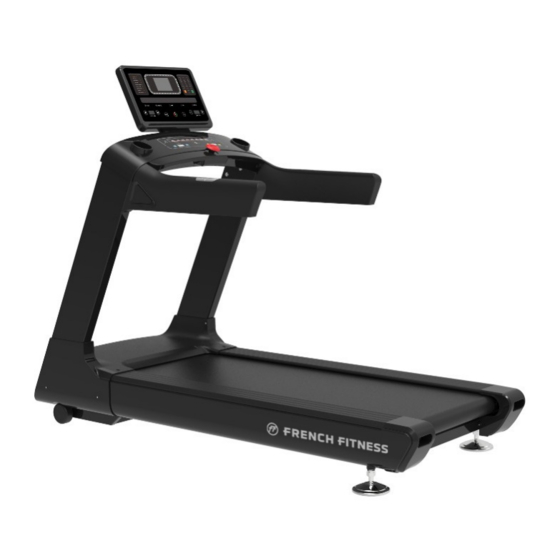
Summary of Contents for FRENCH FITNESS FF-T800
- Page 1 FF-T800 FRENCH FITNESS T800 COMMERCIAL TREADMILL ASSEMBLY MANUAL...
- Page 2 T E CH SPE CS • LED display screen: Multi-window LED display • User-defined program (LED): Calories count screen down mode; Distance count down mode; E XPL OD E D VI E W Time count down mode • Console upright: Aluminum alloy •...
-
Page 3: Table Of Contents
T ABL E OF CONT E NT S Caution ........................4 The Parameter of Technology ................. 5 Drawing ........................6 Assembly Instruction ....................7 Instrument operation guide ..................12 Machine debugging process ................. 16 Adjustment Instructions / Maintenance ..............16 Explode View·... -
Page 4: Caution
CAUT I ON Read all precautions and instructions in this manual before using this equipment. The machine is suitable for commercial fitness clubs, clubhouse fitness, bodybuilding training, sports training, physical education and so on. The machine must be reliable grounding, forbidden without grounding line using the treadmill. -
Page 5: The Parameter Of Technology
Incorrect or overload training may cause the damage of the motor and controller, accelerate the aging transmission system, even bodily injuries. Never touch any parts of running treadmill with your finger People with long hair should pay attention to the safety of hair when using. When you feel uncomfortable and unusual, pls stop at once and consult to the doctor. -
Page 6: Drawing
D RAWI NG 18.5 inches Shelf Acrylic board Heart rate Emergen cy stop switch Hand Side Colum Lifting roller Motor Cover Rear tail... -
Page 7: Assembly Instruction
ASSE MBL Y I NST RUCT I ON Make the assembly work easier. This section of User Manual only to ensure that the treadmill can be assembled correctly and easily. In fact, if you assemble the Treadmill base on the user manual, the work will finish ●... - Page 8 ST E P 1 Connect to communication line and assembly support Instruction: Take down the packing material of support 1) Fix the support on the frame as the picture 2) Attention: Connect the communicate line below. Communicati on line connection (the only corresponding interface of...
- Page 9 ST E P 2 Connect the communication line and heart rate line,leave interspace to put hear rate line, communication line and power line ,assemble the table frame: Assembly instructions: 1) butt joint communication lines in support and frame 2) Fix the case to the corresponding position of the column, and fasten the combination of the table frame and the column connection bolt.
- Page 10 ST E P 3 1) Remove the left and right handrails and assemble the left and right Assembling the left and right handrails and laying the heart rate line Place the 2) cloth the heart rate line; handrails; heart rate cord in the dial holder...
- Page 11 ST E P 4 Assembling the head; connecting the communication line and the heart rate line, assembling the lower case of the dial 1) Pull the meter out of the communication line, and connect the heart rate line to the table frame combination communication line and heart rate line.
-
Page 12: Instrument Operation Guide
T RE AD MI L L OPE RAT I ON I NST RUCT I ONS The treadmill panel adopts the capacitive touch principle, and the user can use only one touch at a time, and the touch effect is comparable to that of the mobile phone screen. - Page 13 “BIM”, “TIME COUNT”, “DISTANCE COUNT”, “CALORIES COUNT”, “Heart Rate”, “MANUAL MODE”, “ALPINE” PASS", "5K LOOP", "TRAINING TOOLS", "FOREST WALK", "TRAILBLAZER", "10K LOOP", "RANDOM HILL". "REST" is the return key: press this key to return to the standby interface; “START/STOP”: If the power is switched on and safe lock is ok,the treadmilll can be started or stopped by pressing this key at anytime 4.
- Page 14 flashes; the preset time is 30:00, press “SPEED+”, “SPEED -” to set the required exercise time, then press “START/STOP” to start the built-in program. The built-in program is divided into 10 Segment, each movement time = set time/10. When entering the next paragraph, if the speed or slope will change, the system will give a “Bi-Bi- Bi-”...
- Page 15 numb progr Program settings: parameter initial value Setting range Display range time(min:sec) 30:00 5:00-99:00 0:00-99:59 gradient(segment) 0-15 0-15 speed(KM/H) 1.0-20 1.0-20 distance(kM) 0.5-99.0 0.00-99.9 Heart 50-200 rate(times/min) 0-999 calorie(KCAl) 10-990...
-
Page 16: Machine Debugging Process
MACHI NE D E BU GGI NG PROCE SS Safety lock function: In any state, pull off the safety lock can be emergency stop the operation of the treadmill,when treadmill emergency stop, will hear a long buzzing ,window display“safe”.At this time,the treadmill can not do any operate except shutdown.After correct installation of the safety lock,treadmill back into the standby state,waiting for a command input. - Page 17 frequency of each machine is less than 6 hours per day, every 15 days Add oil to the left and right, each time adding about 50ml each time. Remember: Do not use oil excessively. It’s not right that he more lubricant, the better. Reasonable lubrication is an important factor to improve the service life of the treadmill.
- Page 18 (the power output of the inverter and the motor will be greatly increased) Need to adjust (1) Tightening: Adjust the adjusting screw in the left and right adjustment holes of the running belt accordingly. the rear end cover clockwise with the special tool (M8L type wrench) equipped with a (2) Adjusting the looseness: Adjust the adjustment screw in the left and right special one-quarter turn (90 degrees).
-
Page 19: Explode View
E XPL OD E VI E W DESCRPTION Q’TY TZ01-SP04-0300 TZ06-SP04-0605 TZ06-SP04-0606 TZ06-SP04-0607 M5X12-M1 M4X10-M1 TZ-SP04 M3X8L-M1 DESCRPTION Q’TY TZ04-SP04-0500 TZ06-SP04-0603 TZ06-SP04-0602 Ф10XФ5.5X1.0t-C1 H4X10L-M1 USB-PCB M5X12L-M1... - Page 20 DESCRPTION Q’TY DESCRPTION Q’TY TZ01-SP04-0100 H4X10L-A1 H4X10L-M1 H4X12L-A1 K4X15L-A1 TZ01-SP04 TZ 7000 TZ01-SP04-0002 TZ06-SP04-0604A M12X12L-N2 TZ06-SP04-0615 Ф24XФ13X1.0t-C1 TZ06-SP04-0616 TZ04-SP04-0400 TZ02-SP04-0003 TZ06-SP04-0613 TZ-7000 TZ06-SP04-0614 TZ-SP05 TZ06-SP04-0612 TZ06-SP04-0611 TZ06-SP04-0620 M10X75L-N1 H16X55L-M1 Ф20XФ11Х1.0t-C1 Ф30XФ17X2.0t-C1 H4X8L-A1 M10X70L-N1 Ф20XФ18t-S2 M10X80L-N1 Ф30XФ21X5.0t-C3 TZ-SP01-03 Ф0XФ4.5X1.0t-C1 M10X35L-N3 M10X15L-N1...
- Page 21 DESCRPTION Q’TY TZ04-SP04-0100S TZ04-SP04-0200 TZ04-SP04-0200 Ф20XФ11X1.0t-C1 M10X12L-N2 M10X20L-N2 TZ04-SP04-0500S TZ04-SP04-0300S M10X40L-N1...
Need help?
Do you have a question about the FF-T800 and is the answer not in the manual?
Questions and answers