Advertisement
Quick Links
Advertisement

Subscribe to Our Youtube Channel
Summary of Contents for FRENCH FITNESS FF-CT80
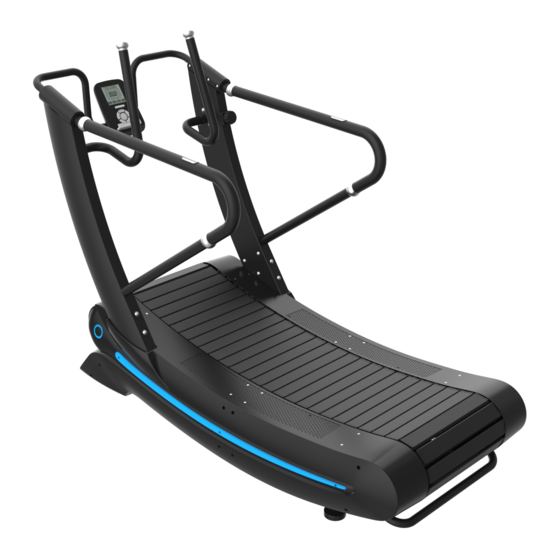
- Page 1 FF-CT80 FRENCH FITNESS CT80 MANUAL CURVE TREADMILL W/RESISTANCE ASSEMBLY MANUAL...
- Page 2 Transport W heels in front & Handles in Creative precision bearing transmission rear for easy transportation system, smooth, zero drag and stick Non- motorized Zero- energy Lower noise, power consumption, failure consumption rate and maintenance cost Pure green energy treadmill Eliminates the slippage of traditional ...
- Page 3 1. SAFETY CAUTIONS .................... 4 2. TECHNICAL STANDARD..................6 3. MACHINE DIAGRAM ..................7 4. INSTALLATION PROCEDURES&MACHINE DEBUG ..........8 5. OPERATION GUIDE ..................12 6. PACKING LIST ....................14 7. EXPLOSIVE VIEW ..................... 15 8. PARTS LIST ...................... 16...
- Page 4 Please read all precautions and instructions in this manual before using this equipment. This Curve treadmill is suitable for commercial fitness clubs, clubhouse fitness, bodybuilding training, sports training, physical education and so on. This Curve treadmill is suitable for indoor use, do not use it outdoors or in high humidity situation.
- Page 5 11. When you feel uncomfortable when using this treadmill, please stop immediately and consult to the doctor. 12. Please check and make sure every bolt and screw was locked tight every time before you start to use the treadmill. If any of them is loose, please change or fixed it.
- Page 6 Input supply voltage: four-cell dry battery Time: 0:00 — 99.59 Distance: 0.00 — 99.99 (km) Calories: 0 — 999 (kcal) Heart rate: 60 — 300 (beats/min) Rotating speed: 0 — 90(KM/H) Resistance adjustment level: 1 — 8 (at1, the resistance is 0, at 8, the resistance is maximum)
- Page 7 Console holder Console Handle Stand column Running belt Foot Pedal Carry handle...
- Page 8 Taking easy-assembly as the principle: User Manual of this section is designed to ensure that the treadmills can be assembled correctly and easily. Considering the big size of the treadmill, please select the location where the treadmill will be placed and ensure there is enough space around it. ...
- Page 9 Assembly step one: Connect the magnetic induction line and assemble the stand column. Assembly instructions: 1) Remove the packing materials on both sides of the stand column. 2) Fix the stand column to the corresponding position of the main frame as shown in the picture below.
- Page 10 Assembly step two: Connect the magnetic induction line,assemble the console holder and handrail Assembly instructions: 1) Connect the magnetic induction line of the console holder to those in the stand column. 2) Fix the console holder tightly with the stand column as shown in the picture below, using 2 pcs of (27).
- Page 11 Assembly step three: Assembling the console; connecting the magnetic line 1) Connecting the magnetic line of the console with the line in the holder console holder. 2) After connected the magnetic line, place the console at the joint of console holder and fasten it (as shown), using 4pcs of (13) and 4pcs of (14).
- Page 12 Console Introduction: This treadmill adopts console model, four dry battery power supply, low power consumption, no external power supply required; This treadmill interface has only one main interface, with six buttons to achieve the purpose of use, the specific operation methods of the treadmill are as follows: 1.
- Page 13 Numerical minus key: For numerical reduction on numerical setting interface, reduction rate: -1 Program setting key: Click this key to start program setting, consist of body fat test; time reciprocal, distance reciprocal, calories reciprocal and heart rate monitoring five kinds of procedures; Reset key: Touch this button (no more than 3s) to back step.;...
- Page 14 1. Main frame assembly one piece 2. Right side stand column handrail one piece 3. Left side stand column handrail one piece 4. Console welding assembly one piece 5. Console one piece 6. Whole Screw one piece...
- Page 16 Item Description TZ04-SP03-0402 Left side cover TZ04-SP03-0403 Running belt rack TZ04-SP03-0407 Right side support group TZ04-SP03-0408 Carry handle TZ04-SP03-0411 Right handle group TZ04-SP03-0415 Left side support group TZ04-SP03-0416 Left handle group TZ04-SP03B-0417 Right side cover TZ04-SP03-0410 Right side stand column welding part TZ04-SP03-0414 Left side handle welding part TZ04-SP03B-0420 Belt pulley rack TZ04-SP03B-0421 handrail group...
- Page 17 Item Description TZ03-SP03-0309 inside bearing spacer Probe fixing piece Probe TZ02-SP03-0239 Counter fixing piece 608 Bearing TZ10-SP03-1002 Foam tape TZ03-7039-0324 Handle spacer (aluminum TZ02-SP03B-0244 Ventilated aluminum pan TZ02-SP03B-0246 Magnet fixed sheet metal TZ02-SP03B-0247 Magnet fixed sheet metal TZ02-SP03B-0250 Aluminum plate fixed sheet metal TZ03-SP03B-0333 Set screw TZ03-SP03B-0328 Small pulley TZ03-SP03B-0327 Big pulley...
- Page 18 Item Description TZ10-SP03-1003 Foam tape TZ17-SP03-1701 Running belt 5039 Soft spring TZ10-SP03B-1004 Pull up Line TZ10-SP03B-1005 Pull down line φ30 8PJ420 Belt M8X40L-N1 Hexagon socket cap screws Ф8 Gasket M8X7t-S1 Lock nut M10X20L-N2 Hexagon socket screw 8X25 Flat key Φ22Xφ13X1.5t-C1 Washer M12X30L-N1 Hexagon socket cap screws M6X8L-J1 Set screw M8X16L-N2 Hexagon round screw...
- Page 19 Item Description M8X55 Carriage bolts M8X25 Carriage bolts M6X14L-N2 Hexagon round screw M6 Nut M5X8L-J1 Set screw M10x8t-S2 Nut Ф20X Ф11 X1.0t-C1 washer M8X25L-N1 Hexagon socket cap screws M4X10L-A1 Cross plate circular bolt M4X15L-A1 Cross plate circular bolt M6X16L-N3 Hexagon countersunk head screw M8X16L-N1 Hexagon socket cap screws M10X50 Set screw 8X20-N Set screw...
- Page 20 Item Description TZ06-SP03-0605 Right side trim strip TZ06-SP03-0606 Right side protecting case TZ06-SP03-0611 Decorative ring TZ06-SP03-0607 left front cover TZ06-SP03-0608 left back cover TZ06-SP03-0616 Console TZ06-SP03-0609 Left side trim strip TZ06-SP03-0610 Left side protecting case φ40 rubber Counter magnet...


Need help?
Do you have a question about the FF-CT80 and is the answer not in the manual?
Questions and answers