
Related Manuals for VTech BM4700N


Summary of Contents for VTech BM4700N
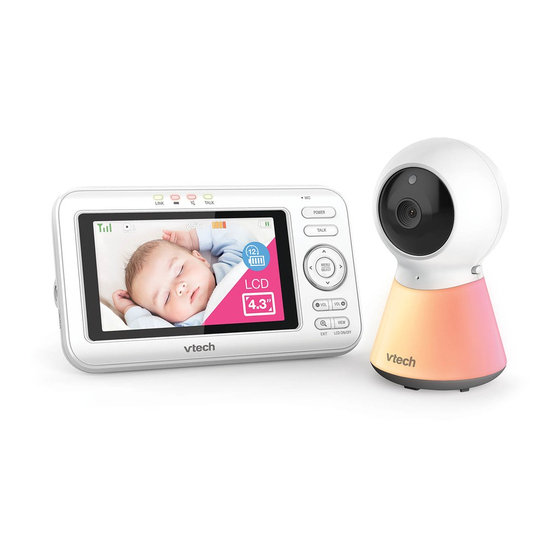
- Page 1 BM4700N BM4700N-2 Full Colour Pan & Tilt Video Monitor User Guide This guide contains important information. Please keep it for future reference.
-
Page 2: Table Of Contents
Temperature ...........................26 Turn on/off Alert Tones ......................27 Adjust Baby Unit Speaker Volume ..................28 Dim Mode ..........................29 Night Vision ...........................29 Monitoring Modes (BM4700N-2 only) ...................30 Additional Information ����������������������������������������������������������������������������������������32 Wall Mount (Optional) ......................32 General Product Care ......................35 Storage ..........................35 Technical Specifications ......................35 Customer Service and Product Warranty ................36... -
Page 3: Important Safety Instructions
15. Do not place this product on an unstable table, shelf, stand Electromagnetic fields (EMF) or other unstable surfaces. This VTech product complies with all standards regarding 16. This product should not be placed in any area where electromagnetic fields (EMF). If handled properly and proper ventilation is not provided. -
Page 4: Setup
Baby Unit Wall Mount Bracket Parent Unit Parent Unit Adapter Baby Unit Adapter Quick start guide 1 set for BM4700N Learn to set up your units and have all detailed instructions on using your 2 sets for BM4700N-2 baby monitor. -
Page 5: Overview
Overview Baby Unit... - Page 6 Light sensor Camera lens Microphone Night light On/Off switch On/Off LED light • On when the baby unit is turned on and is paired to the parent unit. • Flashes when the baby unit is not being viewed; or when the link to the parent unit is lost. Projection light Speaker Projection light on/off key...
- Page 7 Parent Unit...
- Page 8 LED lights LCD display Microphone POWER TALK MENU/SELECT Arrow keys • While viewing image from the baby unit, press to pan and tilt the baby unit leftward, upward, rightward or downward. Volume VIEW /LCD ON/OFF /EXIT Antenna 12 RESET 13 Stand 14 Power jack...
-
Page 9: Parent Unit Icons
Brightness • Adjust the parent unit’s LCD brightness. Camera settings Baby unit speaker volume • Adjust the baby unit’s speaker volume. Monitoring mode (For BM4700N-2 only) • Single mode • Split mode • Patrol mode Lullaby Play/Stop lullaby • Select one of the soothing sounds, or white noise. - Page 10 • Set the confirmation tone on or off when selecting an option in the menus. • Set the parent unit to beep when the baby unit detects sounds while in Split mode (For BM4700N-2 only). Temperature • Turn on/off temperature alert tone.
- Page 11 - Moderate signal strength. • - Low signal strength. • - Weak signal strength. Split mode (*For BM4700N-2 only) Patrol mode (*For BM4700N-2 only) Current view status • The baby unit number that is being viewed when in: - Single CAM mode.
- Page 12 • Displays when connection between parent unit and baby unit is lost. • Displays when sound is detected at a baby unit when in Split view. (*For BM4700N-2 only) • Baby unit detects temperature reaches or exceeds the set maximum.
-
Page 13: Connect The Baby Monitor
Connect the Baby Monitor Connect the parent unit and baby unit to a power supply with the included power adapters. Notes: • The rechargeable battery in the parent unit is built-in. • Use only the power adapters supplied with this product. •... -
Page 14: Charge The Parent Unit Battery
Charge the Parent Unit Battery The parent unit runs on rechargeable battery or AC power. To continuously monitor your baby, keep the parent unit connected to AC power. The parent unit turns on automatically after it connects to the power socket for the first time using, and its battery will charge at the same time. -
Page 15: Position The Baby Monitor
Positioning the Baby Monitor Caution: Keep the baby unit out of the reach of your baby. Never place or mount the baby unit inside the baby’s crib or playpen. 1. Place the baby unit more than 3 feet (1m) away from your baby. 2. -
Page 16: Basic Operation
Basic Operation Power on/off 1. Slide the switch to power on or off your baby unit. Power on Power off 2. Press and hold POWER to power on or off your parent unit. Press and hold Press and hold Power off Power on... -
Page 17: Status Check
Status Check Once you power on both your baby unit and parent unit, your parent unit displays image from the baby unit, and the LINK LED light turns on. The ON LED light of baby unit turns on. Use the menu Press to enter the menu, choose a menu item, or save a setting. -
Page 18: Adjust Speaker Volume
Adjust Speaker Volume Press to adjust your parent unit speaker volume. Talk to your baby unit Press and hold TALK and speak to your parent unit. Your voice is transmitted to the baby unit. Release TALK when finish talking and hear your baby again. -
Page 19: Zoom
ZOOM Press to zoom in or out. Turn off the screen Press and hold LCD ON/OFF to switch off the screen. You can still hear sound from the baby unit. Long press • Press any keys on the parent unit to turn on the screen again. -
Page 20: Pan And Tilt The Camera
Pan and tilt the camera Press on the parent unit to move the camera leftward; or press and hold to move the camera leftward continuously. Press on the parent unit to move the camera rightward; or press and hold to move the camera rightward continuously. Press on the parent unit to move the camera upward;... -
Page 21: Advanced Operation
Advanced Operation Adjust Screen Brightness You can change the brightness of the parent unit screen from Level 1 to Level 5. The LCD screen brightness is preset to Level 3. To adjust LCD brightness: 1� Press on the parent unit to select (Brightness). -
Page 22: Night Light
Night Light You can control the night light remotely on the parent unit or directly ou can unit. On the Baby Unit Press the Night light on/off key located on the back of the baby unit to turn on/off the night light. On the Parent Unit 1�... -
Page 23: Projection Light
Projection light The baby monitor has the projection light for you to soothe and comfort your baby at night. You can turn on or off the projection light on the baby unit using the parent unit. You can also turn on or off the projection light with the baby unit manually. To turn on or off the projection light: 1. -
Page 24: Sound Sensitivity And Sound Activation
If you turn off Sound activation, you will hear sounds from the baby unit all the time, even when the parent unit screen is switched off. If you have turned on sound alert, the parent unit beeps when the baby unit detects sounds while in Split mode (*For BM4700N-2 only). Adjust sound detection sensitivity Sensitivity... - Page 25 Sound activated screen and audio When Sound activation is on, the parent unit screen stays off to save power when the baby unit detects no sound. Once the baby unit detects sounds that are louder than the chosen sound sensitivity level, the parent unit screen and speaker turn on automatically.
-
Page 26: Temperature
Temperature Temperature Alert Your baby unit can help you keep track of your baby’s room temperature in order to ensure that your baby stays in the comfort zone at all times. With temperature sensor, the relevant data will be shown on the status bar when you powered on your units. -
Page 27: Turn On/Off Alert Tones
Turn on/off Alert Tones Low Battery Alert Tone You can set the parent unit to beep when the parent unit operates in low battery condition. Switch it off if you do not wish to be disturbed when the parent unit’s battery is running low. -
Page 28: Adjust Baby Unit Speaker Volume
Sound Detection in Split Mode Alert Tone You can turn on sound alert, and set the parent unit to beep when the baby unit detects sounds while in Split mode (For BM4700N-2 only). Turn on or off sound alert: 1� Press on the parent unit. -
Page 29: Dim Mode
Dim Mode The parent unit display will dim to conserve energy after 10 minutes of inactivity, in which there is neither key pressed nor alert received from the baby unit. 10 min inactivity Press any buttons Night Vision The baby unit has infrared LEDs that allow you to see your baby clearly at night or in a dark room. -
Page 30: Monitoring Modes (Bm4700N-2 Only)
Monitoring Modes (BM4700N-2 only) When more than one baby unit is paired to the parent unit, you can choose to view different baby units in three monitoring modes. Learn more about each below: Single Mode The screen displays images only from the selected baby unit in full screen. - Page 31 Change different views - Single CAM In Single CAM or Patrol mode, press VIEW to switch between the image of baby units Press VIEW Change different views - Patrol Select Patrol as your monitoring mode to alternately view the image from baby units every 10 seconds.
-
Page 32: Additional Information
Additional Information Wall Mount (Optional) Notes: • Check for reception strength and camera angle before drilling the holes. • The types of screws and anchors you need depend on the composition of the wall. You may need to purchase the screws and anchors separately to mount your camera units. - Page 33 3. Align the wall mount bracket and screws with the holes in the wall as shown. Tighten the screw in the middle hole first, so that the wall mount bracket position is fixed. You can tighten the other screw in the top hole. Insert the screws into the holes and tighten the screws until only 1/4 inch of the screws are exposed.
- Page 34 Place the camera unit on the wall mount bracket, and then slide it forward until it locks into place. Align the holes on the wall mount bracket with the screws on the wall, and slide the wall mount bracket down until it locks into place. 5.
-
Page 35: General Product Care
General Product Care To keep this product working well and looking good, follow these guidelines: • Avoid putting it near heating appliances and devices that generate electrical noise (for example, motors or fluorescent lamps). • DO NOT expose it to direct sunlight or moisture. •... -
Page 36: Customer Service And Product Warranty
Voluntary Product Enquiry In addition to your Statutory Rights and subject to the conditions below, VTech warrants that this product will be free from any defect in materials or workmanship under conditions of normal use for a period of 24 months from date of purchase. -
Page 37: Disposal Of Batteries And Product
Disposal of Batteries and Product The crossed-out wheelie bin symbols on products and batteries, or on their respective packaging, indicates they must not be disposed of in domestic waste as they contain substances that can be damaging to the environment and human health.
Need help?
Do you have a question about the BM4700N and is the answer not in the manual?
Questions and answers