
Related Manuals for VTech BM4500-OWL


Summary of Contents for VTech BM4500-OWL
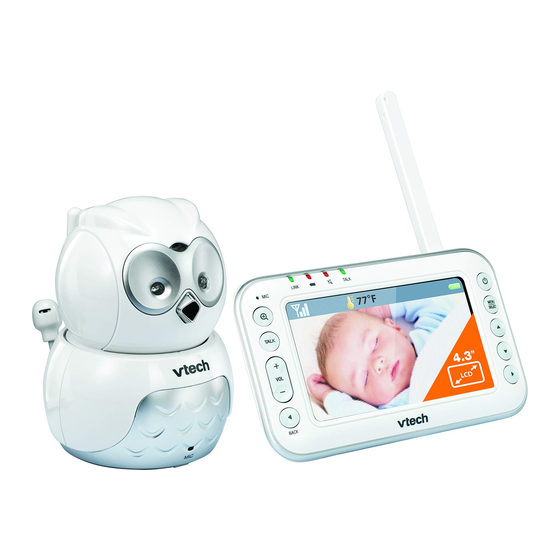
- Page 1 User’s manual Pan & Tilt Full Colour Video & Audio Monitor ht t p : / / hk p ho nes.v te c h.c o m Model: BM4500-OWL...
-
Page 2: Table Of Contents
TABLE OF CONTENTS IMPOrTANT SAFETy INSTrUCTIONS....... 1 SET UP THE BABy MONITOr ..........4 Package Contents ...............4 Baby Unit Installation............5 Baby Unit Installation Options ..........6 2.3.1 Tabletop to Wall Mount Installation ......6 Parent Unit Battery Installation ..........10 Parent Unit Installation ............12 Parent Unit Battery Charging ..........13 GET TO KNOW THE BABy MONITOr ......14 Baby Unit Overview ............14... - Page 3 USING yOUr BABy MONITOr ........31 Parent Unit Settings ............31 Alert Tone ................31 6.2.1 Low Battery Tone Alert .........31 6.2.2 No Link Alert ............31 6.2.3 Sound Alert ............32 Sensitivity ................32 Temperature ..............33 6.4.1 Minimum Temperature .........33 6.4.2 Maximum Temperature ........33 6.4.3 Temperature Alert ..........33 6.4.4 Temperature Format ..........34...
- Page 4 Product introduction BM4500-OWL is a video and audio monitor which consists of one parent unit (BM4500-OWL PU) and one baby unit (BM4500-OWL BU). The parent unit may be shipped with a protective sticker covering the display. Remove the protective sticker before use.
-
Page 5: Important Safety Instructions
IMPOrTANT SAFETy INSTrUCTIONS When using your equipment, basic safety precautions should always be followed to reduce the risk of fire, electric shock and injury, including the following: Follow all warnings and instructions marked on the product. Adult setup is required. This product is intended as an aid. - Page 6 Do not overload wall outlets or use an extension cord. Do not place this product on an unstable table, shelf, stand or other unstable surfaces. This product should not be placed in any area where proper ventilation is not provided. Slots and openings in the back or bottom of this product are provided for ventilation.
- Page 7 Cautions Use and store the product at a temperature between 0 C and 40 Do not expose the product to extreme cold, heat or direct sunlight. Do not put the product close to a heating source. Batteries should not be exposed to excessive heat such as bright sunshine or fire.
-
Page 8: Set Up The Baby Monitor
SET UP THE BABy MONITOr Package Contents The package contains the following items: • Parent unit • Baby unit • Parent unit power adaptor • Baby unit power adaptor • Parent unit battery • Wall mount bracket • 2 Screws •... -
Page 9: Baby Unit Installation
Baby Unit Installation Install the baby unit as shown below. Power up the baby unit by connecting it to AC power. Bundle the power cord neatly with the self-adhesive strap. Notes • The baby unit power adapters are intended to be correctly oriented in a vertical or floor mount position. -
Page 10: Baby Unit Installation Options
Baby Unit Installation Options The baby unit is ready for tabletop use. Use the provided wall mount bracket if you want to mount it on a wall. Make sure to test the reception and the baby unit position before completing the wall mounting installation (see Test your Video and Audio Monitor Before Use on page 26). - Page 11 Align the wall mount bracket and screws with the holes in the wall as shown. Make sure to attach the screw in the middle hole first so that the wall mount bracket position is fixed. Then attach the other screw in the top hole.
- Page 12 Option 2: Use this method so that you can relocate the baby unit with the wall mount bracket easily. Note Check for reception strength and camera angle before drilling the holes. Place the wall mount bracket on a wall and then use a pencil to mark the top and the bottom holes as shown.
- Page 13 Insert the screws into the holes and tighten the screws until only 7 mm of the screws are exposed. Place the baby unit on the wall mount bracket and tighten the screw into the threaded socket at the bottom to secure the baby unit. Align the holes on the wall mount bracket with the screws on the wall and slide the wall mount bracket down until it locks into place.
-
Page 14: Parent Unit Battery Installation
Parent Unit Battery Installation You can power up the parent unit by connecting it to AC power or to the rechargeable battery provided. Even if the parent unit is connected to AC power, we recommend you also install the battery. This guarantees continual operation in case of a power outage. - Page 15 Align the battery compartment cover flat against the battery compartment, then slide it towards the center of the parent unit until it clicks into place. To replace the battery, press down on the large tab of the battery and pull it out of the battery compartment, then follow the previous steps to install the battery.
-
Page 16: Parent Unit Installation
Parent Unit Installation Install the parent unit as shown below. Battery inside the parent unit will be charged when connected to power supply. Bundle the adapter cord neatly with the attached self-adhesive strap. Notes • The parent unit power adapter is intended to be correctly oriented in a vertical or floor mount position. -
Page 17: Parent Unit Battery Charging
Parent Unit Battery Charging When you have connected the parent unit and installed its battery for the first time or after power outage, the parent unit powers on automatically. The battery icon indicates the battery status (see the following table). Notes •... -
Page 18: Get To Know The Baby Monitor
GET TO KNOW THE BABy MONITOr Baby Unit Overview... - Page 19 Light sensor Infrared LEDs Camera Microphone -/VOL/+ • Press to adjust the listening volume. Speaker ON/OFF LED light • On when the baby unit is powered on and linked to the parent unit. • Flashes at a normal pace when the baby unit is not linked to the parent unit •...
-
Page 20: Parent Unit Overview
Parent Unit Overview... - Page 21 / LCD ON/OFF • Press and hold to turn the parent unit screen off. • Press to change viewing mode on the parent unit - to switch between baby units in sequence manually and to activate SPLIT-VIEW or PATROL MODE. This function only applicable when more than one baby unit is paired to the parent unit.
-
Page 22: Lcd Display
+/VOL/- • Press to adjust the speaker volume. Power jack /BACK • While in a menu, press to return to the main menu or idle screen. • While viewing image in mode, press and hold to move the image leftward. On/off •... -
Page 23: Parent Unit Lights
Parent Unit Lights LINK On when strong signal strength is detected between the parent unit and the selected baby unit. Flashes when the parent unit cannot link to the selected baby unit. Off when the parent unit is turned off. On when the parent unit battery is being charged. -
Page 24: Parent Unit Display Screen Icons
Parent Unit Display Screen Icons Connection status displays when strong signal strength is detected between the baby unit and the parent unit. displays when moderate signal strength is detected between the baby unit and the parent unit. flashes when the link between the baby unit and the parent unit is lost. - Page 25 Sound level indicators - Displays the sound level according to the scales of loudness when there is sound transmitted from the baby unit. Speaker volume - Displays while the speaker of the parent unit is turned off. - Displays the speaker volume level while adjusting. Battery status animates when the battery is...
-
Page 26: Parent Unit Main Menu Icons
Parent Unit Main Menu Icons Alert tone You can set the parent unit to beep when • the parent unit operates in low battery condition; • the link between the parent unit and the baby unit is lost; • the parent unit receives loud sound from the baby unit, which lights up four or more sound level indicators on the parent unit. - Page 27 Sound-activated screen Automatically turns on the parent unit screen when a sound is detected in your baby’s room. When no sound is detected, the screen is off to save power. You can change the LCD brightness or turn on or off the dim mode of the parent unit screen.
-
Page 28: Parent Unit Display Messages
Parent Unit Display Messages No link to CAM # The baby unit is out of range or is turned off. (# represents the selected baby unit number) The battery level of the parent unit is very Battery low at low and needs to be recharged. Parent Unit The temperature detected from the selected Temperature too... -
Page 29: Positioning And Operating Range
Positioning and Operating range 3.7.1 Position the Video and Audio Monitor Notes • This baby monitor is intended as an aid. It is not a substitute for proper adult supervision, and should not be used as such. • Keep the baby unit out of the reach of the baby. Never place or mount the baby unit inside the baby’s cot or playpen. -
Page 30: Operating Range
3.7.2 Operating range The operating range of the baby monitor is up to 300 metres outdoors or 50 metres indoors. The actual operating range may vary depending on the environmental conditions, and other interferences such as walls, doors, and other obstructions. 3.7.3 Test your Video and Audio Monitor Before Use You may test the baby monitor before initial use, and at regular times... -
Page 31: Baby Unit Operation
BABy UNIT OPErATION Power the Baby Unit On or Off Switch the ON/OFF key to ON to turn on the baby unit. • The ON/OFF LED light turns on. Switch the ON/OFF key to OFF to turn off the baby unit. •... -
Page 32: Parent Unit Operation
PArENT UNIT OPErATION Power the Parent Unit On or Off to turn on the parent unit. The LINK light turns on. • Press and hold again to turn off the parent unit. The LINK light • Press and hold turns off. Note The LINK light flashes when the parent unit cannot link to the selected baby unit. -
Page 33: Monitoring Mode
Monitoring mode Every time you turn on the parent unit, you enter the SINGLE-CAM mode. The screen displays image of a particular baby unit in full screen. If there is more than one baby unit in your system, you can switch between baby units in SINGLE-CAM mode. You can also monitor in SPLIT-VIEW mode, where the screen displays a maximum of four baby units in one screen, or PATrOL mode, where the screen switches between all paired baby units in sequence every 7... -
Page 34: Talk To The Baby Unit
Talk to the Baby Unit You can broadcast messages from the parent unit to any one of the baby units. To talk to the baby unit: Press and hold TALK on the parent unit. Speak towards the MIC (microphone) on the parent unit. The TALK light is on when the voice connection to the baby unit is made. -
Page 35: Using Your Baby Monitor
USING yOUr BABy MONITOr Parent Unit Settings To enter the parent unit menu: Press when the parent unit is not in use. Press until the desired category is highlighted on the left side. Press to enter that feature menu. to enter that feature menu. Press until the desired feature is highlighted on the right side. -
Page 36: Sound Alert
6.2.3 Sound Alert In Split-view You can set whether the parent unit beeps as soon as the baby unit detects sounds which light up four sound level indicators on the parent unit. The sound alert is preset to On. To set the no link alert of the parent unit: Press when the parent unit is not in use. -
Page 37: Temperature
Temperature 6.4.1 Minimum Temperature You can set the desired minimum room temperature of the baby unit. The minimum temperature can be set between C and 20 C. The minimum temperature is preset to 14 To set the minimum temperature of the baby unit: Press when the parent unit is not in use. -
Page 38: Temperature Format
6.4.4 Temperature Format You can set the temperature scale of the baby unit. To change the temperature scale: Press when the parent unit is not in use. to choose Temperature, then press Press to choose Format. Press to choose Fahrenheit or Celsius, then press Press confirm your selection. -
Page 39: Play Lullabies/Natural Sounds
Play Lullabies/Natural Sounds Play lullaby/natural sound using parent unit control keys: There are 5 lullabies and 4 natural sounds to choose from. The selected lullaby/natural sound plays repeatedly for approximately 20 minutes. To play lullaby/natural sound: Press to play lullaby/natural sound To stop lullaby/natural sound: Press again to stop playing lullaby/natural sound. -
Page 40: Sound-Activated Screen
Sound-activated Screen When the parent unit screen is turned off manually (see page page 29), you can set the screen to be turned on automatically whenever there are sounds detected from the baby units. The parent unit screen will turn off automatically when no sounds are detected from the baby units within 50 seconds. -
Page 41: Dim Mode
Dim Mode The dim mode is preset to on to help you save the parent unit power. Whenever the parent unit has been left idle for 10 minutes while the screen is still on, the screen will be dimmed automatically to save power. To set the dim mode of the parent unit screen: Press when the parent unit is not in use. -
Page 42: Unpair Baby Unit
To pair a new baby unit: Press when the parent unit is not in use. to choose Pair/Unpair CAM, then press Press again to select Pair CAM. Press Press to choose an empty baby unit slot, then press The parent unit screen displays Press and hold the pair button at the CAM for 5 seconds until the power indicator flashes.. -
Page 43: Troubleshooting
TrOUBLESHOOTING If you have difficulty with your video and audio monitor, please try the suggestions below. My video and audio monitor does not work at all. • Make sure the baby units, parent unit and the batteries are installed and charged correctly (pages 5 to 13). For optimum daily performance, charge the parent unit when it is not in use. - Page 44 The video and audio monitor produces high-pitched noise. • The parent unit may be too close to the baby units. Make sure the parent unit and the baby units are at least 1 metre away from one another. • You may be too close to the baby unit when you press and hold TALK.
- Page 45 • Remove the battery and then install it again. Turn on the baby unit and the parent unit. Allow up to one minute for the parent unit and the baby unit to synchronise. • Other electronic products may cause interference with your video and audio monitor.
- Page 46 The parent unit beeps and is not performing normally. • Move the parent unit closer to the baby units (but not less than 1 metre). The parent unit may be out of range. • If the parent unit is powered by the provided battery, it may not have enough charge for the parent unit to perform normally.
-
Page 47: Care And Maintenance
CArE AND MAINTENANCE Operating range This baby unit and parent unit can communicate over only a certain distance - which can vary with the locations of the baby unit, the parent unit, the weather, and the layout of your home. When the parent unit is out of range, the parent unit beeps and displays . -
Page 48: Technical Specifications
TECHNICAL SPECIFICATIONS Transmit frequency 2406 - 2475 MHz Channels 4.3” Color LCD (WQVGA 480x272 pixel) Power requirements Use only power adaptor listed below: Baby unit: Ten Pao International Ltd. Model : S006AKB0500100, Input 100-240V AC 50/60Hz 300mA, Output 5VDC 1000mA. Parent unit: Ten Pao International Ltd. - Page 49 VTECH TELECOMMUNCATIONS LTD. A member of THE VTECH GrOUP OF COMPANIES. Safe&Sound is a trademark of VTech Communications, Inc. and registered in the United States. © 2016 VTech Telecommunications Ltd. All Rights Reserved. V1.0. 06/16...
Need help?
Do you have a question about the BM4500-OWL and is the answer not in the manual?
Questions and answers