
Subscribe to Our Youtube Channel
Related Manuals for Vega Absolute SHVE


Summary of Contents for Vega Absolute SHVE
- Page 1 Electronic Water Meter SHVE, SGVE with LPWAN 868 VEGA radio channel (the second generation User Manual 1 In production since December 2020 iotvega.com betar.ru...
-
Page 2: Table Of Contents
CONTENTS _Toc66717057 Introduction ....................................... 4 1.1 Purpose ....................................5 1.2 Functions ....................................5 1.3 Specification .................................... 6 1.4 Operation principle ................................. 7 2 DESCRIPTION OF BASIC FUNCTIONS ............................... 9 2.1 Readings displaying ................................9 2.2 meter’s operation modes ............................... 9 2.3 Optical port ................................... - Page 3 3.6 “Vega SHVE/SGVE v.2” tab ..............................24 3.6.1 Basic description ................................24 3.6.2 Fields description ................................24 3.7 Device settings by default ..............................25 4 LORAWAN COMMUNICATION PROTOCOL ............................ 26 4.1 Transmitting messages ................................. 26 4.1.1 MODEM transmits packets with the following types ....................... 26 4.1.2 Time correction request ..............................
-
Page 4: Introduction
INTRODUCTION This manual is developed for electronic water meters SHVE, SGVE (hereafter – meter, device) and contains a description about specification, functionality, interfaces, configurator application and communication protocol and some other data which is necessary to meters exploitation. This manual is targeted at specialists familiar with installation work fundamentals of electronic and electrical equipment. -
Page 5: Purpose
СанПиН 2.1.4.1074-2001 with the temperature from 0,1 to 30 °С for cold water meters (SHVE) and from 0,1 to 90 °С for hot water meters (SGVE with a pressure of water in pipeline no more than 1.0 MPa (10kg/sm) and further collection and transmitting of this data to LoRaWAN network via radio frequency band 860-1000 MHz. -
Page 6: Specification
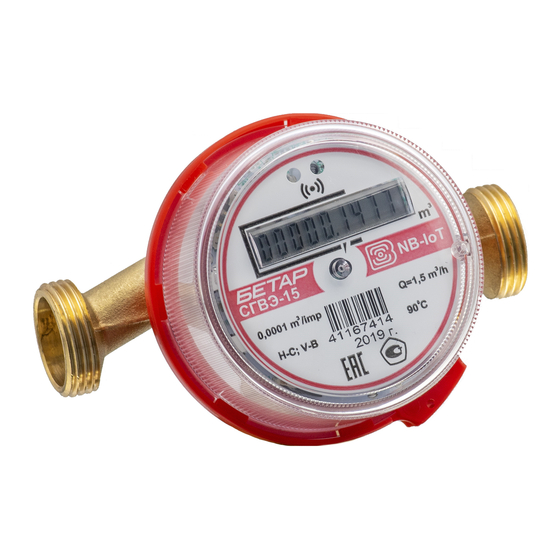
• control of the battery passivation level and automatic depassivation when it is necessary. 1.3 SPECIFICATION The main specification is shown in the table 1. Table 1 Parameter Value Basic Meter type SHVE-15 SGVE-15 Nominal diameter, mm DN15 (15 mm) о С +5…+55 Ambient temperature, от... -
Page 7: Operation Principle
Parameter Value Specification 1.0.3 Nominal transmitter power, mW 25 (configurable) LoRaWAN device class Number of LoRa channels RU868, EU868, IN865, AS923, AU915, KR920, US915, Frequency plan KZ865, custom (EU868 based) Activation type ABP and OTAA Configurable, h 1, 6, 12, 24 Communication By the event Service... - Page 8 Operation principle based on measurement of the impeller turnovers number. Impeller located in a flow part of meter and rotated by water flowing. The impeller turnovers number is proportionally to water flowing volume. A bipolar magnet is molded into the impeller. Counting Hall sensor takes information about the impeller turnovers number from bipolar magnet.
-
Page 9: Description Of Basic Functions
2 DESCRIPTION OF BASIC FUNCTIONS 2.1 READINGS DISPLAYING The device has LED indicator on a faceplate for visual displaying of the readings (fig. 2). Readings are displayed in cubic meters up to the fourth decimal point on a cumulative total. During the operation of the meter, the number of packets sent over the radio channel is displayed on the LED indicator every 2 minutes, while the “SP”... -
Page 10: Optical Port
2.3 OPTICAL PORT There is an optical port (fig. 2) for connection to computer, which also used for testing. The adapter “Opticalport-USB” connected to the USB-port of computer carries out connection between the optical port and computer. “Vega LoRaWAN Configurator” application allows reading and changing the meters parameters. See detailed application description in a part 3. -
Page 11: Class А Device
• OTAA (Over The Air Activation) – meter makes three trying to connect the network with configured frequency plan (RU868 by default). The meter will begin to send data when it receives the LoRaWAN activation confirmation. If all attempts fail, the meter will continue to accumulate data and will attempt to connect to the network every six hours. -
Page 12: "Vega Lorawan Configurator" Application
The “Send Password” command is placed in the “Commands” field in the “Vega SHVE/SGVE v.2” tab. A password is provided upon request. Instructions for providing LoRaWAN keys and passwords for metering devices manufactured by OOO PKF "BETAR"... -
Page 13: Connection Of Meter To Computer
The menu on the left allows you to switch between the “Simple” and “Expert” modes, select the device model, connect to the device, or disconnect from it, get, and apply settings. The application window contains three tabs – Device info, LoRaWAN settings and device settings. The language selection menu is in the upper right corner. - Page 14 In this window, you need to click «Далее». In the window that appears, agree to the terms of the license agreement, then «I accept» and «Далее» (fig. 5). The installation will begin after that. Figure 5 — Driver installing After finish of install process the window will appears (fig. 6). After pressing «Готово» adapter “Opticalport-USB”...
-
Page 15: Optical Port Activation
Figure 8 — “Optical port-USB” adapter location in relation to meter_ Close-up At the main window of the application, you need to choose the device model (“Vega SHVE/SGVE v.2”), COM-port number and press “Connect” button (fig. 9) while optical port is active. - Page 16 Figure 10 — “Device info” tab After making the necessary changes to the settings, you should click the "Apply settings" button and only then disconnect from the device with the "Disconnect" button.
-
Page 17: Device Info" Tab
3.4 “DEVICE INFO” TAB 3.4.1 BASIC DESCRIPTION The "Device info" tab displays network information about the device, - there are basic information (Device info field), current state (Network info, Link check), keys for device activation in LoRaWAN network (ABP info, OTAA info, Key management), log (Device output). Figure 11 —... -
Page 18: Fields Description
3.4.2 FIELDS DESCRIPTION 3.4.2.1 «ABP info» – displays the data necessary to register the device in the LoRaWAN network with ABP method (Activation By Personalization). 3.4.2.2 «OTAA info» – displays the data necessary to register the device in the LoRaWAN network with OTAA method (Over The Air Activation). - Page 19 Figure 13 — “Link check” field 3.4.2.8 «Device output» (not displayed in the "Simple" mode) – monitoring the device status, displaying all events in real time.
-
Page 20: Lorawan Settings" Tab
3.5 “LORAWAN SETTINGS” TAB 3.5.1 BASIC DESCRIPTION The "LoRaWAN Settings" tab allows you to configure various parameters of the LoRa network (fig. 14). Figure 14 — “LoRaWAN settings” tab 3.5.2 FIELDS DESCRIPTION 3.5.2.1 «Region» “Region” allows you to select RU868, EU868, KZ865 or specify a custom frequency plan (fig. 15). Figure 15 —... - Page 21 In the EU868, RU868 and KZ865 frequency plans by default, only those channels are active on which sending requests for connection to the network (join channels). The remaining channels that the device should use can be transferring by the LoRaWAN network server during the device activation procedure (only OTAA).
- Page 22 Figure 17 — ”Adaptive Data Rate” function 3.5.2.5 «RX1 offset» (not displayed in the "Simple" mode) – specifies the time between end of packet transmission and first receiving window opening (fig. 18). The second receiving window always opens after 1 second after the first. Figure 18 —...
- Page 23 device will simply send each packet as many times as specified in this option. If "Confirmed uplinks" function is enabled, the device will send packets until it receives a confirmation or until it sends as many packets as specified in this option. Figure 20 —...
-
Page 24: Vega Shve/Sgve V.2" Tab
3.6 “VEGA SHVE/SGVE V.2” TAB 3.6.1 BASIC DESCRIPTION “Vega SHVE/SGVE v.2” tab contains the special settings and parameters of the connected device (fig. 23). Figure 23 — “Vega SHVE/SGVE v.2” tab 3.6.2 FIELDS DESCRIPTION 3.6.2.1 «Current state» – displays the current parameters of the device (temperature, battery charge, meter diameter, current readings). -
Page 25: Device Settings By Default
3.7 DEVICE SETTINGS BY DEFAULT In the table 4 the device settings by default are shown. Table 4 Parameter Value Communication period 12 hours Data collection period 12 hours Time zone UTC +03:00 Frequency plan RU868 Activation method OTAA “Confirmed Uplinks” function Adaptive Data Rate (ADR) Transmitter power 14 dBm... -
Page 26: Lorawan Communication Protocol
4 LORAWAN COMMUNICATION PROTOCOL 4.1 TRANSMITTING MESSAGES ATTENTION! In fields consisting of several bytes, the little-endian byte order is used. 4.1.1 MODEM TRANSMITS PACKETS WITH THE FOLLOWING TYPES Message with current readings has generated with pre-specified collection period and transmits on LoRaWAN port 2 in according with the schedule. -
Page 27: Modem Recieves Packets With The Following Types
2 bytes Parameter ID uint16 1 byte Data length (len) uint8 len byte Parameter value ----- 2 bytes Parameter ID uint16 1 byte Data length (len) uint8 len byte Parameter value ----- … … … 2 bytes Parameter ID uint16 1 byte Data length (len) uint8... -
Page 28: Unlock Led Indicator Command
The settings package sent to the device may not contain all the settings supported by the device, but only the part of them that needs to be changed. Setting IDs and their possible values are shown in Table 10. Table 10 Length Setting ID Description...
Need help?
Do you have a question about the SHVE and is the answer not in the manual?
Questions and answers