
Related Manuals for Casio IT-9000C


Summary of Contents for Casio IT-9000C
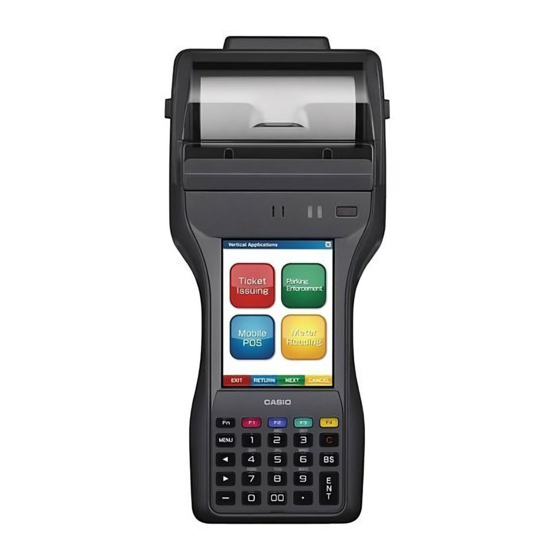
- Page 1 Handheld Printer Terminal IT-9000 Series User’s Guide Be sure to read “Safety Precautions” inside this guide before trying to use your Handheld Printer Terminal.
- Page 2 “FeliCa” is a contactless IC card technology developed by SONY Corporation and a registered trademark of SONY Corporation. Information in this document is subject to change without advance notice. CASIO Computer Co., Ltd. makes no representations or warranties with respect to the contents or use of this manual and speci cally disclaims any express or implied warranties of merchantability or tness for any particular purpose.
-
Page 3: Table Of Contents
Contents Safety Precautions ..................E-3 Operating Precautions ...................E-9 Important ......................E-11 After Service ...................... E-11 Regulatory Information ................E-12 About the Splash-proofi ng/Dust-proofi ng ..........E-14 Checking in the Box ..................E-15 Handheld Printer Terminal System Confi guration ........E-16 General Guide ....................E-18 Loading and Removing the Battery Pack ...........E-22 Loading ...................... - Page 4 Removing ......................E-41 Handling Magnetic Card Reader ..............E-43 Handling the NFC Reader/Writer ..............E-44 RFID Tags ......................E-44 Contactless IC Cards ..................E-44 Performing Communications ..............E-46 ® Bluetooth Communication ................E-46 GSM/W-CDMA Communication ..............E-47 GPS ........................E-47 Resetting the Handheld Printer Terminal ...........E-48 Performing a Full Reset (Initialization) ............
-
Page 5: Safety Precautions
Safety Precautions Congratulations upon your selection of this CASIO product. Be sure to read the following Safety Precautions before trying to use it for the rst time. Your neglect or avoidance of the warning and caution statements in the subsequent pages causes the danger of re, electric shock, malfunction and damage on the goods as well as personal injury. - Page 6 Warning Dust and Moisture Though the Handheld Printer Terminal is dust and water splash resistant, its options including the battery pack are not. Keep loose metal objects and containers lled with liquid away from your Handheld Printer Terminal and the options. Also, never handle the Handheld Printer Terminal and the options while your hands are wet.
- Page 7 Caution Foreign Objects Take care to ensure that metals or combustible objects are not inserted into the openings of the Handheld Printer Terminal or its options, and not to allow moisture to get inside of them. Location Install the cradle properly on a at and stable surface so that it cannot fall down onto oor.
- Page 8 Caution Installing in Vehicle To save your vehicle’s battery from running down, be sure that the Car Power Cable should be unplugged from the cigarette lighter socket when you do not use the Car Mounted-type Battery Charger and that the use of the battery charger should be avoid while the vehicle’s engine is turned off.
- Page 9 Caution Danger of explosion if the battery pack is incorrectly replaced. Replace only with same or equivalent type recommended by CASIO. Dispose of used batteries according to the CASIO instruction. Keep the battery pack out of the reach of small children.
- Page 10 Backup of All Important Data Caution Note that CASIO Computer Co., Ltd. shall not be held liable to you or any third party for any damages or loss caused by deletion or corruption of data due to use of the Handheld Printer Terminal, malfunction or repair of the Handheld Printer Terminal or its peripherals, or due to the batteries going dead.
-
Page 11: Operating Precautions
Operating Precautions Your Handheld Printer Terminal and its options are precision. Improper operation or rough handling can cause problems with data storage and other problems. Note and observe the following precautions to ensure proper operation. Do not leave dead battery pack in the Handheld Printer Terminal for a long period. Dead battery pack can leak, leading to malfunction and damage to the Handheld Printer Terminal. - Page 12 Take care when using chemicals. Applying thinners, gasoline, kerosene, solvents or oils, or substances such as cleaners, adhesives, paints, medications or toiletries that contain those materials, to the plastic case or cover may cause discoloration or other damage. Lithium-ion Battery Pack Each lithium-ion battery pack has its life.
-
Page 13: Important
Important This guide does not include any information about programming and download procedures. See the applicable separate documentation for information about the procedures. After Service Should this product ever malfunction, contact your original retailer providing information about the product name, the date you purchased it, and details about the problem. -
Page 14: Regulatory Information
IT-9000-C25E-C, HA-L60IO, HA-L62IO Trade Name: CASIO Responsible party: Industrial Handheld Division Casio America, Inc. Address: 570 Mt. Pleasant Avenue, Dover, New Jersey 07801, USA Telephone number: 973-361-5400 This device complies with Part 15 of the FCC Rules. Operation is subject to the following two conditions: (1) This device may not cause harmful interference, and (2) this device must accept any interference received, including interference that may cause undesired operation. - Page 15 Casio-Platz 1, 22848 Norderstedt, Germany http://www.casio-europe.com/ Please keep all information for future reference. The declaration of conformity may be consulted at http://doc.casio.com/ Products are for distribution within all member states of the EU. Options of IT-9000 are HA-L60IO, HA-L62IO, HA-L30CHG, HA-G32DCHG, HA-G20BAT, AD-S42120C-N5, HA-L80USBH, HA-L81USBC, and DT-380USB-A.
-
Page 16: About The Splash-Proofi Ng/Dust-Proofi Ng
International Electrotechnical Commission (IEC) standard 60529. Important! The splash- and dust-proo ng performance of this product is based on CASIO testing procedures. Note also that this performance applies to the product at the time of shipment (delivery to the customer) and is not guaranteed inclusive of the environment in which the product is used. -
Page 17: Checking In The Box
Checking in the Box Please check the contents of the box before using the Handheld Printer Terminal for the rst time. Open the box and make sure that all the items shown here are included. Handheld Printer Terminal 58 mm Paper Width Adjuster * Stylus Hand Strap Neck Strap and Stylus Holder... -
Page 18: Handheld Printer Terminal System Confi Guration
The illustration shows the USB Cradle (HA-L60IO). Car Mounted-type Battery Charger HA-L35CHG The car power cable accompanies to HA-L35CHG. Battery Pack Dual Battery Charger HA-G20BAT HA-G32DCHG For the latest options list, refer to the ON-LINE manual available at http://support.casio.com/en/manual/manual.php?cid=010 E-16... - Page 19 Options AC Adaptor Screen Protect Sheet AD-S42120C-N5 HA-C90PS5B Power Cord AC-CORD USB Cable (for host) USB Cable (for client) HA-L80USBH HA-L81USBC USB Cable (to connect cradle to PC) DT-380USB-A E-17...
-
Page 20: General Guide
General Guide Shapes vary according to model. Left Front Right Back Bottom E-18... - Page 21 Printer Prints when loaded with roll paper. Splash Protect Cover A splash proof cover. Slide the cover open when printing. Power Key Turns the power on and off. Indicator 2 Flashes blue when operating via Bluetooth or orange when operating via W-LAN. Lights red when there is a bar code scanning error and lights green when a bar code scans successfully.
- Page 22 NFC Reader Apply a card here so that the card can be accessed. Reset Switch Used to reset the Handheld Printer Terminal. Hand Strap Hook*** Used to attach the handbelt to hold the terminal or to carry it. Cradle Mount Holes These holes hold the terminal seating in the optional cradle or in the battery charger.
- Page 23 Keys Function Keys These keys are used when starting a pre-registered application. C (Clear) Key This key is pressed when canceling an operation and input. BS (Backspace) This key is pressed when deleting the character to the left of the cursor.
-
Page 24: Loading And Removing The Battery Pack
Loading and Removing the Battery Pack Your Handheld Printer Terminal uses two types of battery: a battery pack and a memory backup battery. The battery pack is used to power normal operations and to store data, while the memory backup battery provides the power required to maintain memory contents when the battery pack power is unable to supply power for some reason. -
Page 25: Loading
Loading 1. Turn the terminal upside down. If the hand strap is tted to the terminal, remove it. 2. Turn the left and right lock switches for the battery pack cover to the “FREE” position, and then open the battery pack cover. 3. -
Page 26: Removing
Removing 1. Make sure that the Handheld Printer Terminal is turned off. If the power is on, press the power key to turn it off. 2. Turn the terminal upside down. If the hand strap is tted to the terminal, remove it. 3. -
Page 27: Charging The Battery Pack
Charging the Battery Pack Battery pack installed in the terminal can be charged using either cradle, battery charger or AC adaptor (AD-S42120C). Battery charge condition can be monitored with Indicator 1 on the terminal. Multiple battery packs can also be charged simultaneously using Dual Battery Charger. -
Page 28: Dual Battery Charger
Dual Battery Charger Taking care that the battery pack is oriented correctly, insert it into the Dual Battery Charger. This causes the Charge Indicator LED to light in red, indicating that charging has started. You can connect up to three Dual Battery Chargers. Status of Charge Indicator LED Off: Not charging... -
Page 29: Handling The Hand Strap
Handling the Hand Strap A hand strap can be attached to the Handheld Printer Terminal. Hook A Release buttons Hook B Hand Strap Attach the hand strap following the procedure described below. 1. Attach Hook B of the hand strap to the hand strap hook located on the bottom of the Handheld Printer Terminal. -
Page 30: Handling The Neck Strap
Handling the Neck Strap A neck strap can be attached to the Handheld Printer Terminal to keep it from being dropped while being carried. The stylus holder provided can also be attached. Adjust length here Neck strap rings Stylus holder Neck strap Mounting hooks... -
Page 31: Removing
Removing 1. Pull back the locking bar of the neck strap mounting hook and then release the hook from each ring as shown in the illustration. 2. Following the attachment procedure in reverse way, remove the neck strap rings from each neck strap mounting hook on the Handheld Printer Terminal and then push back the neck strap mounting hooks into each silo. - Page 32 2. Remove Mounting Hook C. 3. Pass the stylus holder through the strap as shown in the illustration. 4. Fold back the strap after passing through Bracket C, and then fasten in the same way it was originally fastened with Bracket A and Bracket B.
-
Page 33: Confi Guring Handheld Printer Terminal Settings
Confi guring Handheld Printer Terminal Settings Calibrating Touch Screen Alignment Whenever the response of the touch screen is poor, or operation being executed does not match with the location you are tapping on the touch screen, please recalibrate the alignment of the touch screen using the following method. Press the Fn key and then press the “4”... -
Page 34: Setting The Display Brightness
Setting the Display Brightness Adjusting Display Brightness You can use the following procedures to adjust display brightness to make it easier to read under different lighting conditions. Press the Fn key and then press the “5” key or “6” key after con rming that “F” is displayed on the screen. -
Page 35: Using The Cmos Imager (Imager Models
Using the CMOS Imager (Imager Models) 1. Turn on the Handheld Printer Terminal, position its CMOS Imager reader port near the bar code or 2D code, and then press the trigger key. Shine the aimer Shine the aimer on the center of on the bar code. -
Page 36: Using The Printer
Using the Printer The printer can print on roll paper (80 mm or 58 mm wide).* Installing the Roll Paper 1. Check that the power is off. If the power is on, always make sure to turn it off by pressing the power key. - Page 37 5. Close the printer cover. Turn the left and right lock switches from the "UNLOCK" position to the "LOCK" position to lock the printer cover. Tear off the protruding roll paper. <About the Splash Protect Cover> When you are using the IT-9000 Open Open outdoors in the rain or in similar...
-
Page 38: Attaching The 58 Mm Paper Width Adjuster
Attaching the 58 mm Paper Width Adjuster Attach the 58 mm Paper Width Adjuster* inside the printer cover when using 58 mm wide roll paper. Refer to the procedure described in “Installing the Roll Paper” for information on opening and closing the printer cover. 1. -
Page 39: Precautions When Using Printer
Precautions When Using Printer Printing Accuracy 1. During high-duty printing such as printing horizontal lines or printing while the battery remaining capacity is low, the printing speed may slow down to prevent excess current consumption that may cause unaligned printing for one dot or more. - Page 40 4. Paper scraps may accumulate and printing quality may decrease when the printer has been used for a long period of time. The thermal head must be cleaned when this happens. Contact your nearest CASIO distributor or an authorized CASIO service provider to have cleaning performed.
-
Page 41: Handling Sd Memory Cards
Handling SD Memory Cards SD memory card can be installed in the SD memory card slot on the Handheld Printer Terminal. Install (or remove) an SD memory card according to the procedure described below. Installing 1. Open the cover of the SD memory card slot ( ) and insert an SD memory card all the way in until the top of the SD memory card aligns with the entrance of the slot of the Handheld Printer Terminal (... -
Page 42: Handling Sim/Sam Cards
Handling SIM/SAM Cards The Handheld Printer Terminal supports SIM cards and SAM cards. (The IT-9000-E/ E-B/E-C/05E/05E-B/05E-C/20E/25E/25E-B/25E-C/C25E-C/MC25E-C/IT-9000E-C25E/ MC25E models only support SAM cards.) Since the SIM/SAM card slot is located inside the battery pack compartment, rst remove the battery pack when installing or removing a SIM/SAM card. Refer to pages 22 to 24 for information on “Loading and Removing the Battery Pack”. -
Page 43: Removing
6. Lay the SIM/SAM card cover down to close it and then slide it in the "Lock" direction. 7. Fit the slot cover. 8. Load the battery pack. Removing 1. Make sure that the power on the terminal has been switched off. If the power is still on, press the power key to switch off. - Page 44 5. Remove the SIM/SAM card. 6. Lay the SIM/SAM card cover down to close it and then slide it in the "Lock" direction. 7. Fit the slot cover. 8. Load the battery pack. Important! The type and number of cards inserted varies depending on model. Insert the cards in the correctly marked slots.
-
Page 45: Handling Magnetic Card Reader
Handling Magnetic Card Reader The Handheld Printer Terminal supports magnetic card reading. This function is not available on some models. See P.19 for information on models that support this function. Use the procedure below for magnetic card reading. 1. Insert the card at the end of the reader slot as shown in the illustration and then steadily slide the card along the slot. -
Page 46: Handling The Nfc Reader/Writer
Handling the NFC Reader/Writer NFC is a type of RFID (Radio Frequency Identi cation) technology that allows the data in a device to be read simply by holding the device up to an NFC reader. It can be used to read RFID tags used for controlling goods as well as contactless IC cards used in applications such as employee identi cation. -
Page 47: Rfid Tags
Important! Both contactless IC cards and RFID tags The NFC employs a low power radio wave which does not require regulatory station license. Frequency band used by the NFC is 13.56 MHz. Secure a suf cient space between IT-9000 and other reader/writer located in the vicinity. Make sure also that a radio station employs the same frequency band does not locate near by prior to using IT-9000. -
Page 48: Performing Communications
Performing Communications ® Bluetooth Communication ® Bluetooth interface can also be used to transfer data between two Handheld Printer Terminals. ® With Bluetooth the two Handheld Printer Terminals should be located within about three meters (9 ) from each other, as long as there is nothing blocking the path between '10 "... -
Page 49: Gsm/W-Cdma Communication
GSM/W-CDMA Communication To use the GSM/W-CDMA functions, you must receive service from a wireless service provider. Available GSM/W-CDMA functions may be dependent on the service provider to which you connect. Please consult your service provider for details about network service. If you use GSM/W-CDMA and WLAN at the same time, the communication speed of WLAN may be reduced, or the reception of WLAN signals may be disconnected, due to the operational state of GSM/W-CDMA. -
Page 50: Resetting The Handheld Printer Terminal
Resetting the Handheld Printer Terminal Resetting the terminal is the same as resetting a PC. Performing a reset causes all unsaved RAM data to be lost that are in mid-course of inputting and editing, but data and settings that are already stored in the FlashROM should be unaffected. Perform a reset to restore normal operation whenever the Handheld Printer Terminal operates abnormally due to misoperation or some other reason. - Page 51 1. Hold down power key and C key while pushing down the reset switch for about 3 seconds with the tip of a stylus until the message shown below appears on the display. To cancel the full reset operation, press L Program key. R Program key 2.
-
Page 52: Warning Label
Warning Label Warning! ■ Never look directly into the laser light. These products scan using laser light. Never look directly into the laser light or shine the laser light into the eyes. IT-9000-20E/25E/25E-B/25E-C/G20E/G20E-B/ G20E-C/G25E/G25E-B/G25E-C/GC25E/GC25E-B/ GC25E-C/GMC25E/GMC25E-B/GMC25E-C IT-9000-MC25E-C/C25E-C/ IT-9000E-C25E/MC25E This label is a warning and caution label for Class 2 laser products that comply with IEC60825-1:2007. -
Page 53: 9000 Specifi Cations
IT-9000 Specifi cations Model: IT-9000-05E/05E-B/E/E-B/G05E/G05E-B/GE/GE-B/GMC25E/ GMC25E-B/GMC30E/GMC30E-B/25E/25E-B/20E/G25E/G25E-B/ G20E/G20E-B/GC25E/GC25E-B/GM35E/GM30E/GM30E-B IT-9000E-MC25E/C25E IT-9000-05E-C/E-C/G05E-C/GE-C/25E-C/G25E-C/G20E-C/ GC25E-C/GM30E-C/GMC25E-C/GMC30E-C/MC25E-C/C25E-C ® CPU: Marvell PXA320 624MHz ® Marvell PXA320 806MHz (IT-9000-05E-C/E-C/G05E-C/ GE-C/25E-C/G25E-C/G20E-C/GC25E-C/GM30E-C/GMC25E-C/ GMC30E-C/MC25E-C/C25E-C only) Memory: Windows CE: 256MB RAM, 256MB Flash ROM (user de ned: 176MB) Windows mobile: 256MB RAM, 256MB Flash ROM (user de ned: 130MB) Windows CE/Window Embedded Handheld: 512MB RAM, 512MB (IT-9000-05E-C/E-C/G05E-C/GE-C/25E-C/G25E-C/G20E-C/... - Page 54 Code11/IATA/CODE49/TLC39/Chinese Sensible Code(Han Xin Code) is not supported: (IT-9000-GMC30E-C/25E-C/G25E-C/ G20E-C/GC25E-C/GM30E-C/MC25E-C/C25E-C) Scanning distance: IT-9000-GMC25E/GMC25E-B/25E/25E-B/20E/G25E/G25E-B/ G20E/G20E-B/GC25E/GC25E-B/IT-9000E-MC25E/C25E: 1D: 45 – 410 mm (1 4" 8" Stacked 2D: 65 – 260 mm (2 16" 4" Matrix 2D: 55 – 195 mm (2 16" 16" IT-9000-GMC30E/GMC30E-B/GM35E/GM30E/GM30E-B: 1D: 90 –...
- Page 55 Frequency: 802.11b/g: 2.400-2.4835 GHz Transmission Rate: 802.11b: Max. 11 Mbps 802.11g: Max. 54 Mbps 802.11n: Max 65 Mbps Communication Range: 50 m indoors, 150 m outdoors (varies according to usage environment and transmission rate) NFC: Frequency Band: 13.56 MHz ± 7 KHz Antenna: Magnetic Loop Antenna Operating Magnetic Field:...
- Page 56 Output: GSM 850: 32 dBm GSM 900: 32 dBm GSM1800 (DCS1800): 29 dBm GSM1900 (PCS1900): 29 dBm W-CDMA: Standard: UMTS/W-CDMA: 3GPP release 99 HSDPA: 3GPP release 5 Communication functions: Voice sound, circuit switching data, packet data Approx. 240 hours in continuous wait state for incoming call. Approx.
- Page 57 Band I: 299 Band VIII: 174 Channel space: 200 KHz Channel bandwidth: 5 MHz Output: IT-9000-G05E/GE/GMC25E/GMC30E/G25E/G20E/GC25E/ GM35E/GM30E: Band I UMTS2100: 23dBm Band II UMTS1900: 23dBm Band V UMTS850: 23dBm Band VI UMTS800: 23dBm Band VIII UMTS900: 23dBm (MC8795V only) IT-9000-G05E-B/GE-B/GMC25E-B/GMC30E-B/G25E-B/G20E-B/ GC25E-B/GM30E-B: Band I UMTS2100: 23dBm Band VIII UMTS900: 23dBm...
- Page 58 ** A repetition of 4 minutes 4 minutes is “Key input is 30sec, Printing of 20 lines and Standby is 8 minutes”. Key input: 20 keys are inputted in 30 seconds. WWAN standby: Approximately 240 hours Continuous WWAN communication: Approximately 260 minutes Memory backup: 10 minutes for protection of data in memory 3 days for backup of built-in clock Operating Temperature: –20°C to 50°C (–...
- Page 59 Dimensional Drawings IT-9000-05E/05E-B/05E-C/E/E-B/E-C/G05E/G05E-B/G05E-C/GE/GE-B/GE-C Approx. Approx. 59.7mm 111.9mm (4 ") ") Approx. Approx. 78.2mm (3 ") 36.6mm (1 ") IT-9000-25E/25E-B/25E-C/20E/G25E/G25E-B/G25E-C/G20E/G20E-B/G20E-C/GC25E/ GC25E-B/GC25E-C/IT-9000E-C25E Approx. Approx. 111.9mm (4 ") 65.8mm (2 ") Approx. Approx. 78.2mm (3 ") 36.6mm (1 ") E-57...
- Page 60 IT-9000-GMC25E/GMC25E-B/GMC25E-C/GMC30E/GMC30E-B/GMC30E-C/ GM35E/GM30E/GM30E-B/GM30E-C/MC25E-C/IT-9000E-MC25E Approx. Approx. 111.9mm (4 ") 65.8mm (2 ") Approx. Approx. 78.2mm (3 ") 36.6mm (1 ") E-58...
-
Page 61: Using The Usb Cradle (Ha-L60Io
Using the USB Cradle (HA-L60IO) The optional USB Cradle (HA-L60IO) makes it possible to transmit system data and le data between the Handheld Printer Terminal and a PC via a USB connection (download or upload). You can also use the USB Cradle to charge the battery pack installed in the Handheld Printer Terminal. - Page 62 Terminal Detect This switch detects when the IT-9000 is mounted correctly on the Switch USB Cradle. Mount Hooks These hooks are used to stabilize the IT-9000 when mounting it on the cradle. Removal Buttons Press when removing the IT-9000. Power Supply/Data Power is supplied to the IT-9000 via these contacts.
-
Page 63: Connecting The Usb Cradle Power Supply
Connecting the USB Cradle Power Supply Use the optional AC adaptor (AD-S42120C) for the power supply of the USB Cradle. Always make sure to connect the AC adaptor to the USB Cradle before performing communication with the Handheld Printer Terminal. Power to the Handheld Printer Terminal is supplied from the USB Cradle. - Page 64 4. Before using the cradle ports, remove the caps from the ports. Connect one end of the USB cable (DT-380USB-A) to the USB client port and the other end to the PC. The USB host port is used for connecting the cradle with other USB peripheral device. USB peripheral device 5.
- Page 65 Status of Indicator 1 on IT-9000: Orange: Charging the battery pack. Red Flashing: Standby due to battery pack error or the surrounding temperature is out of the charging temperature range. (charging begins when the temperature is within the charging temperature range) Green: Charging the battery pack is complete.
-
Page 66: Speci Cations
Specifi cations 1. LAN Speci cations Communications protocol: IEEE 802.3 Media type: 10base-T/100base-TX auto-switched 2. USB Protocol: USB Ver1.1 Standard Transmission Rate: 12Mbps (max.) 3. Charging Charging Method: Constant current/voltage (the charging circuit is built in IT-9000) Charge Period: Approximately 5 hours 4. -
Page 67: Using The Ethernet Cradle (Ha-L62Io
Using the Ethernet Cradle (HA-L62IO) The optional Ethernet Cradle (HA-L62IO) makes it possible to transmit system data and le data between the Handheld Printer Terminal and a PC via a USB or LAN connection (download or upload). You can also use the Ethernet Cradle to charge the battery pack installed in the Handheld Printer Terminal. - Page 68 Terminal Detect This switch detects when the IT-9000 is mounted correctly on the Switch Ethernet Cradle. Mount Hooks These hooks are used to stabilize the IT-9000 when mounting it on the cradle. Removal Buttons Press when removing the IT-9000. Power Supply/Data Power is supplied to the IT-9000 via these contacts.
-
Page 69: Connecting The Ethernet Cradle Power Supply
Connecting the Ethernet Cradle Power Supply Use the optional AC adaptor (AD-S42120C) for the power supply of the Ethernet Cradle. Always make sure to connect the AC adaptor to the Ethernet Cradle before performing communication with the Handheld Printer Terminal. Power to the Handheld Printer Terminal is supplied from the Ethernet Cradle. - Page 70 4. Before using the cradle ports, remove the caps from the ports. When using a LAN, connect one end of the LAN cable to the LAN port and the other end to the PC or hub. When using a USB connection, connect one end of the USB cable (DT-380USB-A) to the USB port and the other end to the PC.
- Page 71 Status of Indicator 1 on IT-9000: Orange: Charging the battery pack. Red Flashing: Standby due to battery pack error or the surrounding temperature is out of the charging temperature range. (charging begins when the temperature is within the charging temperature range) Green: Charging the battery pack is complete.
-
Page 72: Speci Cations
Specifi cations 1. LAN Speci cations Communications protocol: IEEE 802.3 Media type: 10base-T/100base-TX auto-switched 2. USB Protocol: USB Ver1.1 Standard Transmission Rate: 12Mbps (max.) 3. Charging Charging Method: Constant current/voltage (the charging circuit is built in IT-9000) Charge Period: Approximately 5 hours 4. -
Page 73: Using The Cradle-Type Battery Charger (Ha-L30Chg
Using the Cradle-type Battery Charger (HA-L30CHG) The optional Cradle-type Battery Charger (HA-L30CHG) makes it possible to charge the battery pack installed in the Handheld Printer Terminal. General Guide Left Right Back E-71... - Page 74 Terminal Detect This switch detects when the IT-9000 is mounted correctly on the Switch charger. Mount Hooks These hooks are used to stabilize the IT-9000 when mounting it on the charger. Removal Buttons Press when removing the IT-9000. Power Supply Power is supplied to the IT-9000 via these contacts.
-
Page 75: Connecting The Cradle-Type Battery Charger Power Supply
Connecting the Cradle-type Battery Charger Power Supply Use the optional AC adaptor (AD-S42120C) for the power supply of the Cradle-type Battery Charger. 1. Plug the AC adaptor into the AC adaptor jack on the back of the Cradle-type Battery Charger. 2. - Page 76 4. Push the IT-9000 fully into the Cradle-type Battery Charger until the mount hooks in the charger engage the mount holes in the IT-9000. Check that the power LED on the top of the Cradle-type Battery Charger lights green and that indicator 1 on the IT-9000 lights. To remove the IT-9000 from the Cradle-type Battery Charger, push the removal buttons to disengage the mount hooks from the mount holes and then lift the IT-9000 out of the charger.
- Page 77 Specifi cations 1. Charging Charging Method: Constant current/voltage Charge Period: Approximately 5 hours 2. Power Supply Power Source: AC adaptor (AD-S42120C-N5*) Consumption Current: 12V DC approximately 3.5A Output to Handheld Printer Terminal: 12V DC 3.5A (max.) 3. AC Adaptor Model: AD-S42120C-N5 Input: 100V to 240V AC 50/60Hz...
-
Page 78: Using The Car Mounted-Type Battery Charger (Ha-L35Chg
Using the Car Mounted-type Battery Charger (HA-L35CHG) The optional Car Mounted-type Battery Charger (HA-L35CHG) can be used to charge the battery installed in the Handheld Printer Terminal using power from the cigarette lighter in your car. General Guide Left Right Back Terminal Detect Switch This switch detects when the IT-9000 is mounted correctly... -
Page 79: Connecting The Car Mounted-Type Battery Charger Power Supply
Connecting the Car Mounted-type Battery Charger Power Supply Use the cigarette lighter socket in the vehicle for the power supply of the Car Mounted- type Battery Charger. 1. Plug the small plug of the bundled Car Power Cable into the car adaptor jack on the back of the Car Mounted-type Battery Charger. - Page 80 IT-9000 is not mounted properly. Regarding the installation of HA-L35CHG in your car, no technical advice is available from CASIO. Consult with automotive parts store or specialized store regarding the installation method and mounting strength of the products installed in your car.
- Page 81 Specifi cations 1. Charging Charging System: Constant current/voltage Charge time: Approximately 5 hours 2. Dimensions and Weight Dimensions: Approximately 129(W) × 262(D) × 82(H) mm (5 "W 10 "D 3 "H) Weight: Approximately 544g (19.2oz) 3. Operating Environment Temperature: 0°C to 40°C (32°F to 104°F) Humidity: 10% to 90% RH (non-condensation) E-79...
-
Page 82: Using The Dual Battery Charger (Ha-G32Dchg
Using the Dual Battery Charger (HA-G32DCHG) The optionally available Dual Battery Charger (HA-G32DCHG) can be used to simultaneously charge two battery packs. General Guide Left Right Bottom Bundled Items Connection Bracket 2 screws E-80... - Page 83 Charge Indicator This LED indicates the charge status of the battery pack(s). Off: Not charging Red: Charging Red Flashing: Battery pack problem Green Flashing: Standby Green: Charging complete Power Contacts Power is supplied to the battery packs via these contacts. AC Adaptor Jack This is used to supply power by connecting the AC adaptor (sold separately).
-
Page 84: Charging Battery Pack
Charging Battery Pack Use the separately sold AC adaptor (AD-S42120C) for the power supply of the Dual Battery Charger. 1. Plug the cord from the AC adaptor into the AC adaptor jack of the Dual Battery Charger. 2. Plug the AC cord into a wall outlet. 3.Taking care that the battery pack is oriented correctly, insert it into the Dual Battery Charger. -
Page 85: Connecting Multiple Dual Battery Chargers
Connecting Multiple Dual Battery Chargers You can connect up to three Dual Battery Chargers. Doing so makes it possible to supply power to all the Dual Battery Chargers using one dedicated AC adaptor. 1. As shown in the illustrations below, remove the connector covers of the Dual Battery Chargers you want to connect to each other. - Page 86 Specifi cations 1. Charging Speci cation Charging Method: Constant current/voltage Charge Period: Approx. 4 hours (1 battery pack, normal temperature) When charging two battery packs: Approx. 5.5 hours (2 battery packs, normal temperature) 2. Power Supply Power Source: AC adaptor (AD-S42120C-N5) Consumption Current: 12V DC 3.5A Output:...
-
Page 87: Using The Rechargeable Battery Pack (Ha-G20Bat
Using the Rechargeable Battery Pack (HA-G20BAT) HA-G20BAT Important! Store a battery pack in its special soft case whenever you are not using it. If the battery pack has been left over unused for a long period of time, the capacity remained decreases due to spontaneous discharge or chemical decomposition by the battery pack itself. -
Page 88: Disposal Of Waste Batteries (Applicable In The European Union Only
Disposal of Waste Batteries (Applicable in the European Union only) The symbol (crossed out wheeled-bin) on your battery indicates that the battery shall not be disposed with other unsorted waste, but shall be collected separately and handed over to your local community waste collection point or other available collection points for the recycling, at the end of its use. - Page 89 CASIO COMPUTER CO., LTD. 6-2, Hon-machi 1-chome Shibuya-ku, Tokyo 151-8543, Japan 2016 CASIO COMPUTER CO., LTD.
Need help?
Do you have a question about the IT-9000C and is the answer not in the manual?
Questions and answers