Advertisement
Quick Links
Advertisement

Subscribe to Our Youtube Channel
Related Manuals for Snow Peak FES-432


Summary of Contents for Snow Peak FES-432
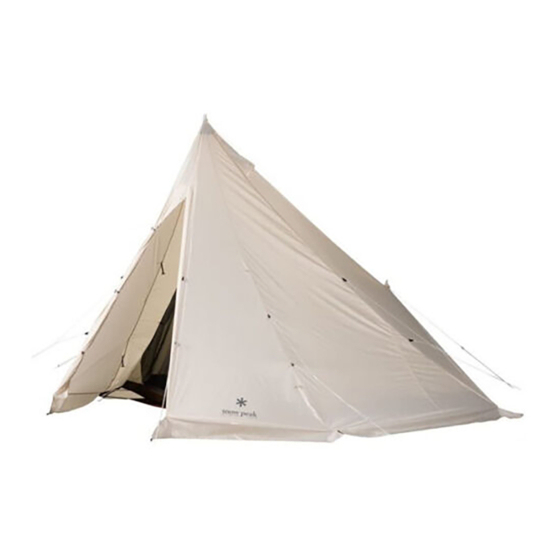
- Page 1 取扱説明書 Ver 1.00 FES-432 タープエクステンションテント4 アイボリー...
- Page 2 この度は、 スノーピーク製品をお買い上げいただき、 誠にありがと う ございます。 本製品は、 キャ ンプ用のタープに 接続するためのテン トです。 安全にご使用いただ く ためにも下記の取扱説明書をよ く読んでから ご使用く だ さい。 また、 読み終わった後も大切に保管して く だ さい。 説明内容で理解出来ない点及び製品に不具合が確認された 際には直ちに使用を中止しご購入いただき ま した販売店様も し く は弊社ユーザーサービスまでお問い合わせ く だ さい。 セッ ト内容 セッ ト内容は一般的な条件下での設営を基本と したものです。 本製品はタープに接続するテン トであるため、 基 本的な設営には280cmウイ...
- Page 3 安全上の注意事項 ご使用の前によ く 読んで予測さ れる事故を回避 し安全にご使用く だ さ い。 危険 明らかに生命にかかわる重大な事故が予測される行為を示します。 ●本製品の素材は難燃性ではあ り ません。 テン ト内では燃焼式のラ ンタ ンやコンロ、 ヒーターな どの熱源 や、 マ ッ チ、 ローソク、 ライ ター、 タバコな どの裸火や炎は絶対に使用しないで く だ さ い。 限られた空間で の火気の使用は火災や酸欠、 一酸化中毒な どの恐れがあ り大変危険です。 ●テン ト内で燃料を保管 した り、 燃料を補給するな ど、 引火性のある ものを持ち込まないで く だ さ い。 焚火の位置...
- Page 4 各部の名称 ※こ こではTP-260IV HDタープヘキサ エヴォ Pro.アイボ リ ーに接続したイ ラ ス トになっており ます。 1ページに記載 の対応表を確認の上、 使用可能なタ ープに接続して使用して く だ さい。 280cmウイ ングポール インナーテント 用テープ イ ンナーテン ト フライ シー ト サブポール グラ ン ド シー ト 初めてお使いになる前に ●品質には万全を期 してお り ますが、 お使いになる前に必ず試 し張り を行い、 付属品や設営道具を確認 して く だ さ い。 万一不具合や付属品の欠品があった場合は、...
- Page 5 自在付ロープ ・ ペグダウンの位置 二又 10m ロープ 2.5m ロープ 2.5m ロープ 2.5m ロープ 二又 5m ロープ 各ロープの固定、 ペグダウ ンの位置は下図のよ う に行っ て く だ さ い。 2.5m ペグ 自在 2.5m ロープ返し部分 2.5m 二又ロープ 約 90° 二又 ロープの自在が付いている 約 90° 二又 10m 5m...
- Page 6 設営の手順 より安全に設営するためにも必ず2人以上で設営してください。 設営 ・ 撤収は以下の説明に従い繰り返 し練習 し、 実際のキ ャ ンプに備えて く だ さ い。 また、 付属品が全て揃っている か前もってご確認く だ さ い。 無理な設営 ・ 撤収は本製品やウイ ングポールの破損や事故の原因にな り ます。 本書を よ く お読みにな り ご使用く だ さ い。 ※こ こではTP-260IV HDタープヘキサエヴォ Pro.アイボ リ ーに取付けたイ ラス トになっています。 1ページ対 応表を確認の上、...
- Page 7 タープ反対側のウイ ングポール先端にもロープの取付け ウイ ングポールの先端をメ イ ンコーナーにある三角金具に差し込み、 その上から二又10mロープのセンター ループを掛けて く ださい。 その後、 ロープをウイ ングポールを中心に約45° 開いた方向へロープの先端とウイ ングポールの下端が一直線になる位置まで伸ばし、 返し部分をペグダウン して く ださい。 ※後で他のロープも 掛けられるよ うに、 ペグは完全には打ち込まず、 すき間を設けて く ださい。 センターループ メインコーナーのロー プの取付け方 センターループをウイ ン グポールの先 端に掛け た後 、 1 回ひねり二 度 掛 け して く ださい。 約...
- Page 8 各コーナーにロープを取付けペグダウン 4ページの 「自在付ロープ ・ ペグダウンの位置」 に従ってタープにロープを取付けペグダウン して く ださい。 ロープはタープの中心から両翼のコーナーを結ぶ延長線上 (各コーナーのグロメ ッ ト付テープの取付け方 向の延長線上) に引っ張って く ださい。 このと きロープを引く方向が狂う と しわの原因になり、 正し く設営す るこ とができな く な り ますので注意して く だ さい。 ※この手順の後、 すき間を設けて打ち込んだペグを完全にペグダウン して く ださい。 ※このと きフライ シー トが接続されている側のウイ ングポールは垂直になるよ うに立ち上げて く ださい。 タープの中心...
- Page 9 ポールカバーの取付け ロープを掛けた後、 ポールカバーで、 ポールの先 端を覆うよ うにベルクロテープで しっかり と留めま す。 二又5mロープのペグダウン サブポールの位置がタープの稜 線の延長線上にく るように注意 しながら、 二 又 5 mロープを引き 広げ、 サブポールを中心に左右 約 45° それぞれ約45° 開いた位置にペ グダウン して く ださい。 約 45° 二又用 5m ペグダウンループのペグダウン タープの稜線上にフライ シー トの中心軸がく るよ うに注意しながら、 ⑴⑵⑶の順番に背面側のペグダウン ループからペグダウン して く ださい。 その後他の箇所も順番に沿ってペグダウン して く ださい。 ⑷...
- Page 10 約 45° 約 45° 約 45° ② ⑧ ウイ ングポール 約 45° 約 45° 約 45° サブポール すき間を 設ける その後ウイ ングポール、 サブポールを立ち上げます。 各ロープを一度緩めた後、 ウイ ングポールの下端がフラ イシー トの内側になるように1本ずつ立ち上げてく ださ い。 その後、 二又ロープの自在の位置を調節してテンシ ョ ンをかけてフライ シー トを自立させて く ださい。 ポールを 立ち上げる人と、 二又ロープの長さ を調節する人で分 かれて声を掛け合いながら作業を...
- Page 11 2 イ ンナーテン トの接続 ⑴イ ンナーテン ト背面上部にあるフッ クをフライ シー ト背面側にあるOリ ングに引掛けて く ださい。 ⑵イ ンナ ーテン ト正面上部にあるベルクロテープを図のよ うにウイ ングポールに巻き付けて く ださい。 ⑴ ⑵ Oリ ング フ ッ ク ベルクロテープ ベルクロテープ 背面 正面 イ ンナーテン トのコーナーにあるペグダウン インナーテン ト正 面 上 部に ループ4箇所とグラン...
- Page 12 撤収の手順 必ず2人以上で撤収してください タープの下、 テン トの中にものがないこと を確認してから撤収を始めて く ださい。 タープの下、 テン ト の中で使用していた製品は、 必ずタープの外へ移動させ、 タープから十分に距離を空けてく ださ い。 2.5mのロープのペグ を抜いて く だ さ い。 イ ンナーテン ト を取付けている場合は⑴イ ンナーテン ト背面上部にあるフッ クを外して く ださい。 ⑵イ ンナーテン ト正面上部にあるベルクロをウイ ングポールから外して く ださい。 タープ本体のメ イ ンコーナー以外の各コーナーに取付けているロープのペグを抜き、 ロープを取り外して く...
- Page 13 結露について 空気中に含まれている水分が急激に冷やされて霧状になったものが結露として現れます。特に狭いテント等 の空間では、 通常の室内よりも水蒸気の濃度が高くなり、 結露の発生する確率が高くなります。原因としては、 人体構成要素の約 60%を占める水分が、呼吸や汗などにより放出され、水蒸気となりテント内に結露が発 生します。テント内では、特にフライシート・ボトム部分などの防水性能が高い部分に結露が発生しやすく なります。結露は優れた透湿防水素材でも使用状況により完全に防ぐことは不可能です。ご使用中は結露軽 減のために適時換気を行ってください。 撥水 ・ 防水性能について ●本製品はいずれの生地にも高性能の撥水加工を施 していますが、 生地の特性上、 撥水性能 (撥水の仕方や耐 久性) に若干の差が見られる場合があ り ます。 また、 ご使用を重ねますと撥水性能が低下する場合があ り ます。 性能が低下 した場合は市販の撥水スプレー等を、 それ らの説明書を よ く お読みの上ご使用く だ さ い。 ●防水性の高い生地を使用 しており ますが、 地面の水溜り な どへ長時間接触 している と雨水が浸み込む場合があ り...
- Page 14 ●樹液が付着 して しま う と きれいに除去する こ とはでき ません。 樹液が垂れそ う な木の下を避けて設営 して く だ さ い。 溶剤な どによ り無理に除去する と生地やコーティ ング を傷めます。 ●使用する際にポールが折れて しま った場合は、 応急処置と して速やかに添え木をあて、 ビニールテープなどで固 定するか、 撤収を して く だ さ い。 ●次回のキ ャ ンプに備え、 上記の通り、 十分に保守、 点検を して く だ さ い。 品質保証について...
- Page 15 Product Manual Ver 1.00 FES-432 Tarp Extension Tent 4 Ivory...
- Page 16 Thank you for purchasing this Snow Peak Product. This product is a tent to connect to a tarp for camping. To ensure your safety when using this product, please read these instructions carefully before use. Please be sure to keep this manual in a safe place for future reference. If you find anything in the instruction manual that is difficult to understand, or if you find a defect with the product, stop using it immediately and contact the dealer where you purchased the product, or Snow Peak Customer Service.
- Page 17 ●Before using the product, check each part for abnormalities. If there are abnormalities, take the product to the dealer or Snow Peak Customer Service for inspection or repairs. ●Pay close attention to the weather. If extreme weather is forecast, pack up camp and evacuate to a safe place.
- Page 18 In the unlikely event that there is a problem or a missing accessory, please contact the dealer where you purchased the product, or Snow Peak Customer Service.
- Page 19 Rope with rope tensioner, peg down position 10 m forked end rope 2.5 m rope 2.5 m rope 5 m forked end rope 2.5 m rope Fix each rope and determine the peg down positions as shown below. 2.5m Rope tensioner 2.5m Looped end...
- Page 20 Setup procedure: Please be sure to have two or more people available to set up the tent. Please practice tent setup and disassembly repeatedly according to the following explanation to prepare for use when camping. Make sure that you have all the accessories in advance. Inappropriate setup or disassembly may damage this product or wing poles, or lead to an accident.
- Page 21 Attaching the rope to the tip of the wing pole on the opposite side of the tarp Insert the tip of the wing pole into the triangular metal fitting at the main corner, and hook the center loop of the 10 m forked end rope from above. Next, extend the rope approximately 45° around the wing pole until the tip of the rope and the lower end of the wing pole are in a straight line, and peg down the looped end of the rope.
- Page 22 Attaching the rope to each corner and pegging down Attach the rope to the tarp and peg down according to "Rope with rope tensioner, peg down position" on page 4. Pull the rope from the center of the tarp on the extension line connecting to the corners of both wings (on the extension line in the mounting direction of the grommet tape at each corner).
- Page 23 Attaching the pole cover After hooking the rope, secure it with Velcro tape so that the pole cover covers the tip of the pole. Pegging down the 5 m forked end rope While paying attention to the position of the sub pole on the extension of the ridgeline of the tarp, pull the ends of the 5 m Approx.
- Page 24 Approx. 45° Approx. 45° Approx. 45° ② ⑧ Wing pole Approx. 45° Approx. 45° Approx. 45° Sub pole Create a gap Next, set up the wing pole and sub pole. After loosening each rope once, raise the poles one by one so that the lower end of the wing pole comes inside the fly sheet.
-
Page 25: Back Side
Connecting the inner tent (1) Attach the hook at the top of the back side of the inner tent to the O-ring on the back of the fly sheet. (2) Wrap the Velcro tape on the top of the front of the inner tent around the wing pole as shown below. ( 1 ) ( 2 ) O-ring... - Page 26 Disassembly procedure: This product should always be assembled/disassembled by two or more people. Make sure there is nothing in your tent or under the tarp before you start disassembling the tent. Be sure to remove items used in the tent or under the tarp to outside the tarp, and keep a sufficient distance from the tarp. Remove the 2.5 m rope pegs.
- Page 27 Condensation Moisture suspended in the air rapidly cools down and turns into mist, which appears as condensation. In smaller spaces such as inside a narrow tent, the concentration of water vapor is higher than in an ordinary room and frequently results in more condensation. The water that comprises about 60% of the human body is released by breathing and sweating, which becomes water vapor and causes condensation to form inside the tent.
- Page 28 If apparent defects in the product's manufacturing are discov- ered, the defective product will be repaired or exchanged free of charge. In other cases, Snow Peak will repair the product for an appropriate fee. The decision to repair or replace the product will be at our discretion. Snow Peak will not be able to repair the product or any damage that occurred due to any of the following: 1.
Need help?
Do you have a question about the FES-432 and is the answer not in the manual?
Questions and answers