Table of Contents
Advertisement
Quick Links
Advertisement
Table of Contents

Related Manuals for ILVE ILD60B


Summary of Contents for ILVE ILD60B
- Page 1 INSTRUCTION MANUAL FOR INDUCTION HOB MODEL: ILD60B...
- Page 2 OPEN 24 ILVE ACCESSORIES ONLINE SHOP...
-
Page 3: Table Of Contents
Dear customer, Congratulations on your purchase of a ILVE induction ceramic hob. In order to make the best use of your appliance, please carefully read the following use and care manual and keep it for later reference. SUMMARY SAFETY ............................4 ...................... -
Page 4: Safety
SAFETY Precautions before using Unpack all the materials. The installation and connection of the appliance must be done by approved and qualified specialists. The manufacturer cannot be responsible for damage caused by installation or connection errors. When used, the appliance must be correctly installed in a kitchen unit and an adapted and approved work surface. -
Page 5: Precautions Not To Damage The Appliance
Precautions not to damage the appliance Raw pan bottoms or damaged saucepans (not enamelled cast iron pots) may damage ceramic glass. Sand or other abrasive materials may damage ceramic glass. Avoid dropping objects, even little ones, on the vitroceramic. Do not hit the edges of the glass with saucepans. Make sure that the ventilation of the appliance is in accordance with the manufacturer’s ... -
Page 6: Description Of The Appliance
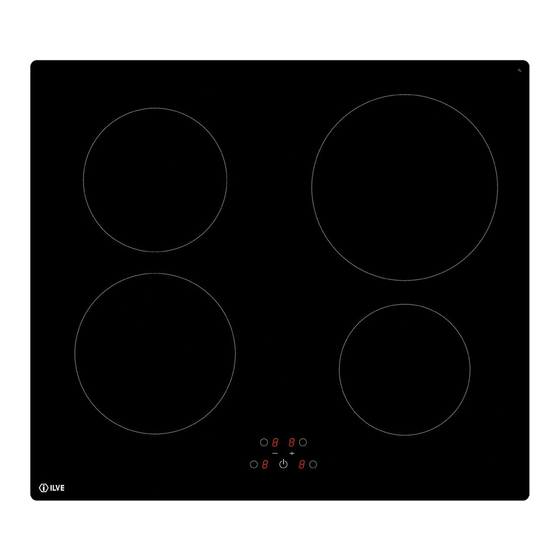
DESCRIPTION OF THE APPLIANCE Technical characteristics Total Position of the Nominal Booster Minimal pan Type Diameter Power heating zone Power* Power* detection Front left 190 mm 1400 W 2000 W 90 mm Rear left 170 mm 1400 W 90 mm INB64B 7100 W Rear right... -
Page 7: Use Of The Appliance
USE OF THE APPLIANCE Sensitive touch Your ceramic hob is equipped with electronic controls with sensitive touch keys. When your finger presses the key, the corresponding command is activated. This activation is validated by a control light, a letter or a number in the display and/or a “beep” sound. In the case of a general use press only one key at a time. -
Page 8: Starting-Up
Starting-up You must first switching on the hob, then the heating zone: Start-up/ switch off the hob : Action Control panel Display To start Press key [ [ 0 ] Touch the key Press key [ Nothing or [ H ] Start-up/ switch off a heating zone : Action Control panel... -
Page 9: Timer
Timer The timer is able to be used simultaneous with all heating zones and this with different time settings (from 0 to 99 minutes) for each heating zone. Setting and modification of the cooking time : Action Control panel Display Zone selection Press key [ O ] from the zone [ 0 ]... -
Page 10: Cooking Advice
Unlocking : Action Control panel Display Start Press key [ [ L ] In the 5 seconds after start : Unlocking the hob Press simultaneously [ - ] and [ O ] at front right [ 0 ] Repress key [ - ] No light on the displays COOKING ADVICE Pan quality... -
Page 11: Pan Dimension
Pan dimension The cooking zones are, up to a certain limit, automatically adapted to the diameter of the pan. However the bottom of this pan must have a minimum of diameter according to the corresponding cooking zone. To obtain the best efficiency of your hob, please place the pan in the centre of the cooking zone. Examples of cooking power setting (the values below are indicative) 1 to 2... -
Page 12: What To Do In Case Of A Problem
WHAT TO DO IN CASE OF A PROBLEM When the symbol [ E 4 ] appears : I) The table must be reconfigured. Please implement the following steps: Important : before you start: make sure there is no more pot on the hob take a pot with a ferromagnetic bottom and a minimum diameter of 16 cm disconnect the appliance from the grid by removing the fuse or turning the circuit breaker off... -
Page 13: Environment Preservation
One or all cooking zone cut-off : The safety system functioned. You forgot to cut-off the cooking zone for a long time. One or more sensitive keys are covered. The pan is empty and its bottom overheated. The hob also has an automatic reduction of power level and breaking Automatic overheating Continuous ventilation after cutting off the hob : This is not a failure, the fan continuous to protect the electronic device. -
Page 14: Installation Instructions
INSTALLATION INSTRUCTIONS The installation comes under the exclusive responsibility of service. The installer must respect the legislation and the standards enforce in his home country. How to stick the gasket: The gasket supplied with the hob avoids all infiltration of liquids in the cabinet. Installation has to be done carefully, in conformity of the following drawing. -
Page 15: Electrical Connection
ELECTRICAL CONNECTION The installation of this appliance and the connection to the electrical network should be entrusted only to an electrician following the normal regulations. Protection against the parts under tension must be ensured after the building-in. The information on connections necessary are on the stickers. Place them on the hob casing near the connection box. - Page 16 Warranty Card Eurolinx Pty Limited A.B.N. 50 001 473 347 trading as ILVE (“ILVE”) Post: P: 1300 856 411 WARRANTY REGISTRATION PRIVACY WARRANTY ILVE Operating Manual...
- Page 17 Warranty Card ALL SERVICE CALLS MUST BE BOOKED THROUGH THE ILVE SERVICE AND WARRANTY DEPARTMENT ON 1300 856 411 Warranty Card tear off ILVE Operating Manual...
Need help?
Do you have a question about the ILD60B and is the answer not in the manual?
Questions and answers