Kyocera KM-C2520 Installation Manual
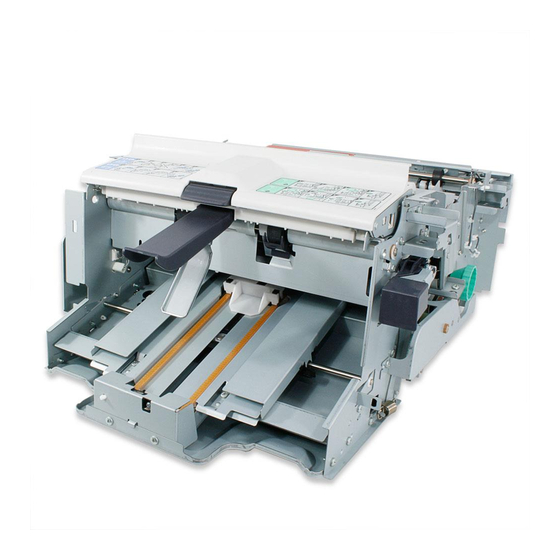
Center-folding unit
Hide thumbs
Also See for KM-C2520:
- Service manual (462 pages) ,
- Advanced operation manual (380 pages) ,
- Operation manual (242 pages)
Table of Contents
Advertisement
Quick Links
Advertisement
Table of Contents

Subscribe to Our Youtube Channel
Related Manuals for Kyocera KM-C2520


Summary of Contents for Kyocera KM-C2520
- Page 1 INSTALLATION GUIDE FOR THE CENTER-FOLDING UNIT GUIDE D’INSTALLATION DE LA PLIEUSE GUÍA DE INSTALACIÓN PARA LA UNIDAD DE PLEGADO EINBAUANLEITUNG FÜR MITTENFALTEINHEIT GUIDA ALL’INSTALLAZIONE DELL’UNITÀ DI PIEGATURA CENTRALE 中折りユニット設置手順書 BF-710...
-
Page 3: Supplied Parts
English Supplied parts A Center-Folding unit ... 1 B Folding tray... 1 C Rear cover ... 1 D Front cover ... 1 E Slider ... 2 Français Pièces fournies A Plieuse... 1 B Bac de pliage... 1 C Capot arrière... 1 D Capot avant ... - Page 4 Procedure Before installing the center-folding unit, turn the MFP’s main power switch off and unplug the power cable from the power supply. Install the document finisher, and then install the center-folding unit. Procédure Avant d’installer la plieuse mettre l’interrupteur d’alimentation principal du MFP hors tension et débrancher le câble d’alimentation de la prise de courant.
- Page 5 Removing the back cover. 4. Remove the four screws (5) to remove the back cover (6) from the document finisher. Enlèvement du capot arrière. 4. Retirer les quatre vis (5) pour retirer le capot arrière (6) du finisseur de document. Extracción de la cubierta posterior.
-
Page 6: Anbringen Der Abdeckungen
[To install the center-folding unit on the full-color machine] 7. Steps 8 and 9 below will be required when the center-folding unit (A) is installed on the full-color machine. [Installation de la plieuse sur la machine pleine couleurs] 7. Les étapes 8 et 9 ci-dessous sont nécessai- res lorsque la plieuse (A) est installée sur la machine pleine couleurs. - Page 7 Installing the slider. 10. Align slider (E) with projection (10) on the front-side plate of the docu- ment finisher and install the slider. 11. Pull out slider (E) and secure it with two M4 × 8 tap-tight S screws (H). To tighten the screw at the rear side of slider (E) easily, open the right cover of the document finisher and secure the screw from the right side (11) of the document finisher.
- Page 8 Installing the cover handle saddle. 14. Install cover handle saddle (J) on the front side of center-folding unit (A) with two M4 × 8 tap-tight S screws (H). Installation de la poignée de capot à cheval. 14. Installer la poignée de capot à cheval (J) sur l’avant de la plieuse (A) à...
-
Page 9: Installing Covers
Installing covers. 18. Fit the projections at the rear side of rear cover (C) and front cover (D) into the center-folding unit’s holes and install the covers. It is easy to install front cover (D) by lifting center-folding unit releasing lever (16). Install the cover assembled in step 6 when the center-folding unit is installed into the full-color machine. - Page 10 Installing the folding tray. 21. Fit the projection of folding tray (B) into the inside hole of center-folding unit (A). Installation du bac de pliage. 21. Ajuster la saillie du bac de pliage (B) dans l’orifice intérieur de la plieuse (A). Instalación de la bandeja plegable.
- Page 11 Adhering the label. 25. Clean the area where the label is adhered on the right cover of the document finisher with alcohol and adhere label (I) aligning with making-off line. Collage de l’étiquette. 25. Nettoyer la zone où l’étiquette doit être col- lée sur le capot de droite du finisseur de document avec de l’alcool et coller l’étiquette (I) en l’alignant, sur la ligne indiquée.
-
Page 12: Adjusting Staple Position
Adjusting staple position 1. Enter the maintenance mode U246, select BOOKLET FOLDER and perform adjustment for each copy sample size. When A4R or LTR (8.5" × 11") is used, follow STAPLE POS ADJ1. When B4 or LGL (8.5" × 14") is used, follow STAPLE POS ADJ2. When A3 or LGR (11"... - Page 13 [Checking centerfold position] 1. Plug the MFP into a power outlet, and turn on its main power switch. 2. Perform a test copy in centerfold mode. A test copy must be made for each of the following paper sizes. Draw a straight line (1) at the center of each paper (a).
- Page 14 Adjusting centerfold position 1. Enter the maintenance mode U246, select BOOKLET FOLDER and perform adjustment for each copy sample size. When A4R or LTR (8.5" × 11") is used, follow BOOKLET POS ADJ1. When B4 or LGL (8.5" × 14") is used, follow BOOKLET POS ADJ2. When A3 or LGR (11"...
- Page 15 NOTICE English This accessory is for use only with the following Applicant’s Listed Machine. Model : DF-710 AVIS Français Cet accessoire est utilisable uniquement avec le copieur figurant dans la liste du demandeur suivant. Modèle: DF-710 AVISO Español Este accesorio es sólo para usar en las siguientes fotocopiadoras de la lista de solicitantes. Modelo: DF-710 HINWEIS Deutsch...
- Page 16 2006. 2 303J156710 Rev1.0...
Need help?
Do you have a question about the KM-C2520 and is the answer not in the manual?
Questions and answers