Advertisement
Quick Links
Owner's Manual & Safety Instructions
Save This Manual
operating, inspection, maintenance and cleaning procedures. Write the product's serial number in the
back of the manual near the assembly diagram (or month and year of purchase if product has no number).
Keep this manual and the receipt in a safe and dry place for future reference.
For Longer Run Time Use
3.0 Amp Hour Battery Or
Greater (Sold Separately)
Email our technical support at: productsupport@harborfreight.com
When unpacking, make sure that the product is intact
and undamaged. If any parts are missing or broken,
please call 1-888-866-5797 as soon as possible.
©
Copyright
2021 by Harbor Freight Tools
No portion of this manual or any artwork contained herein may be reproduced in
any shape or form without the express written consent of Harbor Freight Tools.
Diagrams within this manual may not be drawn proportionally. Due to continuing
improvements, actual product may differ slightly from the product described herein.
Tools required for assembly and service may not be included.
Keep this manual for the safety warnings and precautions, assembly,
Visit our website at: http://www.harborfreight.com
®
. All rights reserved.
Read this material before using this product.
Failure to do so can result in serious injury.
SAVE THIS MANUAL.
21l
Advertisement

Subscribe to Our Youtube Channel
Related Manuals for Bauer Hypermax 2174C-BS


Summary of Contents for Bauer Hypermax 2174C-BS
- Page 1 Owner’s Manual & Safety Instructions Save This Manual Keep this manual for the safety warnings and precautions, assembly, operating, inspection, maintenance and cleaning procedures. Write the product’s serial number in the back of the manual near the assembly diagram (or month and year of purchase if product has no number). Keep this manual and the receipt in a safe and dry place for future reference.
-
Page 2: Table Of Contents
Table of Contents Safety ................2 Maintenance .............15 Specifications ............8 Parts List and Diagram ..........18 Setup .................8 Warranty ..............20 Operation ..............11 WARNING SYMBOLS AND DEFINITIONS This is the safety alert symbol. It is used to alert you to potential personal injury hazards. Obey all safety messages that follow this symbol to avoid possible injury or death. -
Page 3: Safety
2. Electrical safety j. Do not leave the tool unattended when the Battery Pack is connected. Turn off the tool, a. Avoid body contact with earthed or and remove the Battery Pack before leaving. grounded surfaces, such as pipes, radiators, ranges and refrigerators. k. - Page 4 5. Service g. Inspect your workpiece before cutting. If the workpiece is bowed or warped, clamp it with a. Have your power tool serviced by a the outside bowed face toward the fence. qualified repair person using only identical Always make certain that there is no gap replacement parts.
- Page 5 q. If the workpiece or blade becomes jammed, i. Follow all charging instructions and do turn the mitre saw off. Wait for all moving not charge the battery pack or power tool parts to stop and disconnect the plug outside of the temperature range specified from the power source and/or remove in the instructions.
- Page 6 9. Vibration Safety b. Do not smoke during use. Nicotine reduces the blood supply to the hands and fingers, This tool vibrates during use. increasing the risk of vibration-related injury. Repeated or long-term exposure to vibration may c. Wear suitable gloves to reduce the cause temporary or permanent physical injury, vibration effects on the user.
- Page 7 Grounding TO PREVENT ELECTRIC SHOCK AND DEATH FROM INCORRECT GROUNDING: Check with a qualified electrician if you are in doubt as to whether the outlet is properly grounded. Do not modify the power cord plug provided with the charger. Do not use the charger if the power cord or plug is damaged.
-
Page 8: Specifications
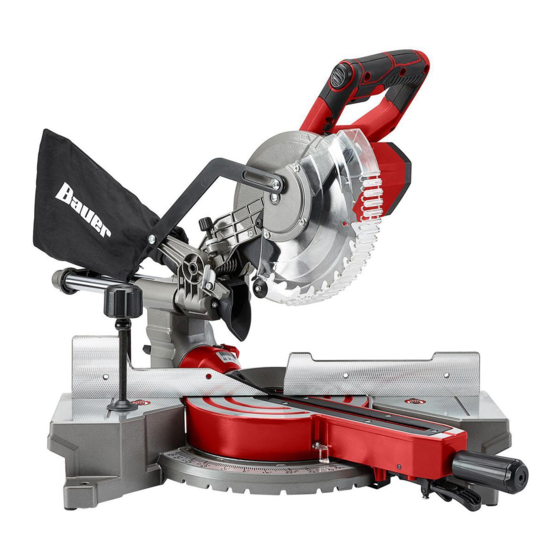
Specifications Charger Type Bauer 20V Li-ion 63947, 63529, 57006 (sold separately) Battery Type Bauer 20V Li-ion 64816, 64817, 57007 (sold separately) Rated No Load Speed 3800/min Cutting Capacity at 45° L 2-1/2″ x 6-1/8″ Cutting Capacity at 90° L/R 2-1/2″ x 8-5/8″... - Page 9 Charging Charge battery before using this tool. Follow instructions included with battery charger ( sold separately). Functions Spindle Lock Dust Bag Safety Lock Button Adjustment Knob Motor Slide Bar Depth Stop Lower Blade Guard Clamp Fence Miter Table Miter Lock Knob Miter Scale Bevel Scale...
- Page 10 Work Area 1. Designate a work area that is clean and well lit. 2. There must not be objects, such as utility lines, The work area must not allow access by children nearby that will present a hazard while working. or pets to prevent distraction and injury.
- Page 11 Operating Instructions Read the ENTIRE IMPORTANT SAFETY INFORMATION section at the beginning of this manual including all text under subheadings therein before set up or use of this product. Tool Changing Note: Blade sold separately. 6. Remove the Arbor Bolt, Flat Washer and Outer Flange.
-
Page 12: Operation
Setting and Testing TO PREVENT SERIOUS INJURY FROM ACCIDENTAL OPERATION: Make sure that the Trigger is in the off-position and remove its Battery Pack before performing any procedure in this section. Adjusting the Miter Angle A miter cut is one that is at an angle across the 3. - Page 13 Aligning the Fence 1. After adjusting the miter or bevel setting, 3. Tighten the Fence Lock Knob. Make sure that the check and adjust the Sliding Fence. Sliding Fence still does not contact the Blade. 2. Loosen the Fence Lock Knob, and move the Sliding Fence to be within 1/8"...
- Page 14 General Instructions for Use 1. Make sure that the Trigger is in the 8. Grip the Saw Handle, press the Trigger off-position, then attach the Battery Pack. Lock Button with your thumb, and squeeze the Trigger to start the Saw. WARNING! TO PREVENT SERIOUS INJURY: The tool will restart automatically if stalled.
-
Page 15: Maintenance
Maintenance and Servicing Instructions Procedures not specifically explained in this manual must be performed only by a qualified technician. TO PREVENT SERIOUS INJURY FROM ACCIDENTAL OPERATION: Make sure that the Trigger is in the off-position and remove its Battery Pack before performing any procedure in this section. TO PREVENT SERIOUS INJURY FROM TOOL FAILURE: Do not use damaged equipment. - Page 16 Calibrating the Bevel Angle For making accurate cuts, the Saw Blade must WARNING! TO PREVENT SERIOUS INJURY: be adjusted to be exactly vertical to the Table. Adjust the Sliding Fence clear of the Blade′s cutting path after making any adjustment to the 1.
- Page 17 Calibrating the Miter Angle Indicator Check the accuracy of the Miter Angle Indicator 2. Loosen the Adjustment Screw holding only after checking or adjusting the Fence to the Miter Angle Indicator in place. confirm that it is at 90º to the Saw Blade. 3.
-
Page 18: Parts List And Diagram
Parts List and Diagram Parts List Part Description Part Description Base Bevel Pointer Absorber Pad Bearing End Cover Miter Scale Label Cross Sunk Head Screw Flat Washer Kerf Board Locknut Hex Bolt Clamp Knob Bevel Scale Label Clamp Miter Pointer Clamping Plate Miter Table Flat Washer... - Page 19 Assembly Diagram Item 57921 For technical questions, please call 1-888-866-5797. Page 19...
-
Page 20: Warranty
PLEASE READ THE FOLLOWING CAREFULLY THE MANUFACTURER AND/OR DISTRIBUTOR HAS PROVIDED THE PARTS LIST AND ASSEMBLY DIAGRAM IN THIS MANUAL AS A REFERENCE TOOL ONLY. NEITHER THE MANUFACTURER OR DISTRIBUTOR MAKES ANY REPRESENTATION OR WARRANTY OF ANY KIND TO THE BUYER THAT HE OR SHE IS QUALIFIED TO MAKE ANY REPAIRS TO THE PRODUCT, OR THAT HE OR SHE IS QUALIFIED TO REPLACE ANY PARTS OF THE PRODUCT.
Need help?
Do you have a question about the Hypermax 2174C-BS and is the answer not in the manual?
Questions and answers