
Related Manuals for Siemens HL9R30020U


Summary of Contents for Siemens HL9R30020U
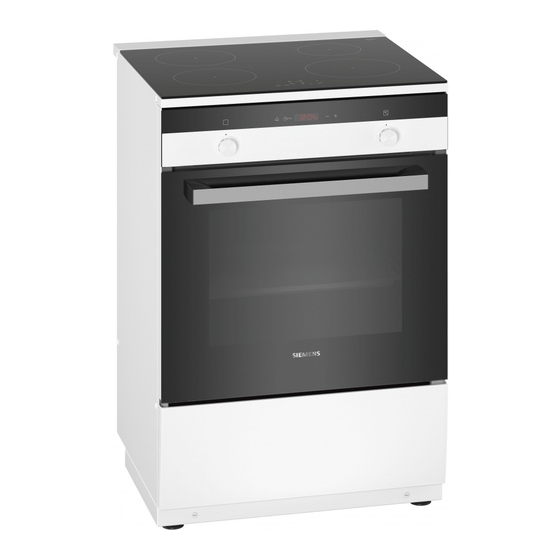
- Page 1 Free standing cooker HL9R30020U User manual Register your product on My Siemens and discover exclusive ser- vices and offers. siemens-home.bsh-group.com/welcome The future moving in. Siemens Home Appliances...
-
Page 2: Table Of Contents
en Safety Table of contents Only a licensed professional may connect ap- pliances without plugs. Damage caused by in- Safety .............. 2 correct connection is not covered under the warranty. Preventing material damage ....... 5 Only use the appliance as follows: Environmental protection and saving en- ¡... - Page 3 Safety en 1.3 Safe use WARNING ‒ Risk of burns! The appliance and its parts that can be WARNING ‒ Risk of fire! touched become hot during use, particularly The appliance will become hot. the hob surround, if fitted. ▶ Do not keep combustible objects or aero- ▶...
-
Page 4: Safety
en Safety An ingress of moisture can cause an electric WARNING ‒ Risk of scalding! shock. The accessible parts of the appliance become ▶ Do not use steam- or high-pressure clean- hot during operation. ers to clean the appliance. ▶ Never touch these hot parts. The insulation on cables of electrical appli- ▶... -
Page 5: Preventing Material Damage
Preventing material damage en 1.5 Halogen bulb WARNING ‒ Risk of electric shock! When changing the bulb, the bulb socket con- WARNING ‒ Risk of burns! tacts are live. The bulbs in the cooking compartment get ▶ Before replacing the bulb, ensure that the very hot. There is still a risk of burning for appliance is switched off in order to pre- some time after they have been switched off. -
Page 6: Environmental Protection And Saving En- Ergy
en Environmental protection and saving energy Damage Cause Measure Stains Unsupervised cooking process. Monitor the cooking process. Stains, blisters Spilled food, especially food with a high Remove immediately with a glass scraper. sugar content. Stains, blisters or Defective cookware, cookware with melted Use suitable cookware that is in a good con- fractures in the glass enamel or cookware with copper or alu-... -
Page 7: Suitable Cookware
Suitable cookware en Note: Cover saucepans with suitable lids. The appliance requires: ¡ Cooking without a lid consumes considerably more ¡ A maximum of 1 W when the appliance is in opera- energy. tion with the display switched on Lift lids as infrequently as possible. ¡... -
Page 8: Installation And Connection
en Installation and connection 5 Installation and connection 5.2 Setting up the appliance You can find out where and how best to install your ap- pliance here. You will also learn how to connect your Place the appliance on a smooth surface. appliance to the power supply. -
Page 9: Familiarising Yourself With Your Appliance
Familiarising yourself with your appliance en Unscrew the screw and remove the door lock. Close the appliance door. 6 Familiarising yourself with your appliance 6.1 Your appliance Explanation You can find an overview of the parts of your appliance here. Control panels Note: On certain models, specific details such as col- Cooling fan our and shape may differ from those pictured. -
Page 10: Time-Setting Options
en Familiarising yourself with your appliance Control Explanation Control Explanation Function selector Temperature selector Use the function selector Use the temperature se- to set the types of heating lector to set the temperat- and other functions. ure for the type of heating You can turn the function and select settings for selector clockwise or anti-... - Page 11 Familiarising yourself with your appliance en Symbol Type of heating What it's used for and how it works Bottom heating Final baking or cooking food in a bain marie. The heat is emitted from below. Full-surface grill Grill flat items such as steak, sausages, or toast. Gratinate food. The entire area below the grill element becomes hot.
-
Page 12: Powerboost
en Familiarising yourself with your appliance Residual heat indicator Cook- Size Maximum power The hob has a residual heat indicator for each cooking zone zone. Do not touch the cooking zone if the residual heat indicator is lit. / 18 cm Power level 9 1800 W... - Page 13 You will find a comprehensive range of products for side facing the appliance door and your appliance in our brochures and online: the curved lip facing downwards. www.siemens-home.bsh-group.com Accessories vary from one appliance to another. When Baking tray Slide the tray in with the sloping purchasing accessories, always quote the exact E.g.
- Page 14 en Operating the hotplate Clean the smooth surfaces with soapy water and a Cooking time 1 hour dish cloth. Switch off the appliance after the specified cooking Clean the accessory with soapy water and a dish time. cloth or a soft brush. Wait until the cooking compartment has cooled down.
- Page 15 Time-setting options en Sautéing fresh vegetables and 7 - 8 10 - 20 Frozen products, e.g. chips, 8 - 9 mushrooms chicken nuggets Frozen dishes, e.g. stir-fries 6 - 7 6 - 10 Vegetables, mushrooms, 6 - 7 breaded, beer-battered or tem- Omelette, cooked one after the 3. - 4.
-
Page 16: Basic Settings
en Basic settings 13 Basic settings You can configure the basic settings for your appliance to meet your needs. 13.1 Overview of the basic settings Display Setting Value Childproof lock - Manual. Automatic. ... -
Page 17: Cookware Test
Cookware test en ▶ 13.3 Exiting the basic settings To exit the basic settings and and switch off the hob, touch . 14 Cookware test 14.2 Checking the result The quality of the cookware has a major influence on the speed and the result of the cooking process. In the following table, you can check the result for the You can use this function to test the quality of the cook- quality and speed of the cooking process:... - Page 18 en Time-setting options Use the function selector to set a suitable type of Place the food in the cooking compartment. heating. 17 Time-setting options ▶ Your appliance has different time-setting options which Use the or button to change the timer duration. ensure that operation can be controlled.
-
Page 19: Childproof Lock
Childproof lock en 17.4 Setting the end time When the dish is ready, switch off the appliance. ‒ Changing the end time You can delay the time at which the cooking time is due to end by up to 23 hours and 59 minutes. In order to achieve a good cooking result, you can only Notes change the set end time before operation starts and... -
Page 20: Appliance Door
en Cleaning and servicing Suitable cleaning agents Only use cleaning agents that are suitable for the differ- Follow the instructions on cleaning the appliance. → "Cleaning the appliance", Page 21 ent surfaces on your appliance. Appliance Surface Suitable cleaning agents Information Stainless steel ¡... - Page 21 humidClean cleaning support en Area Suitable cleaning agents Information Rails ¡ Hot soapy water Soak any heavily soiled areas and use a brush or steel wool. Tip: Remove the shelf supports for cleaning. → "Rails", Page 22 Accessories ¡ Hot soapy water Soak any heavily soiled areas and use a brush or steel wool. ¡...
- Page 22 en Rails or to set the duration to four minutes. Requirement: The cooking compartment has cooled down. a After a few seconds, the appliance starts heating and the duration counts down. Open the appliance door and absorb the residual a When the cooking time has counted down, a signal water with an absorbent sponge cloth.
- Page 23 Appliance door en 22 Appliance door It is normally sufficient if you clean the outside of the Open the locking levers on the left- and right-hand appliance door. If the appliance door is very dirty on hinges. the inside and outside, you can remove the appliance door and clean it.
- Page 24 en Appliance door To remove the upper cover of the oven door, press Hold the top pane in both brackets and insert it at in the tabs on the left and right using your fingers. an angle towards the back. Pull out and remove the cover. Push the pane into both openings on the underside.
-
Page 25: Troubleshooting
Troubleshooting en The notch on the hinge must engage on both sides. Close the appliance door. 22.6 Additional door safety Additional safety devices have been fitted to prevent contact with the oven doors. Always attach these safety devices when children could come near the oven. You can purchase this special accessory from after-sales service. - Page 26 en Troubleshooting Fault Cause and troubleshooting The appliance does At the end of a cooking time, the appliance stops heating up. The oven light and cooling fan not switch off fully at do not switch off. For types of heating with air recirculation, the fan continues to run in the the end of a cooking back wall of the cooking compartment.
-
Page 27: Transportation And Disposal
Transportation and disposal en Fault Cause and troubleshooting The operating voltage is incorrect and outside of the normal operating range. / ▶... -
Page 28: Customer Service
en Customer Service 24.2 Transporting the appliance Secure the door and, if available, the top cover to the appliance sides using adhesive tape. Keep the original appliance packaging. Only transport If the original packaging is no longer available the appliance in the original packaging. Observe the transport arrows on the packaging. - Page 29 How it works en In order to prevent damage, wipe away the condensa- 26.4 Notes on baking tion. When baking, use the shelf positions indicated. When you preheat the appliance, you reduce the build- up of condensation. Baking on one level Shelf posi- tion 26.3 Good to know Rising pasta/baked goods or tin on the...
- Page 30 en How it works Topic Topic You do not want small Leave a minimum clear- You want to bake accord- Use similar items in the baked goods to stick to ance of 2 cm around ing to your own recipe. baking tables as a guide. each other when baking.
- Page 31 How it works en Meal Accessory/cookware Shelf posi- Type of Temperature Cooking tion heating in °C time, minutes Yeast cake with moist topping, 2 levels Universal pan 150–170 40–65 Baking tray Plaited loaf, plaited ring Universal pan 160–170 35–40 Swiss roll Universal pan ...
- Page 32 en How it works Meal Accessory/cookware Shelf posi- Type of Temperature Cooking tion heating in °C time, minutes Biscuits, 3 levels 5+3+1 130–150 30–40 Baking tray Universal pan Meringues Universal pan 80-100 100-150 Meringues, 2 levels Universal pan 90-100 100-150 Baking tray...
- Page 33 How it works en 26.6 Bread and bread rolls ATTENTION! When the cooking compartment is hot, any water in- The values for bread dough apply to both dough side it will create steam. The change in temperature placed on a tray and dough placed in a loaf tin. may cause damage.
- Page 34 en How it works Meal Accessory/cookware Shelf posi- Type of Temperature Cooking tion heating in °C time, minutes Pizza, frozen, thin base, x 2 Universal pan 190–210 20–25 Wire rack Pizza, frozen, deep-pan, x 1 Wire rack 180–200 20–25 Pizza, frozen, deep-pan, x 2 Universal pan ...
- Page 35 How it works en Roasting in cookware Tips for poultry, meat and fish If you cook food in cookware, you can remove it from Observe the instructions when preparing poultry, meat the cooking compartment more easily and serve it dir- and fish ectly in the cookware.
- Page 36 en How it works Topic Topic Lean meat must not dry ¡ Coat lean meat with fat Keep the cooking com- ¡ Cook the food in a out. or oil as required or partment as clean as pos- covered roasting dish cover it with strips of sible.
- Page 37 How it works en Food Accessories/cook- Shelf posi- Type of Temperature Cooking ware tion heating in °C/grill time in mins setting Fillet of beef, medium, 1 kg Cookware without lid 210–220 45–55 Pot-roasted beef, 1.5 kg Cookware with lid 200–220 100–120 Sirloin, medium, 1.5 kg...
- Page 38 en How it works 26.10 Vegetables and side dishes This is where you can find information about preparing vegetable products that you can use as a side dish for your meals. Recommended settings Vegetables and side dishes Use the settings listed in the table. Food Accessories/cook- Shelf posi-...
- Page 39 How it works en be preserved. The thinner you cut the slices, the Ensure that neither fruit nor mushrooms overlap on quicker the drying process will be and the more flavour the wire rack. the dried food will retain. Settings ranges are specified Grate vegetables and then blanch them.
- Page 40 en How it works Remove the jars from the cooking compartment ATTENTION! ‒ after the specified residual heating time. If there are large temperature differences, the jars Vegetables may shatter. ▶ Once all of the jars are bubbling, reduce the tem- Do not place jars on cold or wet surfaces.
- Page 41 How it works en Recommended settings Proving dough The temperature and time are dependent on the type and quantity of the ingredients. The values in the table are therefore guide values only. Meal Accessory/cookware Shelf posi- Type of Temperature Cooking time, tion heating in °C...
- Page 42 en How it works If you can use your appliance to cook on multiple levels, position baking tins either next to one another or offset on different shelves so that they are not directly one above the other in the cooking compartment. Recommended settings Baking Meal...
- Page 44 Valid within Great Britain: Imported to Great Britain by BSH Home Appliances Ltd. Grand Union House Old Wolverton Road Wolverton, Milton Keynes MK12 5PT United Kingdom Manufactured by BSH Hausgeräte GmbH under the trademark licence of Siemens AG *9001679276* 9001679276 (020202)
Need help?
Do you have a question about the HL9R30020U and is the answer not in the manual?
Questions and answers