Table of Contents
Advertisement
Miller Industries
Raptor System
Installation / Configuration Manual
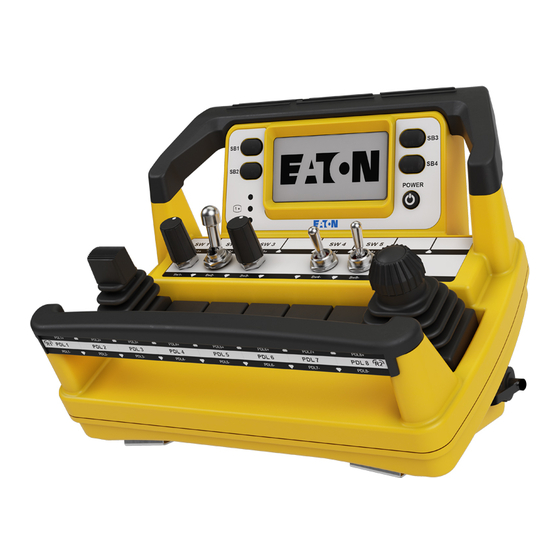
TD3100 Remote Control Unit (RCU)
R260 Base Station
July 23, 2020
DM-R260-0056A
Revision 1
74-1833 Coast Meridian Road, Port Coquitlam, BC, Canada • V3C 6G5
Tel: (604) 944-9247 • Fax: (604) 944-9267
Toll Free 1-800-663-8806
www.eaton.com/wireless
DM-R260-0056A R1
call toll free: 1-800-663-8806
1
Advertisement
Table of Contents

Related Manuals for Eaton TD3100


Summary of Contents for Eaton TD3100
- Page 1 Miller Industries Raptor System Installation / Configuration Manual TD3100 Remote Control Unit (RCU) R260 Base Station July 23, 2020 DM-R260-0056A Revision 1 74-1833 Coast Meridian Road, Port Coquitlam, BC, Canada • V3C 6G5 Tel: (604) 944-9247 • Fax: (604) 944-9267 Toll Free 1-800-663-8806 www.eaton.com/wireless...
- Page 2 DM-R260-0056A R1 call toll free: 1-800-663-8806...
-
Page 3: Table Of Contents
Service Mode: Calibration Mode ..........................21 Service Mode: Run Diagnostics ..........................22 Service Mode: Device Info ............................24 Operations - TD3100 RCU ............................25 Operations - WSO ..............................26 Operations - Charge Cradle ............................27 Diagnostics - R260 Base Station ..........................28 Troubleshooting Guide ............................... -
Page 4: Safety Precautions
Maintenance / Welding DISCONNECT THE BASE STATION BEFORE WELDING on the machine the Base Station is connected to. Failure to disconnect will result in the destruction of the Base Station. www.eaton.com/wireless DM-R260-0056A R1 call toll free: 1-800-663-8806... - Page 5 Many countries prohibit the disposal of waste electronic equipment in standard waste receptacles. Place only discharged batteries in a battery collection container. Use electrical tape or other approved covering over the battery connection points to prevent short circuits. www.eaton.com/wireless DM-R260-0056A R1 call toll free: 1-800-663-8806...
-
Page 6: System Overview
When used with the battery charger or Contactless Charge Cradle, the TD3100 can use and recharge self contained rechargeable pack. Each TD3100 RCU uses a unique ID code to ensure that no two systems will conflict at a job site. -
Page 7: Installation Considerations
Whenever a solenoid or electromagnetic switch is controlled by the Base Station, it is a good practice to install a diode across its terminals to ensure that surges and spikes do not continue back into the circuit. Appropriate 36V Bi-directional Diodes kits can be ordered under the Eaton part number “AKIT-2492-01”. www.eaton.com/wireless... -
Page 8: Powering The Rcu
Replace all batteries as a complete set and do not mix and match battery types. The battery compartments are located on the back of the TD3100. Insert each battery pack tongue first under the retainer at the top of each compart- ... -
Page 9: Testing The Rcu / Base Station Link
If the R260 does not power confirm it was wired correctly. Reference the Wiring Diagram in the section Installing the Base Station. 2. Power TD3100 Press and hold the Power button until the display shows the startup logo then release the ... -
Page 10: Special Functions
The deadband, as configured for the system in general using the LCD screen of the Control Console, may appear excessive for the TD3100 RCU in particular. TD3100 has a built-in deadband which is sufficient for any operation. It is therefore recommended to set the Deadband Offset on the Ad- justment page to a negative number matching the Control Console setting. - Page 11 Immediately upon the E-Stop button activation, regardless of the upcoming RCU shutdown, all current control com- mands coming from the RCU get nullified and the Power Take-off (PTO) turns off. Slow Fast Green Yellow Red & Green Light Legend Solid Flash Flash Solid Solid Solid Alternating www.eaton.com/wireless DM-R260-0056A R1 call toll free: 1-800-663-8806...
-
Page 12: Service Mode
Service Mode Service Mode is available on all TD3100 configurations and allows the operator to adjust the RCU’s characteris- tics. For example, the LCD backlight can be adjusted to operate under various lighting conditions. Once the RCU is put in to service mode a unique display screen is used to view or modify each option. Navigation and option selection/modification is controlled by four buttons as described by the Enter Service Mode and Naviga- tion. -
Page 13: Service Mode: Pairing
1. Prepare the TD3100. 2. Prepare the R260 Base Station. 3. Start Pairing. The following sections describes the three step process to pair the TD3100 with an R260 Base Station. Refer to Trou- bleshooting Chart #4 for Tips and Considerations. NOTE: It is necessary to associate the RCU to Base Station when replacing either the RCU or Base Sta- tion. - Page 14 If the R260 is left in Pairing Mode idle for over 30 seconds, the R260 will time out. The E-Stop light will turn red after Pairing Mode times out. To return to Pairing Mode, repeat step 2.2. Slow Fast Green Yellow Red & Green Light Legend Solid Flash Flash Solid Solid Solid Alternating www.eaton.com/wireless DM-R260-0056A R1 call toll free: 1-800-663-8806...
- Page 15 E-Stop: solid red NOTE: If the pairing fails the TD3100 will display an error screen with the reason for failure. Correct the error, power cycle the RCU and Base Station, and then repeat the pairing process. If repeated attempts at pairing fails, contact your service representative for assistance as there may be a setup or hardware failure.
-
Page 16: Service Mode: Modify Parameters
Service Mode: Modify Parameters Modify Parameters This function allows you to modify the TD3100 operational parameters: Active Backlight Brightness Inactive Backlight Brightness Backlight On Time Auto Backlight Mode Transmitter Timeout Press [ENTER] to adjust these parameters. Press the top left or top right navigation button to move to the next ser- vice option. - Page 17 Consult with the supplier of your equipment if your are unsure of affected safety operation. Failure to follow SAFETY PRECAUTIONS may result in equipment failure and serious personal injury. www.eaton.com/wireless DM-R260-0056A R1 call toll free: 1-800-663-8806...
-
Page 18: Service Mode: Pair Wso
Pairing is a three step process 1. Prepare the TD3100 2. Prepare the WSO accessory 3. Start Pairing The following sections describes the three-step process to pair the WSO to a TD3100. NOTE: Your system may not support the use of WSO accessory. NOTE: It is necessary to pair the WSO to a RCU when replacing either the RCU or WSO. - Page 19 NOTE: If the pairing fails the TD3100 will display an error screen with the reason for failure or the WSO link light with be red. Correct the error, power cycle the RCU and Base Station, and then repeat the pairing process.
-
Page 20: Service Mode: Calibrate Controls
Service Mode: Calibrate Controls Calibrate Controls This service mode allows you to calibrate the different controls (paddles, joy- sticks, pots, etc.) installed on your TD3100. 1. To calibrate the controls navigate to the screen on the right . Press [ENTER] to start ... -
Page 21: Service Mode: Calibration Mode
2. To confirm running calibration mode press [ENTER] again 3. If this device supports calibration mode the TD3100 will power cycle and enter calibration mode. If calibration mode is not defined the TD3100 will loop back to step 1. -
Page 22: Service Mode: Run Diagnostics
Only clean a button or the TD3100 with a soft cloth lightly dampened with water. DO NOT clean a button or the TD3100 with any sharp instruments or objects that can cut or damage the button membrane or housing. DO NOT pour any liquids, use a hose, or pressured water directly on the TD3100. - Page 23 Only clean a button or the TD3100 with a soft cloth lightly dampened with water. DO NOT clean a button or the TD3100 with any sharp instruments or objects that can cut or damage the button membrane or housing. DO NOT pour any liquids, use a hose, or pressured water directly on the TD3100.
-
Page 24: Service Mode: Device Info
This function allows you to retrieve the TD3100 device information. The TD3100 device information is fixed information assigned at the time of the devices manufacturing. The infor- mation is very important for assisting your service representative in identifying your unit and its configuration loadout. -
Page 25: Operations - Td3100 Rcu
Operations - TD3100 RCU Indicators / Items Description Occurs whenever a function is pressed. Will also remain on momentarily on Power Up. RCU is in Operating mode. (Data is sent to and received from R260) Low Battery. (Note: Low batteries will last approximately 1 hour once the Low Battery light begins to flash). -
Page 26: Operations - Wso
Solid bluish white Configuring WSO in self-configuration mode Solid amber Configuration fault WSO self-configuration failed Slow Fast Green Yellow Red & Green Light Legend Solid Flash Flash Solid Solid Solid Alternating www.eaton.com/wireless DM-R260-0056A R1 call toll free: 1-800-663-8806... -
Page 27: Operations - Charge Cradle
Operations - Charge Cradle Items Description The cradle will start charging the TD3100 RCU when the vehicle battery voltage is above 12.25V with the RCU inserted. During charging, if the vehicle battery voltage drops below 12.0V, the charging will be suspended. -
Page 28: Diagnostics - R260 Base Station
Cycle power on the Base Station. Refer to Troubleshooting Chart STATUS I/O E-STOP CAN1 CAN2 Internal fault or PLC program is #1 for solutions. If the problem persists than contact Eaton Wireless not loaded or stopped. Business Unit service providing part and serial number. -
Page 29: Troubleshooting Guide
Press each of the function buttons and observe the I/O Light. turns GREEN, everything is OK. turns RED, there is a short in that connection. Radio Fault: E-Stop – Flashing Call for service. Unknown Fault: Call for service. www.eaton.com/wireless DM-R260-0056A R1 call toll free: 1-800-663-8806... - Page 30 Troubleshooting Guide (continued) Chart #2 Test the RCU TD3100 1. Turn off the Base Station 2. Ensure RCU batteries are good/charged 3. Turn on the RCU Go to “Service Mode: display and indica- Run Diagnostics” to test tors ON? the buttons Complete in order the following steps: 1.
- Page 31 Turn on the RCU to check if the units func- Was it found? tion correctly. If not, proceed to Chart 1 The RCU code may need to be paired to the Base Station again www.eaton.com/wireless DM-R260-0056A R1 call toll free: 1-800-663-8806...
- Page 32 3. Follow each step as laid out in the procedure. 4. Never lay the Base Station circuit board down on anything metallic (there are contact points on the back which could contact the metal and damage the Base Station). www.eaton.com/wireless DM-R260-0056A R1 call toll free: 1-800-663-8806...
- Page 33 Supply power to the Base Station. The Base Station is ready when the Base Station lights Status: solid green E-Stop: solid red Slow Fast Green Yellow Red & Green Light Legend Solid Flash Flash Solid Solid Solid Alternating www.eaton.com/wireless DM-R260-0056A R1 call toll free: 1-800-663-8806...
- Page 34 Failure to secure the cover may void warranty, result in radio equipment failure and serious per- sonal injury. Slow Fast Green Yellow Red & Green Light Legend Solid Flash Flash Solid Solid Solid Alternating www.eaton.com/wireless DM-R260-0056A R1 call toll free: 1-800-663-8806...
- Page 35 Notes www.eaton.com/wireless DM-R260-0056A R1 call toll free: 1-800-663-8806...
-
Page 36: Parts & Accessories
TO UNAUTHORIZED REPAIR OR MODIFICATION) and labor from the date of Solutions (1) This device may not cause delivery as evidenced by a copy of the receipt. EATON entire liability and your harmful interference, and exclusive remedy shall be, at EATON's option, either the (a) repair or (b) re-...
Need help?
Do you have a question about the TD3100 and is the answer not in the manual?
Questions and answers