Table of Contents
Advertisement
Quick Links
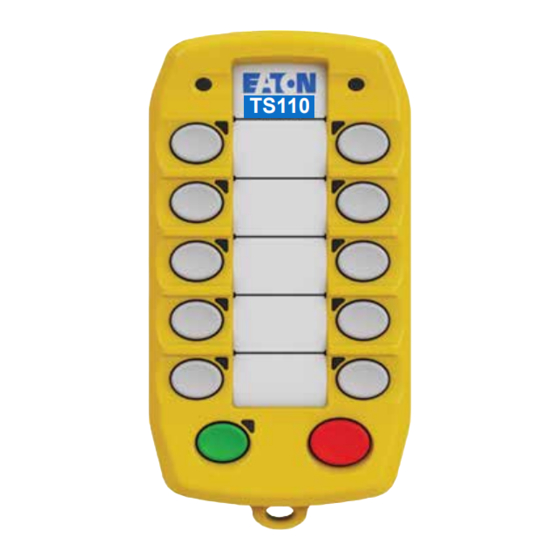
TS110 One-Way
Remote Control Unit (RCU)
Product Guide
November 23, 2021
DMAN-4096-01
Revision 1
EATON
DBA Cooper Industries (Electrical) Inc.
74-1833 Coast Meridian Road, Port Coquitlam, BC, Canada • V3C 6G5
Tel: (604) 944-9247 • Fax: (604) 944-9267
www.eaton.com/wireless
DMAN-4096-01 R1
call toll free: 1-800-663-8806
1
Advertisement
Table of Contents

Related Manuals for Eaton TS110


Summary of Contents for Eaton TS110
- Page 1 TS110 One-Way Remote Control Unit (RCU) Product Guide November 23, 2021 DMAN-4096-01 Revision 1 EATON DBA Cooper Industries (Electrical) Inc. 74-1833 Coast Meridian Road, Port Coquitlam, BC, Canada • V3C 6G5 Tel: (604) 944-9247 • Fax: (604) 944-9267 www.eaton.com/wireless DMAN-4096-01 R1...
- Page 2 DMAN-4096-01 R1 call toll free: 1-800-663-8806...
- Page 3 License. Subject to the terms and conditions of this Agreement, Eaton grants to you a limited, non-transferable, non-sublicensable, non-assignable, non-exclusive and revocable license to access and use the Product Software in conjunction with the operation of Eaton products to which the Product Software pertains or other products as described by Eaton in any user guides and manuals for access to and use of the Product Software (“Documentation”) solely for your own use and only in a manner that is consistent with the terms of this Agreement (“License”).
- Page 4 Product Software in violation of this Agreement; (c) violation or non-compliance with any applicable law, rule, guidelines, acts, decrees, orders or regulations; (d) use, alteration or export of the Product Software (or any component thereof) in violation of this Agreement; and (e) the use of the Product Software by you or any person using your account. Eaton and its affiliates reserve the right to assume the exclusive defense and control of any claims or actions subject to indemnification by you and all negotiations for its settlement or compromise, and you agree to fully cooperate with Eaton and its affiliates upon request by Eaton.
-
Page 5: Table Of Contents
Service Mode: Modify RCU Timeout .......................... 16 Service Mode: Run Diagnostics ..........................17 Service Mode: Software Build Version ........................18 Service Mode: Field Configuration ..........................19 Operations - TS110 RCU ............................22 Operations - Charge Cradle ............................23 Troubleshooting Guide ............................... 24 Notes ..................................27 Parts &... -
Page 6: Safety Precautions
Only use a soft cloth moistened with water when cleaning a button or the TS110. DO NOT clean the TS110 or its buttons using any implement or object that is capable of cutting or damaging the button membrane or housing. DO NOT pour any liquids directly on the TS110. - Page 7 Contact the Rechargeable Battery Recycling Corporation (www.rbrc.org) for U.S.A. and Canada, or your local battery recycling organization. Many countries prohibit the disposal of waste electronic equipment in standard waste receptacles. www.eaton.com/wireless DMAN-4096-01 R1 call toll free: 1-800-663-8806...
-
Page 8: Product Security
When not in use, store the RCU in such a way as to limit access. All system operators should be made aware that individuals with questionable intentions do exist, and to always check their system prior to operation. www.eaton.com/wireless DMAN-4096-01 R1 call toll free: 1-800-663-8806... -
Page 9: System Overview
FHSS signals to overcome interference that commonly affects licensed radios. The 12 button TS110 provides the user flexibility to control the functions they need, and is available in both the 900MHz and 2.4GHz frequency bands. The RCU has a built in Lithium battery pack which is recharged using the uniquely de- signed contactless charger. -
Page 10: Power The Rcu
Before using an RCU, make sure that it has been fully charged NOTE: The batteries can only be charged if the TS110 is between 0°C and 45°C. The unit will operate below 0°C but battery capacity is reduced at low temperatures. Exposing TS110 to tempera- tures below -20°C or above 55°C could permanently damage... -
Page 11: Test The Rcu / Base Station Link
If the Base Station does not power up, confirm that it has been wired correctly. Refer to the Wiring Diagram in the Installing the Base Sta- tion section of the appropriate Base Station product manual. 2. Power TS110 Press Power ON button and the COMM LED ... -
Page 12: Service Mode
Service Mode Service Mode is available on the TS110 one-way RCU and allows the operator to pair to a Base Station, adjust the RCU’s timeout, run diagnostics, and optionally configure the Base Station outputs in the field. Once the RCU has entered into Service Mode, navigation and option selection/modification is controlled by four buttons as described by the Enter Service Mode and Navigation sections below. -
Page 13: Service Mode: Pairing
It is necessary to associate the RCU to Base Station when replacing either the RCU or Base Sta- tion. 1. Prepare the TS110 Make sure TS110 is in Service Mode. Do not yet press the Power ON [GREEN] button. 2. Prepare the Base Station There are two methods to prepare the Base Station A. - Page 14 Service Mode: Pairing (continued) 2.2. Initiate Base Station Setup Mode A. Maneuver the rear of the TS110 so that its magnet is placed over the top left corner of the Base Station. B. Adjust the TS110 position until the Base Station E-Stop light slowly flashes GREEN.
-
Page 15: Service Mode: Start Pairing
NOTE: If the pairing fails, the TS110 STATUS LED will turn ON RED. Correct any errors, cycle power to both the RCU and Base Station, then repeat the pairing process. If repeated attempts at pairing fails, contact your service representative for assistance as there may be a setup or hardware failure. -
Page 16: Service Mode: Modify Rcu Timeout
Failure to follow SAFETY PRECAUTIONS may result in equipment failure and/or serious personal injury. Slow Fast Green Yellow Red & Green Light Legend Solid Flash Flash Solid Solid Solid Alternating www.eaton.com/wireless DMAN-4096-01 R1 call toll free: 1-800-663-8806... -
Page 17: Service Mode: Run Diagnostics
Service Mode: Run Diagnostics Test Buttons and Vibrator 1. On the TS110 press top right Button to enter Diagnostic mode . 2. STATUS LED will blink RED and GREEN . All LEDs will turn on RED. -
Page 18: Service Mode: Software Build Version
Service Mode: Software Build Version RCU Software Build Version On the TS110, press the second left Button from the top to display the software build version. The RCU LEDs on the 10 user buttons will flash the RED software build version until the Power OFF [RED] button pressed. -
Page 19: Service Mode: Field Configuration
Button pairs on the same row may also be interlocked, preventing the two functions from activating at the same time. The 18-digit Configuration Code contains all the information necessary to customize the TS110 / R160 system. Each digit, indicated by a number or letter, represents a specific functional option available for each Base Station output. - Page 20 LEDs of the 10 user buttons. NOTE: While waiting for the user to enter the Configuration Code, the TS110 will use the red LEDs of the ten user buttons to blink out the currently programmed sequence.
- Page 21 GREEN to RED. NOTE: After the full Configuration Code sequence has been entered, the TS110 will blink out what was entered for con- firmation. If there was a mistake, the Configuration Code may be re-entered. The code will only be accepted if the full sequence has been entered and the green button is pressed.
-
Page 22: Operations - Ts110 Rcu
Operations - TS110 RCU Indicators / Items Description On Power up until Base Station is available and for a second whenever a function button is pressed. RCU is in Operating mode. (Data is being sent to the Base Station) Low Battery while RCU in operational mode (Note: Low batteries will last approximately 1 hour once the Low Battery light begins to flash). -
Page 23: Operations - Charge Cradle
Operations - Charge Cradle Items Description The cradle will start charging the TS110 RCU when the vehicle battery voltage is above 12V with the RCU inserted. During charging, if the vehicle battery voltage drops below 11.5V, the charging will be Charging suspended. -
Page 24: Troubleshooting Guide
Troubleshooting Guide Chart #1 Test the RCU—TS110 1. Turn off the Base Station 2. Ensure RCU batteries are good/charged 3. Turn on the RCU Go to “Service Mode: Run Diagnostics” to test indicators ON? the buttons Complete in order the following steps: 1. - Page 25 Turn on the RCU to en- sure the unit functions Was it found? correctly. If not, proceed to Chart 1 The RCU may need to be paired to the Base Sta- tion again www.eaton.com/wireless DMAN-4096-01 R1 call toll free: 1-800-663-8806...
- Page 26 1. Be patient and deliberate when pressing the Power and E-Stop buttons in the correct order during power up in Con- figuration mode 2. Follow each step as laid out in the procedure www.eaton.com/wireless DMAN-4096-01 R1 call toll free: 1-800-663-8806...
-
Page 27: Notes
Notes: www.eaton.com/wireless DMAN-4096-01 R1 call toll free: 1-800-663-8806... -
Page 28: Parts & Accessories
EATON entire liability and your exclusive remedy V3C 6G5 Industry Canada Notifications shall be, at EATON's option, either the (a) repair or This device complies with Industry Canada’s license-exempt (b) replacement of the EATON Wireless product Tel: 604-944-9247 RSSs.
Need help?
Do you have a question about the TS110 and is the answer not in the manual?
Questions and answers