Advertisement
Quick Links
SERVICE MANUAL
HARDWARE
Pads
Pads
Pads
Pads
iPad compatibility
iPad compatibility
iPad compatibility
iPad compatibility
Power
Power
Power
Power
Connections
Connections
Connections
Connections
Dimensions(H x W x D)
Dimensions
(H x W x D)
Dimensions
Dimensions
(H x W x D)
(H x W x D)
(closed, excluding cables)
Weight
Weight
Weight
Weight
(excluding cables and iPad)
SPECIFICATIONS
16 velocity-sensitive with aftertouch, backlit by
velocity
iPad 2
iPad (3rd generation)
Rechargeable internal lithium-ion battery
6V DC, 3A, center pin positive
Attached dock connector cable
Power adapter input (5.5 mm)
1.2" x 10.75" x 8.1"
31 mm x 273 mm x 206 mm
2.69 lbs.
1.2 kg
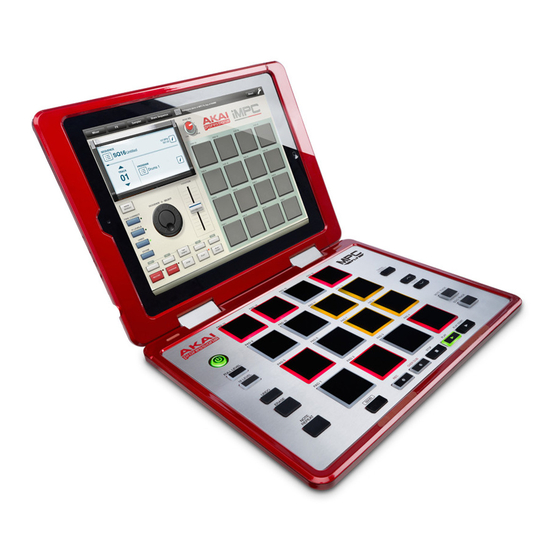
MODEL: MPC FLY 30
Advertisement

Related Manuals for Akai MPC FLY 30


Summary of Contents for Akai MPC FLY 30
- Page 1 SERVICE MANUAL MODEL: MPC FLY 30 SPECIFICATIONS HARDWARE 16 velocity-sensitive with aftertouch, backlit by Pads Pads Pads Pads velocity iPad 2 iPad compatibility iPad compatibility iPad compatibility iPad compatibility iPad (3rd generation) Rechargeable internal lithium-ion battery Power Power Power Power...
-
Page 2: Disassembly Procedures
DISASSEMBLY PROCEDURES DISASSEMBLE THE MAIN PCB ASS’Y. (A) REMOVE THE NAME PLATE. (B) REMOVE 10 SCREWS FROM THE TOP HOUSING. (C) REMOVE THE TOP HOUSING. (D) REMOVE THE RUBBER PAD. (E) REMOVE THE FSR. (Fig1) - Page 3 DISASSEMBLE THE HINGE BLOCK ASS’Y. (A) REMOVE THE IPAD COVER. (B) REMOVE THE IPAD HOLDER CAP. (C) REMOVE 3 SCREWS FROM THE FIXED PLATE. (D) REMOVE 4 SCREWS FROM THE HINGE BLOCK. (E) REMOVE 3 SCREWS FROM THE FIXED PLATE. (F) REMOVE 4 SCREWS FROM THE HINGE BLOCK.
-
Page 4: Wiring Diagram
WIRING DIAGRAM (US/EU/UK/JIS/AUS NZ) -
Page 5: Packing Diagram
PACKING DIAGRAM (US/EU/UK/JIS/AUS NZ) -
Page 6: Explode Diagram
EXPLODE DIAGRAM (US/EU/UK/JIS/AUS NZ) EQUENCIAL NO EXPLODE DIAGRAM WILL BE MARKED ON REF.COLUMM OF BOM LIST... - Page 7 ACV2AKA21 DESCRIPTION LEVEL ACV2AKA21 ACV2 AC100~240V 50/60Hz USA AL9-79-065801 Main PCB Assembly AL0-17-0103 RES Array 4X10K 1/10W 0603 R92,111 AL0-17-0332 RES ARRAY 4X330 10 R7,8,11,12,18,19,31,37,91,308 AL2-49-0070 Diode BAV70 D354~361 AL2-51-0140 Schottky Barrier Rectifiers Diode D16,29 B140-13-F SMA AL2-51-4401 Transistor 2N4401 NPN SOT-23 (Transistor 46 Q1~14,23~26,42,43,48,49,54~70,87~89 MMBT4401LT1 NPN SOT-23) Q124,125,128,129...
- Page 8 angle 120° LDKPT-1608SURCK Liquid-emitting Diode Red SMD 0603 D1,5,6,282,307,309 angle 120° RS000004J06 RES 0 5% SMD 1206 RS000008J05 RES 0 5% SMD 0805 R17,118,178 RS000010J03 RES 0 5% SMD 0603 R379,380 RS000108J05 RES 1.0 5% SMD 0805 R150 RS001K08F05 RES 1K 1% SMD 0805 R20,99,131~133 RS001K10F03 RES 1K 1% SMD 0603...
- Page 9 BA-HINGE03 Hinge EVA1504432 EVA For Weight LAC53ALE112 Safety Label LAC62AKA196 Bar Code Label(Code 39) 0.25 LAC67MAR681 Label(Circle Limpid) LAC67YAH261 Label φ8mm Green 0.25 LAP67YAH255 Sticker φ10mm red MAG1110003 Magnet MT150280601 Name Plate MT150433301 Hinge Block MT150433401 Hinge Block Top Cover MT1504444 Fixed Plate MT1504445...
- Page 10 SPSAHKSC-120890 Switch Adaptor 6V/3A UL/JIS TP02025025T Adhesive TP02070210T Adhesive TWCA300102301 iPAD Cable Assembly JK512S0017 Ipod Connector TWPT15301330102 IPAD Holder (Pearl Red) TWPT153013301 Ipad Holder(ultra sonic) PT1504433 IPAD Holder Cover PT1530133 IPAD Holder MT1512209 SHIELD...
- Page 11 ACV2 - OTS Test Procedure Rev C - 9/24/2012 1. Connect an iPad 3 into the ACV2 OTS Unit 2. Connect a Power supply to the unit 3. Press the Power Button. a. Verify the charging on the iPad b.
- Page 12 Track Down CH1: D#0 Track Up CH1: D0 Timing Correct CH1: C#3 18. Press and hold each pad. a. Verify the values for note on, PolyPress and note off match the chart below. b. Verify LEDS turn amber for each pad. c.
- Page 13 Solo Track LED is Red Play LED is Green 23. Clear this window and enter the following value. It is recommended that you use the save function and later use the open function to recall this value: B0 27 00 B0 28 00 B0 32 00 B0 33 00 B0 43 00 B0 49 00 B0 50 00 a.
- Page 14 DATA0[0..7] DATA0[0..7] DATA0[0..7] DATA0[0..7]...
- Page 15 DATA0[0..7] 100pF C114 100pF C176 100pF C175 100pF 100pF R92D R92C R92B R92A R111D R111C R111B R111A DATA0[0..7]...
Need help?
Do you have a question about the MPC FLY 30 and is the answer not in the manual?
Questions and answers