Table of Contents
Advertisement
Advertisement
Table of Contents

Related Manuals for Akai MPK mini plus


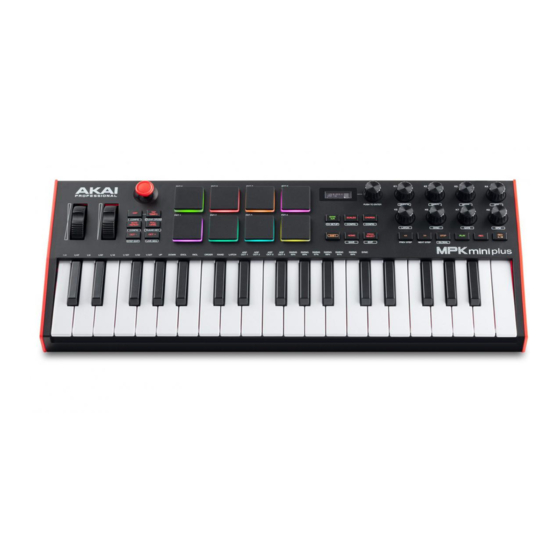
Summary of Contents for Akai MPK mini plus
- Page 1 User Guide English ( 3 – 26 ) Appendix English ( 27 )
-
Page 2: Table Of Contents
Connection Diagram....................3 Setting up MPK mini Plus with Software ............... 4 Setting up MPK mini Plus with MPC Beats ............... 4 Setting up MPK mini Plus with Garage Band ..............4 Setting up MPK mini Plus with Other Software ..............4 Features ...................... -
Page 3: Introduction
Introduction Thank you for purchasing the MPK mini Plus. At Akai Professional, we know how serious music is to you. That’s why we design our equipment with only one thing in mind—to make your performance the best it can be. This User Guide will take you through all the details of setting up and operating your MPK mini Plus and includes instructions for installing and operating the Program Editor software. -
Page 4: Setting Up Mpk Mini Plus With Software
To use your MPK mini Plus with a software program, you must connect the unit to your computer using a standard USB cable first. Note: If you are connecting MPK mini Plus to a USB hub, make sure it is a powered hub. Setting up MPK mini Plus with MPC Beats Open MPC Beats. -
Page 5: Features
The pads are velocity-sensitive, which makes them very responsive and intuitive to play. MPK mini Plus has two banks for samples that can be accessed using the Bank A/B button. Access one of the eight Programs by pressing and holding the Prog Select button and tapping a drum pad. - Page 6 (1–8). A program is a group of settings stored as a file on your MPK mini Plus. Programs can be created and then sent to MPK mini Plus with the downloadable MPK mini Plus Program Editor. Press and hold Shift and press this button to open the Edit menu.
-
Page 7: Rear Panel
CV/Gate Out (1/8" / 3.5 mm, TS): MPK mini Plus will send control voltage (CV) and/or Gate signals over these outputs to optional external synths or sequencers. Use standard 1/8”... -
Page 8: Operation
Operation CV Setup The CV Setup menu is used to adjust the parameters for the CV/Gate outputs and Clock Input/Output. To enter the CV Setup menu, press and hold Shift and press Bank A/B. Then, use the Encoder to Control select and adjust the parameters below. -
Page 9: Scales Configuration
Scales Configuration In Scales mode, you can set the keybed to play only in a certain scale. Press the Scales and Shift buttons simultaneously to open the Scales mode configuration menu and use the Encoder to edit the parameters listed in the table below. These settings can also be adjusted using the Key Scale section of the Program Editor. - Page 10 Name Notes Dor (Dorian) 7-tone scale; Intervals: Whole, Half, Whole, Whole, Whole, Half, Whole Example: D, E, F, G, A, B, C Phryg (Phrygian) 7-tone scale; Intervals: Half, Whole, Whole, Whole, Half, Whole, Whole Example: E,F,G,A,B,C,D Lydia (Lydian) 7-tone scale; Intervals: Whole, Whole, Whole, Half, Whole, Whole, Half Example: F, G, A, B, C, D, E Mixo (Mixolydian)
-
Page 11: Chords Configuration
Global Parameters Certain editable parameters on the MPK mini Plus affect the entire device, known as Global parameters. Press the Stop and Shift buttons simultaneously to bring up the Global menu and use the Encoder knob to select and edit the parameters listed below. These settings can also... -
Page 12: Editing A Program
Editing a Program Press the Shift and Prog Select buttons to open the editing menu. The display will show all editable parameters. Then, use the Encoder to select and adjust the following parameters. These settings can also be adjusted using the Joystick, Pads, and Knobs sections in the Program Editor. -
Page 13: Using The Arpeggiator
Using the Arpeggiator Press the Arp button to engage the Arpeggiator. The notes you play in this mode will be arpeggiated based on several parameters. Hold down the Arp button and press the corresponding key or use the Knobs to edit the following parameters. These settings can also be adjusted using the Arpeggiator section of the Program Editor. -
Page 14: Using The Step Editor
Parameter Value Range Notes Gate 10%-99% Sets the note length for the arpeggiator, expressed as a percentage of the set note division. 30-240 Sets the tempo for the arpeggiator. Can also be set with the Tap Tempo button. Note: The Arpeggiator and Sequencers cannot be used at the same time when the unit is in the Step Edit or Live Sequence modes. -
Page 15: Using The Live Sequencer
Press the Seq Play / Stop button to play a sequence, and again to stop playback. Use the [<<] and [>>] buttons or the Encoder knob to navigate the steps of a sequence. You can also edit sequence parameters at any time by pressing Shift and using the Knobs. Parameter Value Range Notes... - Page 16 To clear all events from a sequence, press and hold Shift and then press Tap Tempo to clear all drum events from the sequence; press and hold Shift and then press Full Level to clear all keyboard events from the sequence. Press the Seq Play / Stop button to play a sequence, and again to stop playback.
-
Page 17: Keybed Functions
Keybed Functions Label Function Sets Arp / Sequencer Division. 1/4T 1/8T 1/16 1/16T 1/32 1/32T Sets Arp Type to the label value. DOWN EXCL INCL ORDER RAND LATCH Turns latch on or off. ARP OCT 1 Sets the Arp Octave Value. ARP OCT 2 ARP OCT 3 ARP OCT 4... -
Page 18: Using The Program Editor
Optional: Connect the unit to your computer using a standard USB cable (If you are connecting it to a USB hub, make sure it is a powered hub). You can still use the Editor and create presets without connecting an MPK mini Plus, but you will not be able to send/load presets to/from it. -
Page 19: Graphical Interface
16 pads are pictured in the Editor: 8 of them correspond to the pads on the MPK mini Plus when Bank A is active, and the other 8 correspond to the pads on the device when Bank B is active. Click the Colors tab to select each pad’s on/off colors. See Editing a Pad to learn more. -
Page 20: Editing A Pad
10. Scale Mode: Click this button to enable scale mode. Use the drop-down menu to select the Key, Scale type, and whether non-scale notes will be silenced or transposed to the nearest scale note. See Editing the Keybed to learn more. 11. -
Page 21: Control Voltage
Setup. Editing a Knob You can edit settings for each of the 8 Knobs on MPK mini Plus, including CC message, minimum value, and maximum value. You can also set the channel through which all the knobs send MIDI data. -
Page 22: Editing The X-Y Controller (Joystick)
To select the MIDI channel for all the knobs, click the text field next to Keybed & Controls under MIDI Channel at the top left corner of the window. Then select the desired MIDI channel number (1 – 16) from the drop-down menu. This will affect the X-Y Controller and keyboard as well as the knobs. Editing the X-Y Controller (Joystick) You can designate the function for each axis of the X-Y Controller (joystick), allowing you to use it to manipulate up to four different parameters simultaneously. -
Page 23: Editing The Arpeggiator
To set the keybed scale, click the button next to Scale Mode to turn this function on. Click the field next to Key and use the drop-down menu to select a key for the scale. Click the field next to Scale to choose the scale you wish the keybed to play and click the field next to Non-S Note to choose whether non-scale notes will be silenced (Ignored) or Transposed. -
Page 24: Editing The Keybed Curve
To set the arpeggiator note length, click the field next to Gate and type in the desired percentage from 10% - 99% To set the clock destination of MPK mini Plus, click on the field next to Clock and select either Internal, External, or CV Trig from the drop-down menu. When set to Internal, the arpeggiator will run off the unit’s internal clock. -
Page 25: Editing The Sequencers
You can edit and program Key and Drum sequences entirely within the Editor software or by using a connected MPK mini Plus with the Editor. Click the Sequencer tab to the right of the Controls tab to open the sequencer editor page. -
Page 26: Saving Programs
Save. The favorite will be saved as an .mpkminiplus file. After saving a program on your computer, you can send it to your MPK mini Plus or edit it again later. All settings that you see in the Editor software will be saved in the program. -
Page 27: Appendix
Specifications are subject to change without notice. Trademarks & Licenses Akai Professional is a trademark of inMusic Brands, Inc., registered in the U.S. and other countries. macOS is a trademark of Apple Inc., registered in the U.S. and other countries. Windows is a reg.istered trademark of Microsoft Corporation in the United States and other countries. - Page 28 Manual Version 1.2...
Need help?
Do you have a question about the MPK mini plus and is the answer not in the manual?
Questions and answers