
Related Manuals for Axis C1210-E


Summary of Contents for Axis C1210-E
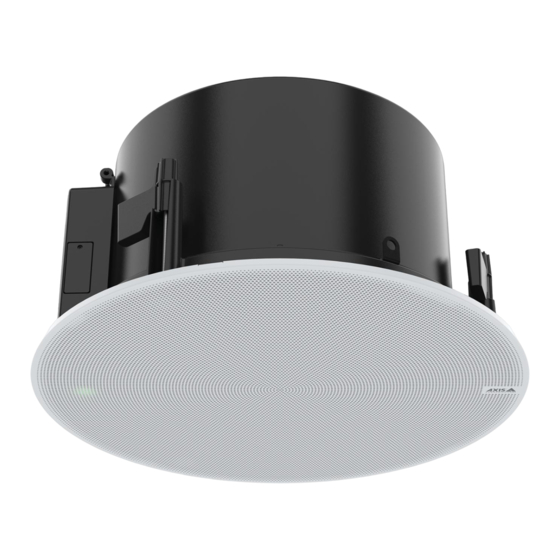
- Page 1 AXIS C12 Series AXIS C1210-E Network Ceiling Speaker AXIS C1211-E Network Ceiling Speaker User Manual...
-
Page 2: Table Of Contents
AXIS C12 Series Table of Contents Solution overview ......... . . -
Page 3: Solution Overview
• AXIS Audio Manager Edge — Audio management software for small systems. Comes pre-installed on all audio devices with a firmware equal to or higher than 10.0. AXIS Audio Manager Edge user manual •... -
Page 4: Installation
AXIS C12 Series Installation Installation To watch this video, go to the web version of this document. www.axis.com/products/online-manual/70655#t10181291 Download the installation guide (pdf): • AXIS C1210-E Network Ceiling Speaker axis.com/products/axis-c1210-e/support#support-resources • AXIS C1211-E Network Ceiling Speaker axis.com/products/axis-c1211-e/support#support-resources... -
Page 5: Get Started
Get started Find the device on the network To find Axis devices on the network and assign them IP addresses in Windows®, use AXIS IP Utility or AXIS Device Manager. Both applications are free and can be downloaded from axis.com/support. - Page 6 Secure passwords Important Axis devices send the initially set password in clear text over the network. To protect your device after the first login, set up a secure and encrypted HTTPS connection and then change the password. The device password is the primary protection for your data and services. Axis devices do not impose a password policy as they may be used in various types of installations.
-
Page 7: Additional Settings
1. Go to the device interface > Audio > Speaker test. 2. To calibrate the audio device, click Calibrate. Note Once the Axis product is calibrated, the speaker test can be run at any time. 3. To run the speaker test, click Run the test. Note It is also possible to run the calibration by pressing the control button on the physical device. -
Page 8: Set Up Sip Through A Server (Pbx)
AXIS C12 Series Additional settings 6. Under Audio, select at least one audio codec with the desired audio quality for SIP calls. Drag-and-drop to change the priority. 7. Under Additional, select additional options. UDP-to-TCP switching – Select to allow calls to switch transport protocols from UDP (User Datagram Protocol) to TCP (Transmission Control Protocol) temporarily. - Page 9 AXIS C12 Series Additional settings To learn more, check out our guide Get started with rules for events. Send an email if a speaker test fails In this example the audio device is configured to send an email to a defined recipient when a speaker test fails. The speaker test is configured to be performed 18:00 every day.
- Page 10 13. Under Action, select Stop playing audio clip. 14. Click Save. Play audio when a camera detects motion This example explains how to set up the audio device to play an audio clip when an Axis network camera detects motion. Prerequisites •...
- Page 11 2.10 From the Condition list, select a video motion detection alternative under Applications. Note If there are no options for video motion detection, then go to Apps, click AXIS Video Motion Detection and turn on motion detection. 2.11 From the Action list, select Send notification through HTTP.
-
Page 12: Learn More
The Session Initiation Protocol (SIP) is used to set up, maintain and terminate VoIP calls. You can make calls between two or more parties, called SIP user agents. To make a SIP call you can use, for example, SIP phones, softphones or SIP-enabled Axis devices. -
Page 13: Nat Traversal
NAT traversal Use NAT (Network Address Translation) traversal when the Axis device is located on an private network (LAN) and you want to access it from outside of that network. Note The router must support NAT traversal and UPnP®. -
Page 14: The Device Interface
AXIS C12 Series The device interface The device interface To reach the device interface, enter the device’s IP address in a web browser. Note Support for the features and settings described in this section varies between devices. Show or hide the main menu. -
Page 15: Audio
Locate device: Click to play a sound that helps you identify the speaker. For some products, a LED will flash on the device. Calibrate : Click to calibrate the speaker. Launch AXIS Audio Manager Edge: Click to launch the application. Device settings Input: Turn on or off audio input. Shows the type of input. - Page 16 Click to show the storage that is configured for the device. To configure the storage you need to be logged in as an administrator. Audio site security CA certificate: Select the certificate to use when you add devices to the audio site when TLS authentication is enabled in AXIS Audio Manager Edge. Save: Click to activate and save your selection.
-
Page 17: Recordings
• Activate license with a key: If the app requires a license, you need to activate it. Use this option if your device doesn’t have internet access. If you don’t have a license key, go to axis.com/applications. You need a license code and the Axis product serial number to generate a license key. -
Page 18: System
AXIS C12 Series The device interface • Deactivate the license: Deactivate the license to use it in another device. If you deactivate the license, you also remove it from the device. To deactivate the license requires internet access. • Settings : Configure the parameters. - Page 19 AXIS C12 Series The device interface Assign IPv6 automatically: Select to turn on IPv6 and to let the network router assign an IP address to the device automatically. Hostname Assign hostname automatically: Select to let the network router assign a hostname to the device automatically.
- Page 20 Authentication failed: Sends a trap message when an authentication attempt fails. Note All Axis Video MIB traps are enabled when you turn on SNMP v1 and v2c traps. For more information, see AXIS OS Portal > SNMP. • v3: SNMP v3 is a more secure version, which provides encryption and secure passwords. To use SNMP v3, we recommend you to activate HTTPS, as the password is then sent through HTTPS.
- Page 21 AXIS C12 Series The device interface Password for the account “initial”: Enter the SNMP password for the account named “initial”. Although the password can be sent without activating HTTPS, we don’t recommend it. The SNMP v3 password can only be set once, and preferably only when HTTPS is enabled. Once the password is set, the password field is no longer displayed.
- Page 22 To install test firmware or other custom firmware from Axis on the device, you need a custom-signed firmware certificate. The certificate verifies that the firmware is approved by both the device owner and Axis. The firmware can only run on a specific device which is identified by its unique serial number and chip ID.
- Page 23 AXIS C12 Series The device interface Users Add user: Click to add a new user. You can add up to 100 users. Username: Enter a unique username. New password: Enter a password for the user. Passwords must be 1 to 64 characters long. Only ASCII printable characters (code 32 to 126) are allowed in the password, for example letters, numbers, punctuation, and some symbols.
- Page 24 AXIS C12 Series The device interface Add a condition: Click to add an additional condition. Action: Select an action from the list and enter its required information. For information about specific actions, see Get started with rules for events. Your product may have some of the following pre-configured rules: Front-facing LED Activation: LiveStream: When the microphone is turned on and a live stream is received, then the front-facing LED on the audio device will turn green.
- Page 25 RSA is the preferred method during negotiation, followed by ECDSA, ED25519, and DSA. Make sure to enter the right MD5 host key that is used by your SFTP server. While the Axis device supports both MD5 and SHA-256 hash keys, we recommend using SHA-256 due to stronger security over MD5. For more information on how to configure an SFTP server with an Axis device, go to the AXIS OS Portal.
- Page 26 IoT integration and is used in a wide variety of industries to connect remote devices with a small code footprint and minimal network bandwidth. The MQTT client in Axis device firmware can simplify integration of data and events produced in the device to systems which are not video management systems (VMS).
- Page 27 AXIS C12 Series The device interface Connect: Turn on or off the MQTT client. Status: Shows the current status of the MQTT client. Broker Host: Enter the hostname or IP address of the MQTT server. Protocol: Select which protocol to use.
- Page 28 AXIS C12 Series The device interface QoS: Change the QoS layer for the packet flow. MQTT publication Use default topic prefix: Select to use the default topic prefix, that is defined in the device topic prefix in the MQTT client tab.
- Page 29 AXIS C12 Series The device interface • TLS port: The network port used for encrypted SIP communication. The signaling traffic through this port is encrypted with Transport Layer Security (TLS). The default port number is 5061. Enter a different port number if required.
- Page 30 AXIS C12 Series The device interface • Name: Enter a descriptive name. This can, for example, be a first and last name, a role, or a location. The name is not unique. • User ID: Enter the unique extension or phone number assigned to the device.
- Page 31 DNS. Windows SMB/CIFS names are not supported. • Network share: Enter the name of the shared location on the host server. Several Axis devices can use the same network share, since each device gets its own folder.
- Page 32 Delete user: Delete the user. You can’t delete the root user. By creating an ONVIF user, you automatically enable ONVIF communication. Use the username and password for all ONVIF communication with the device. For more information see the Axis Developer Community at axis.com. ONVIF media profiles An ONVIF media profile consists of a set of configurations that you can use to change media stream settings.
- Page 33 AXIS C12 Series The device interface Detectors Audio detection These settings are available for each audio input. Sound level: Adjust the sound level to a value from 0–100, where 0 is the most sensitive and 100 the least sensitive. Use the activity indicator as a guide when you set the sound level.
- Page 34 Severity: Select which messages to send when triggered. CA certificate set: See the current settings or add a certificate. Plain config Plain config is for advanced users with experience of Axis device configuration. Most parameters can be set and edited from this page.
-
Page 35: Maintenance
Note All Axis device firmware is digitally signed to ensure that you only install verified firmware on your device. This further increases the overall minimum cybersecurity level of Axis devices. For more information, see the white paper “Signed firmware, secure boot, and security of private keys” at axis.com. -
Page 36: Troubleshooting
Always read the upgrade instructions and release notes available with each new release before you upgrade the firmware. To find the latest firmware and the release notes, go to axis.com/support/firmware. 1. Download the firmware file to your computer, available free of charge at axis.com/support/firmware. 2. Log in to the device as an administrator. -
Page 37: Technical Issues, Clues And Solutions
Axis device. Check all cabling and reinstall the device. Possible IP address conflict The static IP address in the Axis device is used before the DHCP server sets a dynamic address. with another device on the... -
Page 38: Performance Considerations
When setting up your system, it is important to consider how various settings and situations affect the amount of needed bandwidth (the bitrate) required. The following factors are the most important to consider: • Heavy network utilization due to poor infrastructure affects the bandwidth. • Running multiple AXIS Camera Application Platform (ACAP) applications simultaneously may affect the the general performance. -
Page 39: Specifications
AXIS C12 Series Specifications Specifications Product overview Front-facing LED Control button on page 40 Microphone disable switch on page 40 SD card slot on page 40 I/O connector on page 41 Status LED Audio connector on page 40 Network connector on page 40... -
Page 40: Sd Card Slot
The product shall be connected using a shielded network cable (STP). All cables connecting the product to the network shall be intended for their specific use. Make sure that the network devices are installed in accordance with the manufacturer’s instructions. For information about regulatory requirements, see the Installation Guide at www.axis.com. Audio connector •... - Page 41 AXIS C12 Series Specifications Ground Balanced microphone (with or without phantom power) Balanced microphone (with or without phantom or line, “hot” signal power) or line, “cold” signal Digital signal Ring power if selected Ground Ground Stereo unbalanced microphone (with or without electret Stereo unbalanced microphone (with or without power) or line, “left”...
- Page 42 AXIS C12 Series Specifications Example DC ground DC output 12 V, max 50 mA I/O configured as supervised input I/O configured as output...
- Page 43 AXIS C12 Series API commands API commands VAPIX® is Axis’ own open API (Application Programming Interface). You can control almost all functionality available in Axis devices through VAPIX®. To get access to the complete VAPIX® documentation, join Axis Developer Community at axis.com/developer-community Enter the commands in a web browser, and replace <deviceIP>...
- Page 44 AXIS C12 Series API commands Disable FTP Request http://<deviceIP>/axis-cgi/param.cgi?action=update&Network.FTP.Enabled=no Example Enable SSH Request http://<deviceIP>/axis-cgi/param.cgi?action=update&Network.SSH.Enabled=yes Example Disable SSH Request http://<deviceIP>/axis-cgi/param.cgi?action=update&Network.SSH.Enabled=no...
- Page 45 User Manual Ver. M1.17 AXIS C12 Series Date: September 2022 © Axis Communications AB, 2022 Part No. T10177747...
Need help?
Do you have a question about the C1210-E and is the answer not in the manual?
Questions and answers