Table of Contents
Advertisement
Quick Links
Advertisement
Table of Contents

Subscribe to Our Youtube Channel
Related Manuals for Avaya RC100


Summary of Contents for Avaya RC100
- Page 1 Using Avaya Room Camera RC100 Release 1.0 Issue 1 May 2022...
- Page 2 RESERVES THE RIGHT TO TAKE LEGAL ACTION AGAINST YOU the express behalf of Avaya. End User agrees to indemnify and hold AND ANYONE ELSE USING OR SELLING THE SOFTWARE harmless Avaya, Avaya's agents, servants and employees against all WITHOUT A LICENSE.
- Page 3 INFORMATION FOR H.264 (AVC) AND H.265 (HEVC) CODECS written consent of Avaya can be a criminal, as well as a civil offense MAY BE OBTAINED FROM MPEG LA, L.L.C. SEE HTTP:// under the applicable law.
- Page 4 The trademarks, logos and service marks (“Marks”) displayed in this site, the Documentation, Hosted Service(s), and product(s) provided 注意事項 by Avaya are the registered or unregistered Marks of Avaya, its • 本製品は室内用に設計されています。 affiliates, its licensors, its suppliers, or other third parties. Users are not permitted to use such Marks without prior written consent from •...
-
Page 5: Table Of Contents
Logging in to the Avaya CU360 web interface ................. 22 Enabling the Avaya CU360 advanced settings .... 23 Configuring Avaya Room Camera RC100 as the main HD camera for Avaya XT Series .. 24 Configuring Avaya Room Camera RC100 as an additional HD camera for Avaya XT Series ...... 26 Configuring Avaya Room Camera RC100 as USB camera for Avaya XT Series .............. 27... - Page 6 Contents .......................... 43 Support ................ 43 Using the Avaya InSite Knowledge Base May 2022 Using Avaya Room Camera RC100 Comments on this document? infodev@avaya.com...
-
Page 7: Chapter 1: Introduction
Chapter 1: Introduction Purpose This document describes how to use the Avaya Room Camera RC100. This document is intended for people who want to learn how to use the Avaya Room Camera RC100. May 2022 Using Avaya Room Camera RC100... -
Page 8: Chapter 2: Avaya Room Camera Rc100 Overview
• To reduce the risk of fire or electric shock, do not expose Avaya Room Camera RC100 to rain or moisture. • Unplug Avaya Room Camera RC100 from the wall outlet and refer servicing to licensed service personnel: - If the power cord or plug becomes damaged or frayed. -
Page 9: Avaya Room Camera Rc100 Overview
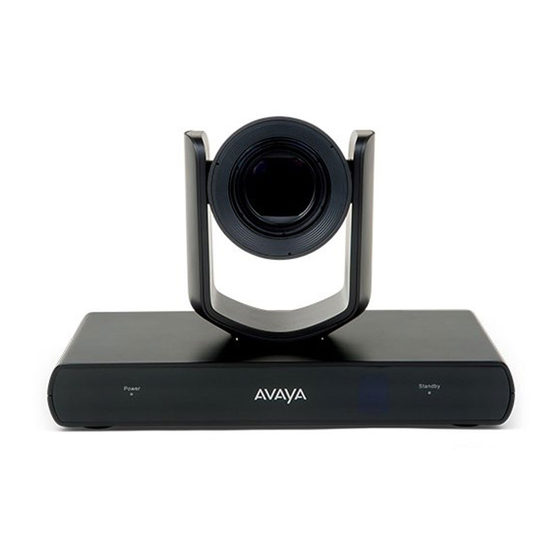
Avaya Room Camera RC100 overview Avaya Room Camera RC100 is a flexible and high-end solution covering a broad spectrum of room sizes and use cases for high-end features and connectivity. Avaya Room Camera RC100 has the following features: •... - Page 10 • Up to 12 through Avaya Room Camera RC100 Remote Control • Up to 64 through IP with Avaya CU360 • Up to 122 through VISCA and USB with Avaya XT Series • Up to 122 through USB through Avaya CU360...
-
Page 11: Avaya Room Camera Rc100 Main Parts
Avaya Room Camera RC100 main parts Avaya Room Camera RC100 main parts Interface Rotary Selector (SYS-SEL) Table continues… May 2022 Using Avaya Room Camera RC100 Comments on this document? infodev@avaya.com... -
Page 12: Avaya Room Camera Rc100 Remote Control Unit
HDMI Reset pinhole Audio In RS232-IN RS232-OUT Power(DC12V) Anti-theft lock Camera Module Avaya Room Camera RC100 remote control unit Avaya Room Camera RC100 supports a remote control unit. May 2022 Using Avaya Room Camera RC100 Comments on this document? infodev@avaya.com... -
Page 13: Avaya Room Camera Rc100 Rotary Selector Settings
Avaya Room Camera RC100 Rotary selector settings Before installing and operating Avaya Room Camera RC100, make sure the Rotary selector is set to F (The default setting is AUTO). For advanced settings, you can select the desired specific... - Page 14 Avaya Room Camera RC100 overview Rotary selector 1080P50 720P60 720P50 1080P30 1080P25 4KP25 4KP30 4KP50 4KP60 1080i60 1080i50 AUTO as default After configuring the video format, restart the Avaya Room Camera RC100. May 2022 Using Avaya Room Camera RC100 Comments on this document? infodev@avaya.com...
-
Page 15: Chapter 3: Avaya Room Camera Rc100 Packing List
Chapter 3: Avaya Room Camera RC100 Packing list Avaya Room Camera RC100 packing list Avaya Room Camera RC100 contains the following standard equipment: • Camera • Remote Control • USB Cable • AC/DC Adapter • HDMI Cable • Bracket • Four sets of screws and plastic dowel •... -
Page 16: Installing Avaya Room Camera Rc100 Using Wall Mount Bracket
Avaya Room Camera RC100 Packing list Installing Avaya Room Camera RC100 using wall mount bracket About this task You can install Avaya Room Camera RC100 on a wall using the wall mount bracket. May 2022 Using Avaya Room Camera RC100 Comments on this document? infodev@avaya.com... - Page 17 Installing Avaya Room Camera RC100 using wall mount bracket Procedure 1. Drill four holes according to the hole diameter and position of the wall bracket. May 2022 Using Avaya Room Camera RC100 Comments on this document? infodev@avaya.com...
- Page 18 2. Install the plastic expansion tube on the hole. 3. Fix the wall bracket at the installation position with expansion screws. 4. Place Avaya Room Camera RC100 on the wall bracket, and fix Avaya Room Camera RC100 with screws. May 2022 Using Avaya Room Camera RC100 Comments on this document? infodev@avaya.com...
-
Page 19: Chapter 4: Setting Up Avaya Room Camera Rc100
USB have the same resolutions. Before you begin • Connect one side of the ethernet cable to the Avaya Room Camera RC100 LAN port and the other side to your IP Network or connect Avaya CU360 through Wi-Fi. -
Page 20: Configuring Avaya Room Camera Rc100 As Usb Camera For Avaya Cu360
• URL: Enter the IP address of the Avaya Room Camera RC100. rtsp://admin:@ip_address/ch1 • Control Camera: Yes Use the remote control to view the IP address of Avaya Room Camera RC100 from the Network section. Default parameters for Avaya Room Camera RC100 are: •... - Page 21 USB have the same resolutions. Before you begin • Connect one side of the USB cable to the Avaya Room Camera RC100 USB port and the other side to the Avaya CU360 USB port. • Connect the power supply plug to the DC IN 12V port of the Avaya Room Camera RC100 and turn on the Avaya CU360 endpoint.
-
Page 22: Logging In To The Avaya Cu360 Web Interface
Logging in to the Avaya CU360 web interface About this task The home page of Avaya CU360 displays the IP address of the endpoint on the top. Change the default login credentials when you log in to the web interface for the first time. -
Page 23: Configuring Avaya Room Camera Rc100 As The Main Hd Camera For Avaya Xt Series
You can use Avaya Room Camera RC100 as the main HD camera on Avaya XT Series. Do not place Avaya Room Camera RC100 on top of the Avaya XT Series endpoint. Use the wall mount bracket to install Avaya Room Camera RC100. -
Page 24: Configuring Avaya Room Camera Rc100 As An Additional Hd Camera For Avaya Xt Series
You can use Avaya Room Camera RC100 as an additional HD camera on Avaya XT Series. Do not place Avaya Room Camera RC100 on top of the Avaya XT Series endpoint. Use the wall mount to install Avaya Room Camera RC100. - Page 25 Configuring Avaya Room Camera RC100 as an additional HD camera for Avaya XT Series Before you begin • Connect one side of the HDMI cable to the Avaya Room Camera RC100 HDMI OUT port and the other side to the Avaya XT Series DVI/HDMI IN 2 port.
-
Page 26: Configuring Avaya Room Camera Rc100 As Usb Camera For Avaya Xt Series
Avaya XT Series endpoint through USB. Before you begin • Connect one side of the USB cable to the Avaya Room Camera RC100 USB port and the other side to the Avaya XT Series USB Type-A upper port. -
Page 27: Logging In To The Avaya Xt Series Web Interface
The default PIN for Advanced settings on the endpoint is 1234. If your administrator configures a PIN to access the advanced settings on the endpoint, Avaya XT Series prompts you to enter the PIN. After you enter the PIN, Avaya XT Series displays the Advanced window. -
Page 28: Enabling The Avaya Xt Series Advanced Settings
Setting up Avaya Room Camera RC100 Procedure 1. Open any of the supported internet browsers and access the Avaya XT Series login page by entering the system IP address, such as http://1.2.3.4/. Figure 1: Logging into the Avaya XT Series web interface 2. -
Page 29: Visca-Cross Cable For Avaya Room Camera Rc100
VISCA, then the OSD through the remote control is disabled. To recover the OSD, it is necessary to connect the Avaya Room Camera RC100 to the Avaya XT Series endpoint again and activate the camera factory recovery procedure within the Avaya XT Series. -
Page 30: Configuring Avaya Room Camera Rc100 For Avaya Vantage
• Connect a type-C Male or type-A Female USB adaptor to the Avaya Vantage type-C port. • Connect the type-A or type-B USB cable to the Avaya Room Camera RC100 USB port and the other side to the adaptor. Procedure 1. - Page 31 Avaya Room Camera RC100 coding capacity limitation HDMI Ethernet (LAN) MJPG H264 H264 H264 Stream1 Stream2 360P25 4KP30 4KP30 4KP30 720P30 360P30 1080P30 1080P30 1080P30 720P30 360P30 720P30 720P30 720P30 720P30 360P30 360P30 360P30 360P30 720P30 360P30 4KP30 720P30 360P30...
- Page 32 Setting up Avaya Room Camera RC100 HDMI Ethernet (LAN) MJPG H264 H264 H264 Stream1 Stream2 360P25 720P25 360P25 1080P60 4KP30 4KP30 720P30 360P30 1080P30 1080P30 1080P30 720P30 360P30 720P30 720P30 720P30 720P30 360P30 360P30 360P30 360P30 720P30 360P30 4KP30 720P30...
- Page 33 Avaya Room Camera RC100 coding capacity limitation HDMI Ethernet (LAN) MJPG H264 H264 H264 Stream1 Stream2 360P25 720P25 360P25 1080P30 4KP30 4KP30 720P30 360P30 1080P30 1080P30 1080P30 720P30 360P30 720P30 720P30 720P30 720P30 360P30 360P30 360P30 360P30 720P30 360P30 4KP30...
- Page 34 Setting up Avaya Room Camera RC100 HDMI Ethernet (LAN) MJPG H264 H264 H264 Stream1 Stream2 360P25 720P25 360P25 720P60 4KP30 4KP30 720P30 360P30 1080P30 1080P30 1080P30 720P30 360P30 720P30 720P30 720P30 720P30 360P30 360P30 360P30 360P30 720P30 360P30 4KP30 720P30...
- Page 35 Avaya Room Camera RC100 coding capacity limitation HDMI Ethernet (LAN) MJPG H264 H264 H264 Stream1 Stream2 360P25 720P25 360P25 1080I60 4KP30 4KP30 720P30 360P30 1080P30 1080P30 1080P30 720P30 360P30 720P30 720P30 720P30 720P30 360P30 360P30 360P30 360P30 720P30 360P30 4KP30...
-
Page 36: Avaya Room Camera Rc100 Menu Configuration
HDMI Ethernet (LAN) MJPG H264 H264 H264 Stream1 Stream2 360P25 720P25 360P25 Avaya Room Camera RC100 menu configuration Avaya Room Camera RC100 has the following menu configuration: Main menu Sub menu IMAGE SHARPNESS BRIGHTNESS CONTRAST GAMMA 2DNR 3DNR MIRROR FLIP... - Page 37 Avaya Room Camera RC100 menu configuration Main menu Sub menu Set Value COLORTONE • AUTO • MANUAL • INDOOR • OUTOOR • OPWB • STATIC SATURA CAMERA RUM SCENE DIGITAL ZOOM Main menu Sub menu • P/T SPEED • PTZ TRIG AF •...
-
Page 38: Menu Explanation
Setting up Avaya Room Camera RC100 Main menu Sub menu HDMI VIDEO FORMAT NET MODE IP ADDRESS NET MASK GATEWAY DNS1 DNS2 Menu Explanation Menu Explanation • Press MENU button to enter or exit menu. • Press button to select options and press ENTER to enter the menu. -
Page 39: Exposure Field Descriptions
Avaya Room Camera RC100 menu configuration Exposure field descriptions Name Description MODE Use the option to switch exposure mode. Use the backlight compensation option to correct the exposure of subjects in front of a bright light source. EXP-COMP Use the option to display the level. -
Page 40: System Field Descriptions
The value changed from CONFIRM to FINISH. Resetting Avaya Room Camera RC100 to factory values About this task Avaya Room Camera RC100 could be reset to factory data by pressing the restore button through the pinhole on the rear side of the camera. May 2022 Using Avaya Room Camera RC100 Comments on this document? infodev@avaya.com... - Page 41 Resetting Avaya Room Camera RC100 to factory values Procedure Press the restore button for 6-7 seconds using a straightened paper clip through the factory restore pinhole. Result Avaya Room Camera RC100 restores the factory data. May 2022 Using Avaya Room Camera RC100...
-
Page 42: Chapter 5: Maintenance
Chapter 5: Maintenance Upgrading Avaya Room Camera RC100 About this task Use a computer connected to the Avaya Room Camera RC100 through USB. Go to the Avaya Support website at https://support.avaya.com to download the latest Firmware. May 2022 Using Avaya Room Camera RC100... -
Page 43: Chapter 6: Resources
• Links to other pertinent information If you are an authorized Avaya Partner or a current Avaya customer with a support contract, you can access the Knowledge Base without extra cost. You must have a login account and a valid Sold-To number. - Page 44 Resources 2. Log on to the Avaya website with a valid Avaya user ID and password. The system displays the Avaya Support page. 3. Click Support by Product > Product-specific Support. 4. In Enter Product Name, enter the product, and press Enter.
- Page 45 ..............Avaya RC100 camera for IP camera ......menu configuration .............. Avaya RC100 camera for laptop ........29 Avaya RC100 camera for USB camera .... 20, 26, Avaya RC100 camera using wall mount bracket ..camera field descriptions ..........39 overview colortone field descriptions ...........
- Page 46 Index wall mount bracket installation ..........16 web interface logging in ............May 2022 Using Avaya Room Camera RC100 Comments on this document? infodev@avaya.com...
Need help?
Do you have a question about the RC100 and is the answer not in the manual?
Questions and answers