FujiFilm X-H2 Basic Manual
Hide thumbs
Also See for X-H2:
- User manual ,
- Owner's manual (404 pages) ,
- New features manual (38 pages)
Table of Contents
Advertisement
Quick Links
FF210003
Basic Manual
Thank you for your purchase of this product. Be sure that you have read
this manual and understood its contents before using the camera. Keep the
manual handy for future reference once you have fi nished.
The latest versions of the product manuals are available at the website be-
low.
https://fujifilm-dsc.com/en/manual/
The website above, which provides detailed instruc-
tions and material not covered in this guide, can be
accessed from a computer, smartphone, or tablet. It
also contains information on the software license.
EN
BL00005178-200
Advertisement
Table of Contents

Related Manuals for FujiFilm X-H2


Summary of Contents for FujiFilm X-H2
- Page 1 The latest versions of the product manuals are available at the website be- low. https://fujifilm-dsc.com/en/manual/ The website above, which provides detailed instruc- tions and material not covered in this guide, can be accessed from a computer, smartphone, or tablet.
- Page 2 MEMO...
- Page 3 Chapter Index Before You Begin First Steps Taking and Viewing Photos Movie Recording and Playback Connections Menu List Notices...
-
Page 4: Table Of Contents
Table of Contents Chapter Index ....................iii Supplied Accessories ................viii About This Manual ..................ix Symbols and Conventions ..................ix Terminology .........................ix Before You Begin Before You Begin Parts of the Camera ..................2 The Serial Number Plate ..................6 The Memory Card Slot Cover (Detachable) ..........6 The Focus Stick (Focus Lever) ................7 The Selector ........................7 The WB Button ......................7... - Page 5 Table of Contents Using the Menus ..................28 The Menus ........................28 Selecting a Menu Tab ................... 30 Touch Screen Mode ................... 31 Shooting Touch Controls ................... 31 Playback Touch Controls ..................36 First Steps First Steps Attaching the Strap ................... 38 Attaching a Lens ..................
- Page 6 Manual Focus ....................80 Checking Focus......................81 Sensitivity ...................... 83 AUTO..........................84 Metering ......................85 Exposure Compensation ................. 86 Focus/Exposure Lock ................87 Other Controls ......................88 Viewing Pictures ..................89 Deleting Pictures ..................90 Movie Recording and Playback Movie Recording and Playback Recording Movies ..................
- Page 7 Table of Contents Tethered Photography ................113 Tethered Photography via USB ..............113 RAW Processing ..................115 Saving and Loading Settings ...............116 Recording Movies Remotely from a Web Browser .......117 Menu List Menu List The Shooting Menus (Still Photography).........120 IMAGE QUALITY SETTING ................120 AF/MF SETTING .....................
-
Page 8: Supplied Accessories
N • If you purchased a lens kit, check that a lens is included. • The plug adapter supplied varies with the country or region. • Visit the website below for information on the software available for your camera. https://fujifilm-x.com/support/compatibility/cameras/ viii... -
Page 9: About This Manual
About This Manual This manual contains instructions for your FUJIFILM X-H2 digital camera. Be sure you have read and understood its contents before proceeding. Symbols and Conventions The following symbols are used in this manual: Information that should be read to prevent damage to the product. - Page 10 MEMO...
-
Page 11: Before You Begin
Before You Begin... -
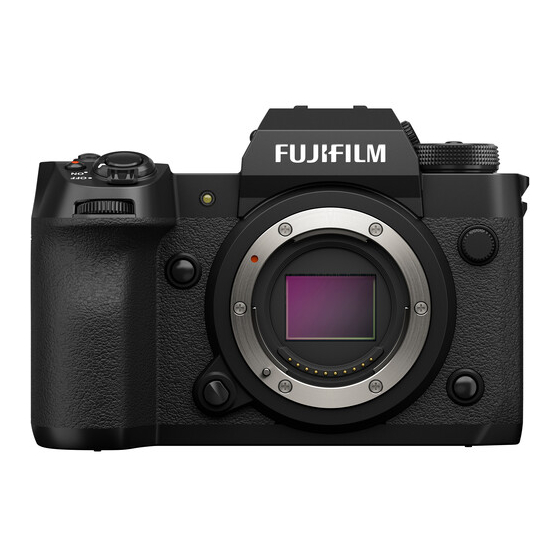
Page 12: Parts Of The Camera
Parts of the Camera ISO button ............83 Lens release button ........39 WB button ............7 Fn2 button Fn1 button AF-assist illuminator Secondary LCD monitor........26 Self-timer lamp Microphone ............92 Tally light Hot shoe Front command dial ........10 Diopter adjustment control ......13 ON/OFF switch ..........49 Dial lock release ........56, 92 Shutter button Mode dial ............8... - Page 13 Parts of the Camera DRIVE button ............9 Memory card slot cover (detachable) b (delete) button ...........90 ..............6, 42 a (playback) button ........89 Battery-chamber cover latch ......40 Battery-chamber cover .........40 Eye sensor ............19 Electronic viewfi nder (EVF) Selector buttons ..........7 MENU/OK button ..........28 .............
- Page 14 Remote release connector (⌀2.5mm) ..62 Battery chamber ..........40 Memory card slot 2 Cooling fan connector cover (for SD memory cards) .......42 Cooling fan connector Hole to screw cooling fan Serial number plate Memory card slot 1 File transmitter/vertical battery grip (for Type B CFexpress cards) ......42 connector Battery latch ............41...
- Page 15 Parts of the Camera The Cable Protector Attach the protector as shown to prevent accidental disconnection. Slide the protector over the USB connector cover so that the cover passes through the slot in the protector. Tighten the lock screw. Connect the cable and pass it through the protector as shown.
-
Page 16: The Serial Number Plate
The Serial Number Plate Do not remove the serial number plate, which provides the CMIIT ID, serial num- ber, and other important information. Serial number plate The Memory Card Slot Cover (Detachable) The memory card slot cover can be re- moved by lowering the interior latch. Re- move the cover for ease of access when a camera rig is attached or in other sit- uations that make it diffi cult to open or... -
Page 17: The Focus Stick (Focus Lever)
Parts of the Camera The Focus Stick (Focus Lever) Tilt or press the focus stick to select the fo- cus area. The focus stick can also be used to navigate the menus. To choose the role played by the focus stick, press and hold the cen- ter of the stick or use D BUTTON/DIAL SETTING ... -
Page 18: The Mode Dial
The Mode Dial To select a shooting mode, rotate the dial until the icon for the desired mode aligns with the index. Mode Mode Description Description P (PROGRAM AE) Aperture and shutter speed can be adjusted using program shift. S (SHUTTER PRIORITY AE) Select for full control over camera A (APERTURE PRIORITY AE) settings, including aperture (M and A) -
Page 19: The Drive Button
Parts of the Camera The DRIVE Button Pressing the DRIVE button displays drive- mode menu, where you can choose from the following the drive modes. Mode Mode Mode Mode B Single frame BKT Bracketing J High-speed burst h HDR u Panorama O Low-speed burst j Multiple Exposure W ISO BKT... -
Page 20: The Command Dials
The Command Dials The rear and front command dials are used for the operations below. Front command dial Rear command dial Choose the desired combi- nation of shutter speed and Adjust exposure compensa- aperture (program shift). tion. Choose a shutter speed. Shooting Shooting Adjust aperture. -
Page 21: The Indicator Lamp
Parts of the Camera The Indicator Lamp Camera status is shown by the indicator lamp. Indicator lamp Indicator lamp Camera status Camera status Glows green Focus locked. Focus or slow shutter speed warning. Pictures can be Blinks green taken. • Camera on: Recording pictures, or picture displayed for confi... -
Page 22: The Lcd Monitor
The LCD Monitor You can adjust the angle of the LCD moni- tor when framing shots, but be careful not to trap your fi ngers or other objects. O • Do not apply excessive force to the hinge when rotating the LCD monitor, as this could damage the hinge. -
Page 23: The Eye Cup
Parts of the Camera The Eye Cup To remove the eye cup, hold the buttons on either side and slide eye cup up. Focusing the Viewfi nder If the indicators displayed in the viewfi nder are blurred, put your eye to the viewfi nder and rotate the diopter adjustment control until the display is in sharp focus. -
Page 24: Camera Displays
Camera Displays This section lists the indicators that may be displayed during shooting. For illustrative purposes, displays are shown with all indicators lit. The Electronic Viewfi nder F L M N O P Q GHIJK T U V... - Page 25 Camera Displays Crop factor .............123 Control lock ..........139 IS mode ............124 Boost mode ...........139 Flash (TTL) mode Power supply ............47 Flash compensation Histogram ............24 Movie compression ........126 Battery level Digital teleconverter ........124 Sensitivity ............83 Self-timer indicator ........123 Exposure compensation .......86 Continuous mode Aperture ............59, 60 Shutter type ...........124...
-
Page 26: The Lcd Monitor
The LCD Monitor T UVW... - Page 27 Camera Displays Crop factor .............123 Boost mode ...........139 Location data download status ..102, 140 Touch zoom ............35 Focus check ..........82, 123 Temperature warning ........43 Depth-of-fi eld preview ........81 Control lock ..........139 Proxy setting (ProRes only) Battery level Movie compression ........126 Power supply ............47 Digital teleconverter ........124 Sensitivity ............83...
-
Page 28: Choosing A Display Mode
Choosing a Display Mode Press the VIEW MODE button to cycle through the following display modes. You can choose separate display modes for shooting and playback. SHOOTING Option Option Description Description Putting your eye to the viewfi nder turns the viewfi nder E EYE SENSOR on and the LCD monitor off... - Page 29 Camera Displays PLAYBACK Option Option Description Description Putting your eye to the viewfi nder turns the viewfi nder E EYE SENSOR EYE SENSOR on and the LCD monitor off ; taking your eye away turns the viewfi nder off and LCD monitor on. LCD ONLY LCD ONLY LCD monitor on, viewfi...
-
Page 30: Adjusting Display Brightness
Adjusting Display Brightness The brightness and saturation of the viewfi nder and LCD monitor can be adjusted using the items in the D SCREEN SET-UP menu. Choose EVF BRIGHTNESS or EVF COLOR to adjust viewfi nder brightness or saturation, LCD BRIGHTNESS or LCD COLOR to do the same for the LCD monitor. -
Page 31: The Disp/Back Button
Camera Displays The DISP/BACK Button The DISP/BACK button controls the display of indicators in the viewfi nder and LCD monitor. Indicators for the EVF and LCD must be selected separately. To choose the EVF dis- play, place your eye to the viewfi nder while using the DISP/BACK button. -
Page 32: The Dual Display
LCD Monitor Standard indicators No indicators 12800 12800 Dual display Info display (manual focus mode only) The Dual Display The dual display consists of a large full-frame window and a smaller close-up of the focus area. -
Page 33: Customizing The Standard Display
Camera Displays Customizing the Standard Display To choose the items shown in the standard indicator display: Display standard indicators. Use the DISP/BACK button to display standard indicators. Select DISP. CUSTOM SETTING. Select D SCREEN SET-UP > DISP. CUSTOM SETTING in the setup menu. - Page 34 Framing Outline Enable FRAMING OUTLINE to make the borders of the frame easier to see against dark backgrounds. Histograms Histograms show the distribution of tones in the image. Brightness is shown by the horizontal axis, the number of pixels by the vertical axis. Number of pixels Shadows Highlights...
-
Page 35: Virtual Horizon
Camera Displays Virtual Horizon Check whether the camera is level. The display type can be cho- sen using D SCREEN SET-UP > ELECTRONIC LEVEL SETTING. Use the virtual horizon to level the camera when mounting it on a tripod or the like. Pitch Roll •... -
Page 36: The Secondary Lcd Monitor
The Secondary LCD Monitor Among the settings that can be viewed in the secondary LCD monitor are shutter speed, aperture, and ISO sensitivity. Dif- ferent settings are displayed in still pho- tography and movie modes. Secondary LCD monitor Default Settings By default, the secondary LCD monitor displays the settings list- ed below. - Page 37 Camera Displays Movie Mode Movie Mode Default Default A MOVIE MODE E FILM SIMULATION B REC. TIME F WHITE BALANCE C EXPO. COMP. G CARD SLOT OPTIONS D ISO H BATTERY LEVEL The Secondary Monitor Backlight Button To turn on the secondary LCD monitor back- light when you fi nd the secondary LCD monitor too dark to read, press the secondary monitor backlight button.
-
Page 38: Using The Menus
Using the Menus To display the menus, press MENU/OK. The Menus Diff erent menus are displayed during still photography, movie recording, and playback. Still Photography (All Modes Except F) Pressing MENU/OK during still photography displays the photo menus. IMAGE QUALITY SETTING IMAGE SIZE IMAGE QUALITY RAW RECORDING... - Page 39 Using the Menus Movie Recording (F/Movie Mode) Pressing MENU/OK in movie mode displays the movie menus. MOVIE SETTING MOVIE SETTING LIST SHOOTING MODE MOVIE MODE HIGH SPEED REC MEDIA REC SETTING HDMI OUTPUT SETTING FIX MOVIE CROP MAGNIFICATION DIGITAL ZOOM EXIT In modes C1 through C7, photo menus will be displayed if F MOVIE is selected for the chosen bank using either H IMAGE QUALITY...
-
Page 40: Selecting A Menu Tab
Using the Menus Selecting a Menu Tab To navigate the menus: Press MENU/OK to display the menus. IMAGE QUALITY SETTING IMAGE SIZE IMAGE QUALITY RAW RECORDING SELECT JPEG/HEIF FILM SIMULATION MONOCHROMATIC COLOR GRAIN EFFECT COLOR CHROME EFFECT EXIT Press the focus stick (focus lever) left IMAGE QUALITY SETTING IMAGE SIZE to highlight the tab for the current... -
Page 41: Touch Screen Mode
Touch Screen Mode The LCD monitor also functions as a touch screen. Shooting Touch Controls To enable touch controls, select ON for TOUCH SCREEN SETTINGS D BUTTON/DIAL SETTING > TOUCH TOUCH SCREEN SETTING DOUBLE TAP SETTING SCREEN SETTING > x TOUCH SCREEN TOUCH FUNCTION TOUCH ZOOM SETTING. - Page 42 LCD Monitor The operation performed can be selected by tapping the touch screen mode indica- tor in the display. Touch controls can be used for the following operations: Mode Mode Description Description Tap your subject in the display to focus and release the shutter. TOUCH TOUCH In burst mode, pictures will be taken while you keep your fi...
- Page 43 Touch Screen Mode MOVIE OPTIMIZED CONTROL oL Selecting ON for B MOVIE SETTING > MOVIE OPTIMIZED CONTROL oL or tapping the movie-optimized mode but- ton in the shooting display optimizes the command dials and touch controls for movie recording. This can be used to pre- Movie-optimized vent camera sounds being recorded with mode button...
- Page 44 Touch Function Functions can be assigned to the follow- ing fl ick gestures in much the same way as function buttons: • Flick up: T-Fn1 • Flick left: T-Fn2 • Flick right: T-Fn3 • Flick down: T-Fn4 N • In some cases, touch-function fl ick ges- INTERNAL MIC LEVEL ADJUSTMENT tures display a menu;...
- Page 45 Touch Screen Mode Touch Zoom If the lens supports touch zoom, you can zoom in and out by touching the display. Tap the touch zoom button in the display to enable touch zoom. Touch zoom is controlled using the but- tons in the display.
-
Page 46: Playback Touch Controls
Touch Screen Mode Playback Touch Controls When ON is selected for D BUTTON/DIAL SETTING > TOUCH SCREEN SETTING > a TOUCH SCREEN SETTING, touch controls can be used for the following playback operations: • Swipe: Swipe a fi nger across the display to view other images. -
Page 47: First Steps
First Steps... -
Page 48: Attaching The Strap
Attaching the Strap Attach the strap. Attach the strap to the two strap eyelets as shown below. To avoid dropping the camera, be sure the strap is correctly secured. -
Page 49: Attaching A Lens
Lenses and Other Optional Accessories The camera can be used with lenses and accessories for the FUJIFILM X-mount. Observe the following precautions when attaching or removing (ex- changing) lenses. -
Page 50: Inserting The Battery
Inserting the Battery Insert the battery in the camera as described below. Open the battery-chamber cover. Slide the battery-chamber cover latch as shown and open the bat- tery-chamber cover. O • Do not open the battery-chamber cover when the camera is on. Fail- ure to observe this precaution could damage image fi les or memory cards. - Page 51 Inserting the Battery Close the battery-chamber cover. Close and latch the cover. If the cover does not close, check that the battery is in the correct orienta- tion. Do not attempt to force the cov- er shut. Removing the Battery Before removing the battery, turn the camera off and open the battery-cham- ber cover.
-
Page 52: Inserting Memory Cards
Inserting Memory Cards Pictures are stored on memory cards (sold separately). The camera is equipped with two memory card slots. Use Slot 1 with CFexpress cards and Slot 2 with SD, SDHC, or SDXC cards. Open the memory card slot cover. Unlatch and open the cover. - Page 53 Inserting Memory Cards Removing Memory Cards Turn the camera off and open the memory card slot cover. Eject the card by pressing it in with a fi nger and then slowly releasing it; the card can then be removed by hand. O •...
-
Page 54: Using Two Cards
Inserting Memory Cards Using Two Cards The camera can be used with two cards, one in each of its two slots. At default settings, photos are saved to the card in the sec- ond slot only when the card in the fi rst slot is full. This can be changed using D SAVE DATA SET-UP >... -
Page 55: Charging The Battery
Charging the Battery For reasons of safety, the battery is not charged at ship- ment. The camera will not function if the battery is not charged; be sure to charge the battery before use. Before charging the battery, turn the camera off . O •... - Page 56 Charge Status The indicator lamp shows battery charge status as follows: Indicator lamp Indicator lamp Battery status Battery status Battery charging Off Charging complete Blinks Charging error...
- Page 57 Charging the Battery O • The supplied AC power adapter is compatible with power supplies of 100 to 240 V (a plug adapter may be needed for overseas use). • Do not use the AC power adapter or USB cable with other devices, as this could cause malfunction.
- Page 58 Charging the Battery Charging via Computer The camera can be charged via USB. USB charging is available with com- puters with a manufacturer-approved operating system and USB interface. Leave the computer on during charging. O • The battery will not charge while the camera is on. •...
-
Page 59: Turning The Camera On And Off
Turning the Camera On and Off Use the ON/OFF switch to turn the camera on and off . Slide the switch to ON to turn the camera on, or to OFF to turn the camera off . Fingerprints and other marks on the lens or viewfi nder can aff ect pic- tures or the view through the viewfi nder. -
Page 60: Basic Setup
Basic Setup When you turn the camera on for the fi rst time, you can choose a language and set the camera clock. Follow the steps below when turning the camera on for the fi rst time. Turn the camera on. A language-selection dialog will be displayed. - Page 61 Basic Setup Set the clock. DATE/TIME GMT +1:00 BERLIN/PARIS 2022 31 12 View information on the smartphone app. • The camera will display a QR code APPLICATION you can scan with your smartphone IMAGES CAN BE EASILY TRANSFERRED TO THE SMARTPHONE. to open a website where you can download the smartphone app.
- Page 62 A confi rmation dialog will be dis- FORMAT FORMAT CARD IN SLOT 1, OK? played. To format the memory card, ERASE ALL DATA highlight OK and press MENU/OK. CANCEL To exit without formatting the memory card, select CANCEL or press DISP/BACK. O •...
-
Page 63: Choosing A Diff Erent Language
Basic Setup Choosing a Diff erent Language To change the language: Display language options. Select D USER SETTING > Qa. Choose a language. Highlight the desired option and press MENU/OK. Changing the Time and Date To set the camera clock: Display DATE/TIME options. Select D USER SETTING >... - Page 64 MEMO...
-
Page 65: Taking And Viewing Photos
Taking and Viewing Photos... -
Page 66: P, S, A, And M Modes
P, S, A, and M Modes P, S, A, and M modes give you varying degrees of control over shutter speed and aperture. Mode P: Program AE Let the camera choose shutter speed and aperture for optimal exposure. Other values that produce the same exposure can be selected with program shift. -
Page 67: Mode S: Shutter-Priority Ae
P, S, A, and M Modes Mode S: Shutter-Priority AE Choose a shutter speed and let the camera adjust aperture for optimal exposure. Rotate the mode dial to S. S will appear in the display. Rotate the front command dial to choose a shutter speed. - Page 68 N • Shutter speed can be adjusted while the AFON button is pressed or the shutter button is pressed halfway. • At shutter speeds slower than 1 second, a count-down timer will be displayed while the exposure is in progress. •...
-
Page 69: Mode A: Aperture-Priority Ae
P, S, A, and M Modes Mode A: Aperture-Priority AE Choose an aperture and let the camera adjust shutter speed for optimal exposure. Rotate the mode dial to A. A will appear in the display. Rotate the lens aperture ring to choose an aperture. N •... -
Page 70: Mode M: Manual Exposure
Mode M: Manual Exposure In manual mode, the user controls both shutter speed and aperture. Shots can be deliberately overexposed (brighter) or underexposed (darker), opening the door for a variety of individual creative ex- pression. The amount the picture would be under- or over-exposed at current settings is shown by the exposure indicator;... - Page 71 P, S, A, and M Modes Rotate the front command dial to choose a shutter speed and the lens aperture ring to choose an aperture. N • The manual exposure display includes an exposure indicator that shows the amount the picture would be under- or over-ex- posed at current settings.
- Page 72 Press the shutter button all the way down. • The shutter will remain open for up to 60 minutes while the shutter button is pressed. • The display shows the time elapsed since the exposure started. • Releasing the shutter button closes the shutter, ending the exposure.
-
Page 73: Filter
P, S, A, and M Modes FILTER Take photos with fi lter eff ects. Rotate the mode dial to FILTER. Choose a fi lter via A SHOOTING SETTING > FILTER SETTING. Filter Filter Description Description G TOY CAMERA Choose for a retro toy camera eff ect. The tops and bottoms of pictures are blurred for H MINIATURE a diorama eff... -
Page 74: Custom Modes
Custom Modes Rotate the mode dial to any of modes C1 (CUSTOM 1) through C7 (CUSTOM 7) to take pictures using previously-saved shooting menu settings. Mode Selection: Still Photography or Movie Choose whether the selected custom settings bank (C1 through C7) is for still photography (x STILL) or movie recording (F MOVIE). - Page 75 P, S, A, and M Modes Saving Current Settings Save current settings in a custom settings bank. Navigate to H IMAGE QUALITY SETTING in the photo menus, highlight x EDIT/SAVE CUSTOM SETTING, and press MENU/OK. To save settings for movie recording, navigate to B MOVIE SETTING in the movie menus and select F EDIT/SAVE CUSTOM SETTING.
- Page 76 Editing Custom Settings Edit existing custom settings banks. Navigate to H IMAGE QUALITY SETTING in the photo menus, highlight x EDIT/SAVE CUSTOM SETTING, and press MENU/OK. To save settings for movie recording, navigate to B MOVIE SETTING in the movie menus and select F EDIT/SAVE CUSTOM SETTING.
- Page 77 P, S, A, and M Modes Press MENU/OK to save the changes and return to the shooting menu list. Adjust additional items as desired. If DISABLE is selected for H IMAGE QUALITY SETTING > AUTO UPDATE CUSTOM SETTING in the photo menu or for B MOVIE SETTING ...
- Page 78 Copying Custom Settings Copy custom settings from one bank to another, overwriting the settings in the destination bank. If the source bank has been re- named, the name will also be copied to the destination bank. Navigate to H IMAGE QUALITY SETTING in the photo menus, highlight x EDIT/SAVE CUSTOM SETTING, and press MENU/OK.
- Page 79 P, S, A, and M Modes COPY TO Highlight the destination bank (C1 CUSTOM 1 through C7) and press MENU/OK. CUSTOM 2 CUSTOM 3 A confi rmation dialog will be dis- CUSTOM 4 CUSTOM 5 played. CUSTOM 6 CUSTOM 7 Any changes to custom settings in the destination bank will be overwritten.
- Page 80 Resetting Custom Settings Reset selected custom settings banks. Select H IMAGE QUALITY SETTING >x EDIT/SAVE CUSTOM SETTING in the shooting menu and press MENU/OK. This assumes that you wish to reset settings for still photography. To reset movie settings, navigate to B MOVIE SETTING in the movie menus and select F EDIT/SAVE CUSTOM SETTING.
- Page 81 P, S, A, and M Modes Renaming Custom Settings Banks Rename selected custom settings banks. Select H IMAGE QUALITY SETTING >x EDIT/SAVE CUSTOM SETTING in the shooting menu and press MENU/OK. This assumes that you wish to rename settings for still photogra- phy.
-
Page 82: Autofocus
Autofocus Take pictures using autofocus. Select single or continuous AF for G AF/MF SETTING > FOCUS MODE in the shooting menu (P 73). Use G AF/MF SETTING > AF MODE to choose an AF mode (P 74). Select G AF/MF SETTING > FOCUS AREA and choose the position and size of the focus frame (P 76). -
Page 83: Focus Mode
Autofocus Focus Mode Choose how the camera focuses. Press MENU/OK to display the menus. Select G AF/MF SETTING > FOCUS MODE in the shooting menu. Choose from the following options: Mode Mode Description Description Focus manually using the lens focus ring. Choose for man- ual control of focus or in situations in which the camera is MANUAL FOCUS unable to focus using autofocus (P 80). -
Page 84: Autofocus Options (Af Mode)
Autofocus Options (AF Mode) Focus can be adapted to a variety of subjects by changing the combination of settings selected for focus and AF modes. Press MENU/OK and go to the shooting menu. Select G AF/MF SETTING > AF MODE. Choose an AF mode. How the camera focuses depends on the focus mode. - Page 85 Autofocus Focus Mode k k (CONTINUOUS AF) Focus Mode (CONTINUOUS AF) Option Option Description Description Sample image Sample image Focus tracks subject at selected fo- cus point. Use for subjects moving SINGLE POINT toward or away from camera. Focus tracks subject in selected fo- cus zone.
-
Page 86: Focus-Point Selection
Focus-Point Selection Choose a focus point for autofocus. Viewing the Focus-Point Display Press MENU/OK and go to the shooting menu. Select G AF/MF SETTING > FOCUS AREA to view the fo- cus-point display. Use the focus stick (focus lever) and rear command dial to choose a focus area. - Page 87 Autofocus Selecting a Focus Point Use the focus stick (focus lever) to choose the focus point and the rear command dial to choose the size of the focus frame. The procedure varies with the option se- lected for AF mode. Rear command Rear command DISP/BACK...
- Page 88 The Focus-Point Display The focus-point display varies with the option selected for AF mode. Focus frames are shown by small squares (), focus zones by the large squares. AF mode AF mode r SINGLE POINT y ZONE z WIDE/TRACKING SINGLE POINT ZONE WIDE/TRACKING Number of points available...
- Page 89 Autofocus Checking Focus To zoom in on the current focus area for precise focus, press the center of the focus stick (focus lever). Press up to two times more to zoom in further and a fourth time to cancel zoom. Normal display Focus zoom N •...
-
Page 90: Manual Focus
Manual Focus Adjust focus manually. Select MANUAL FOCUS for G AF/MF SETTING > FOCUS MODE. Focus manually using the lens focus ring. Rotate the ring left to reduce the focus distance, right to increase. Take pictures. N • Use D BUTTON/DIAL SETTING > LENS ZOOM/FOCUS SETTING to reverse the direction of rotation of the focus ring. -
Page 91: Checking Focus
Manual Focus Checking Focus A variety of options are available for checking focus in manual focus mode. The Manual Focus Indicator The white line indicates the distance to the subject in the fo- cus area (in meters or feet according to the option selected for D SCREEN SET-UP >... - Page 92 Manual Focus Focus Zoom If ON is selected for G AF/MF SETTING > FOCUS CHECK, the cam- era will automatically zoom in on the selected focus area when the focus ring is rotated. Press the center of the focus stick (focus lever) to exit zoom.
-
Page 93: Sensitivity
Sensitivity Adjust the camera’s sensitivity to light. To view sensitivity settings, press the ISO button. Option Option Description Description Sensitivity is automatically adjusted in response to shoot- ing conditions according to combination of standard and AUTO1 AUTO2 maximum sensitivity and minimum shutter speed cho- sen for A SHOOTING SETTING ... -
Page 94: Auto
Sensitivity AUTO Choose the base sensitivity, maximum sensitivity, and minimum shutter speed for AUTO1, AUTO2, and AUTO3. Default Default Item Item Options Options AUTO1 AUTO1 AUTO2 AUTO2 AUTO3 AUTO3 125–12800 DEFAULT SENSITIVITY MAX. SENSITIVITY 400–12800 3200 12800 MIN. SHUTTER SPEED ⁄–¼ SEC, AUTO AUTO The camera automatically chooses a sensitivity between the de- fault and maximum values;... -
Page 95: Metering
Metering Choose how the camera meters exposure. A SHOOTING SETTING > PHOTOMETRY off ers a choice of the following metering options: The selected option will only take eff ect if OFF is selected for g FACE/ EYE DETECTION SETTING and SUBJECT DETECTION SETTING in the G AF/MF SETTING menu. -
Page 96: Exposure Compensation
Exposure Compensation Adjust exposure. Rotate the rear command dial to adjust exposure. N • The command dial used in this role can be chosen using D BUTTON/ DIAL SETTING > COMMAND DIAL SETTING. • In manual mode, exposure can be adjusted by rotating the front or rear command dial after pressing a control to which d WHEN SET TO B (ON/OFF SWITCH) is assigned. -
Page 97: Focus/Exposure Lock
Focus/Exposure Lock Focus and exposure lock when the shutter button is pressed halfway. Position the subject in the focus frame and press the shutter button halfway to lock focus and exposure. Focus and exposure will remain locked while the shutter button is pressed halfway (AF/AE lock). -
Page 98: Other Controls
Focus/Exposure Lock Other Controls Focus and exposure can also be locked using the AEL and AFON buttons. At de- fault settings, you can use the AEL button to lock exposure without locking focus. If the AFON button is assigned AF LOCK ONLY, it can similarly be used to lock fo- AEL button cus without locking exposure. -
Page 99: Viewing Pictures
Viewing Pictures Pictures can be viewed in the viewfi nder or LCD monitor. To view pictures full frame, press a. 100-0001 Additional pictures can be viewed by pressing the focus stick (fo- cus lever) left or right or rotating the front command dial. Press the focus stick or rotate the dial right to view pictures in the order recorded, left to view pictures in reverse order. -
Page 100: Deleting Pictures
Deleting Pictures Use the b button to delete pictures. Deleted pictures cannot be recovered. Protect important pictures or copy them to a computer or other storage device before proceeding. With a picture displayed full frame, press the b button and select FRAME. -
Page 101: Movie Recording And Playback
Movie Recording and Playback... -
Page 102: Recording Movies
Recording Movies Record movies with sound. Recording Movies Movies can be recorded by pressing the t (movie recording) button or rotating the mode dial to F (movie). The t (Movie Recording) Button Use the t (movie recording) button to quickly and easily record movies while in still photography mode. - Page 103 Recording Movies F (Movie) Mode For more control over camera settings, rotate the mode dial to F (movie) and record movies using the shutter button. Rotate the mode dial to F (movie). Rotate the mode dial only after pressing the dial lock release to release the dial.
- Page 104 O • The type of memory card supported varies with the option select for B MOVIE SETTING > MEDIA REC SETTING. Record ProRes movies to CFexpress cards. Movies with a bit rate of 720 Mbps can be recorded to CFexpress cards or to cards with a Video Speed Class of V90 or better. Movies with a bit rate of 360 Mbps can be recorded to CFexpress cards or to cards with a Video Speed Class of V60 or better.
- Page 105 Recording Movies Temperature Warnings The camera automatically turns off to protect itself when its temperature or the temperature of the battery rises. If a temperature warning is displayed, image noise may increase. Turn the camera off and wait for it to cool before turning it on again.
-
Page 106: Adjusting Movie Settings
Recording Movies Adjusting Movie Settings Movie settings can be adjusted from the movie menus or using the B MOVIE SETTING item in the photo menus (P 28). • Use the B MOVIE SETTING item in the photo menus to quick- ly adjust settings when recording movies via the t (movie re- cording) button (P 125). -
Page 107: Viewing Movies
Viewing Movies View movies on the camera. In full-frame playback, movies are iden- tifi ed by a W icon. Press the focus stick (focus lever) down to start movie play- back. PLAY PLAY +1.0 12800 The following operations can be per- formed while a movie is displayed: Focus stick Focus stick... - Page 108 MEMO...
-
Page 109: Connections
Connections... -
Page 110: Overview
These features are covered here only in outline. For more information, visit the website below. https://fujifilm-dsc.com/en/manual/x-h2_connection/ Supported Features This camera supports the following features: Feature... -
Page 111: Connection Settings
Overview Connection Settings Connections to other devices are made via settings either cho- sen from a list of existing connection profi les using SELECT CONNECTION SETTING or newly created using CREATE/EDIT CONNECTION SETTING. -
Page 112: Connecting To Smartphones (Bluetooth)
Visit the following website and install the desired apps on your phone. https://app.fujifilm-dsc.com/ The apps available vary with the smartphone operating system. Connecting to a Smartphone Pair the camera with the smartphone and connect via Bluetooth®. - Page 113 Bluetooth ON/OFF Launch the app on the smartphone and pair the smartphone with the camera. More information is available at the following website: https://app.fujifilm-dsc.com/ When pairing is complete, the cam- era and smartphone will automati- cally connect via Bluetooth. A white...
-
Page 114: Using The Smartphone App
Connecting to Smartphones (Bluetooth) Using the Smartphone App Before launching the smartphone app, choose 1: UNIVERSAL SETTING for SELECT CONNECTION SETTING. -
Page 115: Connecting To Smartphones (Usb)
Connecting to Smartphones (USB) Connect to smartphones and computers via USB to upload pictures from the camera. Copying Pictures to a Smartphone Before connecting to the smartphone to upload pictures via USB, select either AUTO or POWER SUPPLY OFF/COMM ON for USB POWER SUPPLY/COMM SETTING in the network/USB setting menu. - Page 116 Micro-B Micro-B Use a USB on-the-go (OTG) cable. Third-party USB cable USB OTG cable Type-C connector (male) Micro-B connector (male) Type-A connector Type-A connector (male) (female) O • The smartphone must support USB OTG. • The desired results cannot be achieved with a USB Type-C–to– Mirco-B cable.
- Page 117 Connecting to Smartphones (USB) From the recommended apps, select “Camera Importer”. The app will automatically start and allow you to import pho- tos and movies to your smartphone. If the message “There is no MTP device connected” appears on the app, please try again from step 3.
-
Page 118: Connecting The Camera And Computer
Connecting the Camera and Computer Select either AUTO or POWER SUPPLY OFF/COMM ON for USB POWER SUPPLY/COMM SETTING in the network/USB setting menu. Choose 2: USB CARD READER for SELECT CONNECTION SETTING. Turn the camera off . Turn the computer on. Connect a USB cable. - Page 119 Connecting to Smartphones (USB) O • Turn the camera off before disconnecting the USB cable. • When connecting USB cables, be sure the connectors are fully in- serted in the correct orientation. Connect the camera directly to the computer; do not use a USB hub or keyboard. •...
-
Page 120: Using The Camera As A Webcam
Using the Camera as a Webcam The camera can be connected to a computer for use as a webcam. Select either AUTO or POWER SUPPLY OFF/COMM ON for USB POWER SUPPLY/COMM SETTING in the network/USB setting menu. Choose 6: USB WEBCAM for SELECT CONNECTION SETTING. Connect the camera to the computer via USB and then turn the camera on (P 108). -
Page 121: Instax Share Printers
instax SHARE Printers Print pictures from your digital camera to instax SHARE printers. Establishing a Connection Select instax PRINTER CONNECTION SETTING in the network/USB setting menu and enter the instax SHARE printer name (SSID) and password. The Printer Name (SSID) and Password The printer name (SSID) can be found on the bottom of the printer;... -
Page 122: Printing Pictures
Select C PLAY BACK MENU > instax PRINTER PRINT PRINTER PRINT. The camera will con- instax-12345678 nect to the printer. CONNECTING FUJIFILM-CAMERA-1234 CANCEL Use the focus stick (focus lever) to PRINTER PRINT 100-0020 display the picture you want to print, then press MENU/OK. -
Page 123: Tethered Photography
USB or wireless or wired LAN. This section covers USB connections only. For information on tethered photography via wireless or wired LAN, visit the website below. https://fujifilm-dsc.com/en/manual/x-h2_connection/ Tethered Photography via USB Connect the camera to a computer via USB for tethered photog- raphy. - Page 124 Tethered Photography Take pictures via tethered photography. Use software such as “Adobe Lightroom Classic + FUJIFILM Tether Shooting Plug-in” or “FUJIFILM X Acquire”. N • For more information on tethered photography, visit the website be- low. https://app.fujifilm-dsc.com/en/tether/ • Visit the website below for information on the software used.
-
Page 125: Raw Processing
Connect the camera to the computer via USB and then turn the camera on (P 108). Launch X RAW STUDIO. RAW processing can be performed using X RAW STUDIO. Visit the website below for information on the software used. https://fujifilm-x.com/products/software/... -
Page 126: Saving And Loading Settings
Connect the camera to the computer via USB and then turn the camera on (P 108). Launch FUJIFILM X Acquire. Camera settings can be saved or loaded using FUJIFILM X Acquire. Visit the website below for information on the software used. -
Page 127: Recording Movies Remotely From A Web Browser
Control the camera and record movies remotely from a computer or smartphone connected via the optional FT-XH fi le transmitter. The computer can connect to up to four cameras. Visit the website below for information on the software used. https://fujifilm-dsc.com/en/manual/x-h2_connection/... - Page 128 MEMO...
-
Page 129: Menu List
Menu List... -
Page 130: The Shooting Menus (Still Photography)
The Shooting Menus (Still Photography) Items marked with both x and F icons are available in both the still photography and movie shooting menus. Changes to these items in either menu also apply to the item in the remaining menu. IMAGE QUALITY SETTING To display image quality settings, press MENU/OK in the photo shooting display and select the H (IMAGE QUALITY SETTING) tab. - Page 131 Choose whether the current custom settings bank is to CUSTOM MODE be used for still photography or movie recording. SETTING SETTING F MOUNT ADAPTOR Adjust settings for M-mount lenses connected using MOUNT ADAPTOR SETTING SETTING an optional FUJIFILM M MOUNT ADAPTER.
-
Page 132: Af/Mf Setting
AF/MF SETTING To display AF/MF settings, press MENU/OK in the photo shooting display and select the G (AF/MF SETTING) tab. Setting Setting Description Description FOCUS AREA FOCUS AREA Choose the focus area. Choose how the camera focuses. FOCUS MODE FOCUS MODE AF MODE AF MODE Choose the size of the focus area. -
Page 133: Shooting Setting
The Shooting Menus (Still Photography) Setting Setting Description Description Choose whether the display automatically zooms in on FOCUS CHECK FOCUS CHECK the selected focus area when the focus ring is rotated in manual focus mode. Choose whether spot metering meters the current INTERLOCK SPOT AE &... - Page 134 Setting Setting Description Description Choose whether the self-timer lamp lights during self- SELF-TIMER LAMP SELF-TIMER LAMP timer photography. Confi gure the camera to take a selected number of INTERVAL TIMER INTERVAL TIMER shots automatically at a preset interval. SHOOTING SHOOTING Choose whether exposure is automatically adjusted INTERVAL TIMER INTERVAL TIMER...
-
Page 135: Flash Setting
The Shooting Menus (Still Photography) FLASH SETTING To display fl ash settings, press MENU/OK in the photo shooting dis- play and select the F (FLASH SETTING) tab. Setting Setting Description Description FLASH FUNCTION SETTING FLASH FUNCTION SETTING Adjust such settings as fl ash control mode, fl ash level, and fl... -
Page 136: The Shooting Menus (Movies)
The Shooting Menus (Movies) Items marked with both x and F icons are available in both the still photography and movie shooting menus. Changes to these items in either menu also apply to the item in the remaining menu. MOVIE SETTING To display options for movie recording, press MENU/OK in the mov- ie shooting display and select the B (MOVIE SETTING) tab. - Page 137 The Shooting Menus (Movies) Setting Setting Description Description F IS MODE Choose whether to enable image stabilization. IS MODE F IS MODE BOOST Choose the image stabilization level. IS MODE BOOST F ISO Adjust the camera’s sensitivity to light. ZEBRA SETTING ZEBRA SETTING Choose whether highlights that may be overexposed are shown by zebra stripes in the movie mode display.
-
Page 138: Image Quality Setting
CORRECTION movies. F MOUNT ADAPTOR Adjust settings for M-mount lenses connected using MOUNT ADAPTOR an optional FUJIFILM M MOUNT ADAPTER. SETTING SETTING AF/MF SETTING To display AF/MF settings, press MENU/OK in the movie shooting display and select the G (AF/MF SETTING) tab. - Page 139 The Shooting Menus (Movies) Setting Setting Description Description F AF-C CUSTOM SETTING AF-C CUSTOM SETTING Choose focus-tracking options when recording movies with CONTINUOUS AF selected for focus mode. F AF ILLUMINATOR AF ILLUMINATOR Choose whether the AF-assist illuminator lights to assist autofocus.
-
Page 140: Audio Setting
AUDIO SETTING To display audio settings, press MENU/OK in the movie shooting display and select the P (AUDIO SETTING) tab. Setting Setting Description Description INTERNAL MIC LEVEL INTERNAL MIC LEVEL Adjust the recording level for the built-in microphone. ADJUSTMENT ADJUSTMENT Adjust the recording level for external microphones. EXTERNAL MIC LEVEL EXTERNAL MIC LEVEL ADJUSTMENT... -
Page 141: Time Code Setting
The Shooting Menus (Movies) TIME CODE SETTING To display time code settings, press MENU/OK in the movie shoot- ing display and select the Q (TIME CODE SETTING) tab. Setting Setting Description Description TIME CODE DISPLAY TIME CODE DISPLAY Choose whether to display time codes during movie recording and playback. -
Page 142: The Playback Menu
The Playback Menu The playback menu is displayed when you press MENU/OK in play- back mode. Setting Setting Description Description Choose the card from which images will be played SWITCH SLOT SWITCH SLOT back. Copy RAW pictures in other formats. RAW CONVERSION RAW CONVERSION Convert HEIF pictures to JPEG or TIFF. - Page 143 The Playback Menu Setting Setting Description Description View pictures in an automated slide show. SLIDE SHOW SLIDE SHOW PHOTOBOOK ASSIST PHOTOBOOK ASSIST Create books from your favorite photos. Create a digital “print order” for DPOF-compatible PRINT ORDER (DPOF) PRINT ORDER (DPOF) printers.
-
Page 144: The Setup Menus
The Setup Menus USER SETTING To access basic camera settings, press MENU/OK, select the D (SET UP) tab, and choose USER SETTING. Setting Setting Description Description FORMAT FORMAT Format memory cards. b AREA SETTING Choose your location. AREA SETTING Set the camera clock. DATE/TIME DATE/TIME TIME DIFFERENCE... -
Page 145: Sound Set-Up
The Setup Menus SOUND SET-UP To access sound settings, press MENU/OK, select the D (SET UP) tab, and choose SOUND SET-UP. Setting Setting Description Description AF BEEP VOL. AF BEEP VOL. Choose the volume of the beep that sounds when the camera focuses. -
Page 146: Screen Set-Up
SCREEN SET-UP To access display settings, press MENU/OK, select the D (SET UP) tab, and choose SCREEN SET-UP. Setting Setting Description Description VIEW MODE SETTING VIEW MODE SETTING Adjust settings for eye sensor, EVF (electronic view- fi nder), or LCD monitor view modes. Adjust the brightness of the display in the electronic EVF BRIGHTNESS EVF BRIGHTNESS... - Page 147 The Setup Menus Setting Setting Description Description Choose the units used for the focus distance indicator. FOCUS SCALE UNITS FOCUS SCALE UNITS APERTURE UNIT FOR APERTURE UNIT FOR Choose whether the camera displays aperture as a T-number or an f/-number when an optional cinema CINEMA LENS CINEMA LENS lens is attached.
-
Page 148: Button/Dial Setting
BUTTON/DIAL SETTING To access control options, press MENU/OK, select the D (SET UP) tab, and choose BUTTON/DIAL SETTING. Setting Setting Description Description FOCUS LEVER SETTING FOCUS LEVER SETTING Choose the functions performed by the focus stick (focus lever). x EDIT/SAVE QUICK Choose the items displayed in the quick menu during EDIT/SAVE QUICK still photography. -
Page 149: Power Management
The Setup Menus Setting Setting Description Description Choose the role of the button to which exposure and/ AE/AF-LOCK MODE AE/AF-LOCK MODE or focus lock is assigned. Choose the behavior of function buttons assigned auto AWB-LOCK MODE AWB-LOCK MODE white balance (AWB) lock. a ISO BUTTON SETTING ISO BUTTON SETTING Choose the role played by the ISO button during playback. -
Page 150: Save Data Set-Up
The Setup Menus SAVE DATA SET-UP To access fi le management settings, press MENU/OK, select the D (SET UP) tab, and choose SAVE DATA SET-UP. Setting Setting Description Description FRAME NO. FRAME NO. Choose whether fi le numbering is reset when a new memory card is inserted. -
Page 151: Network/Usb Setting Menus
Network/USB Setting Menus To access network/USB settings, press MENU/OK and select the I (network/USB settings) tab. For information on the network/USB settings menu, visit the website below. https://fujifilm-dsc.com/en/manual/x-h2_connection/... - Page 152 MEMO...
-
Page 153: Notices
Notices... -
Page 154: For Your Safety
For Your Safety IMPORTANT SAFETY INSTRUCTIONS • Read Instructions Read Instructions: All the safety and operating instructions Power-Cord Protection: Power-supply cords should be routed should be read before the appliance is operated. so that they are not likely to be walked on or pinched by •... - Page 155 For Your Safety Power Lines: An outside antenna system should not be locat- Damage Requiring Service: Unplug this video product from ed in the vicinity of overhead power lines or other electric the wall outlet and refer servicing to qualifi ed service person- light or power circuits, or where it can fall into such power nel under the following conditions: •...
- Page 156 WARNING WARNING WARNING WARNING If the battery leaks and fl uid gets in contact with your If the battery leaks and fl uid gets in contact with your Do not use the camera in the bathroom or shower. Do not use the camera in the bathroom or shower. This eyes, skin or clothing, fl ush the aff ected area with clean eyes, skin or clothing, fl ush the aff ected area with clean can cause a fi...
- Page 157 For Your Safety CAUTION CAUTION Do not use this camera in locations aff ected by oil Do not use this camera in locations aff ected by oil fumes, steam, humidity or dust. fumes, steam, humidity or dust. This can cause a fi re or electric shock.
- Page 158 The Battery and Power Supply Note: Check the type of battery used in your camera and read ■ ■ Cautions: Handling the Battery Cautions: Handling the Battery • the appropriate sections. Do not transport or store with metal objects such as neck- laces or hairpins.
- Page 159 Digital Split Image is a trademark or registered trademark of such as the sun in a cloudless sky. Failure to observe this FUJIFILM Corporation. Digital Micro Prism is a trademark or precaution could damage the camera image sensor. registered trademark of FUJIFILM Corporation. The typefaces •...
- Page 160 NOTICES To prevent fire or shock hazard, do not expose the unit to rain or moisture. Please read the “Safety Notes” and make sure you understand them before using the camera. Perchlorate Material—special handling may apply. See: http://www.dtsc.ca.gov/hazardouswaste/perchlorate For Customers in the U. S. A. For Customers in the U.
- Page 161 fi ndings Liechtenstein: If you wish to discard this product, including have not been confi rmed by additional research. X-H2 has the batteries or accumulators, please contact your local au- been tested and found to comply with IC radiation exposure thorities and ask for the correct way of disposal.
- Page 162 RoHS Directive 2011/65/EU • RE Directive 2014/53/EU Hereby, FUJIFILM Corporation declares that the radio equipment type FF210003 is in compliance with Directive 2014/53/EU. The full text of the EU declaration of conformity is available at the following internet address: https://dl.fujifilm-x.com/global/products/cameras/x-h2/pdf/x-h2_doc-myt.pdf The full text of the UK declaration of conformity is available at the following internet address: https://dl.fujifilm-x.com/en-gb/products/cameras/x-h2/pdf/x-h2_doc-myt_uk.pdf...
- Page 163 The maximum SAR value is 0.224 W/kg (head/body) averaged over 10 gram of tissue. U.K. Importer: FUJIFILM UK Limited Fujifi lm House, Whitbread Way, Bedford, Bedfordshire, MK42 0ZE, United Kingdom EU Importer: FUJIFILM Electronic Imaging Europe GmbH Fujistrasse 1 47533 Kleve, Germany...
- Page 164 Be sure to read these notes before using the lens Safety Notes WARNING WARNING • Make sure that you use the lens correctly. Read these safety Do not immerse in or expose to water. Failure to ob- Do not immerse in or expose to water. notes and the camera Basic Manual carefully before use.
- Page 165 For Your Safety AC-5VJ AC power adapter Dongguan Yingiu Power Co.,Ltd. Manufacturer No.6 Yongxing Road, Shayao Village, Shijie Town, Address 523292 Dongguan City, Guangdong Province, PEOPLE'S REPUBLIC OF CHINA Model name AC-5VJ Rated input 100 V – 240 V AC, 50/60 Hz Input capacity Max.
- Page 166 push up/down key to scroll the menu list...
- Page 167 push up/down key to scroll the menu list...
- Page 170 MEMO...
- Page 171 MEMO...
- Page 172 7-3, AKASAKA 9-CHOME, MINATO-KU, TOKYO 107-0052, JAPAN https://fujifilm-x.com...
Need help?
Do you have a question about the X-H2 and is the answer not in the manual?
Questions and answers