
Related Manuals for MINOLTA-QMS PagePro 4100GN


Summary of Contents for MINOLTA-QMS PagePro 4100GN
- Page 1 + Documentation ++ Documentation ++ Documentation ++ Documentation ++ Documentation ++ User Manual PagePro 4100GN...
-
Page 2: Table Of Contents
Fitting the paper output tray and paper feed tray 1...2-11 Connecting the power cable...2-12 Switching the printer on and off...2-13 Printing a configuration page ...2-14 Connecting the printer to a computer (parallel port)...2-15 Connecting the printer to a network (network interface) ...2-16 PagePro 4100GN TOC-1... - Page 3 General information on the printer driver... 3-2 Information on installation using Plug-and-Play ... 3-2 Information on installation using the Add Printer Wizard ... 3-2 Information on installing a network printer... 3-2 CD-ROM installation for Win 95/98 or Win NT4.0 ... 3-3 CD-ROM installation for Windows 3.1x ...
- Page 4 Working with the DOS PCL printer tools Using the Status Display...6-1 Calling up the Status Display ...6-1 Switching on/off popup messages (Setup menu)...6-2 Changing the hotkey command for the Status Display (Setup menu) ...6-2 Defining popup messages (Setup menu)...6-2 PagePro 4100GN TOC-3...
- Page 5 Notes on installing the printer driver... 7-2 General information on the printer driver... 7-3 Information on installing a network printer... 7-3 CD-ROM installation for Win95/98 or Win NT4.0 ... 7-4 Printer Test page (Sample) ... 7-10 CD-ROM installation for Win 3.1x ... 7-11 TOC-4 PagePro 4100GN...
- Page 6 CD-ROM installation for MacOS ...7-14 Installing Screen Fonts...7-18 Working with the PostScript printer driver The Windows 95/98 PostScript printer properties dialogue ...8-2 The "Minolta/QMS PagePro 4100 -PS Properties" dialogue...8-2 The Windows NT4.0 PostScript printer properties dialogues ..8-4 Displaying the "Printers" dialogue ...8-4 The "Minolta/QMS PagePro 4100 -PS Default Document Properties"...
- Page 7 Hardware ... 13-1 Software ... 13-1 Operating system ... 13-1 13.2 Technical specification ... 13-2 PagePro 4100GN printer ... 13-2 500-sheet paper feed tray (option) ... 13-3 Duplex unit (option) ... 13-4 SDRAM-SIMM memory module (option) ... 13-4 Parallel interfaces ... 13-4 Network interfaces...
-
Page 8: Introduction
Introduction Introduction Welcome to Minolta/QMS Thank you for purchasing a Minolta/QMS PagePro 4100GN laser printer. To achieve the best possible results and to use your laser printer effectively, this User’s Manual provides you with information on the following topics: installing the printer driver,... -
Page 9: Roadmap Of This Manual
Introductory remarks and information on how to use this manual as well as notes on the safe use of the printer. |nformation on how to set up the printer as well as an introduction to the various features. A step-by-step explanation of the routine for installing the PCL printer driver. -
Page 10: Brief Explanation Of Special Type Styles And Method Of Presentation
This is a helpful tip Text passages that are identified in this manner provide you with tricks and handy tips to make it even easier to work with the printer. PagePro 4100GN Here you can see what has to be done. -
Page 11: Working Safely With Your Laser Printer
Notes on your safety and operating safety Working improperly with the printer can result in health hazards, electric shocks and even fires. Before you unpack the laser printer, you should make yourself familiar with this information on your safety and operating safety. -
Page 12: Pagepro 4100Gn
➜ If the machine becomes unusually hot, or if you notice smoke or an unusual odour coming from the machine, switch it off immediately and remove the power cable from the socket. Contact your customer support technical specialist. PagePro 4100GN... -
Page 13: Laser Safety
Laser safety This printer is equipped with a laser unit. If the printer is used in accordance with the instructions in the User’s Manual, the laser presents no danger. The radiation emitted is completely absorbed and attenuated by the case. -
Page 14: Cdrh Regulations
USA must comply with these statutory requirements without exception. The safety label shown here confirms compliance with the CDRH regulations. This label must be attached to all products sold or used in the USA. PagePro 4100GN... -
Page 15: Laser Safety Label
Using the controls, adjusting the printer or performing procedures other than as specified in this manual may result in exposure to hazardous radiation. ➜ Use the printer only according to the instructions contained in the User’s Manual. Introduction PagePro 4100GN... -
Page 16: Laser Caution Label
Dangerous laser radiation! This is a semiconductor laser. The maximum power of the laser diode is 5 mW and the wavelength is 770–810 nm. ➜ Use the printer only according to the instructions contained in the User's Manual. PagePro 4100GN... - Page 17 Introduction 1-10 PagePro 4100GN...
-
Page 18: Unpacking, Installing And Setting Up The Printer
Remove the printer parts and accessories from the box. ❍ Paper output tray ❍ Printer ❍ Installation Guide ❍ CD-ROM ❍ Power cable ❍ Paper feed tray. Remove the packaging material from the printer. Remove the transport retainers from the printer. PagePro 4100GN... - Page 19 Why save packaging materials? If you need to move the printer, you can use the packaging again. In this way you can be certain that your printer is correctly packed. Unpacking, installing and setting up the printer...
-
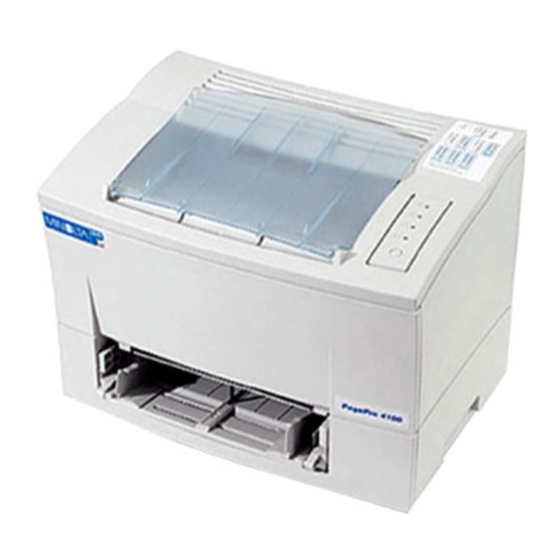
Page 20: Overview Of The Printer
Description Release button for top cover Control panel Paper output tray (face down) Top Cover Paper guides PagePro 4100GN Description Paper feed tray 1 (multipurpose tray) Power Switch (ON/OFF) Socket for power cable Ethernet interface connector (10BaseT/100 BaseTX) Parallel port... -
Page 21: Internal Printer Parts
Internal printer parts Description Fusing unit Paper guide Manual paper feed unit Unpacking, installing and setting up the printer Description Cover to paper feed tray 2 Image transfer roller Imaging cartridge PagePro 4100GN... -
Page 22: Optional Printer Parts
Unpacking, installing and setting up the printer Optional printer parts Description Paper feed tray 2 (500-sheet cassette) Paper feed tray 3 (500-sheet cassette) PagePro 4100GN Description Duplex Unit... -
Page 23: Printer Control Panel
Printer control panel The control panel has three lamps and one button. Description Stand-by lamp (green) Paper empty (orange) Unpacking, installing and setting up the printer Description Fault (red) Control button PagePro 4100GN... -
Page 24: Installing Your Laser Printer
The printer must be positioned in a way that it cannot be adversely affected by the following: splashing liquids, organic gases, e.g. -
Page 25: Ambient Conditions
Ambient conditions The optimum ambient conditions for your printer are as follows: Temperature range 50°F to 95°F / 10°C to 35°C (maximum variation of 18°F / 10°C per hour); Relative humidity of 15% to 85% (maximum variation of 20% per hour). -
Page 26: Space Required
Unpacking, installing and setting up the printer Space required Make certain that there is enough space available around the printer (see figure). This will facilitate operation, reloading paper and toner, and maintenance of the printer. Dimension 40-1/2 in. / 1030 mm 33 in. -
Page 27: Space Required (When Equipped With Optional Paper Cassette Unit)
Space required (when equipped with optional paper cassette unit) Make certain that there is enough space available around the printer (see figure). This will facilitate operation, reloading paper and toner, and maintenance of the printer. Dimension 40-1/2 in. / 1030 mm 33 in. -
Page 28: Setting Up Your Laser Printer
Set the guides of the paper feed tray to match the size of paper you wish to use. Attach the paper output tray to the printer as shown here. Slide the lower part of the paper feed tray into the printer. Fit the cover of paper feed tray 1. PagePro 4100GN 2-11... -
Page 29: Connecting The Power Cable
Connecting the power cable Only use the power cable supplied with the printer! The laser printer requires a power supply with minimal voltage and frequency fluctuation. If necessary, ask an electrician for advice. ✔ Power supply: 120-127 V at 50-60 Hz / 220-240 V at 50-60 Hz ✔... -
Page 30: Switching The Printer On And Off
Improper handling may result in damge to the printer! ➜ Never switch off the printer while a print job is in progress, the printer is receiving data from the computer (flashing “Stand-by“ lamp on the control panel) or the printer is being reset. -
Page 31: Printing A Configuration Page
Be well prepared for technical queries! Please have a current configuration page available when calling for technical assistance. Make a note of the serial No. of the printer on the configuration page, see page 1-8 (Laser safety label). 2-14... -
Page 32: Connecting The Printer To A Computer (Parallel Port)
CAUTION Using the wrong type of cable may result in damage to the equipment! Using the wrong type of cable may damage the socket on the printer. ➜ Only use an IEEE 1284 type B shielded interface cable for connecting the printer to your computer. -
Page 33: Connecting The Printer To A Network (Network Interface)
CAUTION Using the wrong type of cable may result in damage to the equipment! Using the wrong type of cable may damage the socket on the printer. ➜ Only use an IEEE 1284 type B shielded interface cable for connecting the printer to your computer. -
Page 34: Installing The Pcl Printer Driver
Which optional accessories are fitted to your printer? Is your printer a local printer or a network printer? ❍ Local printer: when the printer is connected directly to your computer via a parallel interface cable. ❍ Network printer: when the printer is integrated in a computer network. -
Page 35: General Information On The Printer Driver
Information on installing a network printer You can install the printer as a local printer or as a network printer. You should note the following points when installing it as a network printer: If you would like to access the printer from a server running Windows 95, first install the printer driver from the server using the installation program. -
Page 36: Cd-Rom Installation For Win 95/98 Or Win Nt4.0
When the "Update Device Driver Wizard" dialog appears under Win 95 or 98: ➜ Click [CANCEL] to close the dialog. Place the “PagePro 4100GN printer driver CD“ in the CD-ROM drive of your computer. The installation program starts automatically. The installation program does not start automatically? ➜... - Page 37 Follow the instructions on the screen to complete the installation. After the printer driver has been successfully installed, the “Minolta QMS Printer Utilities“ Program Group appears. You can now call up the “Minolta QMS Printer Utilities“ Program Group via the Windows Start menu. Installing the PCL printer driver...
-
Page 38: Cd-Rom Installation For Windows 3.1X
Switch on the printer. Switch on the computer and start Windows 3.1x. Place the “PagePro 4100GN printer driver CD“ in the CD-ROM drive of your computer. Double-click the icon [CONTROL PANEL] wich is located in the “Main group“ within the “Program Manager“. Double-click [PRINTERS] to display the “Printer“... - Page 39 An error message appears announcing that the UNIDRV.DLL file is required but cannot be found. ➜ Install a UniTool Driver from the list of printers and try again. Installing the PCL printer driver PagePro 4100GN...
-
Page 40: Cd-Rom Installation For Ms-Dos
Make sure that the printer is connected to your computer locally or via a network. Switch on the printer. Switch on the computer and start MS-DOS. Place the PagePro 4100GN printer driver CD in the CD-ROM drive of your computer. Change to the CD-ROM drive. Enter, for example: d:\ (d = corresponding letter of your CD-ROM drive) Change to the directory which contains the installation program. -
Page 41: Uninstalling The Windows Printer Driver
Call up the “Minolta QMS Printer Utilities“ program group. Click on [UNINSTALL]. The deinstallation program starts automatically. Follow the subsequent instructions. The deinstallation of the printer driver is successfully completed once the Windows operating system has been restarted. Installing the PCL printer driver PagePro 4100GN... -
Page 42: Deinstallation For Windows 3.1X
Deinstallation for Windows 3.1x Call up the [MINOLTA/QMS PAGEPRO 4100 UNI] program group. Click on [REMOVE]. You are prompted to confirm/cancel your selection. Click on [YES] in order to delete the printer driver. Click on [CLOSE]. The program group is deinstalled. PagePro 4100GN... - Page 43 Installing the PCL printer driver 3-10 PagePro 4100GN...
-
Page 44: Working With The Pcl Printer Driver
Working with the PCL printer driver Displaying printer driver settings Displaying settings in Windows 95/98 In the START menu, select “Settings – Printer“. The “Printer“ dialogue box appears. Click on the “Minolta/QMS PagePro 4100“ icon. Under “File“, select the item “Properties“. - Page 45 The operating system also uses index cards! The “About“ index card is automatically determined by the operating system and is therefore not described in this manual. Working with the PCL printer driver PagePro 4100GN...
-
Page 46: Displaying Settings In Windows Nt 4.0
Working with the PCL printer driver Displaying settings in Windows NT 4.0 In the START menu, select “Settings – Printer“. The “Printer“ dialogue box appears. Click on the “Minolta/QMS PagePro 4100“ icon. Under “File“, select the item “Document Defaults“. The following box appears. -
Page 47: Displaying The Settings In Windows 3.1X
The “Control panel“ program group appears. In the Control panel window, click on the “Printers“ icon. The “Printer“ dialogue box appears. In the “Printer“ dialogue box, select Minolta/QMS PagePro 4100 [UNI] from the list of “Installed printers“. Click on [SETUP...]. -
Page 48: Paper Index Card
[DEFAULT]. PagePro 4100GN... -
Page 49: Selecting A Paper Format
Selecting a paper format Use “Paper size“ to specify the format of the printed page. The various paper sizes supported by your printer are shown in the dropdown list. The following formats have a fixed definition in the dropdown list:... -
Page 50: Creating A Custom Paper Format
“Paper size“ dropdown list and can be selected when required. You wish to delete a custom format? In the “Custom papers“ dialogue box, mark the paper size you wish to delete. Then click on [DELETE]. Confirm with [OK]. PagePro 4100GN... -
Page 51: Adjusting The Print-Out To Fit The Paper
You may enter any value between 1 and 999. Specifying the orientation of the print paper Under “Orientation“ you can specify whether your document should be printed in portrait (vertical) or landscape (horizontal) format. Working with the PCL printer driver Portrait Landscape PagePro 4100GN... -
Page 52: Switching On/Off The Printer's Sorting Function
Switch on the “Collate“ function in order to sort your print-outs automatically. Deactivate the sort feature in other applications! Deactivate the sort feature in other software applications if there is a conflict between the setting in the printer driver and the setting in the other application. PagePro 4100GN Collate OFF... -
Page 53: Specifying The Paper Source
Specifying the paper source Under “Paper source“ you can specify which tray will feed the printer. Paper source Auto Tray 1 Tray 2/3* Manual feed * optional paper source units Not all paper formats available? If you have selected the optional paper feed tray 2 or 3 under “Paper source“, then not all the paper formats given in the table are available. -
Page 54: Page Layout Index Card
This index card allows you to: print several pages of a document on the same print page, provide print-outs with a watermark, design custom watermarks, scale (enlarge/reduce) documents upon print-out, activate the duplex function (printing on both sides). PagePro 4100GN 4-11... -
Page 55: Printing Multiple Document Pages Per Print Page (N-Up)
Two document pages will be printed on each print page Four document pages will be printed on each print page Nine document pages will be printed on each print page 16 document pages will be printed on each print page PagePro 4100GN... -
Page 56: Printing Watermarks
Activate the checkbox [FIRST PAGE ONLY] so that the watermark will only be printed on the first page of a multi-page document. Watermarks as copy protection! Provide your print-outs with a watermark in order to prevent the printed pages from being copied. PagePro 4100GN 4-13... -
Page 57: Creating Watermarks
Confirm your entries with [OK]. The dialogue box closes. Deleting watermarks? No problem! If you would like to delete a watermark, mark it in the list of watermarks and click on [DELETE]. 4-14 Working with the PCL printer driver PagePro 4100GN... -
Page 58: Scaling The Printed Document
Booklet right open: for printing a document which is folded once in the middle and bound on the left-hand side. The booklet function is not available? The Scaling, Fit to paper and N-up functions cannot be used at the same time as the Booklet function. PagePro 4100GN 4-15... -
Page 59: Quality Index Card
Quality index card This index card allows you to: optimize the exchange of text and graphics data with the printer (All raster), switch on/off Toner Save mode, determine the graphics mode, optimize the print quality of text and graphics (Fine-ART),... -
Page 60: Optimizing Data Exchange With The Printer (All Raster)
“Scaling“, “Fit to paper“ and “Font“ functions. ➜ Select [ON] to send both graphics and font data to the printer as raster graphics. This makes it possible for the printed document to agree as closely as possible with the appearance on the screen. Printing may be slower with this function activated. -
Page 61: Specifying The Graphics Mode
➜ Select [OFF] to achieve an optimum print quality for photos (raster graphics). ➜ Select [ON] to achieve an optimum print quality for text and graphics (vector graphics) in your document. 4-18 Working with the PCL printer driver PagePro 4100GN... -
Page 62: Specifying Truetype Mode
➜ Select [TRUETYPE AS GRAPHICS] to load TrueType fonts into the printer as raster data. Printer-resident fonts are not available in this mode. Determining the resolution The quality of the print-out is defined by means of the “Graphics quality“... -
Page 63: Optimizing The Presentation Of Graphics In The Print-Out (Detail Of Quality
When you print out graphics that you intend to fax or copy afterwards, select the [PHOTOCOPY] dither pattern. The graphics are then printed out in a form suitable for faxing or copying. 4-20 Working with the PCL printer driver PagePro 4100GN... -
Page 64: Font Index Card
Working with the PCL printer driver Font index card This index card allows you to: add fonts to the printer’s on-board memory, delete fonts from the printer’s on-board memory, set the ID. PagePro 4100GN 4-21... -
Page 65: Adding Fonts
Adding fonts You can add fonts to the printer’s on-board memory via the “Font“ index card. ➜ Click on [ADD FONTS...] and then specify the directory in which the downloaded fonts are to be saved. If there are already fonts in this directory, then these are shown in the right-hand list. -
Page 66: Device Option Index Card
Working with the PCL printer driver Device option index card This index card allows you to: activate the optional duplex unit, activate optional paper feed tray 2 or 3. PagePro 4100GN 4-23... -
Page 67: Activating The Optional Duplex Unit
If you have installed paper feed tray 2 or 3, then you can mark this in the list of available options. ➜ Activate paper feed tray 2 or 3 with the [ADD] button. ➜ Deactivate paper feed tray 2 or 3 with the [REMOVE] button. 4-24 Working with the PCL printer driver PagePro 4100GN... -
Page 68: Working With The Windows Pcl Printer Tools
“Status Display“ and the “Control Panel“. Automatic start of "Status Display"! If upon installing the printer driver you activated the option to automatically start the printer driver, then the Status Display is automatically called up upon starting the computer. -
Page 69: Calling Up The Status Display
Calling up the Status Display Calling up the Status Display in Windows 95/98, Windows NT4.0 Open the “Minolta QMS Printer Utilities“ program group. Click on [MINOLTA QMS STATUS DISPLAY 4100]. The Status Display appears. Working with the Windows PCL printer tools... -
Page 70: Calling Up The Status Display In Windows 3.1X
Calling up the Status Display in Windows 3.1x The options on the individual index cards correspond to those of Windows 95/98. Open the “Minolta/QMS PagePro 4100 [UNI]“ program group within the Program Manager. Doubleclick the [MINOLTA/QMS PAGEPRO 4100 STATUS DISPLAY] icon. The "Status Display" appears. PagePro 4100GN... -
Page 71: Altering The Size Of The Status Display Window
[REDUCE] in order to decrease the size of the window. ➜ In the “Status Display“ menu bar, select the menu [VIEW] and then the option [EXPAND] in order to increase the size of the window. Working with the Windows PCL printer tools PagePro 4100GN... -
Page 72: Calling Up The Control Panel
Calling up the Control Panel Use the “Control Panel“ in order to check and/or alter the basic settings of the printer. Open the “Minolta QMS Printer Utilities“ program group. Click on [MINOLTA QMS CONTROL PANEL 4100]. The “Status Display“ appears. -
Page 73: Paper Index Card
Paper index card This index card allows you to: define the response in the case of a lack of suitable paper (paper format error), define the paper format for paper feed tray 1. Working with the Windows PCL printer tools PagePro 4100GN... -
Page 74: Defining The Response In The Case Of A Lack Of Suitable Paper
Working with the Windows PCL printer tools Defining the response in the case of a lack of suitable paper You can determine how the printer responds in the case of a paper format error. ➜ Select [PROCEED] to continue printing on the paper format already fed into the machine. -
Page 75: Printer Setting Index Card
– Jam Recovery, switch on/off the Pre-Heat function, specify the print language for communication between printer and computer. Working with the Windows PCL printer tools... -
Page 76: Switching On/Off The Power Save Mode
Detecting paper misfeeds – Jam Recovery This function protects the data in the event of a paper misfeed. ➜ Select [ON] to instruct the printer to save data if a document jams in the printer prior to being printed. ➜... -
Page 77: Specifying The Print Language
The print language defines the way in which the computer communicates with the printer. ➜ Select [PCL] or [POSTSCRIPT] by clicking in the drop-down list. ➜ Select [AUTOMATIC] to enable the most appropriate print language to be selected automatically. 5-10 Working with the Windows PCL printer tools PagePro 4100GN... -
Page 78: Test Print Index Card
List of PostScript-resident fonts PagePro 4100GN Description Prints out a demonstration page with an overview of all printer functions. Prints out a configuration page with the current printer settings. Prints out a list of all printer fonts available, with designations and samples. -
Page 79: Counter Index Card
Counter index card This index card allows you to: check the status of a counter, reset a counter. 5-12 Working with the Windows PCL printer tools PagePro 4100GN... -
Page 80: Checking The Status Of A Counter
The associated counter is reset to zero “0“. PagePro 4100GN Description This indicates the total number of pages printed by the printer. This counter can only be reset by a customer service engineer. This indicates how many pages have been fed from paper feed tray 2. -
Page 81: Configuration Index Card
Configuration index card This index card summarizes the most important printer settings for quick reference. No settings can be altered via this index card. 5-14 Working with the Windows PCL printer tools PagePro 4100GN... -
Page 82: Working With The Dos Pcl Printer Tools
Using the Status Display Calling up the Status Display Call up the “Status Display“ in order to check the printer and the progress of print jobs. Change to the directory into which the printer driver files were copied upon installation. -
Page 83: Switching On/Off Popup Messages (Setup Menu)
Press the desired keys in succession in order to define a new key combination for calling up the “Status Display“. Defining popup messages (Setup menu) You can specify which printer faults cause a popup message to appear on the screen. ➜... -
Page 84: Using The Dos Control Panel
Calling up the Control Panel Call up the Control Panel in order to specify the basic settings of the printer. Change to the directory into which the printer driver files were copied upon installation. Enter, for example: cd c:\pp4100 Enter the following command in order to call up the “Control Panel“: dospanel The “Control Panel“... -
Page 85: Paper Panel
1. Working with the DOS PCL printer tools PagePro 4100GN... -
Page 86: Selecting A Paper Format
Selecting a paper format Use “Paper size“ to specify the format of the printed page. The various paper sizes supported by your printer are shown in the drop-down list. The following formats have a fixed definition in the drop-down list:... -
Page 87: Specifying The Paper Source
Specifying the paper source Under “Paper source“ you can specify which tray will feed the printer and which type of paper is to be fed in. Paper source Automatic Tray 1 Tray 2/3* Manual * optional paper source units Not all paper formats available? If you have selected the optional paper feed tray 2 or 3 under “Paper... -
Page 88: Specifying The Orientation Of The Printing Paper
Under “Orientation“ you can specify whether your document should be printed in portrait (vertical) or landscape (horizontal) format. Defining the response to format errors The “Paper Time Out“ function allows you to define how the printer responds to paper format errors. ➜... -
Page 89: Specifying A Paper Format For Paper Feed Tray 1
Env. C5 148 × 210 mm Env. B5 182 x 257 mm J-Post (Postcard) Size 3.875 × 7.5 in. 4.125 × 9.5 in. 110 × 220 mm 162 x 250 mm 176 × 250 mm 4 × 5.75 in. PagePro 4100GN... -
Page 90: Font Panel
(Typeface) which is to be used for the print-out, determine the character set (Symbol Set) which is to be used for the print-out, determine the font size (Pitch/Point) which is to be used for the print- out. PagePro 4100GN... -
Page 91: Output Quality Panel
This panel allows you to: switch on/off the Toner Save mode, define the resolution for the print-out, define the print quality optimization for text and graphics (Fine-Art), specify the toner density. 6-10 Working with the DOS PCL printer tools PagePro 4100GN... -
Page 92: Switching On/Off The Toner Save Function
The print language defines the way in which the computer communicates with the printer. ➜ Select [PCL] or [POSTSCRIPT] by clicking in the drop-down list. ➜ Select [AUTOMATIC] to enable the most appropriate print language to be selected automatically. PagePro 4100GN 6-11... -
Page 93: Counter Panel
Counter panel This panel allows you to: check the status of a counter, reset a counter. 6-12 Working with the DOS PCL printer tools PagePro 4100GN... -
Page 94: Checking The Status Of A Counter
The associated counter is reset to zero "0". PagePro 4100GN Description This indicates the total number of pages printed by the printer. This counter can only be reset by a customer service engineer. This indicates how many pages have been fed from paper feed tray 2. -
Page 95: Configuration Panel
Configuration panel This panel summarizes the most important printer settings for quick reference: “Printer Name“ The designation of the printer. “Total Memory“ Indicates the total memory available. “Additional Accessories“ Indicates presence and status of optional accessories. No settings can be altered via this panel. -
Page 96: Printer Setting Panel
Pre-Heat function, switch on/off the automatic continuation in the case of an error message, switch on/off the data protection function in the case of a paper misfeed – Jam Recovery, define the input/output timeout. PagePro 4100GN 6-15... -
Page 97: Switching On/Off The Power Save Mode
Switching on/off the automatic continuation function A print job is interrupted if the printer signals a format error or memory overflow. The “Auto continue“ function enables you to determine whether the print job should continue automatically after a certain time has elapsed despite the presence of an error message. -
Page 98: Detecting Paper Misfeeds - Jam Recovery
Detecting paper misfeeds – Jam Recovery This function protects the data in the event of a paper misfeed. ➜ Select [ON] to instruct the printer to save data if a document jams in the printer prior to being printed. ➜... - Page 99 Working with the DOS PCL printer tools 6-18 PagePro 4100GN...
-
Page 100: Installing The Postscript Printer Driver
Installing the PostScript printer driver Installing the PostScript printer driver System requirements The “Minolta/QMS PagePro 4100GN PostScript Printer Driver“ allows you take full advantage of your printer’s features and capabilities under Windows 95, Windows 98, Windows NT4.0, Windows 3.1x and MacOS. -
Page 101: Windows 3.1X
Which optional accessories are fitted to your printer? Is your printer a local printer or a network printer? ❍ Local printer: When the printer is connected directly to your computer via a parallel interface cable. ❍ Network printer: When the printer is integrated into a computer network. -
Page 102: General Information On The Printer Driver
You will find the latest version of the printer driver under the address http://www.qms.com. Information on installing a network printer You can install the printer as a local printer or as a network printer. You should make note of the following points when installing as a network printer:... -
Page 103: Cd-Rom Installation For Win95/98 Or Win Nt4.0
Windows NT4.0. When the “Update Device Driver Wizard” dialog appears under Win95/98: ➜ Click [Cancel] to close the dialog. Place the “PagePro 4100GN printer driver CD“ in the CD-ROM drive of your computer. Installing the PostScript printer driver PagePro 4100GN... - Page 104 The installation program does not start automatically? ➜ Start Windows Explorer and open the directory of the CD-ROM. ➜ Double-click on [PAGEPRO.EXE] to start the installation program. In the next dialog window, choose a language for the installation procedure. Click the button [OK]. PagePro 4100GN...
- Page 105 Choose [POSTSCRIPT DRIVER] in the “Machine Emulation“ field. Click the [INSTALL] button. Follow the instructions of the “Adobe PostScript Setup“ program. When the “Select Printer Model“ dialog appears, click [BROWSE]. Installing the PostScript printer driver PagePro 4100GN...
- Page 106 Installing the PostScript printer driver In the “Browse for Printer“ dialog, select your CD-ROM drive and navigate to “drivers\pp4100\win95\gb\ps\drv“. Select [Minolta/QMS PagePro 4100 -PS] from the “Printers“ list. Confirm with [OK]. In the “Select Printer Model“ dialog click [NEXT] and follow the instructions of the Setup program.
- Page 107 If you wish to specify printer properties after installing, check box [YES]. Otherwise check box [NO]. Then click [NEXT]. This dialog is not displayed under Windows NT4.0. Change driver settings in the “Minolta/QMS PagePro 4100 -PS Properties“ dialog, and then click [OK].
- Page 108 Installing the PostScript printer driver Click [EXIT] to finish the installation. Eject the “PagePro 4100GN printer driver CD“ from the CD-ROM drive of your computer. The installation of “Adobe PostScript printer driver“ is complete now. After the printer driver has been successfully installed, the “Minolta/QMS PagePro 4100 -PS“...
-
Page 109: Printer Test Page (Sample)
Printer Test page (Sample) Below is a sample of what the printer will output if you select to print a “Test page“. Check that “Minolta/QMS PagePro 4100 -PS” is the “Printer Name“. This confirms that the printer driver has been installed correctly. -
Page 110: Cd-Rom Installation For Win 3.1X
Switch on the printer. Switch on the computer and start Windows 3.1x. Place the “PagePro 4100GN printer driver CD“ in the CD-ROM drive of your computer. Open the “Main group“ within the “Program Manager“ and double-click [FILE MANAGER] to display the “File Manager“. - Page 111 “drivers\pp4100\win311\gb\ps\drv“. Select [MINOLTA/QMS PAGEPRO 4100 -PS] in the “Printer Descriptions Available“ list, then click [INSTALL]. Click [OK] to return to the “Install PostScript Printer from the PPD“ dialog. Click [CLOSE] to close the “Install PostScript Printer from the PPD“ dialog.
- Page 112 If the “Minolta/QMS PagePro 4100 -PS“ printer shall used as default printer, click [SET AS DEFAULT PRINTER]. Click [CANCEL] to close the “Printers“ dialog. Eject the “PagePro 4100GN printer driver CD“ from the CD-ROM drive of your computer. PagePro 4100GN...
-
Page 113: Cd-Rom Installation For Macos
The following procedure is to be followed when working in an OS 8.1 environment. Install the printer driver for MacOS as described below: Make sure that the printer is connected to your computer via network. Switch on the printer. Switch on the computer and start MacOS. - Page 114 Double-click the the folder [PPD] in the [MAC] folder of the CD-ROM. Then open the folder of the prefered language. Drag the [MINOLTA/QMS PAGEPRO 4100 PS] file from the CD-ROM into the “Printer Descriptions“ folder in the “Extensions“ of the “System Folder“. PagePro 4100GN...
- Page 115 Open the “Apple menu“ on “Finder screen“ by clicking the Apple icon. Select [CHOOSER] from the “Apple menu“. From the “Chooser“, click the icon [ADOBEPS]. “ML1_xxxxxx“ (with “xxxxxx“ differing according to your printer) is displayed in the “Select a PostScript Printer“ list. 7-16...
- Page 116 Installing the PostScript printer driver Select [ML1_XXXXXX], then click [CREATE]. The small printer icon appears to the left of ML1_xxxxxx in the Chooser? ➜ This indicates successful completion of the auto setup. Click [SETUP] in the “Chooser“ window and then [CONFIGURE].
-
Page 117: Installing Screen Fonts
The PS3 Fonts folder contains Type 1 and TrueType fonts for Adobe PostScript3 that are visible on a Macintosh screen. Place the “PagePro 4100GN printer driver CD“ in the CD-ROM drive of your computer. Double-click the CD-ROM icon. Open the MAC folder, then the PS3 Fonts folder and double-click the PS3 Fonts Installer icon to start the installation. -
Page 118: Working With The Postscript Printer Driver
The Minolta/QMS PagePro 4100GN PostScript printer driver lets you specify the settings of your PagePro 4100GN printer to optimize printer performance. Note also that such factors as the original data (data format), the type of paper you are using, and the settings of your application software can also effect printing results. -
Page 119: The Windows 95/98 Postscript Printer Properties Dialogue
The Windows 95/98 PostScript printer properties dialogue Note The settings of the printer driver allow you to control a wide variety of printer features from your computer. The main features that can be controlled through this driver are explained in the following sections. - Page 120 [Fonts] – Here you set the font handling and font substitution. [Device Options] – Here you enter printer features and auxiliary accessories that are installed on the printer. [PostScript] – Here you specify PostScript settings and data format options.
-
Page 121: The Windows Nt4.0 Postscript Printer Properties Dialogues
The Windows NT4.0 PostScript printer properties dialogues Note The settings of the printer driver allow you to control a wide variety of printer features from your computer. The main features that can be controlled through this driver are explained in the following sections. -
Page 122: The "Minolta/Qms Pagepro 4100 -Ps Default Document Properties" Dialogue
The “Minolta/QMS PagePro 4100 -PS Default Document Properties“ dialogue appears. The “Minolta/QMS PagePro 4100 -PS Default Document Properties“ provides the following index cards: [Page Setup] – Here you enter general settings for document output. [Advanced] – Here you enter advanced settings for document output. PagePro 4100GN... -
Page 123: The "Minolta/Qms Pagepro 4100 -Ps Properties" Dialogue
[Sharing] – Here you enter the permissions to enable/diable other users to use this printer via network. [Security] – Here the system administrator defines special user rights. [Device Settings] – Here you enter detailed printer hardware features. Working with the PostScript printer driver PagePro 4100GN... -
Page 124: The Windows 3.1X Postscript Printer Properties Dialogue
The Windows 3.1x PostScript printer properties dialogue Note The settings of the printer driver allow you to control a wide variety of printer features from your computer. The main features that can be controlled through this driver are explained in the following sections. - Page 125 [Paper] – Here you enter the format settings for document output. [Features] – Here you enter printer features and auxiliary accessories that are installed on the printer. [Fonts] – Here you set the font handling and font substitution.
-
Page 126: The Macos Postscript Printer Setup Dialogue
[Background Printing] – Here you enter the print job’s priority. [Cover Page] – Here you enter whether the printer puts out a page with printing information before or after a print job. [Color Matching] – Here you enter the color information (color/gray scale) the printer gets from the computer. -
Page 127: The "Printer Specific Options" Dialogue
Jam Recovery This function protects the data in the event of a paper misfeed. ➜ Select [On] to instruct the printer to save data if a document jams in the printer prior to being printed. ➜ Select [Off] to suppress the saving ofdata if a document jams in the printer prior to being printed. -
Page 128: Idiom Recognition
Select [On] and the printer changes received print data from PostScript level 1 or 2 into PostScript level 3. So you can improve print speed and print quality. ➜ Select [Off] and the printer processes data in the received PostScript level. PagePro 4100GN 8-11... - Page 129 Working with the PostScript printer driver 8-12 PagePro 4100GN...
-
Page 130: Working With The Printer
Working with the printer Please note the following points: What should I watch out for when loading paper? To avoid paper misfeeds in the laser printer, please observe the following points: Do not use any paper with the following features: ❍... -
Page 131: Which Sizes Of Paper Can I Use
Which sizes of paper can I use? This printer is only designed for use with the sizes of paper listed below. Paper size Standard sizes 210 × 297 mm 148 × 210 mm JIS B5 182 × 257 mm Letter 8-1/2 ×... -
Page 132: What Types Of Paper Can I Use
Working with the printer What types of paper can I use? This printer is only designed for use with the types of paper listed below. Paper media standard media: Plain paper weight: 16 to 24 lbs. / 60 to 90g/m Recycled paper weight: 16 to 24 lbs. -
Page 133: Using The Control Button
Stand-by lamp (green) Paper empty (orange) The control button allows you to: cancel the current job, print out the configuration page, continue a print job after an error message. Working with the printer Description Fault (red) Control button PagePro 4100GN... -
Page 134: Cancel The Current Job
✔ when there is no more paper in the feed trays; ✔ when paper of a different format to that set in the printer driver was fed into the printer. Make sure that one of the above errors has occurred. -
Page 135: Loading Paper
Slide the guides up to the stack of paper. How many sheets may I place in the cassette? ➜ The stack of paper should not rise above the "max." mark. Refit the cover to paper feed tray 1. Working with the printer PagePro 4100GN... -
Page 136: Loading Paper Into The Manual Feed Unit
Place the paper between the guides with the side to be printed facing upwards. How are envelopes fed in? ➜ Envelopes are loaded with the flap down and facing to the left. Slide the guides up to the paper. PagePro 4100GN... -
Page 137: Loading Paper Into Paper Feed Tray 2/3
2/3 until you feel a resistance. Then lift the front of the cassette slightly before continuing to withdraw the cassette completely. Remove the cassette cover. Working with the printer Paper feed tray 2 Paper feed tray 3 PagePro 4100GN... - Page 138 How many sheets may I place in the cassette? ➜ The stack of paper should not rise above the "max." mark. Refit the cassette cover. Slide the cassette back into paper feed tray 2/3. PagePro 4100GN Paper feed tray 2 Paper feed tray 3...
-
Page 139: Monitoring Print Jobs With The Status Display
Monitoring print jobs with the Status Display The “Status Display“ allows you to monitor the printer and the progress of current print jobs. When the background to the printer graphic is green, the printer is in stand-by mode or a print job is running normally. -
Page 140: Installing Optional Accessories
Take the parts out of the box and remove the plastic packagings. Remove all packaging materials and adhesive tape. Remove the plastic pad from the feed tray. Switch the printer “Off“ and also disconnect the power cable and the interface cable from the printer. PagePro 4100GN... - Page 141 Mount the printer on the paper feed tray so that the locating pins of the feed tray enage with the holes in the printer. Fill the cassette with paper, see page 9-8. How many sheets may I place in the cassette? ➜...
-
Page 142: Installing The Duplex Unit
Take the duplex unit out of the box and remove all the plastic and other packagings. Remove the flat cover at the rear of the printer using a screwdriver or other similar tool. Attach the duplex unit as shown in the adjacent figure. - Page 143 Hold the duplex unit with your hand until your have screwed the unit into position on the printer. Connect the power cable to the printer, see page 2-12, and switch on the printer, see page 2-13. Print out a configuration page in order to check whether "Duplex unit"...
-
Page 144: Installing A Simm Memory Module
Installing optional accessories 10.3 Installing a SIMM memory module This printer is equipped with 8 MB of memory capacity as standard. The memory capacity can be expanded to max. 104 MB with commercially available SDRAM-SIMM memory modules. Memory modules of the following sizes may be used: 8, 16 and 32 MB. - Page 145 Close the output tray. Press the top cover release button and open the cover. Remove the two screws from the side cover and take off the cover. 10-6 Installing optional accessories PagePro 4100GN...
- Page 146 Remove the internal cover in order to gain access to the motherboard. Insert the memory module into one of the three slots. Press it carefully onto the socket until it clips into place. Simm Slots Refit the internal cover. PagePro 4100GN 10-7...
- Page 147 Refit the side cover and secure it with the two screws. Close the printer cover and fold out the paper output tray. Print out a configuration page for the printer, see page 2-14. The new total memory capacity should be shown correctly.
-
Page 148: Caring For And Maintaining Your Printer
You could damage the unit by using incorrect accessories and parts! If you use the accessories and parts of manufacturers other than Minolta/ QMS, we cannot guarantee that the laser printer will operate properly. ➜ Use only Minolta/QMS accessories and parts unless specified otherwise. -
Page 149: Cleaning The Printer
Cleaning the case Switch the printer “Off“ and unplug the power cable. Wipe the printer case with a soft cloth. You may moisten the cloth with a little neutral household cleaner if you wish. Cleaning the paper feed roller Clean the paper feed roller if paper feed problems occur frequently. - Page 150 Caring for and maintaining your printer Press the top cover release button and open the cover. Lift out the imaging cartridge. Fold back the cover over the paper feed roller. PagePro 4100GN 11-3...
- Page 151 Wipe the paper feed roller with a soft, dry cloth. Re-insert the imaging cartridge. Close the printer cover and open the paper output tray. 11-4 Caring for and maintaining your printer PagePro 4100GN...
-
Page 152: Replacing The Imaging Cartridge
The imaging cartridge has a capacity of about 9000 A4 pages or letters with about 5% toner coverage. The imaging cartridge supplied with the printer has a capacity of, on average, 5000 A4 pages or letters with about 5% toner coverage. - Page 153 Take the new imaging cartridge out of the box, hold it firmly with both hands and shake it to break down any lumps of toner that may have formed. 11-6 Caring for and maintaining your printer PagePro 4100GN...
- Page 154 Caring for and maintaining your printer Place the new imaging cartridge in the printer. In doing so, match up the coloured strips and numbers on the cartridge with those on the printer. Guide the new imaging cartridge into the printer as shown in the figure.
- Page 155 Caring for and maintaining your printer 11-8 PagePro 4100GN...
-
Page 156: Troubleshooting
The fusing unit can become very hot! The fusing unit, which is located beneath the top cover, can become very hot when the printer is in operation. ➜ To prevent injuries, avoid contact with this area. PagePro 4100GN Fusing unit 12-1... -
Page 157: Clearing Paper Misfeeds
Press the top cover release button and open the cover. Lift out the imaging cartridge. Wrap the the imaging cartridge in a cloth to protect it against exposure to light. Carefully pull the misfed sheet(s) out of the printer. 12-2 Troubleshooting PagePro 4100GN... - Page 158 Troubleshooting Re-insert the imaging cartridge. Move the imaging cartridge in the direction shown by the arrow until it clips into place. Close the printer cover and open the paper output tray. PagePro 4100GN 12-3...
-
Page 159: Clearing A Paper Misfeed At The Fusing Unit
Switch the printer “Off“. Close the output tray. Press the top cover release button and open the cover. Lift out the imaging cartridge. Wrap the the image transfer roller in a cloth to protect it against exposure to light. 12-4 Troubleshooting PagePro 4100GN... - Page 160 Re-insert the imaging cartridge. Move the imaging cartridge in the direction shown by the arrow until it clips into place. Close the printer cover and open the paper output tray. PagePro 4100GN 12-5...
-
Page 161: Clearing A Paper Misfeed At The Output Tray
Clearing a paper misfeed at the output tray Carefully pull the misfed sheet(s) out of the tray. Open the top cover and close it again in order to reset the printer. 12-6 Troubleshooting PagePro 4100GN... -
Page 162: Clearing A Paper Misfeed At Paper Feed Tray 1
Troubleshooting Clearing a paper misfeed at paper feed tray 1 Carefully pull the misfed sheet(s) out of the tray. Open the top cover and close it again in order to reset the printer. PagePro 4100GN 12-7... -
Page 163: Clearing A Paper Misfeed At The Manual Feed Unit
Clearing a paper misfeed at the manual feed unit Carefully pull the misfed sheet out of the unit. Open the top cover and close it again in order to reset the printer. 12-8 Troubleshooting PagePro 4100GN... -
Page 164: Clearing A Paper Misfeed At Paper Feed Tray 2/3 (Optional)
Remove the stack of paper from the cassette and carefully pull the misfed sheet(s) out of the tray. Open the top cover and close it again in order to reset the printer. PagePro 4100GN 12-9... -
Page 165: Clearing Paper Misfeeds At The Duplex Unit - Top (Optional)
Clearing paper misfeeds at the duplex unit – top (optional) Open the cover to the duplex unit and carefully pull out the misfed sheet(s). Open the top cover and close it again in order to reset the printer. 12-10 Troubleshooting PagePro 4100GN... -
Page 166: Clearing Paper Misfeeds At The Duplex Unit - Bottom (Optional)
Clearing paper misfeeds at the duplex unit – bottom (optional) Open the cover to the duplex unit and carefully pull out the misfed sheet(s). Open the top cover and close it again in order to reset the printer. PagePro 4100GN 12-11... -
Page 167: Problems With Print Quality
Remove the imaging cartridge and check it for damage. If necessary, replace it with a new cartridge, see page 11-5. Clean the inside of the printer, see page 11-2. Deactivate the Toner Save feature in the print menu and try another sample print-out, see page 4-17. - Page 168 Troubleshooting Problem Print-out is too dark Blurred background on the print-out Uneven toner density on the print- PagePro 4100GN Possible cause The imaging cartridge is damaged. The imaging cartridge is damaged. The imaging cartridge is damaged. Insufficent toner in the cartridge.
- Page 169 11-5. Lift out the imaging cartridge and shake it in order to improve the distribution of the remaining toner. If the problem persists, fit a new cartridge, see page 11-5. Clean the paper feed roller, see page 11-2. PagePro 4100GN...
-
Page 170: General Printing Problems
No output Further information and assistance... can be found in the Internet under “www.qms.com“. Navigate to service/printer help (FAQ). PagePro 4100GN Possible cause The printer is not connected to the power supply, or the cable is not connected to the printer. -
Page 171: Printer Messages
The control panel has three lamps and one button. Description Stand-by (green) Paper (orange) The table below shows the possible states of the lamps. State Meaning Lamp flashing Lamp on permanently Lamp off 12-16 Troubleshooting Description Fault (red) Control button PagePro 4100GN... -
Page 172: Status Messages
Troubleshooting Status messages Status messages indicate the current condition of the printer. Lamps Meaning Printer is switched off Printer is switched on and running a self-test (slow flashing) Printer is in Power Save mode PagePro 4100GN Lamps Meaning Printer is ready for... -
Page 173: User Messages
User messages These messages indicate faults which need to be rectified by the user before a print job can be continued or the printer switched back to “Stand-by“. Lamps Meaning Top cover is open. The cover to the duplex unit is open. - Page 174 Paper feed tray 2/3 has not been installed. The network interface is not ready. PagePro 4100GN Action Clear the misfeed, see page 12-2, and then continue with the print job. Load paper into the appropriate feed tray. Prepare a new imaging cartridge for use, see page 11-5.
-
Page 175: Service Messages
12-20 Meaning Action System error or fault Switch the printer off and then on again. If the problem persists, contact your technical customer service centre. System error or fault Fusing unit fault Polygon mirror fault Fan fault Troubleshooting PagePro 4100GN... - Page 176 Troubleshooting Lamps PagePro 4100GN Meaning Action System error or fault Switch the printer off and then on again. If the problem persists, contact your technical customer service centre. 12-21...
- Page 177 Troubleshooting 12-22 PagePro 4100GN...
-
Page 178: Appendix
PageScope printer management tool for simple network operation. Operating system The PagePro 4100GN can be used with the following operating systems: Windows 95, Windows 98, Windows 3.1x, Windows NT 4.0, MS-DOS 6.2 and higher (except MS-DOS 7.0),... -
Page 179: Technical Specification
5 ppm (A4 or Letter) 18 s (A4 or Letter) 29 s (A4 or Letter) max. 23 s (when the printer is working with the standard 8 MB memory installed) A4, A5, JIS B5, Letter, Legal, Executive, Commercial 10, Monarch, DL, C5 and B5 envelopes, custom formats (width: 3-1/2 in. -
Page 180: 500-Sheet Paper Feed Tray (Option)
Paper Paper feeding system Capacity Dimensions Weight PagePro 4100GN 120-127V / 220-240 V at 50-60 Hz • Operation: max. 820 W • Stand-by: max. 60 W • Power Save mode: max. 30 W max. 7.0 A (120 V) / 3.5 A (230 V) Height:13 in. -
Page 181: Duplex Unit (Option)
60 ns or less SIMM (Single In-line Memory Module) Printer: parallel 36-pin connection Computer: EIA 25-pin connection Shielded Signal and ground pairs must be twisted IEEE 1284, type B max. 10 feet / 3 meters 10BaseT/100BaseTX 5 shielded Appendix PagePro 4100GN... -
Page 182: Minolta/Qms's Concern For Environmental Protection
This function can reduce your annual electricity costs by up to 60%. This laser printer fulfils the energy efficiency criteria for the Energy Star of the EPA (US Environmental Protection Agency). -
Page 183: Index
Font index card ... 4-21 Imaging cartridge, replacing ... 11-5 Indicator lamps ... 12-16 Installation of SIMM module ... 10-5 Installing ... 2-1 Installing optional accessories ... 10-1 Installing the printer ... 2-7 Interface connections (parallel) ... 13-4 13-6 Appendix 12-11 PagePro 4100GN... - Page 184 Page layout index card ...4-11 PagePro 4100E printer, technical specification ...13-2 Paper feed tray 1, setting up ...2-11 Paper feed tray 2/3, installation ...10-1 Paper index card ...4-5 Paper lamp ...12-16 Paper output tray, setting up ...2-11 PagePro 4100GN 13-7...
- Page 185 Deleting fonts ... 4-22 Detail of quality ... 4-20 Determinig the resolution ... 4-19 Device options ... 4-23 Displaying in Win 3.1x ... 4-4 Displaying in Win 95/98 ... 4-1 Displaying in Win NT 4.0 ... 4-3 13-8 Appendix PagePro 4100GN...
- Page 186 Printer setting ...6-15 Status Display, calling up ...6-1 Status Display, changing hotkey ...6-2 Printer tools for Windows (PCL) ...5-1 Auto continue function ...5-7 Calling up Status Display (Win 3.1x) ...5-3 Calling up Status Display (Win 95/98, Win NT4.0) ...5-2 PagePro 4100GN 13-9...
- Page 187 Setting up the printer ... 2-11 Ambient conditions ... 2-8 Connecting the power cable ... 2-12 Connecting the printer to a computer ... 2-15 Connecting the printer to a network ... 2-16 Paper feed tray 1 ... 2-11 Paper output tray ... 2-11 Place of installation ...
- Page 188 Windows 95/Windows 98 ...7-1 Technical specification 500-sheet paper feed tray ...13-3 Duplex unit ...13-4 PagePro 4100E printer ...13-2 Parallel interface connections ...13-4 SIMM memory module ...13-4 Test page ...2-14 Troubleshooting ...12-1 Uninstalling the PCL printer driver ...3-8 Unpacking ...2-1 PagePro 4100GN 13-11...
- Page 189 Appendix 13-12 PagePro 4100GN...
Need help?
Do you have a question about the PagePro 4100GN and is the answer not in the manual?
Questions and answers