Panasonic KX-NT400 Operating Instructions Manual
Ip proprietary telephone
Hide thumbs
Also See for KX-NT400:
- Operating instructions manual (206 pages) ,
- Brochure & specs (6 pages) ,
- User manual (6 pages)
Table of Contents
Advertisement
Quick Links
Thank you for purchasing an IP Proprietary Telephone (IP-PT).
Please read this manual carefully before using this product and save this manual for future use.
For more details, please refer to the manuals of the PBX.
In this manual, the suffix of each model number is omitted unless necessary.
Operating instructions
IP Proprietary Telephon
Operating Instructions
Model No.
IP Proprietary Telephone
Model No.
KX-NT400
KX-NT400
SD Logo is
a trademark.
Advertisement
Table of Contents

Subscribe to Our Youtube Channel
Related Manuals for Panasonic KX-NT400


Summary of Contents for Panasonic KX-NT400
- Page 1 Operating instructions IP Proprietary Telephon KX-NT400 Operating Instructions Model No. IP Proprietary Telephone KX-NT400 Model No. Thank you for purchasing an IP Proprietary Telephone (IP-PT). Please read this manual carefully before using this product and save this manual for future use.
- Page 2 Introduction Feature Highlights Colour LCD Touch Screen The large, colour LCD touch screen provides a simple interface for operating the KX-NT400. Using the included stylus pen, you can interact directly with controls on the screen. Intuitive Graphical Interface Call handling...
- Page 3 Data Import and Export to SD Memory Card The KX-NT400 contains an SD memory card slot so that you can back up the KX-NT400’s data to an SD memory card. You can back up information such as your personal contacts, chat log, and settings. If you switch phones or data is lost from the KX-NT400, you can recover your data from the SD memory card.
- Page 4 Introduction System Diagram The figure below illustrates an example network setup using the KX-NT400. A Panasonic KX-NCP Series PBX B LAN C Panasonic Network Camera D Voice Processing System E Panasonic KX-NT400 F Doorphone and Door Opener G PC Operating instructions...
- Page 5 Firmware Notice • The firmware of the KX-NT400 is protected by copyright laws and international treaty provisions, and all other applicable laws. It can not be reverse engineered, decompiled, or disassembled. For Future Reference Record the information in the space below for future reference.
- Page 6 Introduction • The contents and design of the software are subject to change without notice. MODEL NO. SERIAL NO. DATE OF PURCHASE NAME OF DEALER DEALER'S ADDRESS DEALER'S TEL. NO. Operating instructions...
- Page 7 For Your Safety For Your Safety WARNING To reduce the risk of injury, loss of life, electric shock, fire, malfunction, and damage to equipment or General Safety property, always observe the following safety precautions. Do not disassemble this unit. Dangerous electrical shock could result.
- Page 8 Place this unit on a flat surface. • Use only the correct Panasonic handset. CAUTION Do not press or rub the LCD touch screen with too much force. A light touch is enough for the LCD touch screen to respond.
- Page 9 For Your Safety Data Security • Make sure the unit is serviced by only a certified technician. We recommend observing the security precautions described in this section, in order to prevent the Preventing Data Disclosure Over the following: Network – loss, disclosure, falsification, or theft of user information •...
- Page 10 Additional Information Additional Information For Users in New Zealand • This equipment shall not be set to make automatic calls to the Telecom '111' Emergency Service. For Users in Australia and the • The grant of a Telepermit for any item of terminal United Kingdom equipment indicates only that Telecom has accepted that the item complies with minimum...
- Page 11 Additional Information For Users in Russia and Ukraine Operating instructions...
- Page 12 Panasonic PBX only. recycling of old products and used batteries, please take them to applicable Panasonic Communications Co., Ltd. declares that this collection points, in accordance with your equipment is in compliance with the essential national legislation and the Directives 2002/ requirements and other relevant provisions of Radio &...
-
Page 13: Table Of Contents
Table of Contents Table of Contents Before Operating the Telephone..............17 Accessory Information ....................17 Location of Controls ....................... 18 Preparation ........................23 Basic Operations......................25 Going off- and on-hook....................25 Adjusting the Volume...................... 25 Basic Screen Operations ....................26 Entering Text ........................27 Basic Feature Operation................29 Making Calls ........................ - Page 14 Table of Contents Zooming In and Out ......................44 Adjusting the Angle of the Camera .................44 Opening Doors ........................45 Full-Screen Mode ......................45 Other Feature Operations ................46 Presence Status Setting ....................46 Call Forwarding/Do Not Disturb ..................46 When the Dialled Line is Busy or There is No Answer..........47 Sending a Call Waiting Notification (Call Waiting) ............48 Leaving a Message Waiting Indication................48 Leaving a Voice Message ....................
- Page 15 Locking the Handset ..................... 144 Bluetooth Headset Connections.................. 146 Installation ........................146 Bluetooth Headset Operation ..................148 Setting Up the KX-NT400 ....................151 Accessing the Start-up Settings ................... 151 IP Address Settings ...................... 152 IP Port Settings......................153 Quality of Service (QoS) Settings ................. 155 Language Settings......................
- Page 16 Table of Contents Sound Quality......................180 SD Memory Cards ...................... 181 Contact List ........................181 PT-Programming ......................181 Bluetooth Headsets ....................182 Index......................183 Operating instructions...
-
Page 17: Before Operating The Telephone
Before Operating the Telephone Before Operating the Telephone Before Operating the Telephone Accessory Information Accessory Information Included Accessories Handset (1) Handset Cord (1) Stylus Pen (1) Optional Accessories AC Adaptor Bluetooth® Module Headset KX-A420 (PSLP1662) KX-NT307 (PSLP1528) KX-TCA89 Operating instructions... -
Page 18: Location Of Controls
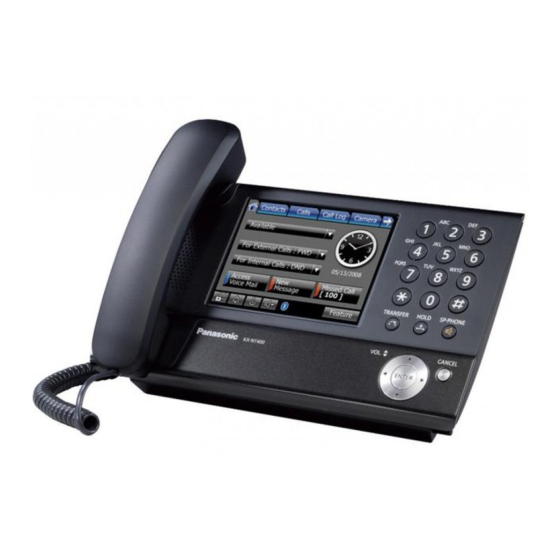
Before Operating the Telephone Location of Controls Location of Controls Front View Note The KX-NT400’s appearance varies by country or area. KX-NT400NE KX-NT400RU Operating instructions... - Page 19 Before Operating the Telephone A LCD (Liquid Crystal Display) B Message/Ringer Lamp When you receive an intercom call, the lamp flashes green, and on an outside call, the lamp flashes red. When someone has left you a message, the lamp stays on red. C SP-PHONE (Speakerphone) Used for performing hands-free operations.
- Page 20 Before Operating the Telephone Right Side View A Side Cover B SD Memory Card Slot Used to insert a SD memory card. SD memory cards are used to backup and restore personal settings and data. For details, see "SD Memory Cards (Page 173)". C USB Port Used to connect a USB keyboard.
- Page 21 Before Operating the Telephone Left Side View A Handset B Handset Jack C Headset Jack D Handset Cord For details, see "Connections (Page 138)". Operating instructions...
- Page 22 Before Operating the Telephone Back View A Stylus Pen Slot Used to store the stylus pen when it is not in use. B Stylus Pen Used to press buttons on the LCD. C Back Cover D Bluetooth Module Socket For details, see "Bluetooth Headset Connections (Page 145)". E Operation Board Angle Adjust Button Used to adjust the angle of the operation board.
- Page 23 Before Operating the Telephone Bottom View A LAN port For details, see "Connections (Page 138)". B PC port C AC inlet For details, see "Connections (Page 138)". Operating instructions...
-
Page 24: Preparation
Before Operating the Telephone Preparation for Installers Preparation for Installers Before starting the operations, confirm that the following items are configured according to your need. Use the following list to see if the KX-NT400 is ready for your operation. Essential settings Question Description Ref. - Page 25 Before Operating the Telephone Not necessary to enter the parameter when DHCP is disabled on the IP Address screen. Not necessary to enter the parameter when VLAN is disabled. Operating instructions...
-
Page 26: Going Off- And On-Hook
Going off- and on-hook press (SP-PHONE), and return the handset to its cradle. With the KX-NT400 there are several ways to go off- • Certain on-screen buttons, such as the Answer hook and on-hook: button on the Calls screen, activate hands-free •... -
Page 27: Basic Screen Operations
Before Operating the Telephone Turning the ringer on and off Usage tips You can turn the ringer on and off on the HOME • Highlighted items are displayed with a yellow screen. background: • Some operations require you to use the Navigator key to highlight an item before performing an action on it. -
Page 28: Entering Text
Before Operating the Telephone Other Common Screen Operations Using the Soft Keyboard The following common operations can also be When you press a text field on the screen, a window performed using either the on-screen controls or the containing the soft keyboard appears. hardware keys. - Page 29 You can connect the keyboard at any time. Note • The USB port is located on the right side of the KX-NT400. See "Right Side View (Page 20)". • For details about connecting a USB key board, see "Connections for a USB Device (Page 140)".
-
Page 30: Presence Status Setting
Screens & Soft Buttons Screens & Soft Buttons Screens & Soft Buttons Screens & Soft Buttons Screens & Soft Buttons This section explains all of the buttons and icons that appear on each of the screens. HOME Screen HOME Screen On the HOME screen, you can perform operations such as setting your presence status and Forward/Do Not Disturb settings and check messages. - Page 31 Screens & Soft Buttons HOME Screen Details A Navigation Soft Button and Icon Description Display the HOME screen (Page 68). Display the Contacts screen (Page 72). Display the Calls screen (Page 77). Display the Call Log screen (Page 84). Display the Camera screen (Page 86). Display the Chat screen (Page 88).
- Page 32 Screens & Soft Buttons Soft Button or Icon Description Check new messages. This button appears only when there is a new message. • Checking New Messages (Page 41) Display the missed call log. This button appears only when there is a new missed call. •...
- Page 33 Screens & Soft Buttons Soft Button or Icon Description Indicates the Bluetooth connection status: Communicating with module Linking Talking When a Bluetooth Module is not installed, these icons do not appear on the screen. • Bluetooth Headset Connections (Page 145) Display the Feature Key screen (Page 90).
-
Page 34: Contacts Screen
Screens & Soft Buttons Contacts Screen Contacts Screen On the Contacts screen, you can view and make calls to contacts in your local directory and contacts stored on an LDAP server. The following operations are available on this screen: • Making a Call from the Contact List (Page 29) •... - Page 35 Scroll the list on the screen. Scroll to the top/bottom of the list on the screen. Telephone Status Icons The icons for each directory entry indicate the status of each extension's telephone. For extensions using KX-NT400 Icon Phone Status Presence Status (Absent Message)
- Page 36 Icon Phone Status Presence Status (Absent Message) Presence status not set The line is not connected or the KX-NT400 did not start. Presence status On or DND for internal call For extensions with Communication Assistant (CA) Icon Phone Status Absent Message...
- Page 37 Screens & Soft Buttons Icon Phone Status Absent Message Busy Absent message not set (Available) Absent message On or DND for internal call Absent message not set (Available) Ringing Absent message On or DND for internal call No Icon The line is not connected C Contact summary information Soft Button or Icon Description...
- Page 38 Screens & Soft Buttons Soft Button or Icon Description Search the LDAP directory for a contact. • Enter up to 32 characters to search LDAP directories by name. • Making a Call from the LDAP Directory (Page 30) Display the LDAP Advanced Search screen. •...
-
Page 39: Calls Screen
Screens & Soft Buttons Calls Screen Calls Screen On the Calls screen, you can use PBX call handling features. Calls Screen Details A Current call display Soft Button or Icon Description Display information about the current calls. Each entry shows the following information: •... - Page 40 Screens & Soft Buttons Call Status Icons Icon Call Status Unknown (The handset is off hook) Outgoing call Incoming call Active call Call on hold Waiting call for a conference call to start (Waiting for other conference call participants) Call in a conference call (Conference is established) Busy Do Not Disturb Parked call...
- Page 41 Screens & Soft Buttons Soft Button or Icon Description Hang up the call. For Outgoing Calls Soft Button or Icon Description Leave a notification that you called to the called extension. • Leaving a Message Waiting Indication (Page 48) Leave a message using the voice mail service. •...
- Page 42 For Active Calls Soft Button or Icon Description Record the current call to voice mail. This feature requires a Panasonic Voice Processing System. You must set the voice mail system’s extension number to perform this operation. • Recording Calls (Two-way Recording) (Page 37) •...
- Page 43 Screens & Soft Buttons Soft Button or Icon Description Transfer the call to voice mail. You must set the voice mail system’s extension number to perform this operation. • Dial Number Settings (Page 102) Put the call on hold. • Holding a call at your extension (Call Hold) (Page 35) Use External Feature Access (EFA) to access special...
- Page 44 Screens & Soft Buttons For Calls in a Conference Call Soft Button or Icon Description Invite another party to the conference call. Press this button to make a call to the party you want to invite. • Making a Conference Call (Page 38) Remove the selected participant from the conference.
- Page 45 Screens & Soft Buttons For Do Not Disturb Calls Soft Button or Icon Description Override Do Not Disturb. When Do Not Disturb Override Deny has been set via System programming on the called party, this operation can not be performed. •...
-
Page 46: Call Log Screen
Screens & Soft Buttons Call Log Screen Call Log Screen On the Call Log screen, you can view a list of your outgoing, incoming, and missed calls. The following operations are available on this screen: • Dialling by Using Call Logs (Page 32) •... - Page 47 Screens & Soft Buttons B Call log entries Soft Button or Icon Description Display the status icon, caller’s name, and timestamp of the call. Press the entry to: • make a call. • add the party to the local directory. •...
-
Page 48: Camera Screen
Screens & Soft Buttons Camera Screen Camera Screen On the Camera screen, you can perform operations related to cameras. • Network Camera (Page 45) Camera Screen Details A Camera Display Soft Button or Icon Description Shows the selected camera’s video feed. You can change the camera’s angle with the following operations: •... - Page 49 Screens & Soft Buttons B Camera Selection Buttons Soft Button or Icon Description Quick selection button for registered cameras. The name you registered for the camera is displayed on the button (e.g., Entrance, Hall). You can assign up to 4 cameras to the buttons. •...
-
Page 50: Chat Screen
Screens & Soft Buttons Chat Screen Chat Screen On the Chat screen, you can participate in a chat session with another KX-NT400 user or Communication Assistant user. The following operations are available on this screen: • Chat (Page 44) •... -
Page 51: Portal Screen
Screens & Soft Buttons Portal Screen Portal Screen On the Portal screen, you can browse Web pages on your organisation’s intranet. • Browser (Page 43) Portal Screen Details A Portal Screen Controls Soft Button or Icon Description Select an intranet Web page from the Web page list. You can edit the intranet Web page list on the Options screen. -
Page 52: Feature Key Screen
Feature Key Screen On the Feature Key screen, you can perform operations in the same way as on a Proprietary Display Telephone. You can access PBX features that are not available elsewhere on the KX-NT400. • PBX Feature List (Page 50) - Page 53 Screens & Soft Buttons C Feature Keys Soft Button or Icon Description You can customise the flexible buttons by assigning functions to them. They can then be used to make or receive outside calls or as feature buttons. • Customising the Flexible Buttons (Page 123) Return to the HOME screen.
-
Page 54: Options Screen
Screens & Soft Buttons Options Screen Options Screen From the Options screen, you can access various settings for the KX-NT400. The following operations are available on this screen: • User Options (Page 101) • Administrator Settings (Page 109) Options Screen Details... -
Page 55: Basic Feature Operation
Basic Feature Basic Feature Operation Making a Call from the Contact List Making a Call from the Contact Operation List The KX-NT400 provides the following 2 types of Making Calls Making Calls contact lists: • Local Directory The local directory contains the following types of... - Page 56 Basic Feature Operation • You can add a new contact by pressing the add • Press to display the soft keyboard, and contact button on the Contacts screen. then start typing the name of the contact. • If you have connected a USB keyboard, start typing the name of the contact.
- Page 57 Basic Feature Operation If necessary, press the directory selection list and Press Advanced. select LDAP Search. Enter the terms you want to search for, and then press Search. To search for a contact, do one of the following: • Press to display the soft keyboard, and then start typing the name of the contact.
-
Page 58: Redialling The Last Number You Dialled (Last Number Redial)
Basic Feature Operation You can use the buttons at the bottom of the “XXX” indicates the caller’s telephone number. window to call the contact’s office, mobile, or home phone if they are registered. To end the call, go on-hook. • Press to select a different LDAP server. -
Page 59: One-Touch Dialling
Basic Feature Operation Press Redial. Select the desired party and go off-hook. To end the call, go on-hook. Usage tips • For details about creating one-touch dialling buttons, see “Customising the Flexible Buttons (Page 123)”. To end the call, go on-hook. Note •... -
Page 60: Receiving A Call
To redirect a call to your mailbox, you must set • Auto answer the voice mail system's extension number. For You can have the KX-NT400 automatically answer details, see “Dial Number Settings (Page 102)”. an incoming call. For intercom calls, the call is connected without the KX-NT400 ringing. For external calls, the call is connected after a programmed number of rings. - Page 61 Holding a Call Holding a Call • You can configure the KX-NT400 to redirect all incoming calls to a specified destination. For You can put a call on hold by either holding the call at details, see “Call Forwarding/Do Not Disturb your extension (Call Hold) or holding the call in a (Page 46)”.
-
Page 62: Receiving A Second Call (Answering Call Waiting)
In the Park the Call window, use the dial keys to setting must be set to Enable on the PBX that enter the number of the parking zone you want to is connected to the KX-NT400. hold the call in. –or–... -
Page 63: Talking To Two Parties Alternately (Call Splitting)
Recording) For details about making a call, see “Making Calls (Page 29)”. You can record a conversation if a Panasonic Voice Wait until the other party to answer to announce Processing System (VPS) (e.g., KX-TVM series) is the transfer. (This step can be omitted.) connected. -
Page 64: Conference Call (Multiple Party Conversation)
Basic Feature Operation To record a conversation Conference Call (Multiple Party Conversation) Conference Call (Multiple On the Calls screen, select the call you want to Party Conversation) record. Press Record the call. During a conversation, you can add additional parties to your call and establish a conference call. -
Page 65: Adding An Incoming Call To A Conference
Basic Feature Operation Leaving a Conference (Unattended Conference) • During a three-party conversation, pressing Leaving a Conference (TRANSFER) alternates between the other parties (Unattended Conference) in the conversation. Adding an Incoming Call to a Conference Adding an Incoming Call to a You can leave a conference call that you established and allow the other parties to continue the Conference... -
Page 66: Ending A Conference Call
Basic Feature Operation To return to a conference Locking Operations (Application Lock) Locking Operations On the HOME screen, press Feature. (Application Lock) The Application Lock feature lets you restrict operation to only a few operation screens. When you set the Application Lock, you can still access some screens, such as the HOME and Calls screens. -
Page 67: Checking New Messages
On the HOME screen, press New Message. Note • Checking voice messages from the HOME screen is only available with a Panasonic Voice Processing System (e.g., KX-TVM series). If your system uses the PBX’s built-in voice mail (Simplified Voice Message), you must access your voice mailbox using feature numbers. - Page 68 When there are new missed calls, the Missed Call button appears on the HOME screen and displays the number of missed calls that you have. The KX-NT400 can store the information for up to 100 missed calls. Press Missed Call to display the missed call log.
-
Page 69: Advanced Feature Operation
Web pages via the browser settings. Browser Browser On the Portal screen, press the drop-down list. The KX-NT400 includes a Web browser, so you can access intranet Web pages from your KX-NT400. Note • The KX-NT400’s Web browser is designed only for viewing intranet content. -
Page 70: Chat
Chat Chat the Dial window appears containing the phone number of the link: You can start a text chat with other KX-NT400 users, and users of programmes such as Communication Assistant. Alex Fishman: Hi Mike, I'm watching Red's A. Mike Smith: Hey there, how you doing?
Need help?
Do you have a question about the KX-NT400 and is the answer not in the manual?
Questions and answers