Panasonic KX-NT543 Quick Reference Manual
Hide thumbs
Also See for KX-NT543:
- Quick reference manual (229 pages) ,
- Manual (11 pages) ,
- Quick reference manual (29 pages)
Table of Contents
Advertisement
Thank you for purchasing an IP Proprietary Telephone (IP-PT). Please read this
manual carefully before using this product and save this manual for future use. For
more details, please refer to the manuals of the PBX.
This product supports the following PBX versions and CODEC
types:
KX-NS1000: PSMPR Software File Version 2.0000 or later
KX-NCP500/KX-NCP1000: PBMPR Software File Version 7.1000 or later
KX-TDE100/KX-TDE200: PMMPR Software File Version 7.1000 or later
KX-TDE600: PGMPR Software File Version 7.1000 or later
CODEC: G.722, G.711, G.729A
Note
R In this manual, the suffix of each model number (e.g., KX-NT546NE) is omitted
unless necessary.
Open Source Software Notice
Parts of this product use open source software. For details about the open source
software, refer to the following web site at:
http://panasonic.net/pcc/support/pbx
Trademarks
R Plantronics is a trademark or registered trademark of Plantronics, Inc.
R The Bluetooth
any use of such marks by Panasonic Corporation is under licence.
R All other trademarks identified herein are the property of their respective owners.
Model No.
®
word mark and logos are owned by the Bluetooth SIG, Inc. and
Quick Reference Guide
IP Proprietary Telephone
KX-NT543/KX-NT546
KX-NT560
Advertisement
Table of Contents

Related Manuals for Panasonic KX-NT543


Summary of Contents for Panasonic KX-NT543
-
Page 1: Quick Reference Guide
® R The Bluetooth word mark and logos are owned by the Bluetooth SIG, Inc. and any use of such marks by Panasonic Corporation is under licence. R All other trademarks identified herein are the property of their respective owners. -
Page 2: For Your Safety
For Your Safety For Your Safety To reduce the risk of injury, loss of life, electric shock, fire, malfunction, and damage to equipment or property, always observe the following safety precautions. Denotes a potential hazard that WARNING could result in serious injury or death. - Page 3 For Your Safety R Unplug this unit from the AC outlet and have the unit serviced by qualified service personnel in the following cases: A. When the power supply cord or plug is damaged or frayed. B. If liquid has been spilled on the unit. C.
- Page 4 For Your Safety Medical (KX-NT560 only) R Do not use the product in health care facilities if any regulations posted in the area instruct you not to do so. Hospitals or health care facilities may be using equipment that could be sensitive to external RF energy. R Consult the manufacturer of any personal medical devices, such as pacemakers or hearing aids, to determine if they are adequately shielded from external RF (radio frequency)
- Page 5 IP-PT. If the known working IP-PT operates properly, have the defective IP-PT repaired by an authorised Panasonic factory service centre. If the known working IP-PT does not operate properly, check the PBX and the Ethernet cable.
-
Page 6: Important Safety Instructions
For Your Safety R If an error message is shown on your display, consult your dealer or the network administrator. R Use only the correct Panasonic handset. Important Safety Instructions When using this unit, basic safety precautions should always be followed... -
Page 7: For Users In Australia And The United Kingdom
Important Information Important Information For Users in Australia and the United Kingdom R This unit is capable of being used in conjunction with hearing aids fitted with inductive coil pick-ups. The handset should be held as for normal conversation. For operation, the hearing aid should be set to its "T"... -
Page 8: Information For Users On Collection And Disposal Of Old Equipment And Used Batteries
Important Information recommends that suppliers, designers and installers using this technology for calls to or from the PSTN refer to ITU E Model requirements in the design of their networks. The overall aim is to minimise delay, distortion and other transmission impairments, particularly for those calls involving cellular and international networks, which already suffer extensive delay. - Page 9 Panasonic Marketing Europe GmbH Winsbergring 15, 22525 Hamburg, Germany KX-NT560 only Panasonic System Networks Co., Ltd. declares that this equipment is in compliance with the essential requirements and other relevant provisions of Radio & Telecommunications Terminal Equipment (R&TTE) Directive 1999/5/EC.
-
Page 10: Accessory Information
Accessory Information Accessory Information Included Accessories Handset (1) Handset Cord (1) Stand (1) Note R The illustrations may differ from the appearance of the actual product. Optional Accessories KX-A239AL (PQLV206AL) *1*2 AC adaptor KX-A239BX (PQLV206CE) KX-A239UK (PQLV206E) KX-A239X (PQLV206) KX-A239EJ (PQLV206E) KX-A420BR (PSLP1662) Wall Mount Kit KX-A433X... -
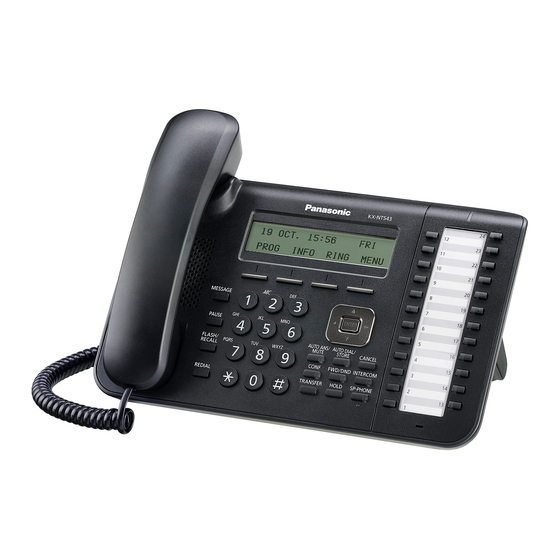
Page 11: Location Of Controls
Location of Controls Location of Controls KX-NT543 KX-NT546 KX-NT560... - Page 12 Location of Controls A LCD (Liquid Crystal Display): KX-NT543: 3 lines, KX-NT546: 6 lines, KX-NT560: 4.4-inch B Soft Buttons (S1-S4): S1-S4 (located from left to right) are used to select the item displayed on the bottom line of the display.
- Page 13 Location of Controls R HOLD: Used to place a call on hold. S CANCEL: Used to cancel the selected item. T INTERCOM: Used to make or receive intercom calls. U SP-PHONE (Speakerphone): Used for performing hands-free operations. V Microphone: Used for hands free conversations. W Flexible CO Buttons: Used to seize an outside line or perform a feature that has been assigned to the key.
-
Page 14: Before Operating The Telephone
Before Operating the Telephone Before Operating the Telephone Speaker volume While in a hands-free conversation Press [ ] or [ ] to adjust the volume. Handset/Headset volume*1 While using the handset or headset Press [ ] or [ ] to adjust the volume. Ringer volume While on-hook or receiving a call Press [ ] or [ ] to adjust the volume. - Page 15 Before Operating the Telephone LCD Backlight While on-hook 1. Press the soft button (S1). PROG 2. Enter 3. Press [ENTER]. 4. Press a dial key to select the LCD backlight mode. : Automatic : Always ON : Always OFF 5. Press [ENTER]. 6.
-
Page 16: Feature Operations
Feature Operations Feature Operations Making Calls Calling MTo an extensionN 1. Go off-hook. 2. Dial an extension number. MTo an outside partyN 1. Go off-hook. 2. Press a flexible CO button. 3. Dial the outside party’s phone number. Redial 1. Go off-hook. 2. - Page 17 Feature Operations Personal Speed Dialling MTo storeN 1. Go off-hook. 2. Enter 3. Enter a personal speed dialling number (2 digits). 4. Enter the phone number to store (max. 32 digits). 5. Press 6. After the confirmation tone, go on-hook. MTo dialN 1.
-
Page 18: During A Conversation
Feature Operations During a Conversation Call Hold MTo holdN 1. Press [HOLD]. 2. After the confirmation tone, go on-hook. MTo retrieve a call at the holding extensionN 1. Go off-hook. 2. Press a flexible CO button or [INTERCOM]. MTo retrieve an outside call from another extensionN 1. -
Page 19: Setting The Telephone According To Your Needs
Feature Operations Setting the Telephone According to Your Needs Do Not Disturb 1. Go off-hook. 2. Enter 3. Press a dial key to select the setting. : Both outside and intercom calls : Outside calls only : Intercom calls only 4. -
Page 20: Useful Features
Feature Operations Useful Features Multiple Party Conversation MTo add other parties during a conversationN 1. Press [CONF]. 2. After the confirmation tone, dial the phone number of the party to add. 3. Talk to the new party. 4. Press [CONF]. 5. - Page 21 Feature Operations Self Labelling (KX-NT560 only) The KX-NT560 IP-PT features 8 flexible buttons around an LCD screen. Each item can be named on the LCD screen through personal or system programming to reflect the function of its corresponding flexible button. Additionally, the flexible buttons can be organised into 4 “pages”, allowing you to assign a total of 32 items to the 8 flexible buttons.
-
Page 22: Installation And Setup
Installation and Setup Installation and Setup Note R Panasonic assumes no responsibility for injuries or property damage resulting from failures arising out of improper installation or operation inconsistent with this documentation. Attaching the Stand Note R If you place the display face down when you attach the stand, be sure to place a soft cloth under the display. - Page 23 Headset jack CAUTION Optional AC Adaptor R Use a Panasonic AC adaptor (Page 10). R The AC adaptor is used as the main disconnect device. Ensure that the AC outlet is installed near the unit and is easily accessible. When connecting a headset R Ensure that the headset cord has slack and is not pulled tight during use to prevent damage to the connectors.
- Page 24 6.5 mm in diameter or less. When connecting to a switching hub R If PoE is available, an AC adaptor is not needed. R KX-NT543/KX-NT546 complies with the PoE Class 2 standard. KX-NT560 complies with the PoE Class 3 standard. When connecting a PC R The PC port does not support PoE for connected devices.
-
Page 25: Wall Mounting
Wall Mounting Wall Mounting Insert the 5 tabs of the wall mounting adaptor into the designated openings in the base, and then slide the wall mounting adaptor in the direction of the arrow until it clicks. Fasten the wall mounting adaptor to the base with 1 screw. (Recommended torque: 0.4 N·m [4.08 kgf·cm] to 0.6 N·m [6.12 kgf·cm]) Connect the cables to the unit, and run the cables through the wall... - Page 26 Notes...
- Page 27 Notes...
- Page 28 If the dimensions of the paper output still deviate slightly from the measurements indicated here, use the measurements indicated here. One screw at either point © Panasonic System Networks Co., Ltd. 2012 PNQX5944XA-VB PP1112MK2122...
Need help?
Do you have a question about the KX-NT543 and is the answer not in the manual?
Questions and answers