Table of Contents
Advertisement
Quick Links
Download this manual
See also:
Service Manual
Advertisement
Table of Contents

Related Manuals for Minolta Magicolor 2300 DL


Summary of Contents for Minolta Magicolor 2300 DL
- Page 1 2300 DL ® NIC Reference Guide 1800684-001B...
-
Page 2: Copyright Notice
Trademarks The following are registered trademarks of MINOLTA-QMS, Inc.: QMS, the MINOLTA-QMS logo, and magicolor. Minolta is a trademark of Minolta Co., Ltd. Other product names mentioned in this guide may also be trademarks or registered trademarks of their respective owners. This product uses Software Developer Kit of Peerless Systems Corporation. -
Page 3: Table Of Contents
Contents 1 Installing Your Printer in Windows Environments ... 1-1 Introduction 1-2 About the Interface Panel 1-2 Local Connections 1-2 Theory 1-2 Supported Environments 1-3 Making the Connection 1-3 Parallel Interface 1-3 USB Connection 1-4 Network Connection 1-5 Theory 1-5 Supported Environments 1-5 Making the Connection 1-5 Ethernet Interface 1-5... - Page 4 Using the Network Menu Options 2-3 IP Address 2-3 Subnet Mask 2-3 Gateway 2-4 HW Address 2-4 DHCP/BOOTP 2-4 HTTP 2-5 SNMP 2-5 3 Using PageScope Light ...3-1 Introduction 3-2 Requirements 3-2 Setting Up the Printer Web Page 3-3 Determining the Printer Name 3-3 Setting Up Your Browser Software 3-3 Understanding the PageScope Light Window 3-5 Navigation 3-5...
- Page 5 Introduction 5-2 Environment 5-2 Opening the Status Display 5-2 Understanding the Status Display Window 5-3 Using the Menus 5-4 File Menu 5-4 Exit 5-4 Display Menu 5-4 Select Popup Message 5-4 Status (Reduce) 5-4 Status (Expand) 5-4 Printer Information 5-5 Supplies Status 5-5 Help Menu 5-5 Contents 5-5...
-
Page 7: Installing Your Printer In Windows Environments
Installing Your Printer in Windows Environments... -
Page 8: Introduction
This chapter guides you through the installation of your printer in Windows environments. There are two ways to connect your printer to a PC: through a network connection (Ethernet interface) or through a local connection (parallel or USB interface). About the Interface Panel ! ! ! ! Ethernet Port Use a twisted-pair (RJ45) Ethernet... -
Page 9: Supported Environments
connection, which means that the workstation exclusively “owns” the connec- tion to the printer. Some network environments provide access to a printer locally attached to one of the PCs. Although all users on this network may use the printer, the (print) data flow to that particular PC may affect its normal use. -
Page 10: Usb Connection
(Start>Settings>Control Panel> System, Device Manager tab). These drivers are provided on your Windows CD-ROM, not on the magicolor 2300 DL Utilities & Documentation CD-ROM. Turn on the PC and the printer. When the printer’s message window displays... -
Page 11: Network Connection
Theory To connect your printer in a TCP/IP network environment, you must make sure that the internal network addresses in the printer have been set. & ' In many cases, you have to enter only a unique IP address. However, you may also have to enter a subnet mask and/or a gateway (router) address,... -
Page 12: Using Dhcp
IP Address—A unique identifier for each device on a TCP/IP network. Subnet Mask—A filter used to determine what subnet an IP address belongs to. Gateway—A node on a network that serves as an entrance to another network. Since the IP address for each PC and printer on your network must be unique, you usually need to modify this preset address so it doesn’t conflict with any other IP address or your network or any attached network. - Page 13 If you’re not using DHCP, the Documentation and Utilities CD-ROM’s AutoInstaller provides a way to set the printer’s IP address. Caution You should always notify your network’s administrator before changing the printer’s IP address. Connect your printer to the network. Attach your printer to the network by plugging the network RJ45 connec- tor into the RJ45 receptacle on the interface panel of your printer.
- Page 14 When the printer’s message window displays 2300DL , set the IP address. Press this key . . . Use the (Leading zeros of each triplet are automatically suppressed; for example, “.001.” displays as “.1.”) Use the If you don’t want to set the subnet mask or gateway, go to step 5. If you don’t want to set the subnet mask, but you do want to set the gate- way, go to step 4.
- Page 15 Press this key . . . If you don’t want to set the gateway, go to step 5. If you want to set the gateway, follow these steps. Press this key . . . Use the (Leading zeros of each triplet are automatically suppressed; for example, “.001.”...
- Page 16 When the printer’s message window displays 2300DL , insert the Utilities and Documentation CD-ROM in your PC’s CD-ROM drive. The CD-ROM AutoInstaller automatically starts. Follow the instructions on the screen to install the printer driver and utilities. When you have finished, remove the CD-ROM and store it in a safe place. Customize the driver settings for your printer’s configuration.
- Page 17 Understanding the Network Configuration Menus...
-
Page 18: Network Menu
This chapter provides detailed information on each of the items in the Network menu. Network Menu Location within the Configuration Menu MENU MENU LANGUAGE SPECIAL PAGES IP ADDRESS SUBNET MASK IP ADDRESS, SUBNET MASK, and GATEWAY are displayed only when both DHCP and BOOTP are set to off. -
Page 19: Using The Network Menu Options
Using the Network Menu Options If the printer is connected to a network, the following settings should be specified. For details about each setting, contact your network administrator. & ' When manually setting the IP address, turn off DHCP and BOOTP first. -
Page 20: Gateway
Purpose Range Default Notes HW Address Purpose Options Default DHCP/BOOTP Purpose Options Default Sets the address of the router/gateway if a router/gateway is used on your network and you allow users outside your network environment to print on your printer. 0–255 for each xxx triplet Use the Up and Down keys to increase or decrease each number;... -
Page 21: Http
Purpose Options Default Notes SNMP Purpose Options Default Notes Network Menu Enables or disables the printer’s internal web page (see chapter 3, “Using PageScope Light.”) HTTP Set: Off, HTTP Set: On HTTP Set: On You must turn the printer off and then on again before these settings take effect. -
Page 23: Using Pagescope Light
Using PageScope Light... -
Page 24: Introduction
This chapter provides information on PageScope Light, an HTTP (Hyper- Text Transfer Protocol)-based web page that resides in your printer and that you can access using Microsoft Internet Explorer or Netscape Navi- gator. This page gives you instant access to printer status and the most fre- quently used printer configuration options. -
Page 25: Setting Up The Printer Web Page
Through the assigned name of the printer—This name comes from the IP host table (the filename is hosts) on the computer system and is usually assigned by the system administrator (for example, magicolor 2300 DL). It may be more convenient for you to use the printer name than the IP address. - Page 26 Start Internet Explorer. From the Tools menu choose Internet Options. Select the Connection tab on the dialog box. Choose the LAN Settings button to display the Local Area Network (LAN) Set- tings dialog box. Select Advanced to open the Proxy Settings dialog box. In the Exceptions text box, type a comma after the last entry and then type the...
-
Page 27: Understanding The Pagescope Light Window
Window The illustration below identifies the navigation and configuration areas of the windows that you see in PageScope Light windows. Link to MINOLTA-QMS web site Links to subtopics Access to Administrator Mode Navigation Selecting the main topic and subtopic displays the configuration area for the printer options (parameters) associated with your selections. -
Page 28: Current Status
Current Status The current status of the printer is displayed at the top of all PageScope Light windows. The icon displays the type of status being displayed. Icon Status Ready Attention Fixable Error Fatal Error The printer must be User Mode You automatically enter User Mode whenever you enter PageScope Light. -
Page 29: Viewing Printer Status
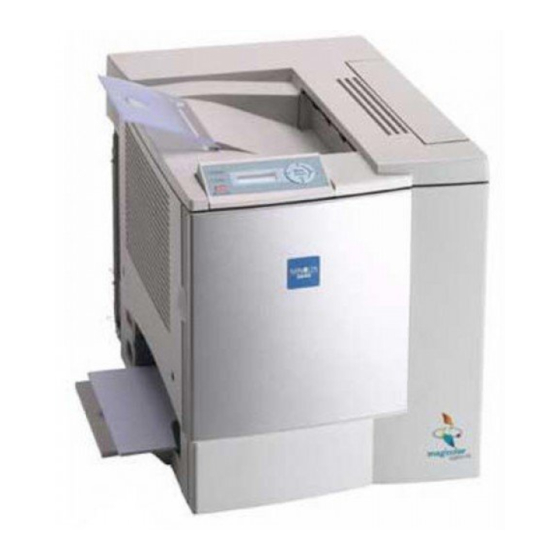
System Page The System page is the starting point for all access to the printer's internal web pages. On this page you find printer status and current configuration set- tings, printer identification, and links to all other web pages. Summary (shown above) The System/Summary window provides the following information. - Page 30 Item Device Status (Product image) On Board Memory DIMM Input Port Duplex Unit Tray2 Description Identifies the type of printer that you are browsing. The printer is pictured in the illustration with all installed options. Displays the amount of memory installed in the printer.
-
Page 31: Details
Interface Info (shown above) The System/Details/Interface Info window provides the following information: Item Network I/F Type Network I/F IP Address Network I/F Subnet Mask Network I/F Gateway Address Network I/F MAC Address Local I/F Type Viewing Printer Status Description Identifies the type of network interface installed on the printer (Ethernet 10/100BaseT). - Page 32 The System/Details/Consumables window provides the following information: Item Consumable items Max Life %Remaining 3-10 Description Identifies the type of consumable that is being monitored. Identifies the maximum life expectancy of the con- sumable in sheets of media. Describes the remaining life of the consumable. Viewing Printer Status...
-
Page 33: Counter
Counter The System/Counter window provides the following information: Item Description Total Faces Printed Identifies the total number of faces (one side of a sheet of media) printed to date. 3-11 Viewing Printer Status... -
Page 34: Online Assistance
The System/Online Assistance window provides the following information: Item Contact Contact Number Product Help URL Corporate URL Supplies and Accessories 3-12 Description Identifies the organization that provides assistance with the printer. Identifies the web address for assistance. Identifies the web address for assistance. Identifies the MINOLTA-QMS web address. -
Page 35: Job
This window allows you to view the status of current print jobs. Active Job (shown above) The Job/Active Job window provides the following information for up to ten print jobs: Item Job ID Job Owner Status Job Type Job Name Number of Pages Number of Copies Viewing Printer Status... -
Page 36: Print
Item Next> button Previous< button Delete Selected Job button Print This window allows you to print pages that provide various information about the printer. Test Print (shown above) The Print/Test Print window provides the following information: Item Configuration Page 3-14 Description If more than five print jobs are queued to print, moves you from the first to the second Active Jobs... -
Page 37: Configuring The Printer
Item Demo Page Menu Map Print button Configuring the Printer In order to make any configuration changes through PageScope Light, you must first enter Administrator Mode. See “Administrator Mode” on page 3-6 for instructions on logging into Administrator Mode. System Page The System page allows you to configure several user- and printer-specific items. -
Page 38: User Choice (Shown Above)
The System/User Choice window allows you to configure the following items: Item AutoContinue Chaining Tray Energy Saver Restore User Default button Apply button Clear button Log-out button 3-16 Description Specifies whether the printer should continue printing if the correct media size is not loaded in the specified tray. Choices: Off, On Default:... -
Page 39: Password
The System/Password window allows you to configure the following items: Item New Password Retype Password Apply button Clear button Log-out button & ' If you forget the new password you’ve assigned, use the printer’s Ser- vice Menu/User Default configuration menu to reset the password (and all other configuration choices) to 1234. -
Page 40: Browser
The System/Browser window allows you to configure the following items: Item Refresh Rate Language 3-18 Description Sets the time interval (in seconds) that passes before the screen automatically updates. During a screen refresh, the printer is polled for any new information or status, and all of the fields in the PageScope Light windows are updated. -
Page 41: Online Assistance Page
Item Apply button Clear button Log-out button Online Assistance Page The System/Online Assistance window allows you to configure the following items: Item Contact Contact Number Sets the telephone number for printer assistance. Configuring the Printer Description Applies the configuration settings for this window. Resets all configuration settings for this window to their factory defaults. -
Page 42: Network
Item Product Help Corporate URL Supplies and Accessories Apply button Clear button Log-out button Network The Network page allows you to configure TCP/IP (Transmission Control Protocol/Internet Protocol) and IPP (Internet Printing Protocol) settings. For more information on these protocols, see chapter 6, “Network Printing.” 3-20 Description Sets the help web site address for printer assistance. -
Page 43: Configuration
TCP/IP Configuration The Configuration/TCP/IP Configuration window allows you to configure the following items. For more information on these TCP/IP, see chapter 6, “Net- work Printing.” Item Auto IP IP Address* Subnet Mask* Configuring the Printer Description Specifies whether an IP address is automatically assigned to the printer. - Page 44 Item Default Gateway* If a router is used on the network, sets the router’s RAW Port Number Apply button Clear button Log-out button * Always enter these addresses without leading zeros. For example, 131.011.010.001 should be entered as 131.11.10.1. 3-22 Description address.
- Page 45 The Configuration/NETBIOS Configuration window allows you to configure the following items. Item WINS/NetBIOS Resolution NetBios Name Domain/Work- group Use DHCP for WINS Primary WINS Secondary WINS Configuring the Printer Description If the check box is selected, name resolution using WINS and NetBios is performed.
- Page 46 Sets the printer’s location. Range: Up to 127 characters Default: [Blank] Specifies the printer make and model. Choices: Non-configurable Default: MINOLTA-QMS magicolor 2300 DL Specifies the printer’s Uniform Resource Identifier (URI), authentication, and security. Range: Non-configurable Defaults: http://192.168.1.2:80/ipp.cgi http://192.168.1.2:631/ipp.cgi None None None None...
- Page 47 Item Operations Supported Apply button Clear button Log-out button Configuring the Printer Description Specifies the enabled printer operations. Choices: Non-configurable Defaults: Print Job, Validate Job, Cancel Job, Get Job Attributes, Get Jobs, Get Printer Attributes Applies the configuration settings for this window. Resets all configuration settings for this window to their factory defaults.
-
Page 49: Using Print Monitor
Using Print Monitor... -
Page 50: Installation Notes
The Crown Print Monitor is used with MINOLTA-QMS Crown printers (not with the magicolor 2300 DL). If you install a print monitor for use with the magi- color 2300 DL and then install the Crown Print Monitor (version 2.0.14 and below) to use with MINOLTA-QMS Crown printer, you must restart your PC before printing. -
Page 51: Using Thestatus Display
Using the Status Display... -
Page 52: Introduction
Ethernet ports, in the following Windows operating systems. Windows XP Windows Me Windows 2000 Windows 98 SE Windows 98 Windows 95 Windows NT 4.0 Opening the Status Display Choose Start>Programs>magicolor 2300 DL Utilities>magicolor 2300 DL Status. IEEE 1284c Parallel Introduction... -
Page 53: Understanding The Status Display Window
Area of Window Printer Status figure Printer Status How to recover Warning Status Printing Status Understanding the Status Display Window Function/Notes Shows a graphic representation of the printer and indicates if/where there is a problem. When the background of the printer graphic is green, the printer is in standby mode or a job is printing normally. -
Page 54: Using The Menus
File Menu Exit Choose File/Exit to close the Status Display. Display Menu Select Popup Message Choose Display/Select Popup Message to choose which mes- sage(s) you want brought to the foreground when that particular condition occurs on the printer. Activating a Message To activate a message for automatic notification, select the appropriate mes- sage in the Inactivate Popup list and choose the Add>>... -
Page 55: Printer Information
Choose Display/Printer Information to display information about the printer, including installed options, current page count, and amount of memory installed. Supplies Status Choose Display/Supplies Status to display consumables usage statistics (percentage remaining) for toner cartridges and the OPC. Help Menu Contents Choose Help/Contents to display online help for the Status Display. -
Page 57: Network Printing
Network Printing... -
Page 58: Bootp
The magicolor 2300 DL supports the following network protocols: BOOTP DHCP HTTP LPD/LPR SNMP TCP/IP This chapter defines each of these protocols and then explains how to print via IPP. BOOTP BOOTP (Bootstrap Protocol), an Internet protocol that enables a diskless workstation to discover its own IP address, the IP address of a BOOTP server on the network, and a file to be loaded into memory to boot the machine. -
Page 59: Ipp
IPP (Internet Printing Protocol) is a protocol for end users’ most common printing situations over the Internet. It allows users to find out about a printer’s capabilities, submit print jobs to a printer, find out the status of the printer or print job, and cancel a previously submitted print job. -
Page 60: Snmp
For obvious reasons network routers filter almost all broadcast traffic. This means that broadcasts that are generated on one subnet will not be “routed” or forwarded to any of the other subnets connected to the router (from the router’s perspective, a subnet is all machines connected to one of its ports). Multicasts, on the other hand, are forwarded by routers. -
Page 61: Printing Via Ipp (Internet Printing Protocol)
Windows XP/2000 Adding an IPP Port There are two ways to add an IPP port under Windows XP/2000: Using SETUP.EXE or using the Add Printer wizard. Using SETUP.EXE You automatically access SETUP.EXE through the AutoInstaller or by locating and then double-clicking on the SETUP.EXE filename. Both the AutoInstaller and SETUP.EXE are located on the Utilities and Documentation CD-ROM. -
Page 62: Using The Add Printer Wizard
Windows XP—If you’re using Windows XP, skip to step 4. Windows 2000—If you’re using Windows 2000 and you entered a valid path in the previous step, the following message displays: “The server on which the ‘Minolta-QMS magicolor 2300DL’ printer resides does not have the correct printer driver installed. - Page 63 In the URL field in the next dialog box enter the printer’s network path- name in one of the following formats and then choose Next: ( http://ipaddress/ipp.cgi ( http://ipaddress:80/ipp.cgi ( http://ipaddress:631/ipp.cgi & ' Windows 2000—If the printer is turned off or not available, the following error message displays: “Could not connect to the printer.
-
Page 64: Windows Me/98/95
Windows Me/98/95 To print via IPP under Windows Me/98/95, you must first do the following: Windows Me/98 Go to http://www.microsoft.com/ Windows98/downloads/contents/ WUPreviews/IPP/Default.asp and follow the instructions to down- load WPNPINS.EXE, the Internet Print Services update file for Win- dows 98. Install the WPNPINS.EXE file by locating it in Windows Explorer and then double-clicking the filename. - Page 65 In the Network Path text box in the next dialog box enter the printer’s network pathname in one of the following for- mats and then choose OK: ( http://ipaddress/ipp.cgi ( http://ipaddress:80/ipp.cgi ( http://ipaddress:631/ipp.cgi & ' Windows Me/98—If the printer is turned off or not available, the following error message displays: “This network printer is currently offline or unavailable.
- Page 66 Enter the printer name in the next dia- log box and choose OK. Choose OK to finish installing the printer driver. The IPP port will be the default port. Using the Add Printer Wizard Choose Start>Settings>Printers to access the Add Printer wizard. (Unless otherwise noted, all dialog boxes pictured here are taken from a Windows 98 operating system.) In the second dialog box, select the...
-
Page 67: Printing Via Ipp If The Printer Driver Is Already Installed
If the printer is available, this dialog box displays. Choose Have Disk, locate the direc- tory on the CD-ROM where the printer driver files are located (for example, DRIVERS\ENGLISH), and then choose Next. Finish installing the printer. The IPP port will be the default printer port. Printing via IPP if the Printer Driver is Already Installed Choose Start>Settings>Printers to access the Add Printer wizard. - Page 68 Windows Me/98 On the Details tab, choose Add Port. In the next dialog box, select the Net- work radio button, enter the printer’s network pathname in one of the follow- ing formats, and then choose OK to add the path: ! http://ipaddress/ipp.cgi ! http://ipaddress:80/ipp.cgi ! http://ipaddress:631/ipp.cgi...
-
Page 69: Index
Index Active Job, PageScope Light 3-13 Administrator Mode, PageScope Light 3-6 AutoInstaller 1-7 BOOTP 6-2 DHCP/BOOTP menu 2-4 Browser, PageScope Light 3-18 Configuration Printer, via Network configuration menu 2-2 Printer, via PageScope Light 3-15 Configuration page, PageScope Light 3-21 Consumables, PageScope Light 3-10 Index Counter, PageScope Light 3-11 Crown Print Monitor 4-2... - Page 70 Gateway Definition 1-6 Menu 2-4 Setting manually 1-7 Setting via AutoInstaller 1-7 Hardware address See HW Address Host table 3-3 Hosts file 3-3 HTTP 6-2 Menu 2-5 HW Address Menu 2-4 Interface Info, PageScope Light 3-9 Interface panel 1-2 Interfaces 1-2 Internet address See also IP Address Setting manually 1-7...
-
Page 71: Contents
Parallel interface Connecting 1-3 Supported environments 1-3 Parallel port 1-2 Password, PageScope Light 3-17 Print Monitor 4-2 Crown Print Monitor 4-2 Installation 4-2 Windows 2000 4-2 Windows Me/98/95 4-2 Windows NT 4 4-2 Windows XP 4-2 Print page, PageScope Light 3-14 Printer name 3-3 Protocols, network BOOTP 6-2...
Need help?
Do you have a question about the Magicolor 2300 DL and is the answer not in the manual?
Questions and answers