Kodak Scanmate i1120 User Manual
Kodak scanmate i1120: user guide
Hide thumbs
Also See for Scanmate i1120:
- User manual (96 pages) ,
- Setting up (9 pages) ,
- Specifications (2 pages)
Table of Contents
Advertisement
Advertisement
Table of Contents

Related Manuals for Kodak Scanmate i1120


Summary of Contents for Kodak Scanmate i1120
-
Page 2: User Precautions
For disposal or recycling information, contact your local authorities or, in the USA, visit the Electronics Industry Alliance website: www.eiae.org. • The product packaging is recyclable. • The Kodak ScanMate i1120 Scanner is Energy Star compliant and is shipped from the factory with the default time set to 15 minutes. EMC statements United States: This equipment has been tested and found to comply with the limits for a Class B digital device pursuant to Part 15 of the FCC rules. -
Page 3: Acoustic Emission
This symbol indicates that when the last user wishes to discard this product, it must be sent to appropriate facilities for recovery and recycling. Please contact your local Kodak representative or refer to www.kodak.com/ go/recycle for additional information on the collection and recovery programs available for this product. - Page 4 OVERVIEW INSTALLATION SCANNING MAINTENANCE TROUBLESHOOTING APPENDICES...
-
Page 5: Supporting Documentation
• USB 2.0 cable • Power supply • AC power cord bundles • Welcome Folio: - Installation CD (includes: Kodak Smart Touch functionality, Kodak drivers and software) - Application CDs (includes ScanSoft PaperPort, ScanSoft OmniPage and BizCard5) - Warranty/Registration sheets - Printed User’s Guide, English... -
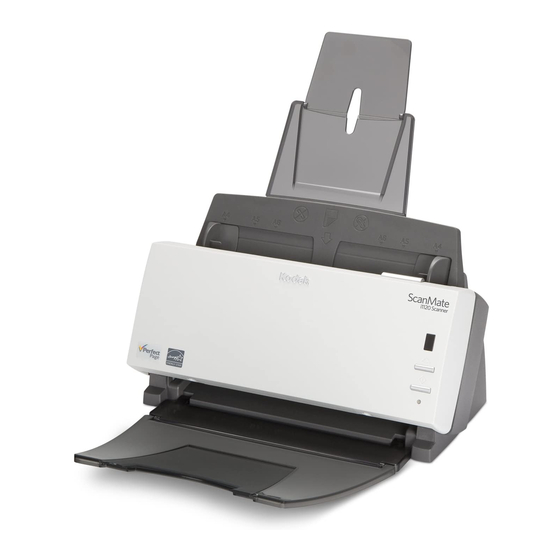
Page 6: Scanner Components
Scanner cover Output tray Output tray extension Scanner cover — provides access to the internal components of the scanner. Output tray — collects the scanned documents. Output tray extension — unfold this extension when scanning documents longer than 8.5 x 11 inches (A4). - Page 7 A-61602 February 2009 Power switch Power port Power switch — turns the scanner on and off. Power port — connects the power cord to the scanner. USB port — connects the scanner to the PC. Calibration guide Pre-separation pad Calibration guide — for optimum image quality, keep the calibration guide clean.
- Page 8 • The Kodak Driver Software must be performed first, before installing any other portions of the scanner. 1. Insert the Kodak ScanMate i1120 Scanner Installation CD in the CD-ROM drive. The installation program starts automatically. 2. Select Install Scanner Software.
- Page 9 Software License Agreement. The installation will start and several progress screens will be displayed. 5. Click Finish when the installation is complete. 6. Remove the Kodak ScanMate i1120 Scanner Installation CD from the CD-ROM drive. 1. Press the release button to open the scanner cover.
- Page 10 3. Align the four tabs on the input tray with the slots on the scanner. 4. Roll the input tray toward the back of the scanner until it snaps into place. 5. Close the scanner cover. A-61602 February 2009...
- Page 11 Attaching the output tray 1. Locate the output tray slots on the scanner. 2. Align the output tray pins with the slots and lower the output tray into place. NOTE: The output tray can be folded up when not in use for easy storage.
- Page 12 4. Plug the other end of the power cord into the wall outlet. 5. Attach the USB cable to the scanner USB port, located on the back of the scanner. 6. Attach the other end of the USB cable to the proper USB port on your PC.
- Page 13 Turning on the scanner When you turn on the scanner, the green indicator on the front of the scanner will flash as the scanner goes through a series of self tests. Please wait while the operating system synchronizes the scanner with the installed software.
-
Page 14: Getting Your Scanner Ready To Scan
Selecting your scanning application... 3-3 Scanning with Smart Touch ... 3-4 1. Be sure the scanner is on and ready to scan (green indicator light is on and constant). 2. Adjust the side guides (by sliding them in or out) to accommodate the size of documents you are scanning. - Page 15 When organizing documents for scanning, stack the documents so the lead edges are aligned and centered in the input tray. This allows the feeder to introduce documents into the scanner one at a time. 2. Remove all staples and paper clips before scanning. Staples and paper clips on documents may damage the scanner and documents.
- Page 16 PCs, notebooks, PDAs and PIMs. NOTE: Smart Touch was installed when you installed the Kodak Driver Software. The rest of the above scanning applications are provided on separate CDs that were included with your scanner.
- Page 17 Scanning with Smart Touch The following steps are an example of creating a Black and White PDF using Smart Touch. For more information on how to use Smart Touch, see the User’s Guide for Smart Touch provided on the Installation CD. 1.
-
Page 18: Table Of Contents
Your scanner needs to be cleaned periodically. If your documents do not feed easily, if several documents feed at the same time or if streaks appear on your images, it is time to clean your scanner. The section entitled, “Supplies and consumables” at the end of this chapter provides a listing of the supplies required to clean your scanner. -
Page 19: Cleaning The Rollers
NOTE: For easier cleaning of the NFR rollers, you may want to order Kodak ScanMate i1120 Scanner Cleaning Swabs. For ordering information see the section entitled, “Supplies and consumables” later in this chapter. Dry the rollers with a lint-free cloth. -
Page 20: Cleaning The Pre-Separation Pad
Cleaning the pre- separation pad A-61602 February 2009 1. Press the release button to open the scanner cover. 2. Squeeze the plastic clamps that hold the pre-separation pad in place and lift it out of position. 3. Wipe the pre-separation pad from top to bottom with a roller cleaning pad. -
Page 21: Cleaning The Calibration Area
Replacing the pre- separation pad 1. Press the release button to open the scanner cover. 2. Remove dust and debris from this area by using a Staticide wipe or a small brush. Be careful not to scratch the glass (may cause... - Page 22 A-61602 February 2009 1. Press the release button to open the scanner cover. 2. Squeeze the plastic clamps that hold the pre-separation pad in place and lift it out of position. 3. Insert the new pre-separation pad into position, aligning it with the slots, and pushing it in until it snaps into place.
-
Page 23: Replacing The Feed Roller Assembly
Set it aside. 3. Rotate the orange tab upward to release the feed roller assembly and lift the feed roller assembly up and out of the scanner. 4. Install the new feed roller assembly by aligning the shaft end of the assembly in position. -
Page 24: Supplies And Consumables
Kodak ScanMate i1120 Feed Roller Assembly Kodak ScanMate i1120 Scanner Cleaning Swabs Kodak Digital Science Roller Cleaning Pads Kodak Digital Science Transport Cleaning Sheets (qty 50) Staticide Wipes for Kodak Scanners NOTE: Items and catalog numbers are subject to change. -
Page 25: Troubleshooting
Problem A document is jammed in the scanner Scanner will not scan/feed documents Image quality is poor or has decreased Clean the scanner. See the procedures in Chapter 4, Maintenance. Documents are jamming or multiple documents are feeding Distorted images Scanning multiple pages in “Single... - Page 26 Installation CD. • Your PC may not meet the minimum requirements for the scanner. • The scanner is rated and designed to operate with USB 2.0, but will function with USB 1.1. If you are using a USB 1.1 connection, update your connection to USB 2.0.
-
Page 27: Led Error Codes
Command failure Document jam Internal test E 1 5 Scanner cover open 1. Visit www.Kodak.com/go/disupport to obtain the current phone number for your country. 2. When calling, please have the following information ready: • A description of your problem. •... -
Page 28: Appendix A Specifications
Appendix A Specifications Scanner Type/Speed Duplex color scanner with an automatic document feeder, scans 20 pages per minute (landscape) Scanning Technology CCD type, 600 dpi optical resolution Grayscale output bit depth is: 8 Color capture bit depth is: 24 Color output bit depth is: 24... - Page 29 System requirements Following is the minimum recommended system configuration to run a Kodak ScanMate i1120 Scanner. • Recommended processor and memory: - For documents up to 356 mm (14 in.) long up to 300 dpi: 3.2 GHz Intel Pentium IV processor with 512 MB of RAM - For documents up to 660 mm (26 in.) long up to 400 dpi: 3.2 GHz...
-
Page 30: Limited Warranty For Kodak Scanners
Kodak or through Kodak’s authorized distribution channels: Kodak warrants that a Kodak Scanner, from the time of sale through the Limited Warranty period applicable to the Product, will be free of defects in materials or workmanship and will conform to the performance specifications applicable for the particular Kodak Scanner. -
Page 31: How To Obtain Limited Warranty Service
(800) 822-1414. Kodak also provides a variety of service programs that may be purchased to assist with the use and care of the Kodak Scanner. Kodak is committed to providing its customers with quality, performance, reliability and service under the Limited Warranty. -
Page 32: Depot Service
Kodak Scanners must obtain a Return Material Authorization number (“RMA”) by calling (800) 822-1414, and within ten (10) business days from the date of issuance of the RMA must return the Kodak Scanner to the address designated in the RMA at the end user’s own expense and risk. -
Page 33: Contacting Kodak
• For Information on Kodak Scanners: www.Kodak.com/go/docimaging • For U.S. Service, Repair and Technical Assistance by Telephone: 5 a.m. to 5 p.m. Monday-Friday; (800) 822-1414 (excluding Kodak holidays) • For Technical Documentation and FAQ’s available 24 hours a day: www.Kodak.com/go/disupport A-61602 February 2009...
Need help?
Do you have a question about the Scanmate i1120 and is the answer not in the manual?
Questions and answers