Table of Contents
Advertisement
Advertisement
Chapters
Table of Contents

Related Manuals for Kodak ScanMate i1150WN


Summary of Contents for Kodak ScanMate i1150WN
- Page 2 Wi-Fi is a registered trademark of Wi-Fi Alliance, Austin, Texas USA 3rd Party Licenses This software is based in part on the work of the Independent JPEG Group Copyright (C)2009-2013 D. R. Commander. All Rights Reserved. Redistribution and use in source and binary forms, with or without modification, are permitted provided that the following conditions are met: Redistributions of source code must retain the above copyright notice, this list of conditions and the following disclaimer.
-
Page 3: User Precautions
• The product packaging is recyclable. • Parts are designed for reuse and recycling. • The Kodak ScanMate i1150WN and the Kodak i1190WN Scanner are Energy Star compliant and are shipped from the factory with the default time set to 15 minutes. - Page 4 Acoustic emission Maschinenlärminformationsverordnung – 3, GSGV Der arbeitsplatzbezogene Emissionswert beträgt <70 dB(A). [Machine Noise Information Ordinance — 3, GSGV The operator-position noise emission value is <70 dB(A).] EMC and Wireless Regulatory Statements This device contains a preinstalled 2.4 GHz Wireless LAN module (Model: RTL8188EE) For Indoor Use: This device is intended for indoor use only.
- Page 5 Notice to users in China: CCC; SRRC certification (pending) Notice to users in EU/EFTA: We, Kodak Alaris Inc. hereby declare that this equipment (document scanner) model i1150WN & i1190WN incorporating Radio and Telecommunications Terminal Equipment (R&TTE) is in compliance with the essential requirements and other relevant provisions of Directive 1999/5/EC. The preinstalled 2.4 GHz Wireless LAN module is considered Class 1 in the EU.
- Page 6 Notice to users in Thailand: This wireless communication equipment has the electromagnetic field strength in compliance with the Safety Standard for the Use of Wireless Communication Devices on Human Health announced by the National Telecommunications Commission. Notice to users in the US: FCC: This equipment has been tested and found to comply with the limits for a Class B digital device, pursuant to Part 15 of the FCC Rules.
- Page 7 OVERVIEW INSTALLATION SCANNING MAINTENANCE TROUBLESHOOTING APPENDICES A & B...
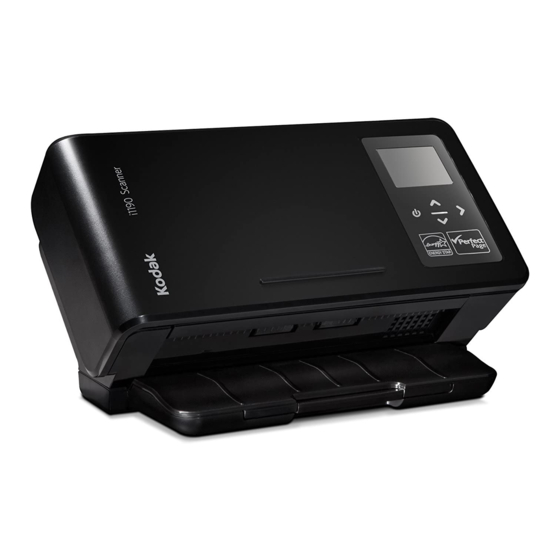
- Page 8 Supporting documentation .............. 1-2 What’s in the box ................1-2 Scanner components ..............1-3 The Kodak ScanMate i1150WN Scanner and the Kodak i1190WN Scanner are compact wireless/wired network scanners perfect for personal and desktop workgroups. Both scanner models support the ScanMate+ Mobile app which allows you to scan a set of documents directly from the scanner to your mobile device.
- Page 9 • Scanning Setup Guides — the TWAIN Datasource and ISIS Driver are included with the Kodak ScanMate i1150WN Scanner and the Kodak i1190WN Scanner. The Scanning Setup Guides explain how to use basic image processing features and is provided on the Installation DVD in PDF format.
-
Page 10: Scanner Components
Scanner components Front view Output tray — collects the scanned documents. The output tray can be pulled out and extended to accommodate documents up to 35.56 cm (14 inches) in length. End Stop — can be lifted up when scanning documents for better document stacking. - Page 11 ID-1 card positioning — for scanning one small card (i.e., US driver’s license or other credit card sized ID cards) in portrait orientation. There is also an ID-2 card placement position for scanning one large card (e.g., German ID card issued prior to November 2010) in landscape orientation (this position is not shown in the ‘Front view’...
- Page 12 NOTES: • When the scanner is in use by a current user (a session is Active), the user’s name is displayed in the following message, Scanner in use by ‘User Name’ followed by either an Add paper and press Scan to begin message or Press Scan to begin message if paper is in the input tray.
- Page 13 USB port — connects the scanner to the PC using a USB cable. Ethernet port — connects the scanner to the network using an Ethernet cable (not provided by Kodak Alaris). Security lock port — connects a security lock to the scanner. You can purchase a standard security lock at an office supply store.
- Page 14 Inside view 1 Paper present sensor — detects the presence of documents in the input tray. 2 UDDS and IDP sensor — used to detect multifeeds and document edges. 3 Pre-separation pad — pull this pad out of position when cleaning or changing the separation roller.
-
Page 15: Table Of Contents
If your PC does not have a CD/DVD drive, you can access the drivers from the Kodak Alaris website: www.kodakalaris.com/go/IM. It is recommended that you visit the Kodak Alaris website for the latest driver, software and firmware updates. This chapter is intended to provide more in-depth information than what is provided on the installation DVD. - Page 16 Do steps 1 and 2 below and then in Step 3 use this connection option.. 1. Install the Kodak Driver Software (Windows operating systems) by inserting the Kodak ScanMate i1150WN Scanner and the Kodak i1190WN Scanner Installation DVD in the disk drive. The installation program starts automatically.
-
Page 17: Connection Options Beteween The Computer And Scanner
Wired Network connection, run the wizard and follow the prompts to change the connection option. • If the scanner is going to be shared by multiple users, the Kodak Software driver needs to be installed on each computer. When the scanner is being shared with more than one user, the scanner’s... -
Page 18: Overview
NOTE: In addition to connecting to the scanner and using the scanner’s embedded web pages to create a configuration, the same pages are served from Kodak Alaris by entering www.kodakalaris.com/go/EasySetup on the browser of your choice. A-61854 April 2016... -
Page 19: Scanning
This PDF file results in a 2D barcode image document. Scanning this document in EasySetup mode on the scanner configures the scanner with the encoded configuration information automatically. The patent pending EasySetup technology allows many end users to configure their scanners using the EasySetup option. If required, an EasySetup Configuration page can be used to quickly copy configurations between scanners with identical settings or as a means of recovering scanner information in the rare instance where the... - Page 20 Configuration options can be basic or a little more advanced. • Default configuration — the scanner comes pre-configured with Wired Network and Wireless Directly (ad hoc) enabled. You can connect the scanner to your company network by using an Ethernet cable.
-
Page 21: Accessing The I1150Wn/I1190Wn Scanner Setup Website
• Method 1 — connect the scanner to your network with an Ethernet Scanner Setup cable (this cable is not provided by Kodak Alaris). If you use this option, attach the Ethernet cable to the Ethernet port, located on the... - Page 22 3. From your PC change your current network to the same name as the SSID on the scanner (i.e., i1150WN-58333620). The PC network connection icon in the System Tray will now show the bars and an exclamation point, which means that your PC is not connected to the internet, but you still can access the scanner’s embedded web pages.
-
Page 23: Password Protection
Password protection When you access the website, an optional password protection dialog box will be displayed if a password has been set. By default there is no password. This capability is provided to limit access to networking options you do not want viewed or changed without authorization. -
Page 24: Setting Or Changing A Password
Setting or changing a When you are logged in, the Support tab provides an option for creating password a password. 1. Click Change Admin Password on the Support tab to display the Change Admin Password dialog box. 2. Enter the previous password in the Old password field. If there is no previous password, this field will be blank. -
Page 25: The Home Page
The Home page The Home page contains a set of five tabs beginning with the Network tab. NOTES: • If your scanner is password protected, only the Support, Status and About tabs will be displayed and the Update Scanner Firmware and Change Admin Password buttons will not be displayed. - Page 26 Update Scanner Firmware — when selected, you will be prompted to browse to the location of the new scanner firmware and start the firmware update. See www.kodakalaris.com/go/IM for updated software and firmware. This option is available to anyone who is logged into the scanner website.
-
Page 27: The Network Tab
The Network tab The Network tab allows you to setup your wireless or wired connections. When you setup your scanner, the connection mode factory default is set to Wired Network with optional Wireless Directly (ad hoc). The Wired Network interface is configured with DHCP set (i.e., “Obtain an IP address automatically”). -
Page 28: Wired Network With Optional Wireless Directly (Ad Hoc) Connection
Wired Network with Configure the Wired Network and optional Wireless Directly (ad hoc) optional Wireless Directly connections by entering the appropriate information in the fields on the (ad hoc) connection Network tab. The default network settings are: Wired = ON; DHCP = enable Wireless = ON;... -
Page 29: Optional Wireless Directly (Ad Hoc) Options
Optional Wireless Directly Scanner’s SSID — it is recommended that you keep the default SSID. (ad hoc) options If you need to change it, contact your network administrator for the proper naming convention. All wireless devices on a WLAN must use the same SSID in order to communicate with each other. - Page 30 Verify your settings and click OK. A confirmation message will be displayed. When applying a new network configuration, the scanner will restart and the wireless network you were connected to may have changed. If changed, you will need to reconnect to that network before you can access the web page again.
- Page 31 Optional: EasySetup 1. Click Print EasySetup. The EasySetup Configuration page will be displayed. 2. Enter a description in the EasySetup page description field. 3. Select how you want to apply these settings: to any scanner or a specific scanner. If you select specific to S/N, you must enter the serial number of the scanner you want to save these settings to.
-
Page 32: Wireless Directly (Ad Hoc) Connection
Wireless Directly (ad hoc) If you want to set up the scanner using the scanner as Wireless connection Directly (ad hoc), make sure your device (e.g., mobile phone, tablet, PC, etc.) is connected to the scanner's Wireless Directly (ad hoc) connection. - Page 33 Wireless Directly (ad hoc) options: See the previous section entitled “Optional Wireless Directly (ad hoc) options” for a description of these options. A-61854 April 2016 2-19...
-
Page 34: Wireless Network Connection
Wireless Network connection NOTE: Click on Wireless Network to turn off the conflicting Wired Network and Wireless Directly selections. Then configure your Wireless Network settings. Typically, you would select the Network SSID that your company is sharing, the Security choices and the Security Pre-shared Key. Wireless Network •... - Page 35 • Wireless Security Options — the following options are available for encrypting data between the sender and the receiver when using a wireless connection. NOTE: Contact your network administrator for the security key. - None (Not Secure) - WEP (Not Secure) - WPA/WPA2 Personal •...
- Page 36 Verify your settings and click OK. A confirmation message will be displayed and the OK button will appear when the activity completes with the Completion status displayed. When applying a new network configuration, the scanner will restart and the wireless network you were connected to may have changed. If changed, you will need to reconnect to that network before you can access the web page again.
- Page 37 Optional: EasySetup 1. Click Print EasySetup. The EasySetup Configuration page will be displayed. 2. Enter a description in the EasySetup page description field. 3. Select how you want to apply these settings: to any scanner or a specific scanner. If you select specific to S/N, you must enter the serial number of the scanner you want to save these settings to.
- Page 38 5. Select Generate EasySetup PDF. 6. Print the EasySetup Configuration page. 7. Place the EasySetup Configuration page into the scanner’s input tray and press and hold the i button for 4 seconds on the Operator Control Panel. The message In use by EasySetup will be displayed on the Operator Control Panel.
-
Page 39: Usb With Optional Wireless Directly (Ad Hoc) Connection
USB with an optional There is no USB selection required on the website. If you want to Wireless Directly (ad hoc) configure the scanner as a USB device without the optional Wireless connection Directly (ad hoc), uncheck Wireless Directly from the Network tab. NOTE: Wired Network must be selected or you will not be able to get to the website without restoring factory defaults if you uncheck Wireless Directly (ad hoc). -
Page 40: Device Tab
Device tab The Device tab provides the following options. • Power - Sleep after: allows you to set the amount of time, in minutes, the scanner has to be inactive before it goes into sleep mode. The maximum allotted time is 240 minutes before the scanner goes into sleep mode. -
Page 41: Support Tab
Support tab The Support tab provides general information about Service and Support. From this tab you can also update scanner firmware and change the admin password. For more information, see the section entitled, “Setting or changing a password” earlier in this chapter. A-61854 April 2016 2-27... -
Page 42: Status Tab
Status tab The Status tab displays the current configuration settings. This is a dynamic page, which is updated every time you click the Status tab with the current active settings in the scanner. Any changes (e.g., IP address or network settings) will be displayed on this page. About tab The About tab provides copyright, version and other general information. -
Page 43: Advanced Easysetup Considerations
Advanced EasySetup Creating an EasySetup Configuration page can be done by selecting the Print EasySetup page on the Network tab. The EasySetup considerations Configuration page displays the current setup that will be encoded in the encrypted 2D barcode image. This information is displayed in the table at the bottom of the dialog box;... -
Page 44: Using The Special Easysetup Configuration Page
Using the special The following options are available on the EasySetup Configuration EasySetup Configuration page. page EasySetup page description — the description in this field will be printed at the top of the EasySetup page. This description should be a message that informs the user what you want them to do. -
Page 45: Using The Network Info/Setup Icon (I) On The Scanner
Using the Network The Network Info/Setup (i) icon has two functions: Info/Setup icon (i) on • When pressed once, the network settings are displayed, including, the scanner but not limited to: - Scanner name - SSID - Wireless Addr: 111.222.3.4. or none - Firmware version - Wireless Subnet Mask - Wireless MAC Addr: 01.02:03:04:05:06... -
Page 46: Waking Up' The Scanner
‘Waking up’ the If the scanner is not already powered on, touch any button on the scanner (i.e., Up, Down, Start or Power). scanner Turning the scanner To turn the scanner off, touch the power button for 3 seconds. NOTE: The Sleep/Power Off energy saver feature will turn the scanner off after the time specified in the scanner driver. -
Page 47: Multiple Users
3 Scanning Contents Multiple users.................. 3-1 Getting your scanner ready to scan ..........3-1 Getting your documents ready to scan ........... 3-2 Scanning applications ..............3-3 Scanning with Smart Touch ............3-4 Multiple users When a scanner is being shared by more than one user, there could be times when the scanner will be in use by someone else. -
Page 48: Getting Your Documents Ready To Scan
NOTE: Keep the end stop down when scanning documents longer than A4 (11.7 inches). Input tray extension for long documents Output tray extension and end stop NOTE: When scanning small documents (e.g., credit cards, US driver’s license, etc.), the document must be fed through the scanner in portrait orientation. - Page 49 5. If you are scanning small documents such as a driver’s license or credit card, they should be scanned one at a time (in portrait orientation). When in a batch, you need to place the small document first in the batch. A-61854 April 2016...
-
Page 50: Scanning Applications
• ScanMate+ Mobile app — easily scan documents from your scanner using your mobile device. The ScanMate+ Mobile app (iOS and Android) is available from the Kodak Alaris website or the App Store / Play Store. • Kodak Capture Pro Limited Edition — quickly scan and process information ‘out of the box’... -
Page 51: Scanning With Smart Touch
Output folder in the Smart Touch directory under “My Documents”. NOTE: If you have a Kodak ScanMate i1150WN Scanner and you are scanning 10 documents or less, your scanner will scan these documents at 40 pages a minute (burst mode). Anything over... -
Page 52: Maintenance
4 Maintenance Contents Opening the scanner cover............. 4-1 Cleaning procedures............... 4-2 Cleaning the rollers ..............4-2 Cleaning the separation roller ............ 4-3 Cleaning the feed rollers ............4-5 Cleaning the imaging guides ............4-8 Running a transport cleaning sheet..........4-8 Replacement procedures ............... -
Page 53: Cleaning Procedures
IMPORTANT: • Only use cleaners such as those recommended by Kodak Alaris. Do not use household cleaners. • Allow surfaces to cool to ambient temperature before use. Do not use cleaners on hot surfaces. -
Page 54: Cleaning The Separation Roller
Cleaning the separation The separation roller should be removed from the scanner for best roller cleaning results. 1. Remove the pre-separation pad by grasping it and pulling it straight out. 2. Grasp the separation roller and pull it straight out. 3. - Page 55 5. Insert the separation roller by aligning the tab with the slot and snapping it into position. 6. Re-install the pre-separation pad by aligning the slots with the holes on the pre-separation pad and snapping it into place. A-61854 April 2016...
-
Page 56: Cleaning The Feed Rollers
Cleaning the feed rollers 1. Remove the input tray. 2. Grasp the top edge of the feed roller cover and lift it out of position. NOTE: Be careful not to damage the paper present sensor when removing or cleaning around the feed roller. 3. - Page 57 4. Rotate the lower feed roller so the pin is positioned with the open slot. then grasp the lower feed roller and pull it straight out. 5. Wipe the top and lower feed roller tires with a roller cleaning pad. A-61854 April 2016...
- Page 58 6. Inspect the feed rollers. If the feed roller tires show signs of wear or damage, replace the feed roller. See the “Replacement procedures” for more information. 7. Reinstall the lower feed roller by aligning the pin with the open slot and fitting it into position.
-
Page 59: Cleaning The Imaging Guides
Cleaning the imaging 1. Gently wipe the upper and lower imaging guide using a Brillianze guides Detailer wipe (Step 1) or Staticide wipe. Be careful not to scratch the imaging area when cleaning. IMPORTANT: Staticide wipes contain isopropanol which can cause eye irritation and dry skin. -
Page 60: Replacement Procedures
Replacement Kodak Scanners use replaceable feed roller modules that can feed a wide range of document types, sizes and thicknesses. Module life and procedures performance will vary based on the customer’s document set, the frequency of cleaning the paper path and tires, and following the recommended schedule for changing the module. -
Page 61: Replacing The Pre-Separation Pad
Replacing the pre- 1. Remove the pre-separation pad by grasping it and pulling it out of separation pad position. 2. Discard the worn pre-separation pad. 3. Install the new pre-separation pad by aligning the slots with the holes on the pre-separation pad and snapping it into place. 4-10 A-61854 April 2016... -
Page 62: Replacing The Feed Roller
Replacing the feed roller 1. Remove the input tray. 1. Grasp the top edge of the feed roller cover and lift it out of position. NOTE: Be careful not to damage the paper present sensor when removing or cleaning around the feed roller. 2. - Page 63 3. Rotate the lower feed roller so the pin is positioned with the open slot, then grasp the lower feed roller and pull it straight out. 4. Install a new lower feed roller and top feed roller by aligning the pins with the open slots and fitting each roller into position.
-
Page 64: Supplies And Consumables
Kodak Digital Science Roller Cleaning Pads (qty 24) 853 5981 Kodak Digital Science Transport Cleaning Sheets (qty 50) 169 0783 Staticide Wipes for Kodak Scanners (qty 6 boxes of 24) 896 5519 Brillianize Detailer Wipes / for Kodak Scanners 826 6488 NOTE: Items and catalog numbers are subject to change. -
Page 65: Problem Solving
Use the chart below as a guide to check possible solutions to help you resolve the situation. There are also Frequently Asked Questions and videos available on the Kodak Alaris website: www.kodakalaris.com/go/IMsupport. Problem... - Page 66 Kodak Alaris folders. • The scanner is rated and designed to operate with USB 2.0, but will function in a USB 1.1 port. If you are using a USB 1.1 connection, update your connection to USB 2.0.
- Page 67 2 to 3 feet apart. Using scanners web pages to install • Use Kodak Alaris hosted pages by entering the following URL in your multiple units is too complex and browser: www.kodakalaris.com/go/EasySetup.
-
Page 68: Installation Issues
Installation Issues If you are having trouble with the installation procedures that are provided on the DVD, refer to the chart below for possible solutions. Problem Possible Solution When trying to connect my computer Make sure that: and scanner, the screen always says •... -
Page 69: Additional Help
I am connecting the scanner to my • Check to make sure that your scanner is turned on, and that it is network using the scanner’s wireless showing the Wireless Network icon: . If you do not see this icon, signal, but I do not see my scanner in check that the Wireless switch on the back of the scanner is in the the Available scanners list... -
Page 70: Indicator Lights
Operator Control Panel, such as a document jam. If the error is not user-correctable, you may need to power-cycle the scanner. If the problem persists, call Service. Contacting Service Before contacting Service, visit the Kodak Alaris website for Frequently Asked Questions and videos. 1. For support visit: www.kodakalaris.com/go/i1150WNsupport or www.kodakalaris.com/go/i1190WNsupport... -
Page 71: Documents To Be Processed At
This appendix provides scanner specifications and system requirements. Scanner Type/Speed Kodak ScanMate i1150WN Scanner — a wireless/network scanner that is capable of scanning duplex scans at 30 pages per minute at 200 and 300 dpi in (throughput speeds may vary depending on driver, black and white, color and grayscale with “burst”... -
Page 72: System Requirements
Operating: less than 64 dB(A) (Sound Pressure level) Idle mode: less than 41 dB(A) Bundled Software TWAIN, ISIS, WIA Drivers, Smart Touch and Kodak Capture Pro Software Limited Edition TWAIN Drivers available from: www.kodakalaris.com/go/scanners ScanMate+ Mobile app available from: www.kodakalaris.com/go/scanners... -
Page 73: Limited Warranty For Kodak Scanners
Kodak Alaris or through Kodak Alaris’ authorized distribution channels: Kodak Alaris Inc. warrants that a Kodak Scanner, from the time of sale through the Limited Warranty period applicable to the Product, will be free of defects in materials or workmanship and will conform to the performance specifications applicable for the particular Kodak Scanner. -
Page 74: How To Obtain Limited Warranty Service
Warranty Service descriptions Kodak Alaris offers a range of service programs to support its Limited Warranty and to assist with the use and care of the Kodak Scanner (“Service Methods”). A Kodak Scanner represents an important investment. Kodak Scanners provide the productivity needed to stay competitive. -
Page 75: Depot Service
Scanners must obtain a Return Material Authorization number (“RMA”) by calling (800) 822-1414, and within ten (10) business days from the date of issuance of the RMA must return the Kodak Scanner to the address designated in the RMA at the end user’s own expense and risk. - Page 76 Website: www.kodakalaris.com/go/IM For U.S. Service, Repair and Technical Assistance by Telephone: Telephone technical support is available Monday-Friday between the hours of 5 a.m. to 5 p.m. excluding Kodak Alaris holidays. Phone: (800) 822-1414 For Technical Documentation and FAQ’s available 24 hours a day: Website: www.kodakalaris.com/go/IM...
Need help?
Do you have a question about the ScanMate i1150WN and is the answer not in the manual?
Questions and answers