Table of Contents
Advertisement
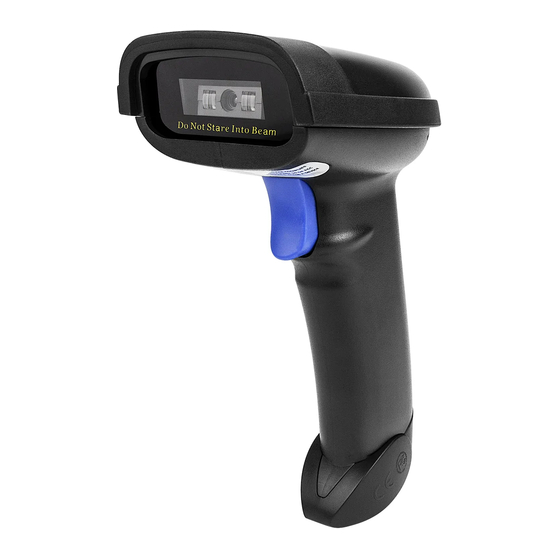
NT-1228BC
V18.7.12
Quick Setup Guide
This model can work both via USB cable or via bluetooth.
Connection Mode
Working via USB cable
Get Started: Connect scanner with your device via USB cable. If you use US keyboard, it's a plug and play
model. If you use other type of keyboard , please refer to below "keyboard language type" to set the
keyboard language before use it.
Working via Bluetooth
Get Started
After you connect the bluetooth with your device (please refer to the section of "bluetooth
:
connection" from this manual) then you can start to use it. (US keyboard by default) If you use other type of
keyboard , please refer to below "keyboard language type" to set the keyboard language before use it.
Low voltage Alarm
Scanner will make 2x beeps to remind you that it's under low voltage. Plug the USB cable
:
to charge power for it.
If you want to have other configurations please refer to below programming barcodes.
Firmware Version:
Read below command barcode to check scanner firmware version.
Check Scanner Version
Below programming barcodes are applied for version ≥ NT_ZNCWBSDk8815
Barcode Programming
Netum barcode scanners are factory programmed for the most common terminal and communications
settings. If you need to change these settings, programming is accomplished by scanning the bar codes in this
guide. An asterisk (*) next to an option indicates the default setting.
Advertisement
Table of Contents

Related Manuals for Netum NT-1228BC


Summary of Contents for Netum NT-1228BC
- Page 1 Below programming barcodes are applied for version ≥ NT_ZNCWBSDk8815 Barcode Programming Netum barcode scanners are factory programmed for the most common terminal and communications settings. If you need to change these settings, programming is accomplished by scanning the bar codes in this...
-
Page 2: Bluetooth Connection
2) Touch Home | Menu | Settings | Wireless & Networks | Bluetooth settings 3) Make sure the device has Bluetooth “On”. Scan for devices. 4) In the list of found devices, select “Netum Bluetooth”. Tap Pair. 5) The scanner will connect to the Android device. -
Page 3: Operation Mode
Click on “Bluetooth” in the left column. Your IOS device will automatically start searching for any Bluetooth Devices in the area. 3) Once you have identified the “Netum Bluetooth” on the screen, tap on it and you will automatically be connected. The scanner’s LED light will turn to solid blue. -
Page 4: Application Mode (Spp)
American Keyboard * Portugal Keyboard French Keyboard Spanish Keyboard Germany Keyboard Turkey Q Keyboard Italy Keyboard Turkey F Keyboard B) Application Mode (SPP) For Android or Windows only Software installation is required, If you have an application that supports mobile scanners this is the mode recommended. BT SPP Mode Note: this command is only apply for Bluetooth Wireless Mode... -
Page 5: Scan Mode
Scan Mode Trigger Mode (Default) Scanning this bar code will enable the scanner to enter manual trigger mode. Continuous Mode This mode enables the engine to scan/capture, decode and transmit over and over again. Auto Sense Mode Scanning this bar code will enable the scanner to enter auto sense mode. Working Mode If you are heading for a working area which lies outside the signal range, you may activate the offline mode of the scanner, following the steps described below. - Page 6 Clear Memory 3).By scanning the following barcode, all data entries in the buffer memory can be manually uploaded after reconnecting to the working station (only in offline mode). Uploading the Data 4). By scanning the following barcode, the gross quantity of the uploaded data entries will be summarised (only in offline mode).
-
Page 7: Restore Factory Default
30 s 6 Mins 12 Mins Mins 1Hour 2Hours IOS Keyboard POP UP/HIDE During the scanning IOS keyboard can be hided or popped up by scanning below command barcode. IOS Keyboard POP UP/HIDE Beeper Enable/Disable scanner to beep to indicate successful scan. BEEP ON BEEP OFF Restore factory default... -
Page 8: Transmit Code Id Character
1. Factory Restore 2. Serial Port 3. Baud Rate 19200 4. Enter+LF Transmit Code ID Character A code ID character identifies the code type of a scanned bar code. This can be useful when decoding more than one code type. The code ID character is inserted between the prefix character (if selected) and the decoded symbol. - Page 9 *None Symbol Code ID Identifiers A= UPC-A, UPC-E, EAN-8, EAN-13 J= MSI, MSI/Plessey Code 39, Code 32 GS1-DataBar, /UCC/EAN-128 Codabar Bookland EAN, Bookland EAN/ISBN D= Code 128, ISBT 128 M= Trioptic Code 39 Code 93 Coupon Code Interleaved 2 of 5 GS1 DataBar-14, GS1 DataBar Limited, GS1 DataBar Expanded, RSS G= Discrete 2 of 5 SETUP128...
- Page 10 Read 1D Normal barcode/ Reversal barcode * Disable to read 1D reversal barcode Enabled to read 1D reversal barcode UPC/EAN Enable/Disable UPC-A To enable or disable UPC-A, scan the appropriate bar code below. *Enable UPC-A Disable UPC-A Enable/Disable UPC-E To enable or disable UPC-E, scan the appropriate bar code below. *Enable UPC-E...
- Page 11 Disable UPC-E Enable/Disable EAN-8 To enable or disable EAN-8, scan the appropriate bar code below. *Enable EAN-8 Disable EAN-8 Enable/Disable EAN-13 To enable or disable EAN-13, scan the appropriate bar code below. *Enable EAN-13 Disable EAN-13 Enable/Disable Bookland EAN(ISBN) To enable or disable EAN Bookland, scan the appropriate bar code below.
- Page 12 Enable Bookland EAN *Disable Bookland EAN Decode UPC/EAN Supplementals UPC/EAN Supplementals are bar codes appended according to specific format conventions (e.g.UPC A+2, UPC E+2, EAN 13+2, EAN 13+5). The following options are available: *Ignore UPC/EAN with Supplementals Decode UPC/EAN with Supplementals Auto discriminate UPC/EAN Supplementals Transmit UPC-A Check Digit Scan the appropriate bar code below to transmit the symbol with or without the UPC-A check digit.
-
Page 13: Transmit Upc-E Check Digit
*Transmit UPC-A Check Digit Transmit UPC-E Check Digit Scan the appropriate bar code below to transmit the symbol with or without the UPC-E check digit. *Transmit UPC-E Check Digit Do Not Transmit UPC-E Check Digit Convert UPC-E to UPC-A Enable this parameter to convert UPC-E (zero suppressed) decoded data to UPC-A format before transmission. After conversion, data follows UPC-A format and is affected by UPC-A programming selections Convert UPC-E to UPC-A *Do Not Convert UPC-E to UPC-A... -
Page 14: Enable/Disable Code 128
Enable EAN-8 Zero Extend *Disable EAN-8 Zero Extend Code 128 Enable/Disable Code 128 To enable or disable Code 128, scan the appropriate bar code below. *Enable Code 128 Disable Code 128 Enable/Disable GS1-128 To enable or disable GS1-128, scan the appropriate bar code below. *Enable GS1-128 Disable GS1-128... - Page 15 Enable/Disable ISBT 128 To enable or disable ISBT 128, scan the appropriate bar code below. *Enable ISBT 128 Disable ISBT 128 Code39 Enable/Disable Code 39 To enable or disable Code 39, scan the appropriate bar code below. *Enable Code 39 Disable Code 39 Code 39 Check Digit Verification When this feature is enabled, the scan engine checks the integrity of all Code 39 symbols to verify that the data...
- Page 16 *Do Not Verify Code 39 Check Digit Transmit Code 39 Check Digit Scan this symbol to transmit the check digit with the data. Transmit Code 39 Check Digit (Enable) Scan this symbol to transmit data without the check digit. *Do Not Transmit Code 39 Check Digit Enable/Disable Code 39 Full ASCII Code 39 Full ASCII is a variant of Code 39 which pairs characters to encode the full ASCII character set.
- Page 17 Enable Code 93 *Disable Code 93 Set Lengths for Code 93 The length of a code refers to the number of characters (i.e., human readable characters), including check digit(s) the code contains. Lengths for Code 93 may be set for any length, one or two discrete lengths, or lengths within a specific range.
- Page 18 Set Lengths for Code 11 The length of a code refers to the number of characters (i.e., human readable characters), including check digit(s) the code contains. Set lengths for Code 11 to any length, one or two discrete lengths, or lengths within a specific range.
-
Page 19: Interleaved 2 Of 5 (Itf)
*Do Not Transmit Code 11 Check Digit(s) (Disable) Interleaved 2 of 5/ITF Enable/Disable Interleaved 2 of 5 To enable or disable Interleaved 2 of 5, scan the appropriate bar code below. *Enable Interleaved 2 of 5 Disable Interleaved 2 of 5 Set Lengths for Interleaved 2 of 5 Interleaved 2 of 5 Any Length - Scan this option to decode I 2 of 5 symbols containing any number of characters I 2 of 5 - Any Length... - Page 20 *Do Not Convert I 2 of 5 to EAN-13 Discrete 2 of 5/Industrial 2 of 5/IND25 Enable/Disable Discrete 2 of 5 To enable or disable Discrete 2 of 5, scan the appropriate bar code below. Enable Discrete 2 of 5 *Disable Discrete 2 of 5 Matrix 25 Enable/Disable Matrix 25...
-
Page 21: Transmit Check Character
*Disable Standard 25 Enable Standard 25 Standard 25 Check Digit Verification Disable Standard 25 Check Digit Verification Enable Standard 25 Check Digit Verification Transmit Check Character Disable Standard 25 Transmit Check Character Enable Standard 25 Transmit Check Character Codabar Enable/Disable Codabar To enable or disable Codabar, scan the appropriate bar code below. - Page 22 Enable Codabar *Disable Codabar MSI/MSI PLESSEY Enable/Disable MSI To enable or disable MSI, scan the appropriate bar code below. Enable MSI *Disable MSI GS1 DataBar/RSS Enable/Disable GS1 DataBar-14 To enable or disable GS1 DataBar-14, scan the appropriate bar code below. Enable GS1 DataBar-14...
-
Page 23: Enable/Disable Gs1 Databar Expanded
*Disable GS1 DataBar-14 Enable/Disable GS1 DataBar Limited To enable or disable GS1 DataBar Limited, scan the appropriate bar code below. Enable GS1 DataBar Limited *Disable GS1 DataBar Limited Enable/Disable GS1 DataBar Expanded To enable or disable GS1 DataBar Expanded, scan the appropriate bar code below. Enable GS1 DataBar Expanded *Disable GS1 DataBar Expanded PDF417... - Page 24 To enable or disable PDF417, scan the appropriate bar code below. Disable PDF417 *Enable PDF417 Read Normal Phase/ Phase Reversal *Read Normal Phase Read Phase Reversal Read Normal Phase/ Phase Reversal Read normal phase/ phase reversal/ mirror image picture Enable/Disable QR To enable or disable QR, scan the appropriate bar code below.
- Page 25 Disable QRCode *Enable QRCode Data Matrix(DM) Scan normal or mirror image picture. Enable/Disable Data Matrix(DM) To enable or disable Data Matrix(DM), scan the appropriate bar code below. Disable Data Matrix *Enable Data Matrix Read Normal Phase/ Phase Reversal *Read Normal Phase Read Phase Reversal...
-
Page 26: Enable/Disable Maxi Code
Read Normal Phase/ Phase Reversal Maxi Code Enable/Disable Maxi Code To enable or disable Maxi Code, scan the appropriate bar code below. *Disable MaxiCode Enable MaxiCode Aztec Code Enable/Disable Aztec Code To enable or disable Aztec Code, scan the appropriate bar code below. *Disable Aztec Code Enable Aztec Code... -
Page 27: Han Xin Code
Han Xin Code Enable/Disable Han Xin Code To enable or disable Han Xin Code, scan the appropriate bar code below. Disable Han Xin Code Enable Han Xin Code Read Normal Phase/ Phase Reversal *Read Normal Phase Read Phase Reversal Read Normal Phase/ Phase Reversal Hide Prefix or suffix digits The start/middle/end of barcode chars can be hidden. - Page 28 Hide Barcode Start Chars Hide Barcode Middle Char Start Hide Barcode Middle Chars Hide Barcode End Chars Output Format To change the Scan Data Transmission Format, scan one of the eight bar codes corresponding to the desired format. Enable Hide Barcode Start Char Enable Hide Barcode Middle Char Enable Hide Barcode End Char...
- Page 29 To Hide chars of barcode Start/Middle/End: Procedures 1. Scan the Hide Barcode Start / Middle Start / Middle length / End Chars symbol. 2. Determine the hex value for the length you wish to enter(hide 4 chars, scan 0,4; hide 12 chars, scan 0,C). 3.
- Page 31 Output Format To change the Scan Data Transmission Format, scan one of the eight bar codes corresponding to the desired format. *Default output format Enable Suffix output Enable Prefix output Example on how to add normal prefix or suffix on barcode "123456789" Add "...
- Page 32 1. Scan command barcode of " Add Prefix" 2. Check the prefix hex value from the ASCII Chart. A- "4","1"; B-"4" "2"; 3. Scan the 2 digit hex value from the Numeric Bar Codes 4. Scan the output format to enable prefix output. Enable Prefix output 5.
- Page 33 8. Scan the output format to enable suffix output. Enable Suffix output 9. Scan the barcode then you will get AB123456789! Example on how to add Combination Key suffix for barcode "123456789" Add "Ctrl+P" on "123456789" as suffix 1.Scan command barcode of " Add Suffix" to add "Ctrl+P" as suffix. Add Suffix 2.
- Page 34 4. Scan the output format to enable suffix output. Enable Suffix output 5. Scan " Keyboard Ctrl Combination Key" Scan the barcode 123456789. (test it on Excel) Table 1. ASCII Character Equivalents ASCII ASCII ASCII ASCII Space " & < >...
-
Page 35: Contact Information
Left Arro Down Arro Arro Print Scree *Ctrl *Shirt *Left Alt *Righ t Alt Insert Home Page Up Delete Support For any inquiries concerning our products, please send an email to service@gzxlscan.com, and we will respond to you as soon as possible. Contact Information Tel.:+0086 20-6626-0708 Email:service@gzxlscan.com... -
Page 36: Rf Exposure Statement
RF exposure statement This equipment complies with the FCC radiation exposure limits set forth for an uncontrolled environment. This transmitter must not be co-located or operating in conjunction with any other antenna or transmitter. FCC Warning This device complies with Part 15 of the FCC Rules. Operation is subject to the following two conditions: (1) This device may not cause harmful interference, and (2) this device must accept any interference received, including interference that may cause undesired operation.
Need help?
Do you have a question about the NT-1228BC and is the answer not in the manual?
Questions and answers
Excelへさせる方法を教えてください。バーコード読み込み後自動(key操作しないで)である特定処理を実行
To automatically execute a specific process in Excel after scanning a barcode with the Netum NT-1228BC without manual key operation, follow these steps:
1. Ensure the Scanner is in HID Keyboard Mode
- The NT-1228BC scanner supports HID mode, which makes it act like a keyboard.
- Verify that the scanner is set to HID mode via Bluetooth or USB.
2. Enable Auto Enter or Auto Tab
- Configure the scanner to append an "Enter" or "Tab" key after scanning.
- This can be done using the programming barcodes in the manual.
3. Use Excel VBA for Automation
- Open Excel and press `Alt + F11` to open the VBA editor.
- Insert a new module and create a macro that triggers when data is entered into a specific cell or column.
- Example VBA code:
```vba
Private Sub Worksheet_Change(ByVal Target As Range)
If Not Intersect(Target, Me.Range("A:A")) Is Nothing Then
' Execute desired process, e.g., move to next cell, process data, etc.
MsgBox "Barcode Scanned: " & Target.Value
End If
End Sub
```
- Adjust the range (`A:A`) to match where the barcode data is entered.
4. Test the Setup
- Scan a barcode and check if Excel automatically processes the input.
By setting the scanner to auto-enter the data and using an Excel VBA event, the process runs without manual key operation.
This answer is automatically generated
How do I factory reset this scanner, I've printed out the codes and scanned them that doesn't' work. It won't go into pairing mode. Thanks for the help
To factory reset the Netum NT-1228BC scanner, scan the barcode labeled "Factory Reset" found in the NT-1228BL Barcode Scanner Factory Reset section.
This answer is automatically generated
nao consegui usar. onde vejo os codigos scaneados?
The Netum NT-1228BC barcode scanner connects to a device via USB cable or Bluetooth. Once connected, scanned codes will appear on the connected device as if they were typed from a keyboard. If using a non-US keyboard, configure the keyboard language before use.
This answer is automatically generated
how to delete last digit, the 11th digit?
Hi i have this barcode %BLEQE.NGI but when i read this barcode in the notepad arrive only LEQE.NGI
Excelでドイツセルに読み込めない。読み込み後、自動で処理を自動起動する方法を教えてください。