Table of Contents
Advertisement
Available languages
Available languages
Quick Links
Advertisement
Table of Contents

Related Manuals for Black & Decker light n easy IR1050


Summary of Contents for Black & Decker light n easy IR1050
- Page 1 COMPACT STEAM IRON PLANCHA DE VAPOR COMPACTA use and care ma n u a l manual d e us o y cu i d a d o IR1000 IR1010 IR1020S IR1050 IR1000Series_29222_ES_IB_B.indd 1 IR1000Series_29222_ES_IB_B.indd 1 5/27/22 9:14 AM 5/27/22 9:14 AM...
- Page 2 Thank you for your purchase! Gracias por su compra! www.prodprotect.com/blackanddecker Should you have any questions or concerns with your new product, please call our Customer Service Line at 1-800-231-9786 (US). Please do not return to the store. Si usted tiene alguna inquietud o pregunta con su producto, por favor llame a nuestra línea de servicio al cliente una atención inmediata 1-800-231-9786 (EE.UU) 01-800-714-2503 (México).
-
Page 3: Important Safety Instructions
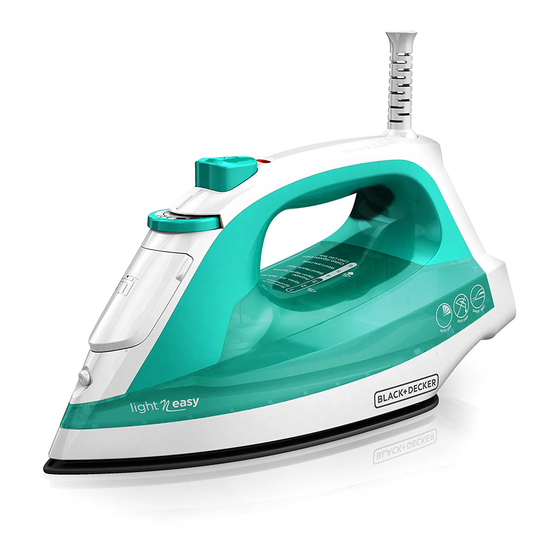
IMPORTANT SAFETY INSTRUCTIONS When using your iron, basic safety precautions should always be followed, including the following: • Read all instructions before using. or on an ironing board. • Only use iron for intended use. • Burns can occur from touching hot metal parts, hot water, or steam. - Page 4 GETTING TO KNOW YOUR COMPACT STEAM IRON Soleplate 360˚ pivoting cord Spray nozzle Water tank Water-fill cover Heel rest SmartSteam™ dial 10. Integrated heel clip (not shown) Spray mist button Plug clip (not shown) Power/auto shut-off light Product may vary slightly from what is illustrated. IR1000Series_29222_ES_IB_B.indd 4 IR1000Series_29222_ES_IB_B.indd 4 5/27/22 9:14 AM...
-
Page 5: How To Use
HOW TO US E This product is for household use only. G ET T I N G STA RTE D • Remove the plastic band around the power plug and all labels, tags and stickers attached to the body, cord, or soleplate of the iron. •... -
Page 6: Setting Guide
Iron as long as needed. Note that if the iron is left inactive, the 3-Way Auto Shut off Safety feature will activate. Please see Additional Features section for more details. When finished ironing, turn the dial to the MIN setting and unplug from the outlet. - Page 7 Spray Mist Press the Spray Mist button to generate a light spray of water. Spray Mist is used to dampen tough wrinkles while dry or steam ironing. This setting works at any SmartSteam™ dial setting. Do not spray silk. 3-way Auto Shut-Off The iron will automatically switch to Auto Shut-Off mode and stop heating after being left inactive for 30 seconds on the soleplate or side, and 8 minutes on the heel rest.
-
Page 8: Iro Ni Ng Ti Ps A N D Tr Ic Ks
IRO NI NG TI PS A N D TR IC KS • This iron is designed to use normal tap water. If your water is very hard, you can use a mixture of 50% tap water and 50% distilled water to avoid build-up. -
Page 9: Troubleshooting
TROUBLESHOOTING Problem Cause Solution The iron is plugged in, Power supply issue. Check that the plug is but the soleplate is not properly inserted into the heating. outlet or try plugging the iron into a different outlet. Not enough steam or no SmartSteam™... -
Page 10: Wa R R A N Ty A N D C Ustome R S E Rv I C E I Nfor Mation
WA R R A N TY A N D C USTOME R S E RV I C E I NFOR MATION Two-Year Limited Warranty (Applies only in the United States and Canada) For service, repair or any questions regarding your appliance, call the appropriate 800 number listed within this section. -
Page 11: Instrucciones Importantes De Seguridad
INSTRUCCIONES IMPORTANTES DE SEGURIDAD Cuando se usan aparatos eléctricos, siempre se deben respetar las siguientes medidas básicas de seguridad: • LEA TODAS LAS INSTRUCCIONES ANTES DE No desatienda la plancha cuando esté USAR El APARATO. enchufada o sobre la tabla de planchar. •... - Page 12 CONOZCA SU PLANCHA DE VAPOR COMPACTA Suela Cable giratorio de 360 grados Boquilla de rocío Tanque de agua Tapa del orificio de llenado Talón de descanso Dial de control SmartSteam™ 10. Clip de cable, integrado en el talón (no mostrado) Botón de rocío fino Clip de cable en el enchufe Luz indicadora de funcionamiento/...
-
Page 13: Primeros Pasos
COMO USAR Este producto es para uso doméstico solamente. PRIMEROS PASOS • Retire todas las etiquetas y calcomanías adheridas al cuerpo, cable o suela de la plancha. • Retire y conserve la literatura. LLENADO DEL TANQUE DE AGUA Con la plancha inclinada a un ángulo de 45 grados, abra la tapa del tanque de agua. -
Page 14: Guía De Ajustes
Consejo: Para planchar en seco a temperatura baja, utilice los ajustes 1 a 3 en el dial de control SmartSteam™ o para utilizar una temperatura alta, simplemente vacíe el tanque de agua y siga las instrucciones correspondientes. Si vacía el tanque, una vez que la plancha se haya precalentado quizás tenga que presionar el botón de potente disparo de vapor varias veces para vaciar el tanque completamente. -
Page 15: Características Adicionales
CARACTERÍSTICAS ADICIONALES Tecnología SmartSteam™ Esta tecnología le brinda el control de ambos la temperatura de la suela y el nivel de vapor, en un dial. En las planchas tradicionales, los controles están separados haciendo más difícil saber cuales ajustes son los correctos a utilizar para cada tejido. - Page 16 ALMACENAMIENTO DE SU PLANCHA Verifique que la plancha esté ajustada a la posición MIN, desenchufada y que se haya enfriado completamente. Vacíe el tanque de agua abriendo la tapa del orificio de llenado e invirtiendo la plancha sobre un fregadero. Enrolle el cable alrededor del talón de la plancha de forma holgada y asegure el cable, sujetándolo con el clip de cable integrado en el talón (C) o el clip de cable en el...
- Page 17 R ES O LU CI Ó N D E P R OBL EM AS PROBLEMA CAUSA POSIBLE SOLUCIÓN La plancha está enchufada pero la Existe un problema con la fuente Verifique que el enchufe esté suela no está calentando. de energía. insertado correctamente en el tomacorriente o trate de enchufar la plancha a un tomacorriente diferente.
- Page 18 IN FO R M ACIÓ N DE G A R A N T Í A Y SE RV I CI O AL C L I ENT E Garantía limitada de dos años (Solamente aplica en los Estados Unidos y el Canadá) Para servicio, reparaciones o cualquier pregunta sobre su electrodoméstico, por favor llame al número 800 adecuado que aparece en esta sección.
- Page 19 IN FO R M ACIÓ N DE G A R A N T Í A Y SE RV I CI O AL C L I ENT E Garantía limitada de dos años (No aplica en Estados Unidos y Canadá) Para servicio, reparaciones o preguntas relacionadas al producto, por favor llame al número del centro de servicio que se indica para el país donde usted compró...
- Page 20 Por favor llame al número correspondiente que aparece en la lista a continuación para solicitar que se haga efectiva la garantía y donde Ud. puede solicitar servicio, reparaciones o partes en el país donde el producto fué comprado. Argentina Honduras Atención al consumidor Serviteca 0800 444 7296...
- Page 21 IMPORTADO POR / IMPORTED BY: COMERCIALIZADO POR: Inversiones la Mundial Ltda. SPECTRUM BRANDS DE MEXICO, S.A. DE Rut: 78.146.900-9 C.V. Avenida 1° de Mayo No. 120 Piso 7, Oficina Libertad 790, Santiago – Chile 702. Colonia San Andres Atoto, C.P.53500 Fono: (562) 26810217 info@ilm.cl Naucalpan de Juárez, Estado de México, México Tel.
- Page 22 IR1000Series_29222_ES_IB_B.indd 22 IR1000Series_29222_ES_IB_B.indd 22 5/27/22 9:14 AM 5/27/22 9:14 AM...
- Page 23 IR1000Series_29222_ES_IB_B.indd 23 IR1000Series_29222_ES_IB_B.indd 23 5/27/22 9:14 AM 5/27/22 9:14 AM...
- Page 24 www.BlackAndDeckerAppliances.com Made in China. Fabricado en China. T22-5002711-B © 2022 Spectrum Brands, Inc. All rights reserved / Todos los derechos reservados. Spectrum Brands, Inc., Middleton, WI 53562 29222 IR1000Series_29222_ES_IB_B.indd 24 IR1000Series_29222_ES_IB_B.indd 24 5/27/22 9:14 AM 5/27/22 9:14 AM...
Need help?
Do you have a question about the light n easy IR1050 and is the answer not in the manual?
Questions and answers