Advertisement
Quick Links
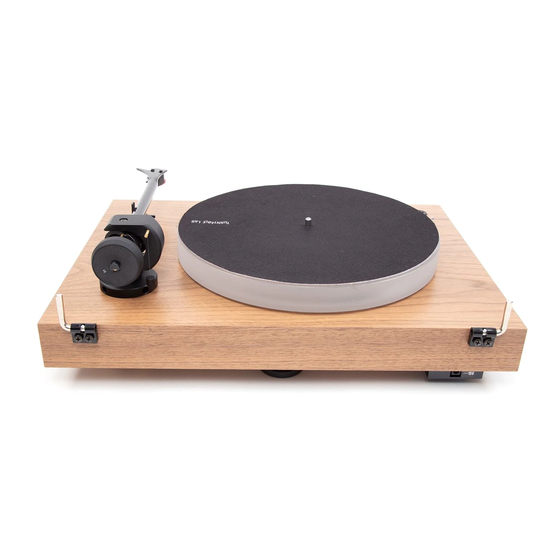
X2 Setup Guide
Please read before unpacking.
1
Unpack all items from accessory box.
single adapter
counterweight
drive belt
& Allen key
Antiskating
Connect it E
Weight
RCA cable
5
Unpack the power supply.
9
Remove tonearm twist tie.
13
Lower the tonearm lift and place the
tonarm between platter & armrest.
Lower the tonearm with the lift.
Put the needle protection cover back
17
on the cartridge.
Technical Data
Speed
33, 45, 78 (electronic speed change)
Principle
belt drive
Speed cariance
33: +/-0,25%; 45: +/-0,20%
Wow & flutter
33: +/-0,12%; 45: +/-0,10%
Platter
30mm thick acryl, 2 kg heavy acryl
Main bearing
Stainless steel
Tonearm
9" carbon/aluminium sandwich tonearm
2
Remove dust cover carton from the box.
6
Carefully remove the protection covering.
10
Unpack the Antiskating stub and screw it
into the pre-drilled hole.
14
Balance the tonearm by turning the
counterweight until it stays level.
18
Put the loop of the Antiskating Weight in
the second groove on the tonearm post.
Effective arm length
9"/230 mm
Overhang
18 mm
Effective tonearm mass
13,5 g
Tracking force range
0 - 30mN
Power consumption
4.5 W max / 0.3 W standby
Dimensions
460 x 150 x 340 mm (WxHxD) lid closed
Weight
10 kg net
Getting started:
Make sure you have enough space to unpack your turntable.
Always unpack and setup in a clean enviroment
Important for warranty: Do not throw packaging away.
3
Lift the wrapped turntable out of the box.
7
Put the drive belt on the pulley
& sub-platter.
Small pulley- 33/45 RPM
Big pulley - 78 RPM (round belt)
11
Put the counterweight in place.
Turn the front scale of the counterweight
15
to Zero without moving the weight itself.
19
Unpack Dust Cover and put it on
the turntable.
www.project-audio.com/en/products/x2
Unpack the acrylic platter
4
and subplatter.
8
Put the platter on the turntable.
12
Remove the needle protection cover.
Turn the counterweight counterclockwise
16
until the scale reads roughly 18.
20
Connect to your sound system and you
are ready to enjoy your records!
Plug in Connect it E
Plug in the power
RCA Cable.
supply.
Advertisement

Subscribe to Our Youtube Channel
Related Manuals for Pro-Ject Audio Systems X2


Summary of Contents for Pro-Ject Audio Systems X2
- Page 1 Make sure you have enough space to unpack your turntable. Always unpack and setup in a clean enviroment Important for warranty: Do not throw packaging away. X2 Setup Guide Please read before unpacking. Unpack the acrylic platter Remove dust cover carton from the box.
Need help?
Do you have a question about the X2 and is the answer not in the manual?
Questions and answers