Table of Contents
Advertisement
Available languages
Available languages
Quick Links
FACTORY START
Husqvarna Motorcycles GmbH
KTM Motorrad AG
Stallhofnerstraße 3
Stallhofnerstraße 3
A-5230 Mattighofen
A-5230 Mattighofen
www.husqvarna-motorcycles.com
www.ktm.com
KTM Motorrad AG
Division HUSABERG
Stallhofnerstraße 3
A-5230 Mattighofen
www.husaberg.com
SXS13540100
79001996000
81301996000
09.2014
3.211.938
*3211938*
Advertisement
Table of Contents

Subscribe to Our Youtube Channel
Summary of Contents for KTM SXS13540100
- Page 1 FACTORY START 09.2014 SXS13540100 3.211.938 79001996000 Husqvarna Motorcycles GmbH KTM Motorrad AG KTM Motorrad AG Stallhofnerstraße 3 Division HUSABERG Stallhofnerstraße 3 *3211938* 81301996000 A-5230 Mattighofen Stallhofnerstraße 3 A-5230 Mattighofen A-5230 Mattighofen www.husqvarna-motorcycles.com www.ktm.com www.husaberg.com...
- Page 2 3 DEUTSCH Wir freuen uns, dass Sie sich für dieses Produkt entschieden haben. Unser hochwertiges Qualitätsprodukt ist rennerprobt und wurde speziell für sportliche Herausforderungen entwickelt. Eine korrekte Montage des Produktes ist unerlässlich, um ein Maximum an Sicherheit und Funktionalität gewährleisten zu können. Bitte befolgen Sie daher die Montageanleitung oder wenden Sie sich an Ihren autorisierten Fachhändler.
-
Page 3: Montage
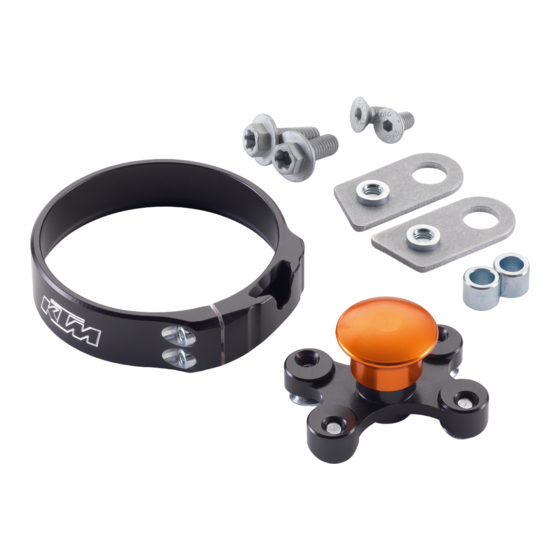
Factory Start 79001996000 Factory Start 81301996000 1x Einrastring 2x Innensechskantschraube M3x10 1x Einrastbutton 4x Senkschraube M5x5 Gabelschutzverstärkung (nur SXS13540100) 78001993000 2x Bundschraube M6x15 2x Buchse 2x Verstärkungsblech Vorabeiten Motorrad aufbocken. Das Vorderrad ausbauen (siehe Bedienungsanleitung). Das rechte Gabelbein (in Fahrtrichtung gesehen) und den Gabelschutz (2) demontieren. -
Page 4: Bedienung
Nur Factory Start SXS13540100 Montage der Verstärkungsbleche Die beiden Verstärkungsbleche wie dargestellt außen am Gabelschutz positionieren und die Bohrungen mit einem Stift markieren. Markierungen auf 5 mm aufbohren. Die 5 mm Bohrungen von der Innenseite mit einem 10 mm Bohrer mit der Hand oder einem Kegelsenker ansenken und zwar so weit, dass der Kopf der M5x10 Senkkopfschrauben ungefähr plan mit... -
Page 5: Scope Of Supply
1x snap ring 2x hex head scrwes M3x10 1x snap button 4x countersunk screws M5x5 Fork protector reinforcement 78001993000 (SXS13540100 only) 2x collar screws M6x15 2x bushings 2x reinforcement plates Preliminary work Jack up the motorcycle. Remove the front wheel (see the Owner’s Manual). -
Page 6: Final Steps
Factory Start SXS13540100 only Mounting the reinforcement plates Position the two reinforcement plates on the outside of the fork protector as shown and mark the drill holes with a marker. Drill 5 mm holes at the marks. Countersink the 5 mm holes from the inside either manually using... -
Page 7: Volume Della Fornitura
Volume della fornitura Factory Start SXS13540100 Factory Start 79001996000 Factory Start 81301996000 N. 1 anello con meccanismo a scatto N. 2 viti TCEI M3x10 N. 1 bottone a scatto N. 4 viti a testa svasata M5x5 Rinforzo copristelo (solo SXS12540100) 78001993000 N. - Page 8 Solo Factory Start SXS13540100 Montaggio dei lamierini di rinforzo Come mostrato nella figura, posizionare i due lamierini di rinforzo sul lato esterno del copristelo e con una penna contrassegnare i fori. In corrispondenza dei contrassegni praticare dei fori da 5 mm.
-
Page 9: Contenu De La Livraison
1x bague d’encliquètement 2x vis six-pans creux M3x10 1x bouton d'encliquètement 4x vis noyées M5x5 Renfort de protection de fourche 78001993000 (seulement SXS13540100) 2x Vis à épaulement M6x15 2x Bague 2x Tôle de renfort Préparation Béquiller la moto. Déposer la roue avant (voir le manuel d’utilisation). - Page 10 Seulement Factory Start SXS13540100 Montage des tôles de renfort Mettre en place les deux tôles de renfort comme illustré, à l’exté- rieur sur la protection de fourche et marquer les alésages avec un feutre. Aléser les repères sur une profondeur de 5 mm.
-
Page 11: Volumen De Suministro
81301996000 1 anillo de encaje 2 tornillos Allen M3x10 1 botón de encaje Refuerzo para protector de la horquilla 78001993000 (solo SXS13540100) 2 tornillos de collarín M6x15 2 casquillos 2 chapas de refuerzo Trabajos preliminares Levantar la motocicleta sobre tacos. - Page 12 Solo Factory Start SXS13540100 Montaje de las chapas de refuerzo Colocar las dos chapas de refuerzo en la parte exterior del protector de la horquilla, tal como se muestra en la ilustración, y marcar los agujeros con un lápiz. Taladrar las marcas a 5 mm.


Need help?
Do you have a question about the SXS13540100 and is the answer not in the manual?
Questions and answers