Table of Contents
Advertisement
Advertisement
Table of Contents

Related Manuals for Dahua TPC-BF1241-B3F4-S2


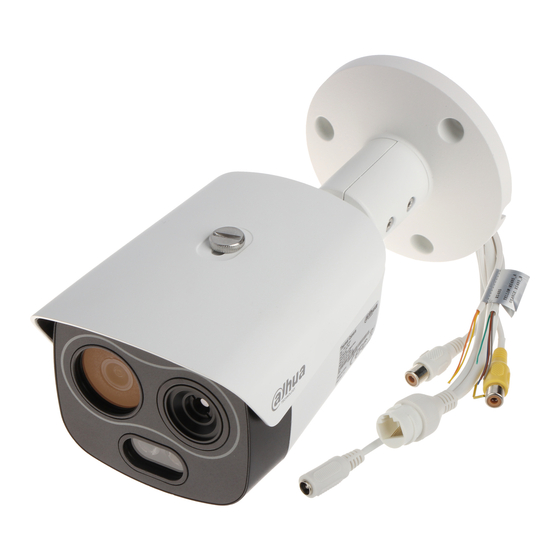
Summary of Contents for Dahua TPC-BF1241-B3F4-S2
- Page 1 Thermal Network Hybrid Camera Web Operation Manual V1.0.5...
-
Page 2: Foreword
Foreword General This user’s manual (hereinafter referred to as "the Manual") introduces the characteristics, basic configurations, daily operation and maintenance of the thermal camera (hereinafter referred to as "the Camera"). Thermal hybrid camera contains all the binocular and trinocular cameras. Ports The Manual is mainly about on the web interface, how to operate your Camera. - Page 3 Privacy Protection Notice As the Camera user or data controller, you might collect personal data of others such as face, fingerprints, car plate number, Email address, phone number, GPS and so on. You need to be in compliance with the local privacy protection laws and regulations to protect the legitimate rights and interests of other people by implementing measures include but not limited to: providing clear and visible identification to inform data subject the existence of surveillance area and providing related contact.
-
Page 4: Table Of Contents
Table of Contents Foreword ..............................I 1 Product Introduction ..........................1 Overview ............................1 Features ............................1 Functions ............................2 2 Basic Settings ............................7 Initializing Camera ........................... 7 Modifying IP Address ........................7 2.2.1 Modifying One IP Address ...................... 8 2.2.2 Modifying Several IP Addresses .................... - Page 5 4.2.11 Configuring 802.1X ......................80 4.2.12 Configuring QoS ........................ 81 Peripheral ............................82 4.3.1 Configuring IR Light ......................82 4.3.2 Configuring Wiper ........................ 82 4.3.3 Configuring Fan ........................83 4.3.4 Configuring Heater ......................83 Smart Thermal ..........................84 4.4.1 Configuring Smart Plan ......................84 4.4.2 Configuring Intelligent Video Surveillance (IVS) ..............
- Page 6 System Log ..........................160 5.6.1 Searching System Logs ....................... 160 5.6.2 Remote View........................161 Online User ..........................162 6 Additional Accessing Methods ......................163 Accessing through NVR ........................ 163 Accessing through SmartPSS ......................164 Cybersecurity Recommendations ..................165 Appendix 1...
-
Page 7: Product Introduction
Product Introduction Overview Thermal Hybrid Camera is based on requirements such as temperature measurement, fire prevention, safety protection and night vision. This product can help you view videos, videotape an object, test temperature, warn the potential fire, track a cold/hot spot and analyze a special behavior. This product can be used in energy industry, transportation, building, power system, public security, government, enterprises, and other fields (such as science, education, culture and health). -
Page 8: Functions
Figure 1-1 Application scenarios Functions Live Table 1-1 Function description Function Description You can view both the visible images and thermal images. Live You can use thermal images to identify an object, and then use visible images to view more details of the object. For those cameras with PTZ, you can use the PTZ to operate the cameras to enlarge the surveillance range and identify details of an object. - Page 9 Real-time spot For cameras with temperature measuring, you can check the real-time temperature temperature data of any spot in your monitoring area. measurement For cameras with laser ranging, you can measure the distance between the Laser ranging camera and the object in the middle of the image. Switch video bit stream or streaming protocol.
- Page 10 Add, modify or delete a user account. User Management Set the user permissions. Change password Change users’ admin password. External Camera Management You can manage your camera’s external Cameras such as heater, fill light and wiper. Smart Thermal Table 1-4 Function description Function Description...
- Page 11 Event Table 1-5 Function description Function Description You can implement operation of motion detection and video masking detection. Video detection When there is an alarm, you can implement following operations at the same time such as linkage video recording, alarm output, email delivery, PTZ operation and screenshots.
- Page 12 Supports outputting real-time heat map information. Then, you can do the Heat map further analysis through the heat map tools. Supports enabling or closing temperature testing rules. Additional Supports enabling or closing isotherm. functions Supports enabling or closing color code articles. ...
-
Page 13: Basic Settings
Basic Settings Initializing Camera Initialize your Camera and set the user password when you are logging in for the first time or after you have restored your camera to default settings. Initialize the Camera by ConfigTool or through web. This section takes web for example. Ensure your Camera IP address (192.168.1.108 by default) and your PC IP address are in the same ... -
Page 14: Modifying One Ip Address
2.2.1 Modifying One IP Address When there are only a few Cameras or the login passwords of Cameras are different, you can modify only one IP address at one time. Logging in web client to modify IP addresses is taken as an example for detailed description. - Page 15 Preparation You have obtained the installation package of ConfigTool. To obtain the installation package, you can consult technical support staffs. You have achieved network communication between PC (which is with ConfigTool) and the Camera. Procedure Step 1 Click The Modify IP interface is displayed.
-
Page 16: Logging In To Web Interface
Logging in to Web Interface After you have modified the IP addresses, you can log in the WEB interface of the Camera through a browser to operate, configure and maintain the Camera. Background Information To log in the Camera in a smooth way, you need to make sure that the PC connected to the Camera satisfies the following requirements. -
Page 17: Resetting Password
Figure 2-5 Live Interface Click Log out on the upper right corner to exit the interface. Resetting Password If you forget the password, you can use the reserved e-mail address to achieve password resetting. Step 1 Open IE browser and type the camera’s IP address. Then press Enter. The Thermal Camera interface is displayed. - Page 18 Figure 2-7 Reset the password(1/2) Step 3 Reset the password. Scan the QR code, and the security code will be sent to the email address you have already fulfilled. Type the security code then. Reset the password in time when you receive the security code, because the security ...
-
Page 19: Daily Operation
Daily Operation Live Cameras of different models might have different functions. The web operation manual is for thermal hybrid cameras of all models. So your final interface shall prevail. On the Live interface, you can do operations to the real-time surveillance images such as viewing, taking snapshots and recording videos. -
Page 20: Function Bar
Select bit stream type and streaming protocol when previewing a video. Main Stream: It has large bit stream value and image with high resolution, but also requires large bandwidth. This option is normally used for storage and surveillance. Encode bar Sub Stream: It has small bit stream value and smooth image, and ... -
Page 21: Window Adjustment
Click the icon to capture a live image and save it under the path you have set. Snapshot To check or modify the storage path, see "4.7.2.1 Configuring Storage Path. " Select visible image or thermal image. Then click this icon to start video recording. - Page 22 3.1.3.1 Image Adjustment Adjust brightness, contrast, hue and saturation of video images on your web. For detailed operations, see "4.1.1 Configuring Lens." , and the Image Adjustment interface is displayed at the right side of live interface. See Click Figure 3-5. Figure 3-5 Image adjustment interface Table 3-3 Image adjustment configuration...
- Page 23 Adjust focal length of your lens to zoom in or out surveillance images; adjust optical afterfocus of your lens to improve clarity level of video images. Click , and the zooming and focusing interface is displayed at the right side of live interface. Select the visible channel and you can zoom, focus and change the aperture.
-
Page 24: More Functions
Figure 3-6 Temperature recording area 3.1.4 More Functions 3.1.4.1 Real-time Spot Temperature Measuring Only Cameras with temperature-measuring function support this function, and the actual product shall prevail. Move the pointer to any position of the video image and click. Then the real-time temperature of this spot is displayed. -
Page 25: Ptz
Mind the distance during laser ranging. Less than 50 m will result in a damaged laser. Click Start Ranging, and the camera starts to measure the distance from itself to the object in the middle of the image (as indicated with the red cross sign). 3.2.1 Bullet Cameras PTZ setting of bullet camera is used for controlling external PTZ Camera. - Page 26 Click Save. Step 3 3.2.1.2 Configuring PTZ Functions The protocol setting has been completed. For detailed operations about protocol setting, see "3.2.1.1 Configuring Protocol". For images representing the effect of external PTZ, you need to preview on the preview images ...
- Page 27 Step 3 In the preset box, type the preset number. Range of the preset number is limited by the PTZ protocol. Click Add to add a preset. Step 4 Enter a preset number and click Go to. The camera turns to the corresponding position. Step 5 3.2.1.2.3 Configuring Tour By configuring tour, you can put the presets to the auto tour to make the camera move back and...
- Page 28 Figure 3-11 Wiper Click Enable to enable the wiper; click Disable to disable it. Step 2 3.2.1.3 Operating PTZ The corresponding protocol setting and function setting have been completed. See "3.2.1.1 Configuring Protocol" and "3.2.1.2 Configuring PTZ Functions" for more details. For images representing the effect of external PTZ, you need to preview on the preview images ...
-
Page 29: Speed Dome Cameras & Pan Tilt Cameras
For detailed operations of PTZ, see "3.2.1.2 Configuring PTZ PTZ function Functions." 3.2.1.4 Configuring Preset Backup You can export presets you have set to back them up. When you need those presets, you can import them to your Camera and restore them. If you want to export or import presets, you have to obey the following steps. - Page 30 3.2.2.2 Configuring PTZ Functions Select Setting > PTZ > Function and the Function interface is displayed. It’s set by default that the thermal image is displayed. In the thermal image, you can click switch the image to visible image. And, in the visible image, you can click to switch the image to thermal image.
- Page 31 3.2.2.2.2 Configuring Tour By configuring tour, you can put the presets to the auto tour group to make the camera move back and forward quickly and automatically according to the presets. Preparation You have set several presets. Procedure Step 1 Select Setting >...
- Page 32 Select Setting > PTZ > Function > Scan. Step 1 The Scan interface is displayed. See Figure 3-17. Figure 3-17 The scan interface Step 2 Configure scan. Select a Scan No. and set its Speed. Click Setup. Buttons of Set Left Limit and Set Right Limit are displayed. Operate the PTZ control panel and move the camera to a left border you want and click Set Left Limit;...
- Page 33 Figure 3-18 The pattern interface Step 2 Configure pattern. Select a Pattern No. Click Setup. Buttons of Start Rec and Stop Rec are displayed. Click Start Rec. Operate the PTZ control panel and adjust you camera’s direction, zoom and focus. Click Stop Rec.
- Page 34 Click Stop to stop the pan. 3.2.2.2.6 Configuring PTZ Speed PTZ speed is determined by two factors—firstly and basically, the speed level (low, middle and high, marked by ① in Figure 3-20); secondly, the control panel’s speed value (1, 2, 3…8 marked by ② in Figure 3-20).
- Page 35 Figure 3-21 The idle motion interface Step 2 Configure idle motion. Select the Enable check box to enable this function. Select an idle motion and set idle time. After you have set a value of idle time, when the time when you do not operate the PTZ is longer than that value, the idle motion will be implemented immediately.
- Page 36 Figure 3-22 Power up Select the Enable check box. Step 2 Select the Power Up actions. Step 3 Select Auto and the PTZ will continue to implement the action before the power is off. Step 4 Click Save. 3.2.2.2.9 Configuring Time Task You can configure a time task and let camera implement certain actions within the period you have set.
- Page 37 Figure 3-23 The time task interface Step 2 Configure time task. Select the Enable check box to enable this function. Select a Time Task Num. Select a Time Task Action from Preset, Tour, Scan and Pattern. When you set Preset as Time Task Action, the Action Number selection box is displayed.
- Page 38 Figure 3-24 The PTZ restart interface Step 2 Click PTZ Restart. PTZ restarts. 3.2.2.2.11 Restoring PTZ to the Default Settings The operations below will delete all the PTZ settings you have configured. Please be cautious. Select Setting > PTZ > Function > Default. Step 1 The Default interface is displayed.
- Page 39 Figure 3-25 The default interface Click Default. Step 2 All your PTZ settings are restored to the default ones. 3.2.2.3 Operating PTZ The corresponding protocol settings and function settings have been completed.
- Page 40 Figure 3-26 PTZ control panel Table 3-7 Parameter description Function Description Eight directions are contained: up, down, left, right, upper left, upper Direction button right, lower left, and lower right. Controls the movement speed. The bigger the value is, the faster the movement will be.
-
Page 41: Playback
If you want to export or import presets, you have to obey the following steps. Select Setting > PTZ > Preset Backup. Step 1 The Preset Backup interface is displayed. Figure 3-27 Preset backup Step 2 Export or import presets. Click Export to export presets for backup. - Page 42 Figure 3-29 Video playback Table 3-8 Function bar description Functions Description Playback control For detailed information about control buttons, see "3.3.1.2 Operate Control Bar. " Controls playback volume. Volume muted. adjustment muted, and the volume can be adjusted. Record type includes All, General, Event, Alarm, and Manual.
- Page 43 Table 3-9 Playback control bar Icons Functions Description Play Click this icon to play video. Stop Click this icon to stop playback. Click this icon to play the next frame. Play by Frame You need to pause the playback before using play by frame. Slow Click this icon to slow down the playback.
- Page 44 Each color on the time bar represents a certain record type. See the matching relationship in Figure 3-30. Step 4 Play video. Click in the playback control bar. The system plays the recorded video of the selected date (in time order). Click any point in the colored area of the time bar.
- Page 45 Table 3-10 Picture Playback file more operations Operation Description Enter start time and end time, and then click to find out all the video files Search between the entered start time and end time. Select dav or mp4 in the Download Format. Then click The file will be downloaded to the set storage path.
-
Page 46: Picture Playback
Figure 3-35 Video clipping In Video Format, select dav or mp4. Step 1 Step 2 Click on the time bar to select the start time, and then click to start. Step 3 Click again on the time bar to select the end time, and then click to finish. - Page 47 Table 3-11 Image playback Function Description Includes the following two types: When this icon displays, the picture playback is paused or Control button not started. Click this icon to start picture playback. for playing pictures When this icon displays, the picture playback is ongoing. ...
-
Page 48: Reports
Figure 3-39 List of playback files Table 3-12 Picture Playback file more operations Operation Description Enter starting time and ending time, and click Search Finds out all the picture files between the entered starting time and ending time. Click , and the file is downloaded to local host. Download The download operation might vary with different browsers, and the actual interface shall prevail. -
Page 49: Alarm
Procedure Click the Report tab. Step 1 The Report interface is displayed. See Figure 3-40. Figure 3-40 Report Set the conditions for searching and click Search. Step 2 Temperature data you have searched is displayed. See Figure 3-41. Figure 3-41 Result of report searching Alarm You can select alarm type as needed, when the selected alarms are triggered, the system would... -
Page 50: Subscribing Alarm Information
The alarm is triggered You have enabled detection to lack of SD card when the free space in Disk full storage space. For detailed operations, see "4.5.5.1 the SD card is lower than Configuring SD Card Abnormality Parameters." the set percentage. The alarm is triggered You have enabled detection to SD card storage Disk error... - Page 51 Figure 3-42 Alarm Step 2 Select an alarm type. Step 3 Select Prompt, and the system prompts and records alarm information as needed. If you are not in the Alarm interface when alarm events you have subscribed are displayed on the Alarm tab and the alarm information triggered, there will be a will be recorded.
-
Page 52: Setting
Setting Functions of different Cameras might vary, and the actual product shall prevail. Click Default, and the Camera is restored to default configuration. Click Refresh to view the latest configuration. Configuring Camera Configure camera’s components such as lens, video and audio to ensure proper surveillance. 4.1.1 Configuring Lens 4.1.1.1 Configuring Visible Image 4.1.1.1.1 Configuring Picture Parameters... - Page 53 Changes the value to adjust the picture brightness. The bigger the value is, the Brightness brighter the picture will be. Changes the contrast of the picture. The bigger the value is, the more the Contrast contrast will be between bright and dark areas. Makes the color deeper or lighter.
- Page 54 Table 4-2 Description of exposure parameters Parameter Description Auto: Adjusts the image brightness according to the actual condition automatically. Shutter priority: When the exposure range is normal, the system prefers the configured shutter range when auto adjusting according to the ambient lighting condition.
- Page 55 When in WDR mode, the camera constrains over bright areas and compensates dark areas to improve the image clarity. When in HLS mode, the camera dims strong light, and it is applicable to the exit of toll station or ...
- Page 56 Figure 4-4 The WB interface Step 2 Configure white balance parameters. See Table 4-4. Table 4-4 WB mode description WB Mode Description The system compensates WB according to light condition to ensure color Auto precision. The system auto compensates WB to most outdoor environments with natural Outdoor or artificial light to ensure color precision.
- Page 57 Figure 4-5 The day & night interface Step 2 Configure day & night parameters. See Table 4-5. Table 4-5 Day & night mode description Parameter Description Select Type from Electrical and ICR. Type You can select Camera display mode from Color, Auto and B/W. Day &...
- Page 58 Figure 4-6 The focus & zoom interface Step 2 Configure the focus & zoom parameters. See Table 4-6. Table 4-6 Description of focus & zoom parameters Parameter Description Select the On check box to enable it. Digital Zoom You can use the digital zoom to continue the zooming operation even if the optical zoom is at the maximum value.
- Page 59 4.1.1.1.7 Configuring Defog The image quality will be compromised in foggy or hazy environment, and defog can be used then to improve image clarity. Click the Defog tab. Step 1 The Defog interface is displayed. See Figure 4-7. Figure 4-7 The defog interface Step 2 Configure the defogging settings.
- Page 60 Figure 4-8 Restoring lens to the default settings 4.1.1.2 Configuring Thermal Image To find and configure thermal image, you need to select Setting> Camera > Conditions > Conditions first, and in the Channel box, select 2. See the following steps. Configure a specific scenario where you use the camera, including indoor scenario, outdoor scenario, and adaptive scenario.
- Page 61 Figure 4-9 The thermal image interface Step 3 Configure lens parameters. See Table 4-8. Table 4-8 Parameter description of lens Classification Parameter Description Profile Normal, Day and Night can be selected. Select the duplicate frame and set the frequently used video parameter as the user-defined scene.
- Page 62 Add color to the thermal image and use color to indicate the temperature. "White glow" is the default color. White glow: Lighter when the temperature is higher in gray image. Black glow: Lighter when the temperature is lower in ...
- Page 63 Enlarge the thermal image according to the zoom time you EZoom have set. Select the district of strengthening video quality. The brightness and clarity of the chosen district will be higher. District consists of 25% central point, 50% central point, 75% ROI Type central point, full screen, bottom part, middle part, above part and user-defined part.
-
Page 64: Configuring Video Parameters
Figure 4-10 Common setting When Profile Management is set as Full Time, you can select Day or Night as Always Enable, and the surveillance system works under Always Enable. Figure 4-11 Full time setting When Profile Management is set as Schedule, you can drag the slide block to set ... - Page 65 Figure 4-13 Video Step 2 Configure video streaming. See Table 4-9. Table 4-9 Parameter description Parameter Description Select the option box to enable sub stream (enabled by default). Enable Enabling sub stream 1 and sub stream 2 at the same time are supported. Encode mode of video.
- Page 66 This parameter can be configured only when bit rate type is set as Changeable. Maximum You can select the max value of the bit rate according to the reference bit rate bit rate value, and the bit rate changes with monitoring scenes, but the max bit rate keeps close to the value you set.
- Page 67 Select the check box and snapshots of thermal images will carry the Heat map in jpeg temperature-measuring information. Step 3 Click Save. 4.1.2.3 Configuring Video Overlay Configure Overlay which covers Privacy Masking, Channel Title, Time Title, Geography location, Font, and Picture Overlay. 4.1.2.3.1 Configuring Privacy Masking You can enable this function if you need to cover certain area in the video image.
- Page 68 Click Channel Title. Step 2 The Channel Title interface is displayed. See Figure 4-16. Figure 4-16 Channel title Select Enable and enter channel title, and then the title displays in the video image. Step 3 You can drag the "Channel Title" box in the video image with your mouse to adjust the box’s location.
- Page 69 You can drag the "Time Title" box in the video image with your mouse to adjust the box’s location. Click Save. Step 5 4.1.2.3.4 Configuring OSD Info Enable this function if you want to display words on the video image. Text Overlay and Picture Overlay can’t work at the same time.
- Page 70 Figure 4-19 Font setting Step 3 Select color and size of the font based on your own needs. Click Save. Step 4 4.1.2.3.6 Configuring Picture Overlay You can enable this function if you need to display picture information in the video image. Geography location and Picture overlay can’t work at the same time.
- Page 71 You can drag the "Picture Overlay" box in the video image with your mouse to adjust the box’s location. Click Save. Step 5 4.1.2.4 Configuring ROI Select ROI in the image, and then the selected image would display with configured quality. Select Setting >...
-
Page 72: Configuring Audio Parameters
Figure 4-22 Storage path interface Step 2 Click Browse, and configure storage paths of live snapshot, live record, playback snapshot, playback download, video clips, and heat map. See Table 4-11 for detailed description. Table 4-11 Storage path description Path Description Live snapshot refers to the snapshot of live interface. - Page 73 Figure 4-23 Audio Step 2 Configure Audio parameters. See Table 4-12. Table 4-12 Parameters Parameters Description Audio can be enabled only when video is enabled. Enable Main Stream or Sub Stream, and the network stream is Enable composed of both audio and video streams. If you do not select Main Stream or Sub Stream, then only video images are transmitted.
-
Page 74: Configuring Network
Click Save. Step 3 Configuring Network 4.2.1 Configuring TCP/IP You need to configure the camera’s IP address and DNS server to connect the camera with other Cameras in the network. Preparation You have connected the camera to network. Procedure Select Setting > Network > TCP/IP. Step 1 The TCP/IP interface is displayed. - Page 75 Static: You need to manually configure IP Address, Subnet Mask and Default Gateway. DHCP: Obtains IP address automatically. With DHCP enabled, IP Mode Address, Subnet Mask and Default Gateway cannot be configured. You can check the current IP address whether the DHCP takes effect or not.
-
Page 76: Configuring Port
Select the check box, get the Camera MAC address, and then you can modify and configure the Camera IP address with ARP/ping command. This is enabled by default. During reboot, you will have no more than two minutes to configure the Camera IP address with a ping packet which has certain length. - Page 77 Figure 4-25 Port Step 2 Configure parameters. See Table 4-14. Configuration of Max Connection takes effect immediately and others after reboot. 0–1024, 37780, 37880, 1900, 3800, 5000, 5050, 9999, 37776, 39999 and 42323 are occupied for specific uses. It is not recommended to use the default value of other port during port ...
- Page 78 554 is the default port number. If you play live view through Apple’s QuickTime or VLC, the following format is available. This function is also available for Blackberry. When the URL format requiring RTSP, you need to specify channel ...
-
Page 79: Configuring Pppoe
Figure 4-26 ONVIF Step 2 Select the On check box in Authentication bar. Step 3 Click Save. 4.2.3 Configuring PPPoE Point-to-Point Protocol over Ethernet, it is one of the protocols that Camera uses to connect to the internet. Get the PPPoE user name and password from the Internet Service Provider, and then, set network connection through PPPoE, the Camera will acquire a WAN dynamic IP address. -
Page 80: Configuring Smtp
Register and log in the DDNS website, and then you can view the information of all the connected Cameras in your account. Procedure Select Setting > Network > DDNS. Step 1 The DDNS interface is displayed. See Figure 4-28. Figure 4-28 DDNS setting interface Select Type and configure as needed. - Page 81 Figure 4-29 SMTP (Email) Step 2 Configure your SMTP server. Step 3 For SMTP (Email)’s other parameters to be configured, see Table 4-16. Table 4-16 SMTP (Email) parameter description Parameter Description Enable Anonymity, and senders’ identities will not be displayed in Emails Anonymity transmitted to others.
-
Page 82: Configuring Upnp
4.2.6 Configuring UPnP Configure UPnP protocols to establish the reflection relation between intranet and external network. A user can access IP address of external network to visit Cameras in the intranet. Preparation Ensure UPnP network service has been installed to your PC. ... - Page 83 The SNMP interface is displayed. See Figure 4-31 and Figure 4-32. Figure 4-31 SNMP (1) Figure 4-32 SNMP (2) Select the Version check box to enable SNMP. Step 2 Step 3 Configure SNMP parameters. See Table 4-17. In the Trap Address bar, enter the IP address of the PC that has MIB Builder and MG-SOFT MIB Browser installed, other parameters leave to the default.
- Page 84 Table 4-17 SNMP parameter description Parameter Description Select a version and its information will be displayed in the SNMP interface. Select v1, and only v1’s information is displayed. Select v2, and only v2’s information is displayed. SNMP Version Select v3, and you can configure user name, password and authentication ...
-
Page 85: Configuring Bonjour
Unfold all the tree lists displayed in the MG-SOFT MIB Browser, and then you can view the configuration information, video channel amount, audio channel amount and software version. Use PC with Windows OS and disable SNMP Trap service. The MG-SOFT MIB Browser will display prompt when alarm is triggered. -
Page 86: Configuring Auto Registration
Figure 4-34 Multicast Select Enable and then enter IP address and port number. See Table 4-18. Step 2 Table 4-18 Multicast Parameter Meaning The Multicast IP address of Main Stream/Sub Stream is 224.1.2.4 by default, Description and the range is 224.0.0.0–239.255.255.255. See the multicast port of corresponding stream: Main Stream: 40000;... -
Page 87: Configuring Qos
Figure 4-36 802.1x Step 2 Select the Enable check box. Step 3 Set 802.1x parameters. See Table 4-20. Table 4-20 Parameters of 802.1x Parameter Description Authentication PEAP (protected EAP protocol). Username The user name that was authenticated on the server. Password Password of your username. -
Page 88: Peripheral
Peripheral Manage the Camera’s components. 4.3.1 Configuring IR Light Select Setting > Peripheral > IR Light. Step 1 The IR Light interface is displayed. See Figure 4-38. Figure 4-38 IR light Step 2 Configure IR light’s running mode. Zoom Prio: When the camera zooms in or out the visible surveillance image, the IR ... -
Page 89: Configuring Fan
Timing: You can configure the Interval Time and Period. Interval Time: Interval from the point when the wiper starts to the point when the wiper stops. Period: Time when the wiper works. Click Save. Manual: Turn on and off the wiper manually. ... -
Page 90: Smart Thermal
Manual: When you think it’s cold enough and you want to let the camera work in a warm condition, you can select Manual as the Mode. Select the On check box, and click Save. Smart Thermal Configure the Camera intelligent rules to help you detect objects that enter a specialized area unexpectedly and the hidden danger (fire, calling and smoking behavior in a gas station). - Page 91 objects that are valuable to you, (your car, for example), and once the objects are missing from the drawn area, linked actions, (an alarm to a thief, for example), will be triggered and you will be informed to take measures. 4.4.2.1 Basic Scene-Selecting Requirements The target should occupy no more than 10% of the whole image.
- Page 92 Figure 4-43 PTZ function Step 1 Select Setting > Smart Thermal > Smart Plan. The Smart Plan interface is displayed. Select 1 or 2 in Channel box and click Add Plan to select a preset. Step 2 Step 3 You might see IVS icon is , which means IVS function is enabled.
- Page 93 Step 4 Set tripwire rules. to add a rule. Tripwire is the default Rule Type. In the Name column, Click double-click a name, Rule1, for example, to define it ("First-class guarding area" as the new name, for example). See Figure 4-44. Figure 4-44 Tripwire There is a default yellow line on the video image which you can click and drag towards...
- Page 94 An alarm is triggered only when size of the target that is crossing tripwire lies between the two filter boxes. When drawing a rule, you can select Maximum Size or Minimum Size and click Clear to delete a relevant filter box. For more tripwire settings, see the following table.
- Page 95 Figure 4-45 Intrusion There is a default yellow box on the video image which you can click and drag to the wanted area. Also, you can click the box corners to adjust the box shape. However, for many cases, you might need to click Clear to clear the default box and click Draw Rule to define box: Based on the scene you want to monitor (a pentagon area, for example), draw a pentagon around the area.
- Page 96 Table 4-24 Intrusion parameters Parameter Description Define a period during which the alarm settings are active. Click Setting, and the period setting interface is displayed. Configure period. Method 1: Hold down and drag the left mouse button to select a ...
- Page 97 Procedure Select Setting > Smart Thermal > IVS. Step 1 The Rule Config interface is displayed. Select a preset in Preset bar. Step 2 The camera turns to the position. Step 3 Configure rules. Click to add a rule. In the Rule Type column list, select Abandoned Object. In the Name column, double-click a name, Rule3, for example, to define it.
- Page 98 Table 4-25 Abandoned object parameters Parameter Description Define a period during which the alarm settings are active. Click Setting, and the period setting interface is displayed. Configure period. Method 1: Hold down and drag the left mouse button to select ...
- Page 99 Figure 4-47 Missing object There is a default yellow box on the video image which you can click and drag to the wanted position. Also, you can click the box corners to adjust the box shape. However, for many cases, you might need to click Clear to clear the default box and click Draw Rule to define box: Based on the scene you want to monitor (a pentagon area, for example), draw a pentagon around the area.
- Page 100 Table 4-26 Missing object parameters Parameter Description Define a period during which the alarm settings are active. Click Setting, and the period setting interface is displayed. Configure period. Method 1: Hold down and drag the left mouse button to select ...
- Page 101 Figure 4-48 Global setup Select a preset in Preset bar. Step 2 The camera turns to the position. You need this step only when presets are supported in this Camera. Step 3 Add detected area and excluded area. Click Add Detect Region to draw a detected area on surveillance image. Right-click to end drawing.
-
Page 102: Call Detection
Select the On check box and set per Limit Threshold and Lower Limit Threshold on your own needs. Isotherm Filter This function is aimed at diminishing false alarms caused by waving water. When overlap rate of an object at this moment and at earlier time is Tracking Overlap smaller than the rate you have set, this object can be detected and an Rate... - Page 103 Select 1 in Channel box and click Add Plan to select a preset. Step 2 Step 3 (You might need to firstly click to disable the corresponding IVS function.) Click to enable Call Detection. The icon turns into Click Save. Step 4 4.4.3.2 Configure Call Detection Select Setting >...
-
Page 104: Smoking Detection
In Preset box, select a preset (the blue font, Step 2 , for example, means the preset has already enabled Call Detection). Step 3 The whole surveillance image is set as the call detection area by default (as indicated by the yellow box). - Page 105 Select 1 in Channel box and click Add Plan to select a preset. Step 11 Step 12 You might need to click to get the two icons into disable the corresponding IVS function and Call Detection function. Ensure the two functions are disabled.
-
Page 106: Boat Detection
In Preset box, select a preset (the blue font, Step 2 , for example, means the preset has already enabled Smoking Detection). Step 3 The whole surveillance image is set as the smoking detection area by default (as indicated by the yellow box). If you want to form a specific area, a pentagon, for example, click Clear to clear the yellow box. - Page 107 PTZ function Figure 4-51 Step 1 Go to Setting > Smart Thermal > Smart Plan. The Smart Plan interface is displayed. Select 2 in Channel box and click Add Plan to select a preset. Step 2 Step 3 (You might need to firstly click to disable the corresponding IVS function.) Click to enable Call Detection.
-
Page 108: Configuring Fire Warning
For configuration of intelligent rules, see “4.4.2.2 Configuring Intelligent Rules. ” 4.4.5.3 View Web Interface Alarm Records After finishing settings in "4.4.5.1 Configure Smart Plan" and "4.4.5.2 Configure Boat Detection", select Alarm tab and select IVS in Alarm Type to enable alarm notifications on the web interface. Then view unexpected boats records on the Alarm tab when an alarm is triggered. - Page 109 Anti-jamming: Your camera will only detect those objects that are newly with high temperature and send off alarms. That means under Anti-jamming mode, a constantly high-temperature object (a boiler, for example) is excluded. High Response: Your camera will detect any a hidden fire danger and send off ...
-
Page 110: Configuring Hot Trace
Select the Send Email check box and an e-mail will be delivered to the Camera user once an alarm is triggered. Send Email Set your e-mail first before enabling the Send Email function. See "4.2.5 Configuring SMTP" for detailed operations. Select the check box of PTZ and select an item from None, Preset, Tour, and Pattern in the Activation bar. - Page 111 Conditions under which an alarm is triggered. Single Select the Hot Spot temperature more than check box and when the highest temperature is larger than the temperature you have set, an alarm is triggered. Select the Cold Spot temperature less than check box and when ...
-
Page 112: Configuring Pic In Pic
Select the Send Email check box and an e-mail will be delivered to the Camera user once an alarm is triggered. Send Email Set your e-mail first before enabling the Send Email function. See "4.2.5 Configuring SMTP" for detailed operations. Select the check box of PTZ and select an item from None, Preset, Tour, and Pattern in the Activation bar. -
Page 113: Configuring Link Schedule
Select Setting > Smart Thermal > Pic in Pic. Step 1 The Pic in Pic interface is displayed. See Figure 4-55. Figure 4-55 Pic in pic Select the Enable check box. Step 2 Step 3 Drag the blue box’s corner to enlarge the box. Click in the box and drag your mouse to adjust the box’s location. -
Page 114: Configure Linked Measures
Figure 4-57 Setting Select a weekday and a period. Then you can define the period. When you select the check box of All, you’re doing period settings towards all weekdays. Click Save. You return to the Link Schedule interface. Click Save. Step 3 4.4.10 Configure Linked Measures After you configure the Camera intelligent rules, you can set linked actions such as Relay-out, Send... - Page 115 Enable this function and alarm recording will be triggered when there is an alarm. To view and set storage path of recorded videos, see "4.1.2.5 Configuring Storage Path". Record The following two conditions must be satisfied before alarm recording ...
-
Page 116: Event
Event 4.5.1 Configuring Video Detection 4.5.1.1 Configuring Motion Detection When an object appears and moves fast enough to reach the sensitivity value you have set, the object will be detected and an alarm will be triggered. Step 1 Select Setting > Event > Video Detection > Motion Detection. The Motion Detection interface is displayed. - Page 117 Figure 4-59 Area configuration Set area name and select motion detection areas as needed. You can configure the sensitivity and mutation threshold. The threshold defines the allowed moving area for certain objects. The motion detection will not be triggered as long as those objects stay within the area.
- Page 118 Enable this function and alarm recording will be triggered when there is an alarm. To view and set storage path of recorded videos, see "4.1.2.5 Configuring Storage Path". Record The following two conditions must be satisfied before alarm recording ...
- Page 119 Figure 4-60 Video temper Select the Enable check box. Step 2 Step 3 Configure video temper parameters. See Table 4-31. Table 4-32 Parameters description Parameter Description Define a period during which the alarm settings are active. Click Setting, and the period setting interface is displayed. Configure period.
-
Page 120: Configuring Audio Detection
Set a length of time for the Camera to delay turning off recording after an alarm Record Delay is ended. You can connect this relay-out port to such alarm Cameras as light and siren. Relay-out When an alarm is triggered, those alarm Cameras will work. Select the check box to enable this function. - Page 121 Figure 4-61 Audio detection settings Step 2 Configure parameters of audio detection. See Table 4-33. Table 4-33 Parameters of audio detection Parameters Description Input Enable this function and an alarm will be triggered when there is abnormal Abnormal audio input. Intensity Enable this function and an alarm will be triggered when the change of Change...
- Page 122 Define a period during which the alarm settings are active. Click Setting, and the period setting interface is displayed. Configure period. Method 1: Hold down and drag the left mouse button to select working period you need. Method 2: Select Setting > Event > Video Detection and click Period ...
-
Page 123: Configuring Temperature Alarm
Select the Snapshot check box to take a snapshot when there is an alarm. To view and set storage path of snapshots, see "4.1.2.5 Configuring Snapshot Storage Path". To make the snapshot function take effect, you need to firstly enable ... - Page 124 Table 4-34 Temperature alarm parameters Parameter Description Define a period during which the alarm settings are active. Click Setting, and the period setting interface is displayed. Configure period. Method 1: Hold down and drag the left mouse button to select ...
-
Page 125: Configuring Alarm
Select the Snapshot check box to take a snapshot when there is an alarm. To view and set storage path of snapshots, see "4.1.2.5 Configuring Storage Snapshot Path". To make the snapshot function take effect, you need to firstly enable ... -
Page 126: Configuring Abnormality
Enable this function and alarm recording will be triggered when there is an alarm. To view and set storage path of recorded videos, see "4.1.2.5 Configuring Storage Path. " Record The following two conditions must be satisfied before alarm recording ... - Page 127 4.5.5.1 Configuring SD Card Abnormality Parameters When any abnormality happens to the SD card, an alarm will be triggered and linked activities will be executed. SD card abnormality includes "No SD card", "SD Card Error" and "Capacity Warning." Select Setting > Event > Abnormality > SD Card. Step 1 The SD Card interface is displayed.
- Page 128 The Network interface is displayed. See Figure 4-65. Figure 4-65 Network Step 2 Select an event type. Step 3 Select the Enable check box. Step 4 Configure network abnormality parameters. See Table 4-37. Table 4-37 Network parameter description Parameter Description Enable this function and alarm recording will be triggered when there is an alarm.
- Page 129 Figure 4-66 Illegal access Select the Enable check box. Step 2 Step 3 Configure illegal access parameters. See Table 4-38. Table 4-38 Illegal access parameter description Parameters Description The number of times that the login password is allowed to be wrongly entered for.
-
Page 130: Temperature Measuring Settings
Figure 4-67 Burning warning Step 2 Select the Enable check box. Configure Sensitivity and Energy Threshold: Step 3 Sensitivity: Sensitivity for the camera to recognize whether the lenses are watching towards the sun. The larger the value is, the easier the camera will be to recognize the sun. Energy Threshold: The minimum energy value of the object watched by the lenses. - Page 131 See Figure 4-69. Figure 4-69 Rule adding Double-click the rule you have just added to select measurement items and modify the measurement name. Draw your rules. Select Measurement Items as Spot, and you can click a position on the surveillance image and a spot is formed.
- Page 132 Table 4-40 Parameter description of relay-out Parameter Description Temperature’s display items. Select Measurement Items as Spot, and average temperature and temperature slope will be displayed. Select Measurement Items as Line, Rectangle, Ellipse or Polygon, and maximum/minimum/average temperature, temperature slope Alarm Results and temperature difference are displayed.
- Page 133 Figure 4-70 Temperature contrast Step 2 Set temperature contrast rules Click to add a temperature contrast rule. See Figure 4-71. Figure 4-71 Temperature contrast rules adding Double-click to add a temperature contrast rule. Set alarm parameters. See Table 4-41. Table 4-41 Parameters Parameters Description You can select from the following three options to determine a...
-
Page 134: Configuring Global Setup
4.6.2 Configuring Global Setup You can enable Temperature Switch, Isotherm and Color Code. Temperature Switch: A switch with which you can enable or disable temperature testing rules. Enable the Temperature Switch and the temperature testing rules you have set will be displayed on surveillance images. - Page 135 Select the On check box. Isotherm You have to make sure that floor temperature <= median temperature <= ceiling temperature <= saturation temperature. When gain mode is under low-temperature mode, value ranges Min Limit from -40 °C to 150 °C. Temperature When gain mode is under high-temperature mode, value ranges ...
-
Page 136: Exporting Heat Map
Figure 4-74 Isotherm Figure 4-75 Color code 4.6.3 Exporting Heat Map By exporting heat map, you can grasp temperature of every pixel on thermal images. Step 1 Select Setting > Temperature > Heat Map. The Heat Map interface is displayed. See Figure 4-76. Figure 4-76 Heat map setting... -
Page 137: Storage Management
Click Export Heat Map. Step 2 Heat map files will be saved under the path you have set. For detailed operation of resetting the storage path, see "4.1.2.5 Configuring Storage Path." Storage Management 4.7.1 Configuring Schedule You can set schedule of recording, snapshotting, holidays. If the record mode is Off in Storage >... - Page 138 Figure 4-78 Setting Select a day in a week and configure its period. There are 6 periods for each day. Select the All check box, and the entered time period will apply to the whole week. Sunday is selected by default, and you can select other days as needed.
- Page 139 Step 2 Select snapshot type and configure time period. Select snapshot type, and then you can also hold down the left mouse button to select the time period in the chart as needed. Click the Setting for the day that you need to configure time period. The Setting interface is displayed.
-
Page 140: Camera Storage
Figure 4-81 Holiday schedule Step 2 Select from record and snapshot. Step 3 Select days you need to set as your "holiday." Those days with yellow color indicates they were set as holidays. Click Save. Step 4 4.7.2 Camera Storage 4.7.2.1 Configuring Storage Path You can set video recording and snapshot’s storage methods according to event types. - Page 141 4.7.2.2 Configuring Local Storage The system will display the internal SD card information. You can set it as Read Only or Read & Write; you can also Hot Swap or Refresh it. Select Setting > Storage > Destination > Local, and the Local interface is displayed. See Figure 4-83.
-
Page 142: Configuring Record Control Parameters
Table 4-44 FTP parameter description Parameters Description Server Address The IP address of the SFTP or FTP server. Port The port of the SFTP or FTP server. User name The user name to log in the server. Password The password to log in the server. Remote Directory The destination path in the server. -
Page 143: System Management
Figure 4-86 Record control settings Step 2 Configure record control parameters. See Table 4-46. Table 4-46 Record control parameter description Parameters Description Pack Duration The duration of each file pack. The time period for which the system records video before alarm, if the value is 5, then the system records video for 5 seconds before alarm starts and save it. - Page 144 Figure 4-87 General Step 2 Configure general parameters. See Table 4-47. Table 4-47 General parameter description Parameter Description The name of the Camera. Camera name Each Camera has different name. Language Select system language. Video Standard Select video standard from PAL and NTSC. Click Save.
-
Page 145: User Management
Table 4-48 Date & Time parameters Parameter Description Date Format Date format. Time Format Configure the Time format, you can select from 24-Hour or 12-Hour. Time zone Configure the Time zone that the Camera is at. Configure system time. Current Time Click "Sync PC", and the system time changes to the time on PC. - Page 146 “"”, “;”, “:”, and “&” are not covered in special characters.) Administrator users can modify all the uses’ password. You can have 19 users and 8 groups at most. You can manage users through single user or group, duplicate user names or group names are ...
- Page 147 After adding group, click to modify group memo or authorities; click delete the added group, admin group and user group cannot be deleted. Click in the row of admin group or user group to modify group memo. Figure 4-92 User group added.
- Page 148 Figure 4-94 Add user Step 3 Configure parameters. See Table 4-49. Table 4-49 User parameter description Parameter Description Username User’s unique identification You cannot use existing user name. Password Enter password and confirm it. Confirm Password The two items must be the same. Group name The group that users belong to.
- Page 149 Select Setting > System > Account > Account > Username. Step 1 The Username interface is displayed. See Figure 4-95. Figure 4-95 Username Step 2 Click The Modify User interface is displayed. See Figure 4-96. Figure 4-96 Modify user (1) Select the Modify Password check box.
-
Page 150: Adding Onvif User
Figure 4-97 Modify user (2) Step 4 Type old password. Type new password and confirm it. The password must have 8 to 32 digits and at the same time have at least two of the four types: capital letter, lowercase letter, number and special characters. Click Save to finish password modification. -
Page 151: Safety Management
Figure 4-99 Add user Step 3 Enter username, password and confirm the password. Then, select group name. Click Save. Step 4 4.8.4 Safety Management Set RTSP authentication, IP filter, system service and HTTPS to secure data transmission and prevent data leakage. 4.8.4.1 Configuring RTSP Authentication RTSP (Real Time Streaming Protocol) is to secure transmission of streaming media. - Page 152 When accessing through WAN, you can only use MAC of your router to limit MAC verification. You cannot enable white list and black list at the same time. You cannot add your Camera IP/MAC to the white list. ...
- Page 153 Select Setting > System > Safety > System Service. Step 1 The System Service interface is displayed. See Figure 4-102. Figure 4-102 System service Enable functions on the System Service interface. See Table 4-52. Step 2 Table 4-52 System service parameters description Parameter Description Disabled by default.
- Page 154 Click Save. Step 3 4.8.4.4 Configuring HTTPS With HTTPS, you can install customized certificates or signed certificates. You can also obtain and install a root certificate. After installing customized certificates or signed certificates to your Camera, you need to install a root certificate to your PC.
- Page 155 Figure 4-104 Certificate creating Configure HTTPS parameters. See Table 4-53. Table 4-53 Parameters description Parameter Description Country Abbreviation of a country. Limited to 2 capital letters. IP or Domain Name IP address or domain name of your Camera Validity period Validity period of the certificate.
- Page 156 Figure 4-105 Certificate Click Install Certificate. The Certificate Import Wizard interface is displayed. See Figure 4-106. Figure 4-106 Certificate import wizard Click Next. The certificate store selection interface is displayed.
- Page 157 Figure 4-107 Certificate store Select "Place all certificates in the following store. " Click Browse and set the "Trusted Root Certification Authorities" as certificate store. Click Next. The certificate import completing wizard is displayed. See Figure 4-108. Figure 4-108 Certificate import wizard completing Click Finish.
- Page 158 Figure 4-109 Security warning Click Yes. The system pops up a messaged that indicates the import was successful. See Click Save to finish certificate importing. Figure 4-110 Successful import prompt Click Save to finish installation of root certificate. Step 6 Enable HTTPS and a prompt that the Camera needs to be rebooted is displayed.
- Page 159 Figure 4-111 HTTPS Step 2 Install a certificate that has been signed. Click Browse on the right side of Certificate Path bar to select a certificate you are to upload. Click Browse on the right side of Certificate Key Path bar to select the certificate password you are to upload.
- Page 160 Figure 4-112 Certificate Click Install Certificate. The Certificate Import Wizard interface is displayed. See Figure 4-113. Figure 4-113 Certificate import wizard Click Next. The certificate store selection interface is displayed. See Figure 4-114.
- Page 161 Figure 4-114 Certificate store Select "Place all certificates in the following store." Click Browse and set the trusted root certificate authority as certificate store. Click Next. The certificate import completing wizard is displayed. See Figure 4-115. Figure 4-115 Certificate import wizard completing Click Finish.
- Page 162 Figure 4-116 Security warning Click Yes. The system pops up a messaged that indicates the import was successful. See Figure 4-117. Click Save to finish certificate importing. Figure 4-117 Successful import prompt 10) Click Save to finish installation of root certificate. Step 6 Enable HTTPS and a prompt that the Camera needs to be rebooted is displayed.
-
Page 163: System Maintenance
System Maintenance Maintenance Requirements For the system’s good and safe running, it’s recommended to manage and maintain the system, backup files with the following methods. Check surveillance images regularly. Clear regularly user and user group information that are not frequently used. ... -
Page 164: Backing Up And Restoring
Figure 5-2 Auto maintain Step 2 Enable Auto Delete Old Files and select on your own the time gap of deleting the old files. Ranges from 1 to 31 day(s). Step 3 Click Save. Backing Up and Restoring 5.3.1 Importing and Exporting Files that are exported do not contain presets. -
Page 165: Upgrading Firmware
Step 2 Restore the Camera to default setting. Click Default, and all the configurations except IP Address and Account are reset. Click Factory Default, and all the configurations are reset. Upgrading Firmware If a wrong upgrade file has been used, please reboot the Camera, otherwise some functions ... -
Page 166: System Log
Figure 5-6 Version System Log 5.6.1 Searching System Logs The log type includes "all, system, setting, data, event, record, account and safety." Select Setting > Information > Log. Step 1 The Log interface is displayed. See Figure 5-7. Figure 5-7 Step 2 Set start time and end time, and then select log type. -
Page 167: Remote View
The log type includes "all, system, setting, data, event, record, account and safety. " All: All log information. System: Includes program launch, force exit, exit, program reboot, Camera turn off/reboot, system reboot and system upgrade. Setting: Includes save configuration and delete configuration file. ... -
Page 168: Online User
You need to type remote computer’s IP address here. Online User View all the current Web users. Select Setting > Information > Online User, and the Online User interface is displayed. See Figure 5-10. Figure 5-10 Online user... -
Page 169: Additional Accessing Methods
Additional Accessing Methods Accessing through NVR Connect this camera to NVR (Network Video Recorder) through Wi-Fi or Ethernet. Then you can set and manage this camera through the NVR’s web client. Preparation Your PC, NVR and your thermal camera are all connected to network. ... -
Page 170: Accessing Through Smartpss
Accessing through SmartPSS You can set and manage this thermal camera through SmartPSS client. Preparation You PC (with SmartPSS installed) and your thermal camera have been both connected to network. You have installed and opened SmartPSS. Procedure Click Cameras in the homepage. Step 1 The Cameras interface is displayed. -
Page 171: Appendix 1 Cybersecurity Recommendations
Cybersecurity Recommendations Appendix 1 Cybersecurity is more than just a buzzword: it’s something that pertains to every device that is connected to the internet. IP video surveillance is not immune to cyber risks, but taking basic steps toward protecting and strengthening networks and networked appliances will make them less susceptible to attacks. - Page 172 Enable HTTPS We suggest you to enable HTTPS, so that you visit Web service through a secure communication channel. Enable Whitelist We suggest you to enable whitelist function to prevent everyone, except those with specified IP addresses, from accessing the system. Therefore, please be sure to add your computer’s IP address and the accompanying equipment’s IP address to the whitelist.
- Page 173 Establish the 802.1x access authentication system to reduce the risk of unauthorized access to private networks. It is recommended that you enable your device's firewall or blacklist and whitelist feature to reduce the risk that your device might be attacked.
Need help?
Do you have a question about the TPC-BF1241-B3F4-S2 and is the answer not in the manual?
Questions and answers