Table of Contents
Advertisement
Quick Links
Advertisement
Table of Contents

Subscribe to Our Youtube Channel
Related Manuals for Anritsu MT8870A


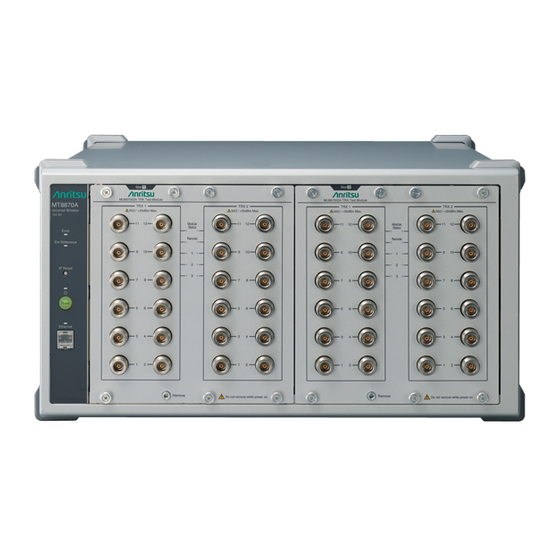
Summary of Contents for Anritsu MT8870A
- Page 1 Quick Start Guide Universal Wireless Test Set MT8870A...
-
Page 2: Table Of Contents
Initial Configuration ..............................4 2.1. Hardware and Software Requirements ....................4 2.2. Installing Run Time ............................4 2.3. Installing MT8870A Configuration Software (Utility Tool) ............5 2.4. Changing PC Network Configuration ...................... 5 2.5. Starting Instrument ............................7 2.6. Starting Utility Tool ............................7 2.7. -
Page 3: Introduction
This also refers to the whole unit including modules. MU88700xA Module installed in MT8870A. This transmits and measures RF signals. Chassis This refers to the MT8870A main frame and is used when it needs to be distinguished from a module, such as on a menu screen. -
Page 4: Initial Configuration
- Display resolution of 1024 ×768 pixels or better - PDF Viewer - Interface*1 Ethernet or GPIB *1: An Ethernet connection is recommended for initial configuration of the MT8870A using this software. 2.2. Installing Run Time To use the Utility Tool, the following software is required. Download and install from the Web sites. -
Page 5: Installing Mt8870A Configuration Software (Utility Tool)
(released in August 2013) is required. Requires Utility Tool v02.00.04 (released in July 2021) or newer when using MU887002A. If the version on the DVD is older, obtain a newer version from the Anritsu web site. Get the latest Utility Tool from the Anritsu Web site as described in Chapter 4. - Page 6 Since the MT8870A IP factory default is 192.168.1.x (where x is 1 to 4), change the IP address to 192.168.1.100 to match the network configuration. Note: In this description, the PC IP address is set to 192.168.1.100, but any IP address in the range of...
-
Page 7: Starting Instrument
Double-click the Utility Tool icon on the PC desktop. Click IPv4 to display the Network interface selection screen showing the IP address configured in section 2.4. If the PC has two or more network interfaces, select the interface connected to the MT8870A. -
Page 8: Changing Network Settings
(1) Change the settings to match the network environment. (2) Click Apply to set the new network settings at the MT8870A and restart it. Quit the Utility Tool and change the PC network configuration to match the new MT8870A settings. -
Page 9: Changing Gpib Settings
(1) Select the chassis from the Select Interface Function Tree, and click Maintenance - Settings. (2) Set the GPIB address and Delimiter/Terminator for each module. (3) Click Apply to set the new GPIB settings at the MT8870A and restart it. -
Page 10: Upgrading Firmware
6 blink during the upgrade. (6) The MT8870A restarts after the upgrade is completed, Restarting requires some time. (7) When the MT8870A restarts, the completion result is displayed on the Progress screen. [Click "OK" to close the Progress screen.]... - Page 11 To upgrade the firmware for specific modules: (1) Select the chassis and click Upgrade Firmware. (2) Click Browse to select the directory containing the new firmware. (3) Select the firmware file. (4) Check/un-check the module(s) for firmware upgrading. (5) Click Upgrade.
-
Page 12: Installing Waveform File
Note: The waveform file installed at factory shipment is included on the accessory DVD labeled Waveform. 2.11. Restoring PC Network Configuration The initial configuration is now complete. After finishing control of the MT8870A, restore the PC network configuration to the original settings. -
Page 13: Checking Operation
3. Checking Operation The MT8870A can be operated only by the remote commands described in the operation manual. Remote commands related to analysis are described in each operation manual. This section explains how to perform a simple operation check using the MT8870A control software (CombiView) on the attached DVD. -
Page 14: Checking Operation With Cellular Analysis License
Checking Operation with Cellular Analysis License The procedure for checking the MT8870A when using the registered Cellular analysis software is described below. 1) At the software selection screen, double-click Cellular - Common - Spectrum Monitor to display the Spectrum Monitor screen. - Page 15 3) Click the measurement execution button (triangle symbol) at the top of the screen to perform measurement. Check the displayed graph and confirm that the waveform has a peak. This confirms RF signal output and measurement. If the waveform does not have a peak, check the following: - RF cables connected to correct port set at Input Port/Output Port at Spectrum Monitor screen - Level and Frequency settings of Spectrum Monitor match settings of Vector Signal Generator - Modulation of Vector Signal Generator set to Off...
-
Page 16: Checking Operation With Short Range Wireless Analysis License
Checking Operation with Short Range Wireless Analysis License The procedure for checking the MT8870A with the registered Short Range Wireless analysis software license is described below. 1) At the software selection screen, double-click Short Range Wireless - Bluetooth/WLAN to start the SRW Applet screen. - Page 17 4) Click the measurement execution button (triangle symbol) at the top of the screen to perform measurement. Check the displayed graph and confirm that the waveform has a peak. This confirms RF signal output and measurement. If the waveform does not have a peak, check the following: - RF cables connected to correct port set at VSA/VSG Port in SRW Applet screen - Power and Frequency settings of CW Analysis match VSG settings - Modulation of VSG set to CW...
-
Page 18: Information About Product Registration
4. Information about Product Registration Download the latest versions of various software and operation manuals by registering the user and product at the Anritsu Web site. A notification email is sent when software and operation manuals are updated. 4.1. If You Do Not Have Anritsu ID First, register the user to obtain an Anritsu ID. - Page 19 3) Input the required information and click NEXT.
- Page 20 4) Input the 6-digit confirmation code sent to your email address and click "Submit".
-
Page 22: Registering Product Information
4.2. Registering Product Information Log-in to the Anritsu Web site using the Anritsu ID and register the product information. If you do not have an Anritsu ID, register for an Anritsu ID as described in section 4.1. Go to http://www.anritsu.com/ and follow the steps listed below to register the purchased MT8870A. - Page 23 5) Enter the serial number of the MT8870A you purchased and click "ADD". Once the serial number is confirmed, click "Submit" to complete registration.
-
Page 24: Downloading
4.3. Downloading The latest versions of software and operation manuals are available from the Anritsu Web site. Navigate to the software download page shown below. 1) Visit http://www.anritsu.com/ 2) Log-in to “My Anritsu”. 3) Select MY PRODUCTS 4) Select "MT8870A" as the filter condition and click "Update". - Page 25 You must register the product the first time you use it. Please refer to "4.2 Product Registration" for details. Product registration may take a few days to confirm the details. Trademarks and Registered Trademarks Microsoft ® and Windows ® are registered trademarks of Microsoft Corporation in the United States and other countries.
- Page 26 Representation Office in Russia Anritsu Company Ltd. Tverskaya str. 16/2, bld. 1, 7th floor., Moscow, 125009, Russia Anritsu Company, S.A. de C.V. Unit 1006-7, 10/F., Greenfield Tower, Concordia Plaza, Phone: +7-495-363-1694 No. 1 Science Museum Road, Tsim Sha Tsui East, Blvd Miguel de Cervantes Saavedra #169 Piso 1, Col.
Need help?
Do you have a question about the MT8870A and is the answer not in the manual?
Questions and answers