Table of Contents
Advertisement
Quick Links
Advertisement
Table of Contents

Related Manuals for Classe Audio CAP-2100


Summary of Contents for Classe Audio CAP-2100
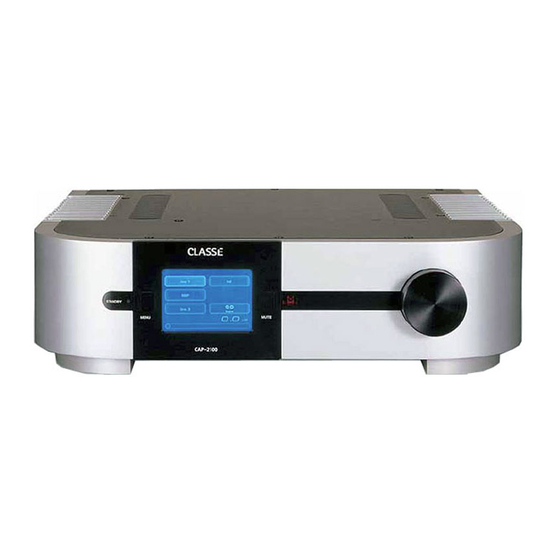
- Page 1 Owner’s Manual CAP-2100 Integrated Amplifier...
- Page 2 WARNING: TO REDUCE THE RISK OF FIRE OR ELECTRIC SHOCK, DO NOT EXPOSE THIS APPLIANCE TO RAIN OR MOISTURE. CAUTION: TO REDUCE THE RISK OF ELECTRICAL SHOCK, DO NOT REMOVE COVER. NO USER-SERVICEABLE PARTS INSIDE. REFER SERVICING TO QUALIFIED PERSONNEL. All of us at Classé...
-
Page 3: Important Safety Instructions
Important Safety Instructions Read these instructions. Keep these instructions. Heed all warnings. Follow all instructions. Do not use this apparatus near water. Clean only with dry cloth. Do not block any ventilation openings. Install in accordance with the manufacturer’s instructions. Do not install near any heat sources such as radiators, heat registers, stoves, or other apparatus (including amplifi... -
Page 4: Table Of Contents
Contents Welcome to the Classé family ...6 a word about installation ...6 Unpacking and Placement ...7 unpacking your integrated amplifier ...7 placement ...7 ventilation ...7 custom installations...7 serial number ...7 register your purchase! ...8 operating voltage ...8 warm up/break-in period ...9 please read this manual ...9 Special Design Features ...10 flexible graphical user interface ...10... - Page 5 CAN-Bus ... 32 features ... 32 hardware setup ... 33 using CAN-Bus... 34 CAN-Bus shared features ... 35 configuration... 35 operate ... 35 AC status ... 35 status ... 35 name ... 35 global brightness ... 36 global standby ... 36 CAN-Bus model specific features ...
-
Page 6: Welcome To The Classé Family
Every eff ort has been made to make the Classé CAP-2100 simple and Welcome to the Classé family Congratulations on your purchase of a Classé product. It is the result of many years of continuous refi nement, and we are sure that you will enjoy it for many years to come. -
Page 7: Unpacking And Placement
As with any integrated amplifi er, it is best to place the CAP-2100 centrally within your system, since it is the hub to which all other components are connected. -
Page 8: Register Your Purchase
Having found the serial number, now would be a good time to fi ll out the operating voltage Th e CAP-2100 integrated amplifi er is set at the factory for 100V, 120V, 220V, Warning: registration card. Please register your purchase so we can advise you of updates and other items of interest. -
Page 9: Warm Up/Break-In Period
warm up/break-in period Your new Classé integrated amplifi er will deliver outstanding performance immediately. However, you should expect to hear it improve somewhat as it reaches its normal operating temperatures and its various components “break-in.” It has been our experience that the greatest changes occur within the fi... -
Page 10: Special Design Features
Th e LCD touchscreen on the front panel of your new component supports an extremely fl exible and versatile graphical user interface (GUI) while maintaining a clean, uncluttered appearance. Th e CAP-2100 provides a range of controls that might otherwise require dozens of buttons and knobs on the front panel. -
Page 11: Extensive Listening Tests
extensive listening tests Excellent measured performance is to be expected in world-class products, and Classé products deliver that performance. However, experience has shown that technical excellence alone is insuffi cient to guarantee subjectively musical results. For this reason, all Classé products are laboriously fi ne-tuned during the development process by carefully controlled listening tests. -
Page 12: Front Panel
Front Panel Standby button & LED indicator Th e front panel Standby button will toggle the integrated amplifi er between operate, its fully operational state, and a standby mode that leaves the integrated amplifi er off , yet ready to respond to system commands via any of the supported control options (e.g. -
Page 13: Menu Button
IR repeater system to solve the problem. For more information about using an infrared repeater system to route signals to and from the CAP-2100, refer to the section Rear Panel later in this manual, or contact your local Classé dealer. -
Page 14: Volume Knob
Volume Knob Th e large knob on the right side of the front panel of the CAP-2100 is used to control the volume of the system. Th e volume is raised or lowered in precise 0.5dB increments throughout the range of the control most likely to be used while listening to music. -
Page 15: Rear Panel
Rear Panel Speaker Outputs Two pairs of high quality fi ve-way binding posts are provided on each channel of the integrated amplifi er, in order to facilitate bi-wiring. In practice, bi-wiring involves connecting two (preferably identical) sets of speaker cables between each amplifi er channel and its corresponding loudspeaker. -
Page 16: Optional Phono Preamp
CD recorder, etc.) you may have to these single-ended RCA inputs. You may select to hear the output of your recording device by touching the tape monitor button on the main operational screen of the CAP-2100. Single-ended (RCA) inputs Th ese RCA jacks accept right-channel and left-channel (single-ended) inputs from line-level source equipment such as tuners, CD players, and tape decks. - Page 17 Refer to the operating manuals of your balanced-output line-level source to verify that the pin assignments of its output connectors correspond to the CAP-2100. If this is not the case, wire the cables so that the appropriate output pin connects to the equivalent input pin.
-
Page 18: Rs-232 Control Port
Th e Menu System. For example, your dealer can program Trigger Out1 to toggle an outboard Classé power amplifi er between operate and standby with your CAP-2100 (to facilitate the operation of bi-amped systems). Th e remote trigger input will respond to the presence of 5–12VDC, with... - Page 19 14 AC Mains Power Switch Th e main power switch for the CAP-2100 is located near the middle of the rear panel, beside the receptacle for the power cord. Th e integrated amplifi er should be in standby before being switched off .
-
Page 20: The Remote Control
Your new integrated amplifi er comes with a versatile remote control which can control both the CAP-2100 itself and several aspects of the rest of a Classé-based system. Th e buttons are arranged in logical groups according to their functions. - Page 21 System Controls Th e CAP-2100 remote control can also control user-defi ned functions as well as the volume and mute functions on a Classé system. • F1/F2/F3/F4 keys are available for controlling aspects of the CAP-2100 not covered by the other buttons on the remote control.
-
Page 22: The Menu System
In addition, the CAP-2100 has a dedicated tape loop for use with sources that can both record and play back, bringing the total number of sources you can connect to the CAP-2100 to fi... -
Page 23: Main Menu System
Th is menu system provides access to many installation-specifi c features that let you customize how the CAP-2100 works within the context of your particular system. -
Page 24: Rotary
Th us, if the CAP-2100 sees the knob moving relatively quickly, it uses coarse steps to eff ectively accelerate the action of the circuitry. As the knob begins to turn more... - Page 25 Of course, it is possible to bump into the knob by accident, which might result in its spinning very quickly indeed. Rather than increasing the volume uncontrollably under these conditions, the CAP-2100 actually slows everything down again as a safety measure against accidentally blowing up your speakers.
-
Page 26: Input
input Each input on your integrated amplifi er can be customized in several ways to • speed limit: establishes a maximum rotary speed, beyond which there will be no change in volume whatsoever; the knob’s input will be ignored completely until it slows down below the speed limit. - Page 27 When an input is renamed ‘SSP’, it becomes a unity gain input. When such an input is selected, the volume control of the CAP-2100 is disabled, all outputs are driven at line level and the volume indication is removed from the main...
-
Page 28: Phono Gain
Each of the CAP-2100’s trigger outputs may be programmed as to its “logic level,” which is to say, whether its voltage is low (essentially 0V), or high (approximately 12V) when the trigger is activated. -
Page 29: Teach Ir
Th e teach IR screen provides a scrolling list of all the available IR codes in the CAP-2100. By scrolling to the command you need to learn into your macrocapable remote, and then pressing the send IR code button, the CAP-2100 will send the appropriate command code out its front panel–where it... -
Page 30: Brightness
Th e brightness setting of the CAP-2100 has three possible values: low, medium, and high. Select the appropriate setting based on the level of ambient light typically found in your listening room while using the system. A high brightness setting usually works best in brightly-lit rooms;... -
Page 31: Remote Fkeys
Fkeys Th e remote control supplied with the CAP-2100 has four function keys (Fkeys) that allow you to have instant, easy access to specifi c system functions that might otherwise be buried in a menu somewhere. For example, if you use the balance control frequently, you may want to consider programming one of the Fkeys to take you straight to that screen. -
Page 32: Status
CAP-2100. If you ever have occasion to call our technical support people to ask a question not covered in this manual, they may want to know precisely what version of software your unit is running. -
Page 33: Hardware Setup 1
A single CAN-Bus Terminator may be required. It is inserted into the CAN-Bus OUT connector of the last component in the CAN-Bus daisy chain. One is included in the box with your CAP-2100. They are also available free of charge from your nearest Classé Customer Support Centre http://www.Classeaudio.com/support/service.htm... -
Page 34: Using Can-Bus
using CAN-Bus CAN-Bus is controlled via the touchscreen of any Delta series component. Th ere Th e diagrams below illustrate how to connect the CAN-Bus hardware. Any combination of models in any order without SSP-300 or SSP-600. Any combination of models in any order with SSP-300 or SSP-600. NOTE: Daisy chain may need to be terminated with CAN-Bus Terminator. -
Page 35: Can-Bus Shared Features
Th e touchscreen will then display the CAN-Bus devices screen, which lists connected Delta series components by model & serial number. Highlighting a unit on the CAN-Bus devices screen identifi es it as the target unit. Th e front panel LEDs of the target unit will start fl ashing (unless you highlight the unit that you are using to access CAN-Bus). -
Page 36: Global Brightness
global brightness By setting all your components to global brightness you can adjust the touchscreen and LED brightness for your entire system by changing the brightness of a single touchscreen. All CAN-Bus software updates automatically set the updated unit to Global Brightness. If you want a particular unit to be excluded from Global Brightness, deselect Global Brightness for that unit. -
Page 37: Amp Info
PlayLink is automatically active after a software update, and the PlayLink icon will only appear on the CAN-Bus confi guration screen of a Delta series disc player. PlayLink can only select a single input per disc player. It is therefore not designed for users who regularly play both CDs and DVDs through diff... -
Page 38: Troubleshooting
Important! Important! Troubleshooting In general, you should refer any service problems to your Classé dealer. Before contacting your dealer, check to see if the problem is listed here. If it is, try the suggested solutions. If none of these solves the problem, contact your Classé dealer. - Page 39 Only one speaker seems to be playing. • Check the main balance control setting of the CAP-2100 by pressing the Menu button, followed by the Balance button. • Does the problem occur with all inputs? If so, check the interconnect cables between the source component and the CAP-2100 input.
- Page 40 • If the hum exists only on the phono input, make sure the turntable/tonearm assembly is not too close to other components. Th ere should be at least 12 inches (30cm) clearance from the other components. Th e more clearance you provide, the better (as long as the tonearm cable is not stretching).
- Page 41 b. If the fuse appears to be blown, replace it only with a fuse of the same type and rating (specifi ed below). Using any other type of fuse, particularly a larger-value fuse, can result in permanent damage to your integrated amplifi er. If you are uncomfortable replacing the fuse yourself, contact your Classé...
-
Page 42: Care & Maintenance
cleaning the cabinet Caution! cleaning the LCD touchscreen Important! installing the remote control batteries Care and Maintenance To remove dust from the cabinet of your integrated amplifi er, use a feather duster or a soft, lint-free cloth. To remove dirt and fi ngerprints, we recommend isopropyl alcohol and a soft cloth. -
Page 43: Specifications
Specifications All specifi cations are accurate at the time of printing. Classé reserves the right to adjust specifi cations without notice. Power output (both channels driven) Frequency response Phase Signal-to-noise ratio Channel separation Noise floor (FFT) Distortion (THD + noise) (unweighted, 0.8Vrms/1kHz input, 10Hz –... -
Page 44: Dimensions
Dimensions... - Page 46 Classé Audio 5070 François Cusson Lachine, Quebec Canada H8T 1B3 +1 (514) 636-6384 +1 (514) 636-1428 (fax) http://www.classeaudio.com email: cservice@classeaudio.com North America: 1 800 370 3740 email: classe@bwgroupusa.com Europe: 44 (0) 1903 221 700 email: classe@bwgroup.com Asia: (852) 2790 8903 email: classe@bwgroup.hk All Others: +1 514 636 6394 email: cservice@classeaudio.com...
Need help?
Do you have a question about the CAP-2100 and is the answer not in the manual?
Questions and answers