Classe Audio CA-3200 Owner's Manual
Hide thumbs
Also See for CA-3200:
- Owner's manual (48 pages) ,
- Owner's manual (30 pages) ,
- Owner's manual (136 pages)
Table of Contents
Advertisement
Advertisement
Table of Contents

Subscribe to Our Youtube Channel
Related Manuals for Classe Audio CA-3200


Summary of Contents for Classe Audio CA-3200
- Page 1 Owner’s Manual CA-3200 Power Amplifier...
- Page 2 WARNING: TO REDUCE THE RISK OF FIRE OR ELECTRIC SHOCK, DO NOT EXPOSE THIS APPLIANCE TO RAIN OR MOISTURE. CAUTION RISK OF ELECTRIC SHOCK DO NOT OPEN CAUTION: TO REDUCE THE RISK OF ELECTRICAL SHOCK, DO NOT REMOVE COVER. NO USER-SERVICEABLE PARTS INSIDE. REFER SERVICING TO QUALIFIED PERSONNEL.
- Page 3 Important Safety Instructions Read these instructions. Keep these instructions. Heed all warnings. Follow all instructions. Do not use this apparatus near water. If a liquid does enter your component, immediately disconnect it from the AC mains and take it to your Classé dealer for a thorough checkup Clean only with dry cloth.
-
Page 4: Table Of Contents
Contents Welcome to the Classé family................5 a word about installation................5 Unpacking and Placement................6 unpacking your amplifier ................. 6 placement ....................6 ventilation ....................6 custom installations.................. 7 serial number ................... 7 register your purchase! ................7 operating voltage..................7 warm up/break-in period................ -
Page 5: Welcome To The Classé Family
You will find the warranty registration card at the end of the separate warranty policy booklet, enclosed. a word about installation Every effort has been made to make the Classé CA-3200 simple and straightforward to install and use. Still, we have no way to evaluate many other variables such as the size and shape of your room, its acoustics, and the associated equipment you have chosen to use with your amplifier. -
Page 6: Unpacking And Placement
The vents on both the bottom and the top of the CA-3200 must be kept free from any obstruction which would reduce the flow of air through the unit. Avoid... -
Page 7: Custom Installations
It will take only a minute or so. Please complete the card now, before you forget. operating voltage The CA-3200 power amplifier is set at the factory (internally) for 100V, 120V, 230V, or 240V AC mains operation, as appropriate for the country in which it is to be sold (230V only in European Union countries, in compliance with CE regulations). -
Page 8: Warm Up/Break-In Period
The CA-3200 includes protection circuitry that will prevent the amplifier from operating at dangerously high or low voltages. • At startup: the AC mains voltage must be within a range of approximately -15% to +10% of its nominal value at startup, or the amplifier will not turn on. -
Page 9: Highly Refined Circuit Design
Special Design Features highly refined All Classé analog amplification stages are based on circuits that have been circuit design extensively optimized over many years of continuous development. By starting with excellent circuit designs and working with them over the years, we are able to discover the many small refinements that add up to superlative performance, in a variety of applications. -
Page 10: Extraordinary Longevity
extraordinary longevity Another benefit of having worked with highly refined circuit designs so extensively over many years is that we have vast experience in what works well over the long term. By using only the highest quality parts to begin with, and then using them in an informed way as a result of both accelerated aging experiments and actual long- term experience, we are able to design and manufacture products which we are confident will stand the test of time. -
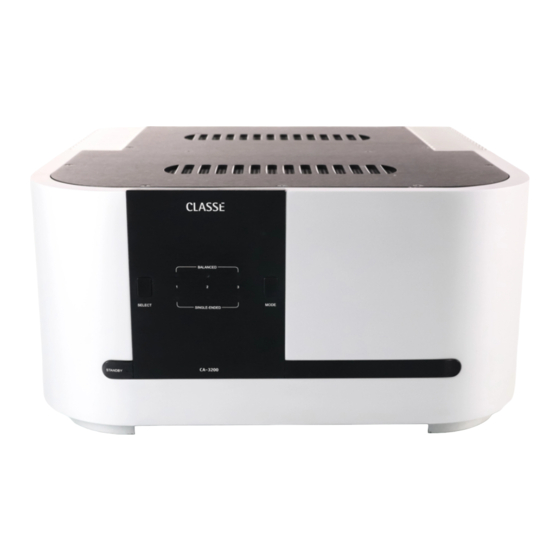
Page 11: Front Panel
Front Panel Standby button & LED indicator The front panel Standby button will toggle the amplifier between operate, its fully operational state, and a standby mode that leaves the amplifier off, yet ready to respond to system commands via any of the supported control options (e.g. - Page 12 Also, it is a good practice to physically disconnect any and all valuable electronics from the AC mains during electrical storms, as a lightning strike anywhere near your home can put a tremendous surge on the AC mains that can easily damage any piece of electronics, no matter how well designed and protected.
-
Page 13: Rear Panel
Rear Panel The following descriptions are intended as a quick reference, should you have any questions about your new product. Please see the next section (entitled Initial Setup) for specific advice on incorporating your new amplifier into your system. Balanced (XLR) Input Balanced audio interconnections were originally developed in the professional audio world, for preserving the delicate nuances of extremely small microphone-level signals. - Page 14 For this reason, we strongly recommend using the balanced analog interconnections between your Classé components wherever possible. The pin assignments of these XLR input connectors are: Pin 1: Signal ground Pin 2: Signal + (non-inverting) Pin 3: Signal – (inverting) Connector ground lug: chassis ground These pin assignments are consistent with the standard adopted by the Audio Engineering Society (AES14-1992).
- Page 15 Classé CAN Bus Control Ports These RJ-45 connectors are reserved for future control and communication applications using Classé Audio’s implementation of the Controller Area Network (CAN) Bus specification. IR Input and Output Your Classé amplifier includes two -inch mini mono-jacks in order to 8 th support the IR remote controls that are ubiquitous today.
- Page 16 For more information, please contact your dealer and ask about home automation systems. AC Mains Input An IEC standard power cord is used with the CA-3200. Plug the cord into the IEC receptacle on the rear panel, and the other end into a suitable wall outlet.
- Page 17 Danger! Potentially dangerous voltages and current capabilities exist within your power amplifier, even when disconnected from AC mains. Do not attempt to open any portion of the amplifier’s cabinet. There are no user-serviceable parts inside your power amplifier. All service of this product must be referred to a qualified Classé...
-
Page 18: Initial Setup
Initial Setup Your new Classé amplifier is quite simple to set up and enjoy. Please follow the steps outlined below in order to safely set up and use your new amplifier. Important: The AC mains connection should be the last connection you make on your new power amplifier. -
Page 19: Configuring Amplifier Turn-On Delay/Amp No
configuring amplifier In a system that contains multiple Classé amplifiers, you may set the turn-on delay/amp no. number of seconds of turn-on delay for each amplifier, allowing each to turn on in the order you have specified, rather than all at once. This number also acts as an ID when using the CAN Bus. -
Page 20: Care And Maintenance
Double-check all your connections. We understand that this step sounds redundant, but it is worth the extra minute or two it might take just to ensure that all connections are correct and secure before plugging the power cables to the AC outlets. Turn on all the other components in your system, and then turn on your amplifier. -
Page 21: Troubleshooting
If the LED continues to blink, there is a fault condition in the amplifier itself. It should be powered down, disconnected from the AC mains and taken to your Classe dealer for service. • If it powers up without any difficulty, power it back down and reconnect only the inputs. - Page 22 The AC mains fuse is blown. There is a specific troubleshooting procedure for a blown AC mains fuse, since this rare occurrence sometimes indicates a significant problem. Please follow the following steps, in order: a. Disconnect your amplifier from the AC mains, as well as from its input connections and speaker connections, and remove the fuse cover on the rear of the unit.
-
Page 23: Specifications
Specifications Classé Audio reserves the right to make improvements without notice. ■ Power output 200W/ch continuous rms @ 8Ω (both channels driven) 390W/ch continuous rms @ 4Ω ■ Frequency response 10Hz – 22kHz (+0/-0.1dB) 10Hz – 155kHz (+0/-3.0dB) ■ Phase better than -10°... -
Page 24: Dimensions
Dimensions... - Page 26 Classé Audio 5070 François Cusson Lachine, Quebec Canada H8T 1B3 +1 (514) 636-6384 +1 (514) 636-1428 (fax) http://www.classeaudio.com email: cservice@classeaudio.com Copyright © 2006 Classé Audio Inc. Printed in Canada. v2.0 031506...
Need help?
Do you have a question about the CA-3200 and is the answer not in the manual?
Questions and answers