
Related Manuals for Orca WSW COMPOSITE


Summary of Contents for Orca WSW COMPOSITE
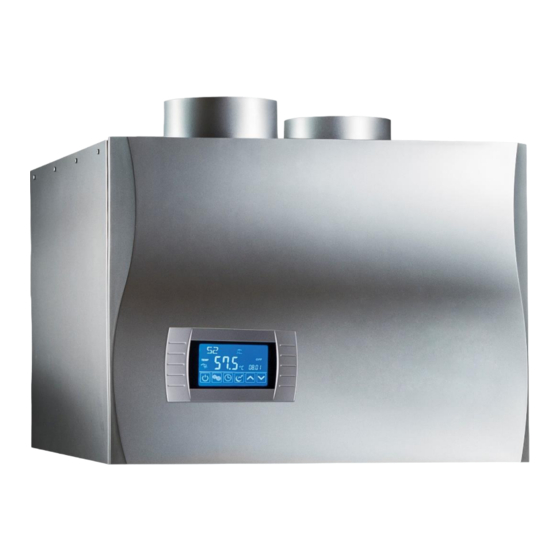
- Page 1 Installation and user manuals for domestic hot water heat pump ORCA WSW COMPOSITE V1_2022...
- Page 2 Manuals are made for different series of device. Because of that reason there could be some differences between real parameters, dimensions or pictures. We reserve the right to change the technical or any other specifications without notice and without liability. We do not take responsibility for typographical errors.
-
Page 3: Table Of Contents
CONTENT Important warnings ________________________________________________ 1 Purpose of device __________________________________________________ 1 Unit specifications _________________________________________________ 2 Transport and depot _______________________________________________ 2 Instructions for safe maintenance ____________________________________ 3 Needed supervisions ______________________________________________________________________ 3 Unit dimensions ___________________________________________________ 4 Unit installation ___________________________________________________ 5 Water connection _________________________________________________ 6 Filling and venting heating system ___________________________________________________________ 7 INSTRUCTIONS FOR USE ____________________________________________ 8 Function of wire controller _________________________________________________________________ 8... -
Page 4: Important Warnings
1 Important warnings This unit must be well earthed during operation; otherwise serious injuries and also death can occur. Power supply must be protected with a safety FI switch (current to switch off max. 0,03A). Newer incline the unit for more than 30°from its vertical position. Do not install the unit in space with a lot of dust or chemical gasses in the air, the unit can be damaged. -
Page 5: Unit Specifications
75% of the necessary heat from the air, the rest is provided by electrical power that drives the high-quality rotary compressor. The sanitary water is heated through a heat exchanger (condenser) integrated in the water storage tank. 3 Unit specifications WSW COMPOSITE MODEL 2,5kW Nominal heating power Max. -
Page 6: Instructions For Safe Maintenance
5 Instructions for safe maintenance If all instructions for installation, usage and maintenance are followed, the heat pump will work without servicing and additional maintenance. If the heat pump is off for a longer time period (during the winter months), it must be periodically (every fortnight) turned on and let to operate for some time (30min). -
Page 7: Unit Dimensions
6 Unit dimensions Air outlet Air inlet Condesate outlet Electrical connections Water outlet ¾'' Water inlet ¾'' Upper connections Water connections are 3/4" (external thread) Air duct connections are in diameter 150mm and pipes to connect need to have same or bigger diameter. -
Page 8: Unit Installation
7 Unit installation Min. one elbow is required. Because the inlet and outlet air connections are very close together there is a possibility of cold air circulation which leads to defrosting. When the air inlet and outlet are in different spaces, each space needs to have an opening to the outside or they need to be connected with an opening surface at least 400mm to be able to equalize pressure. -
Page 9: Water Connection
8 Water connection Marks: CWI – cold water inlet HWO – hot water outlet TTT – temperature sensor of water outlet BTT – bottom temperature sensor F – water outlet (water inlet to water tank heat exchanger) R – water inlet (water outlet form water tank heat exchanger) IMPORTANT: The temperature sensor BTT must always be installed higher than the heat exchanger in the water tank. -
Page 10: Filling And Venting Heating System
To connect the water tank on the water system, consider manuals supplied by water tank manufacturer On the back side of the unit there is a pipe connection for condensate drain. This connection must be connected to outlet drainage, because in high water usage and air moisture there can be more than a few liters of water in one day. -
Page 11: Instructions For Use
9 INSTRUCTIONS FOR USE 9.1 Function of wire controller Auxiliary display Main display area area Button Name Function ON/OFF Turn on/off the unit. Mode Switch unit running modes or save setting parameters. Clock Set the clock or the timer. Electric heater Turn on/off the electric heater or switch fan modes. -
Page 12: Operations
9.2 Operations Status icon Name What it means Shows that the unit is in heating mode. Compressor is in operation. If Heating the set temperature is not achieved the electric heater turns on. Shows that the unit is in e co.heating mode. Eco mode is recomended, Eco, Heating if the room temperature is 18°C or more. -
Page 13: Turn On/Off The Unit
Lock Show that the keyboard is locked. 9.3 Turn ON/OFF the unit Press and hold for 0.5s in the standby interface of the wire controller to turn on the unit and at this time the main display area shows the water outlet temperature. Press and hold for 0,5s in the running interface of the wire controller to turn off the unit an at this time the main display area shows OFF. -
Page 14: Mode Selection
9.4 Mode selection Press , to select the mode from Heating, Eco heating, Intelligent, Vacation in the stanbay or funning interface. Outlet water temperature Heating mode Eco heating mode Time Press Date Press Intelligent mode Vacation mode Press In teh standby or running interface press ,once to check the target temperature of the outlet water. -
Page 15: Time Setting
9.5 Time setting In the standby or running interface, do as folows to set the time when in heating mode. When press once, the time parameter will flash. When press ,again, the hour parameter will flash then press , to change it. After making the changes to the parameter, press , to confirm, then change the minute parameter as well as the date parameter in the same way. - Page 17 In the the heating mode, two running period scan be set Press nad hold for 2s to enter into the timer setting interface.. Running period 1. The symbol ON 1 on the right side of the interface and the timenparameter flash at this time. Press agin and the hour parameter flashes.
- Page 18 Example:Running period 1. 8:00 – 10:00; Runing period 2: 16:30-22:00...
- Page 20 If you want to cancel the timer setting, follow this below...
-
Page 21: In The Vocation Mode
9.6 In the vocation mode Press and hold for 2s to enter into the timer setting interface. The symbol ON and the data parameter are flasing at this time. Then set the date in the same way as 2.6. Example: Set the start-up date on September 28. ( Note: Turn off the unit before going out.) -
Page 22: Electric Heater Setting
9.7 Electric heater setting The electric heat can be turned on when the unit is heating or standby. Press once to turn on the electric heater and press again to shut it off. -
Page 23: Fan Mode Setting
FAN MODE SETTING Press and hold for 2s for the first time to change the fan mode to low speed running and the fan will run at low speed when the unit target temperature is reached. Press " " and hold for 2s again to change the fan mode to high speed running and the fan will run at high speed when the unit target temperature is reached. -
Page 24: Kejboard Locking
9.9 Kejboard locking Press and hold for 5s once to lock the keyboard. Press and hold for 5s again to unlock the keyboard. NOTE The fact is is that the heat pump will work best and cheapest if it will not always need to heat to the maximum permissible temperature of the water in the reservoir. -
Page 25: Troubleshooting
10 TROUBLESHOOTING Code Failure Reason Solution The temp. sensor is open or short circuit Check or change the bottom temp. sensor Bottom sensor failure The temp. sensor is open or short circuit Check or change the top temp. sensor Top sensor failure The temp. -
Page 26: Electric Scheme
11 ELECTRIC SCHEME DI06 –GND: some units have an option to use energy form a PV system. When GND and DI06 are connected, the unit will try to heat water in the tank up to temperature set under parameter r14, if contacts are not connected, the unit will work in normal operation regime. -
Page 27: Temperature Sensor Resistance
12 Temperature sensor resistance... -
Page 28: Parameter Table
13 Parameter table Parameter range Factory Access Solar pump Low fan/ Circulation pump/ Solar Output O05 Service pump/ Recovery valve Running indicator/Circulation Output O06 (CN6) Solar valve Service pump/ Solar pump/ Solar valve Outlet water temp. compensation Compensation YES/NO Service 1~10°C Max. - Page 29 Temp. difference to stop cooling 1~40°C Service mode Temperature to open electronic 50~90 °C Service safety valve 50~90°C Temperature to stop solar pump User Constant solar pump operation YES/NO Service Temperature 10~60°C Desired water temperature with HP User 1~20°C Temperature difference to start HP Service Start el.
- Page 30 case, the antilegionella protocol will be turned off even if the set temperature in the water tank is not reached.
-
Page 31: Temperature Sensor Resistance
13.1 Temperature sensor resistance... -
Page 32: Connection Of Electric Heater Or Other Heat Source
14 Connection of electric heater or other heat source To connect the electric heater or other heat source, you have to remove the complete top cover and on the back side of unit remove the black cover of the electronic board: Under this black cover you will find 3 black connectors with marks L, N and PE. - Page 33 Warranty statement We hereby declare that: Device will work properly in warranty period if you will use it in accordance with its purpose and instructions for use, we will on your request if it is made within the warranty period, on our own expense take care to remove the defects and shortcomings of the device, which cause non proper operation of unit within 45 days from the date of notification of failure.
- Page 34 WARRANTY CERTIFICATE FOR WARRANTY CONDITIONS GUARANTEED: STAMP tel: email: Goods: typ:_ , ser. Nr.: typ:_ , ser. Nr.: typ:_ , ser. Nr.: Sale date (seller): , Stamp: INSTALATION AND FIRST 1. SERVICE (12 months after 2. SERVICE AND MG. ANODE 3.