Table of Contents
Advertisement
Quick Links
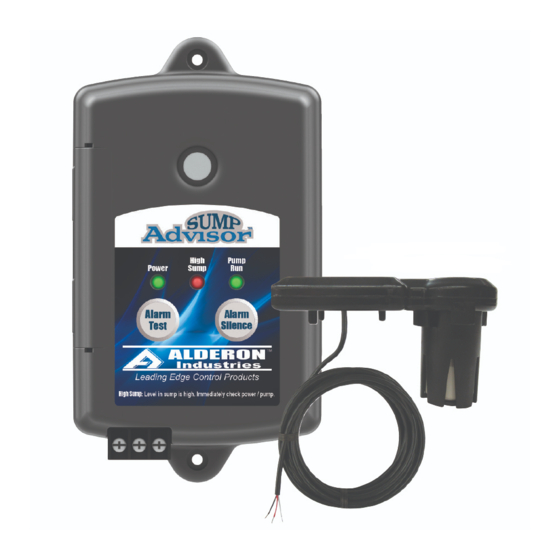
Sump Advisor
2-Zone Alarm and Sensor
™
Rated Type 1, Indoor Alarm Panel (use with Alderon™ VertiMAC™ series)
2000514
2000558 2000559 2000560 2000561
QUICK START GUIDE
Step 2: Mounting Alarm Panel
Determine mounting location for the alarm panel, make sure the power
outlet (120VAC, 50/60 Hz) is within five feet (5') of the alarm panel. The
power outlet should be on a separate circuit breaker from any other
device and not on a switched receptacle to maintain power integrity.
CAUTION: Do not connect power to the alarm panel until the
installation of both the Sump Advisor™ alarm panel and Sump Advisor™
sensor are completed.
Alderon Industries™
Pat. No. 10,794,379
5 Feet Maximum
Safety Guidelines
Before proceeding with the installation or operation of this product,
read all instructions thoroughly, as well as complying with all federal,
state and local codes, regulations, and practices. This product must
be installed by qualified personnel familiar with all applicable local
electrical and mechanical codes. Refer to the National Electrical Code
(NFPA 70). Failure to properly install and test this product can result in
personal injury or equipment malfunction.
Step 1: 9VDC Battery Backup
Step 1A: To install or replace the battery for the backup power feature,
remove the alarm panel access cover.
Step 1B: Install the 9VDC battery matching the terminals of the wire
connector on the alarm panel to the terminals on top of the battery.
Place the battery inside the top panel compartment to secure and
ensure proper operation of the backup power feature.
1A
1B
Step 3: Mounting Alarm Panel
To mount the alarm panel, hold in the desired mounting location and
mark the drill hole locations. Once marked, drill pilot holes for screws (not
included) and use wall mount anchors (not included) if necessary. Place
alarm panel in the mounting location, adjust until the pilot holes are lined
up with the enclosure and fasten screws to secure the alarm panel in place.
WARNING
(continued)
Advertisement
Table of Contents

Related Manuals for Alderon Industries Sump Advisor 2000514


Summary of Contents for Alderon Industries Sump Advisor 2000514
- Page 1 Refer to the National Electrical Code (NFPA 70). Failure to properly install and test this product can result in Alderon Industries™ personal injury or equipment malfunction. Pat. No. 10,794,379...
- Page 2 Step 4: Wiring Auxiliary Dry Contacts If connecting to an existing alarm security system or building automation system (BAS), leave the positive (+) and negative (-) terminals open and use 18 gauge 2-conductor wire to connect the existing product to terminals 2A, 2B, 1A, and 1B. If connecting to an Alderon™...
- Page 3 Step 6: VertiMAC™ Pump Switch Step 7: Mounting Pump Switch (sold separately) Determine the pump differential and move the rubber grommet on the Attach the pipe clamp to pipe at actuator rod to achieve the desired range. The maximum differential is the approximate mounting level six inches (6.0″) and minimum differential is one and a half inches (1.5″).
- Page 4 Step 11: Pump Switch Quick Test Customer Support TEST PUMP OFF: When the actuator rod on the VertiMAC™ pump Online alderonind.com switch is in the down position (deactivated), the pump should be off and the green power LED should be the only LED illuminated on the Sump Email Advisor™...
Need help?
Do you have a question about the Sump Advisor 2000514 and is the answer not in the manual?
Questions and answers