Table of Contents
Advertisement
Quick Links
AIR CONDITIONER
AR18NSPXBWKNEU
AR24NSPXBWKNEU
AR18NSWXBWKNEU
AR24NSWXBWKNEU
AR18NSWXCWKNEU
AR24NSWXCWKNEU
AR18NSPXBWKXEU
AR24NSPXBWKXEU
AR18NSWXBWKXEU
AR24NSWXBWKXEU
AR18NSWXCWKXEU
AR24NSWXCWKX-EU
SPLIT-TYPE AIR CONDITIONER
INDOOR UNIT
MODEL CODE
AR18NSPXBWKNEU
AR24NSPXBWKNEU
AR18NSWXBWKNEU
AR24NSWXBWKNEU
AR18NSWXCWKNEU
AR24NSWXCWKNEU
CONTENTS
1. Precautions
2. Product Specifications
3. Alignment and Adjustments
4. Disassembly and Reassembly
5. ASSY CONTROL
6. Electrical Parts List
7. Wiring Diagram
8. PCB Diagram
9. Operating Instructions
10. Troubleshooting
11.Block Diagram
12. Reference Sheet
OUTDOOR UNIT
AR18NSPXBWKXEU
AR24NSPXBWKXEU
AR18NSWXBWKXEU
AR24NSWXBWKXEU
AR18NSWXCWKXEU
AR24NSWXCWKXEU
Advertisement
Table of Contents

Related Manuals for Samsung AR18NSPXBWKNEU


Summary of Contents for Samsung AR18NSPXBWKNEU
- Page 1 SPLIT-TYPE AIR CONDITIONER INDOOR UNIT OUTDOOR UNIT MODEL CODE AR18NSPXBWKNEU AR18NSPXBWKXEU AR24NSPXBWKXEU AR24NSPXBWKNEU AR18NSWXBWKXEU AR18NSWXBWKNEU AR24NSWXBWKXEU AR24NSWXBWKNEU AR18NSWXCWKXEU AR18NSWXCWKNEU AR24NSWXCWKXEU AR24NSWXCWKNEU AIR CONDITIONER CONTENTS 1. Precautions 2. Product Specifications 3. Alignment and Adjustments AR18NSPXBWKNEU AR24NSPXBWKNEU 4. Disassembly and Reassembly AR18NSWXBWKNEU...
-
Page 2: Table Of Contents
6-1 INDOOR MAIN PCB CODE DB92-04101B······························································································ 6-1 6-2 OUTDOOR MAIN PCB CODE DB92-04029D························································································ · · 6-4 6-3 INDOOR DISPLAY PBA CODE DB92-02877A ························································································ 6-7 7. Wiring Diagram······························································································ 7-1 7-1 Indoor Unit ······················································································································································ 7-1 7-2 Outdoor Unit ··················································································································································· 7-4 Samsung Electronics... - Page 3 12-2 12-4 Cleaning /Filter Change······························································································································· 12-5 12-5 Installation ··························································································································· · · · · · ························ 12-6 12-6 Installation Diagram of Indoor Unit and Outdoor Unit ··································································· 12-7 12-7 Reference sheet ··························································································································· · · · · · ············ 12-9 Samsung Electronics...
-
Page 4: Precautions
Do not place a cloth or other materials over it. Remove the batteries if you don't use the remote control for a long time. (If applicable) Use the remote control within 7 meters from the indoor unit. (If applicable) Samsung Electronics... -
Page 5: Disposing Of The Unit
Never store or load the air conditioner upside down or sideways to prevent the damage to the compressor. Young children or infirm persons should be always supervised when they use the air conditioner. Max current is measured according to IEC standard for safety. Current is measured according to ISO standard for energy efficiency. Samsung Electronics... -
Page 6: The Feature Of Product
It’s so easy to install! You can easily hang the product on the wall and connect the pipes and wires by opening the cover on the bottom of the product. Now you won’t have to tilt the product to connect the pipe and the wires! Samsung Electronics... - Page 7 -10 °C to 46 °C -10 °C to 46 °C Operation range 27 °C or less 27 °C or less 27 °C or less Heating -15 °C to 24 °C -15 °C to 24 °C -15 °C to 24 °C Samsung Electronics...
- Page 8 -10 °C to 46 °C -10 °C to 46 °C Operation range 27 °C or less 27 °C or less 27 °C or less Heating -15 °C to 24 °C -15 °C to 24 °C -15 °C to 24 °C Samsung Electronics...
- Page 9 44.8 Indoor Unit 1065*311*301 1065*311*301 1065*311*301 Net Dimension Outdoor Unit 880*310*648 880*310*648 880*310*648 Indoor Unit Noise Outdoor Unit Air Purifying System EASY CLEAN FILTER EASY CLEAN FILTER EASY CLEAN FILTER Indoor Display 88 SEG 88 SEG 88 SEG Samsung Electronics...
- Page 10 Code No. Q’ty Remark ASSY HANGER DB90-07731A ASSY WIRELESS REMOCON DB93-16761C HOLDER REMOCON DB61-06087A BATTERY 4301-000121 Indoor Unit DB68-07469A MANUAL USERS MANUAL INSTALL DB68-06732A SCREW-TAPPING 6002-000623 CAP-SCREW DB67-01404B Rubber Leg DB67-01533A Outdoor unit case Samsung Ele ctr o nic s...
-
Page 11: Alignment And Adjustments
Because the teat mode operate the cool mode by force not related to the set temperature / indoor ● temperature, check whether each subordinate is operated normally or not after completing installation Note and must turn off the power of the air conditioner. Samsung Electronics... - Page 12 Heatsink overheat or IPM overheat *Note* If the set doesn’t work (No power), check the thermal fuse of terminal block OPEN or SHORT with Multimeter. * Measure the thermal fuse housing PIN#1~2 : OPEN(disconnection)-> defective product Samsung Ele ctr o nic s...
- Page 13 3-2-2 Outdoor LED Display Error and Check method Outdoor OLP over temperature error Samsung Ele ctr o nic s...
-
Page 14: Setting Option Setup Method
Setting option SEG3 Press the button the display panel to . … Press the button repeatedly to select . Setting option SEG4 Press the button the display panel to . … Press the button repeatedly to select . Samsung Electronics... - Page 15 Setting option SEG9 Press the button the display panel to . … Press the button repeatedly to select . Setting option SEG10 Press the button the display panel to . … Press the button repeatedly to select . Samsung Electronics...
- Page 16 Setting option SEG15 Press the button the display panel to . … Press the button repeatedly to select . Setting option SEG16 Press the button the display panel to . … Press the button repeatedly to select . Samsung Electronics...
- Page 17 Setting option SEG19 Press the button the display panel to . … Press the button repeatedly to select . Setting option SEG20 Press the button the display panel to . … Press the button repeatedly to select . Samsung Electronics...
- Page 18 1. When Operation lamp flashes, plug the power plug again and press power button to run. 2. Check whether you set correct option code per model when air-conditioner does not run or operation lamp flashes. Option code : Model Option code AR18NSPXBWK/EU 011C45-15EA1C-27323C-3727C4 AR24NSPXBWK/EU 011C45-16EA4A-27414A-3714C4 AR18NSWXBWK/EU 011C45-15E21C-27323C-3727C4 AR24NSWXBWK/EU 011C45-16E24A-27414A-3714C4 AR18NSWXCWK/EU 011C45-15E21C-27323C-3727C4 AR24NSWXCWK/EU 011C45-16E24A-27414A-3714C4 Samsung Electronics...
-
Page 19: Disassembly And Reassembly
Necessary Tools +SCREW DRIVER Q’ty 1 ea. To assembly and disassembly the screw MONKEY SPANNER Q’ty 1 ea. To assembly and disassembly the Fan motor and Compressor - SCREW DRIVER Q’ty 1 ea. To assembly and disassembly the screw Samsung Electronics... -
Page 20: Indoor Unit
Remove the Cap Screw as shown on the right side and then remove the screw and separate the Cover Panel. 4) Cover Panel is fixed to body by Hook in center area and side area. Center area Side area Side area HOOK F03,F04 SAMSUNG ELECTRONICS... - Page 21 5) Separate the hook after pushing both end of Cover Panel as shown in the figure.(Watch out for the damage of the hook) 6) Raise front part upward obliquely as shown in the figure and then remove the hooks. SAMSUNG ELECTRONICS...
- Page 22 Assembly of Cover Panel after service end. - Reassembly is in the reverse order of the removal. - Piping and drain hose must be careful not to damage and Progress must be done with both hands. Hook (Side) Hook (Center) Screw Cap Screw SAMSUNG ELECTRONICS...
- Page 23 4 HOOK Structures. When separate the hook : Use the (-) screw Driver. (-)Screw Driver Insert the hook and then pull the hook as shown on the right side. (Watch out for the damage of the hook) SAMSUNG ELECTRONICS...
- Page 24 Parts Procedure Remark 9) Remove the Panel Frame from the Main Frame as shown on the right side. 10) Remove the WIFI KIT connector. WIFI KIT connector is located of Panel Front. (For model with WIFI KIT) SAMSUNG ELECTRONICS...
- Page 25 Humidity wire connector. Caution: When you separate the connector, pull pressing the locking button. 14) Loosen the ground wire. 15) Loosen the remote control PCB wire connector. Caution: When you separate the connector, pull pressing the locking button. SAMSUNG ELECTRONICS...
- Page 26 16) Take off the CASE-CONTROL from the main frame after loosen the remaining connector. Caution: When you separate the connector, pull pressing the locking button. TRAY DRAIN 17) To detach TRAY-DRAIN from the main frame, pull the bottom of the TRAY- DRAIN towards you. SAMSUNG ELECTRONICS...
- Page 27 19) Unfasten the screw at the left side. (use + Screw Driver) 20) Unfasten the screw at the right side. (use + Screw Driver) 21) To detach Evaporator from the main frame, pull the bottom of the Evaporator towards you. SAMSUNG ELECTRONICS...
- Page 28 Remark FAN MOTOR 22) Unfasten the screw. (use + Screw Driver) & CROSS FAN 23) Detach the FAN Motor case. 24) Unfasten the screw a little. (use + Screw Driver) 25) Pull the CROSS-FAN to the left side. SAMSUNG ELECTRONICS...
- Page 29 - Confirm Seal of backside necessarily after replace of Assy SPI Lamp. - Seal should be close adhesion to SPI Lamp. - Measure as shown on the right side since replace. (If the seal is not close adhesion perfectly : Defectiveness can happen) SAMSUNG ELECTRONICS...
-
Page 30: Outdoor Unit (Q)
4-6 Outdoor Unit Parts Procedure Remark COMMON WORK Rh and detach it. 2) Loosen each screws and detach the Cabi Top Cover RIGHT and detach it. Samsung Electronics... - Page 31 Parts Procedure Remark COMMON WORK and detach it. and detach it. Remove the 4 Cond Bar from the holder of outdoor unit cabinet. Samsung Electronics 4- 3...
- Page 32 (Use Monkey Spanner.) 2) Detach the Fan Propeller. 3) Loosen ng screws to detach the Motor. (Use Monkey Spanner.) 4) Disconnect the wire between Ass’y Control Out and Motor. 8) Loosen ng bolts and detach the Bracket Motor 4- 4 Samsung Electronics...
- Page 33 3) Detach several connectors from the PCB of Ass’y Control Out. Heat Exchanger 1) Release the refrigerant at 2) Loosen ng screw on both sides. 3) Disassemble the pipes in both inlet and outlet with welding torch. 4) Detach the Heat Exchanger. Samsung Electronics 4- 5...
- Page 34 Procedure Remark Compressor 1) Loosen the ng nut and detach the Compressor Lead Wire. (Use Monkey Spanner.) 2) Loosen the bolts at the bottom of Compressor like the picture on the right side. (Use Monkey Spanner.) 4- 6 Samsung Electronics...
-
Page 35: Assy Control
ASSY THERMISTOR DB95-05163A ASSY CONNECTOR WIRE-DC SIGNAL DB93-14207A ASSY CONNECTOR WIRE-DC SIGNAL DB93-15445A WiFi ASSY CONNECTOR WIRE-DC SIGNAL DB93-14208A ASSY CONNECTOR WIRE-DC SIGNAL DB93-14218A SCREW-TAPPING 6002-000630 M3,L8 ASSY CONNECTOR WIRE-DISPLAY DB93-14209A SENSOR HUMIDITY DB32-00241C ASSY CONNECTOR WIRE-DC SIGNAL DB93-14221A Samsung Electronics... -
Page 36: Assy Kit Code Db92-04378B
EA Attach seal ASSY COVER CONTROL DB93-10846A ASSY CONNECTOR WIRE-4WAY ※ Screw standard positon Standard spec Holder WIRE CLAMP 6002-000234 TH,+,-,1,M4,L16,ZPC(WHT),SWRCH18A, CASE-PLATE 6002-000231 TH,+,-,2S,M4,L12,ZPC(WHT),SWRCH18A, 6002-000555 PH,+,-,2S,M4,L25,ZPC(WHT),SWRCH18A, Holder WIRE CLAMP-PLATE 6002-000239 TH,+,-,2S,M4,L8,ZPC(WHT),SWRCH18A, Earth 6009-001001 TH,+,WT,-,M4,L10,ZPC(WHT),SWRCH18A, 6002-000536 PH,+,-,2S,M4,L8,ZPC(WHT),SWRCH18A, Heatsink-IPM,PFCM DB91-00933A PH,+,WSP,-,M3,L12,ZPC(WHT),SWRCH18A, Samsung Electronics... -
Page 37: Electrical Parts List
R-CHIP 10Kohm,1%,1/10W,TP,1608 2007-000052 R802 R-CHIP 10Kohm,1%,1/10W,TP,1608 2007-000052 R803 R-CHIP 10Kohm,1%,1/10W,TP,1608 2007-000052 R804 R-CHIP 10Kohm,1%,1/10W,TP,1608 2007-000052 R816 R-CHIP 10Kohm,1%,1/10W,TP,1608 2007-000116 R825 R-CHIP 120ohm,5%,1/10W,TP,1608 2007-000143 R511 R-CHIP 4.7Kohm,5%,1/16W,TP,1005 2007-000143 R512 R-CHIP 4.7Kohm,5%,1/16W,TP,1005 2007-000143 R513 R-CHIP 4.7Kohm,5%,1/16W,TP,1005 2007-000143 R552 R-CHIP 4.7Kohm,5%,1/16W,TP,1005 Samsung Electronics... - Page 38 R-CHIP 330ohm,5%,1/16W,TP,1005 2007-001313 R411 R-CHIP 330ohm,5%,1/16W,TP,1005 2007-001313 R811 R-CHIP 330ohm,5%,1/16W,TP,1005 2007-001433 R618 R-CHIP 12Kohm,1%,1/10W,TP,1608 2007-007306 R508 R-CHIP 100ohm,1%,1/16W,TP,1005 2007-007306 R515 R-CHIP 100ohm,1%,1/16W,TP,1005 2007-007306 R516 R-CHIP 100ohm,1%,1/16W,TP,1005 2007-007306 R517 R-CHIP 100ohm,1%,1/16W,TP,1005 2007-007306 R518 R-CHIP 100ohm,1%,1/16W,TP,1005 2007-007306 R519 R-CHIP 100ohm,1%,1/16W,TP,1005 Samsung Electronics...
- Page 39 C-AL,SMD 10UF,20%,50V,GP,TP,6.6X6.6X5.4MM 2402-001145 C701 C-AL,SMD 47uF,20%,50V,GP,TP,6.3X7.7mm 2402-001145 C703 C-AL,SMD 47uF,20%,50V,GP,TP,6.3X7.7mm 2802-001211 X501 RESONATOR-CERAMIC 8MHz,0.5%,TP,3.2x1.3x0.9 mm DB41-01362A PCB MAIN PCB MAIN FR-4,2Layer,T1.6,120*98,4,WIND FREE, A-STD#4, BLDC MOTOR, A3050,1Oz,240*197 DB91-01837A IC04 ASSY MICOM 17K_RAC_A3050_Inverter,STM-1632-OA,HART-m310,100MQFP,ROM 256KB 0903-001864 - IC-MICROCONTROLLER HART-M310,QFP,100P,20x14mm,8MHz,5V,600mW,-40to+85C,24KB,256KB,MAIN PBA SOC Samsung Electronics...
- Page 40 2007-000491 R08 R-CHIP 2.2Kohm,1%,1/10W,TP,1608 2007-000869 R07 R-CHIP 4.7Kohm,1%,1/10W,TP,1608 2203-000257 C04 C-CER,CHIP 10nF,10%,50V,X7R,TP,1608 2203-000440 C03 C-CER,CHIP 1nF,10%,50V,X7R,TP,1608 2203-005249 C02 C-CER,CHIP 100nF,10%,50V,X7R,TP,1608 2203-005249 C05 C-CER,CHIP 100nF,10%,50V,X7R,TP,1608 2402-001368 C01 C-AL,SMD 47uF,20%,25V,TP,6.3x4.9mm DB41-01365A PCB DISPLAY PCB DISPLAY FR-4,2Layer,T1.6,64*36,12,WIND FREE, 88DISPLAY, 3LED,1Oz,192*160 Samsung Electronics 6-16...
-
Page 41: Outdoor Main Pcb Code Db92-04029D
10Kohm,5%,1/16W,TP,1005 2007-000148 R214 R-CHIP 10Kohm,5%,1/16W,TP,1005 2007-000148 R215 R-CHIP 10Kohm,5%,1/16W,TP,1005 2007-000148 R216 R-CHIP 10Kohm,5%,1/16W,TP,1005 2007-000148 R217 R-CHIP 10Kohm,5%,1/16W,TP,1005 2007-000148 R218 R-CHIP 10Kohm,5%,1/16W,TP,1005 2007-000148 R219 R-CHIP 10Kohm,5%,1/16W,TP,1005 2007-000148 R220 R-CHIP 10Kohm,5%,1/16W,TP,1005 2007-000148 R221 R-CHIP 10Kohm,5%,1/16W,TP,1005 2007-000148 R222 R-CHIP 10Kohm,5%,1/16W,TP,1005 Samsung Electronics 6-20... - Page 42 100ohm,1%,1/16W,TP,1005 2007-007306 R281 R-CHIP 100ohm,1%,1/16W,TP,1005 2007-007306 R282 R-CHIP 100ohm,1%,1/16W,TP,1005 2007-007306 R283 R-CHIP 100ohm,1%,1/16W,TP,1005 2007-007306 R291 R-CHIP 100ohm,1%,1/16W,TP,1005 2007-007306 R292 R-CHIP 100ohm,1%,1/16W,TP,1005 2007-007318 R303 R-CHIP 1Kohm,1%,1/16W,TP,1005 2007-007318 R305 R-CHIP 1Kohm,1%,1/16W,TP,1005 2007-007318 R311 R-CHIP 1Kohm,1%,1/16W,TP,1005 2007-007942 R211 R-CHIP 1Mohm,1%,1/16W,TP,1005 Samsung Electronics 6-21...
- Page 43 C-CER,CHIP 1000nF,10%,25V,X5R,TP,1005(1106),T0.5 2203-007456 C213 C-CER,CHIP 1000nF,10%,25V,X5R,TP,1005(1106),T0.5 2203-007456 C214 C-CER,CHIP 1000nF,10%,25V,X5R,TP,1005(1106),T0.5 2203-007456 C217 C-CER,CHIP 1000nF,10%,25V,X5R,TP,1005(1106),T0.5 2802-001211 X201 RESONATOR-CERAMIC 8MHz,0.5%,TP,3.2x1.3x0.9 mm DB41-01352A PCB PCB MAIN FR-4,2Layer,T1.6,142*48.5,8,RAC_OUT_MAIN,1Oz,284*194 DB91-01825A IC231 ASSY MICOM 16_RAC_PF23_SG_OUT,STM-1622-OA, HART_M310,100MQFP,ROM 256KB 0903-001864 - IC-MICROCONTROLLER HART-M310,QFP,100P,20x14mm,8MHz,5V,600mW,-40to+85C,24KB,256KB,MAIN PBA SOC Samsung Electronics 6-22...
-
Page 44: Wiring Diagram
EEV or Valve Close error-Self diagnosis E422/E554 /Gas Leak Error E458 Out door and Fan Error E461 Comp. Starting Error E464 IPM Over Current (O.C) Error E465 Comp V_Iimit/I_limit Error E500 Heatsink overheat or IPM overheat INDOOR - UNIT CODE NO : DB68-04014A SAMSUNG ELECTRONICS... -
Page 45: Outdoor Unit
7-2 Outdoor Unit AR18NSPXBWKXEU DB68-06674A DB68-06674A-00 SAMSUNG ELECTRONICS... - Page 46 Outdoor Unit AR24NSPXBWKXEU DB68-06675A DB68-06675A-00 This document con not be used without Samsung’s authorization. Samsung Electronics...
-
Page 47: Pcb Diagram
#3 : TEMP SENSOR #17 : GND #4 : HUMID SENSOR CN71 : AC POWER #18 : Trace2 #5 : EVA_IN_TEMP #1 : POWER #19 : Trace1 #6 : GND #2 : NULL #20 : Trace0 #3 : N SAMSUNG ELECTRONICS... - Page 48 #15 : NULL #2 : SGND #16 : NULL #1 : DRED1 #3 : HEATER_L #17 : SGND #2 : DRED2 #4 : HEATER_R #18 : Trace2 #3 : DRED3 #19 : Trace1 #4 : SGND #20 : Trace0 SAMSUNG ELECTRONICS...
- Page 49 CNP401 : WIRE COMP #1 : GND #1 : R351 #1 : W #2 : R354 #2 : V #3 : +5V_1 #3 : U #4 : SGND #5 : +12V_1 #6 : POWER_SAVE #7 : 4WAY #8 : HOT_GAS SAMSUNG ELECTRONICS...
- Page 50 8-4 DISPLAY PCB DB92-04106A Display PCB : DB92-04106A CN01 CN04 CN02 CN01 CN02 CN04 DIN/DOUT DIN/DOUT Vout 5VDC SWITCH INPUT 5VDC Vout PWM_LED TEST_RX TEST_TX MODE0 SAMSUNG ELECTRONICS...
-
Page 51: Sub Pcb--Receive-Db92-02874A
SUB PCB--RECEIVE-DB92-02874A CN01 CN61/CN62/CN63 - CN71 - POWER IN CN01 - RECEIVE #1 : GND #2 : Vout #3 : Vcc #4 : S/W CN32 - FJM/NASA CN76 - SMPS DC OUT SMPS DC OUT Samsung Electronics... -
Page 52: Wire Connectiong The Indoor Unit Terminal Blocks
: Good Bad : Ring terminal is connected reversely Bad : Not clamped Screw Bad : In the gap between Ring terminal & Screw Bad : Unused Ring Terminal Samsung Electronics... -
Page 53: Operating Instructions
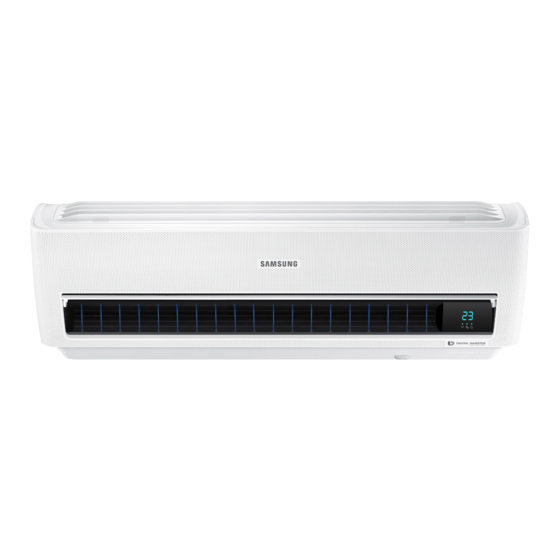
9. Operating Instructions 9-1 Name of Each Part 9-1-1 Indoor Unit The design and shape are subject to change according to the model. Main Parts The actual product may differ slightly from the image depicted below. 01 Air intake 06 WI-FI module 02 Air filter 07 Wind-free panel 03 Air flow blade (up and down) -
Page 54: Wireless Remote Control-Buttons And Display
9-2 Wireless Remote control-Buttons and Display Set temperature indicator Timer option indicator Operation mode indicator Options indicator Low battery indicator Transmit indicator Fan speed indicator Virus doctor indicator Wind-free indicator Vertical air swing indicator Horizontal air swing indicator Power button Temperature button Timer button Fan speed button... -
Page 55: Troubleshooting
HEAT mode, and indoor fan and out- Indoor fan and outdoor fan stop operation door fan do not operate intermittently for within 20% intermittently in a HEAT mode. of the total heater operation. Samsung Electronics 10-1... -
Page 56: Communication Error
Is the power is normal? Exchange the PBA of no power unit (check the LED Lamp) Exchange the indoor unit PBA. Is the communication error occurred again? Terminate the service. Exchange the outdoor unit PBA. 10-2 Samsung Electronics... -
Page 57: Indoor Temperature Sensor Error
Is the connection of power cable supply power and measure the voltage of #1-#2 in and communication cable normal? the connector Exchange the indoor PBA Below 0.5V or Over 4.5V? Micom error or connector check Exchange the indoor PBA Samsung Electronics 10-3... -
Page 58: Indoor Fan Motor Speed Detecting Error (Bldc Fan)
Is the voltage of CN72 Exchange the Indoor PBA #3-#5 and #3-#6 with in 1Vdc~15Vdc during the operation? PBA problem or Motor problem Change the PBA first and check the operation Exchange the Fan motor 10-4 Samsung Electronics... -
Page 59: Outdoor Temperature Sensor Error
Is the connection of power cable supply power and measure the voltage of "B"in the connector and communication cable normal? Exchange the Outdoor PBA Below 0.5Vdc or Over 4.5Vdc? Micom error or connector check Exchange the Outdoor PBA Samsung Electronics 10-5... -
Page 60: Outdoor Cond Temperature Sensor Error
Is the connection of power cable supply power and measure the voltage of "B" in the connector and communication cable normal? Exchange the Outdoor PBA Below 0.5Vdc or Over 4.5Vdc? Micom error or connector check Exchange the Outdoor PBA 10-6 Samsung Electronics... -
Page 61: Outdoor Discharge Temperature Sensor Error
Is the connection of power cable supply power and measure the voltage of "B"in the connector and communication cable normal? Exchange the Outdoor PBA Below 0.5Vdc or Over 4.5Vdc? Micom error or connector check Exchange the Outdoor PBA Samsung Electronics 10-7... -
Page 62: Operation Condition Secession Error
* Heating mode * * Cooling mode * Is the outdoor temperature over 40 or Is the outdoor temperature under -7 under -30 ? The temperature condition is too poor to operate. Wait until temperature is changed 10-8 Samsung Electronics... -
Page 63: Eeprom Error/Otp Error
2. Troubleshooting procedure MODEL "A" DB92-02866A CN501 DB92-02867A CN202 power o and download EEPROM data (or. Insert the service EEPROM IC) Restart after power o Terminate the service Is the error appeared again? Exchange the Outdoor PBA Samsung Electronics 10-9... -
Page 64: Outdoor Fan Motor Error
Is the voltage of "A" #3-#5 and Exchange the Outdoor PBA #3-#6 with in 1Vdc~15Vdc during the operation? PBA problem or Motor problem Change the rst and check the operation Exchange the Fan motor Samsung Electronics 10-10... -
Page 65: Compressor Starting Error
Is the connection of compressor wire is normal? Connect the comp wire normally Download the EEPROM data Is the restart error occurred again? Terminate the service Is the compressor body and interphase Exchange the Outdoor PBA resistance insulated? Exchange the compressor 10-11 Samsung Electronics... -
Page 66: Compressor Wire Missing Error/Rotation Error
Is the connection of compressor wire is normal? Connect the comp wire normally (PBA and Compressor) Is the restart error occurred again? Terminate the service Is the compressor body and Exchange the Outdoor PBA interphase resistance insulated? Exchange the compressor Samsung Electronics 10-12... -
Page 67: Current Sensor Error/Input Current Sensor Error
R410,R411,R412 IC451 R408,R409,R410 DB92-02867A R063,R064,R065 IC451 Restart after power Is the PFC shunt and IPM Exchange the Outdoor PBA shunt resistance value correct? Is the current sensor error appeared again? Terminate the service Exchange the Outdoor PBA Samsung Electronics 10-13... -
Page 68: Over Current) Error
Connect the comp wire normally Is the O.C error occurred again? Terminate the service Is the condition of indoor/outdoor temperature Restart after returning to the normal load normal load? Is the O.C error Terminate the service occurred again? 10-14 Samsung Electronics... - Page 69 Is the position of Correct the sensor position or temperature sensor and sensing exchange the sensor value normal? Is the compressor body and interphase resistance Exchange the Outdoor PBA insulated? Exchange the compressor Samsung Electronics 10-15...
-
Page 70: No Power Outdoor (Initial Diagnosis) (Not Displayed)
Check the fuse open or not? (F001) Exchange the Main PBA Restart after power o . Is the power normal? Check the power source. Is AC power is normal for SMPS? Exchange the Main PBA CN150 : 220Vac~240Vac Check SMPS wire connection Samsung Electronics 10-16... -
Page 71: When The Up/Down, Left/Right, Grill Louver Motor Does Not Operate (Initial Diagnosis) (Not Displayed)
Is the connected louver wire? Does operation start when swing button of the Normal remote control unit pushed? Is the voltage changeable at the pin#2~#5 of CN61, Exchange the PBA CN62, CN63 (louver connector)? Up/Down louver motor is faulty. Samsung Electronics 10-17... -
Page 72: When The Remote Control Is Not Receiving
2. Troubleshooting procedure If the connector was normally assemble? Check the connector to normally assemble. Have the battery in remote control? Insert the battery in remote control. All the lights out ? Re-check the connector Exchange the display PBA 10-18 Samsung Electronics... -
Page 73: Smart Install Error
±10% extent of reference pressure? - Discharge temperature and the indoor [Execute the troubleshooting] Check the refrigerant leaks. Check the PCB Relay. - Fill up perfectly refrigerant after re-vacuum. Execute the related trouble- shooting. 10-19 Samsung Electronics... -
Page 74: Outdoor Olp Over Temperature Error (One Way Inverter Only)
The condition is too poor for air conditioner to operate Wait until OLP temperature is decreased Wait until OLP temperature is decreased Restart after power off Restart after power off Exchange the Outdoor PBA Exchanged the Compressor d h C 10 -20 Samsung Electronics... -
Page 75: Block Diagram
· BUZZER DRIVE ON,OFF TIMER · STEPPING MOTOR SELECT(UP/DOWN) - BLDAE CONTROL(H/V) TEMP/HUMI SELECT DC12V DC5V BEEP ON/OFF SELECT DISPLAY ON/OFF SELECT SMPS POWER BLOCK WPS MODE SELECT DC5V AP MODE SELECT DC12V DC15V AC230V AC INPUT Samsung Electronics 11-1... -
Page 76: Outdoor Unit
Download Comm. Main Sensor - Inv Control Main Inverter Current 4Way V/V Micom Micom Sensing Inverter Compressor Download ZCP OVP DC LINK Communi Comm. In - out cation Converter SMPS Filter POWER Reactor SMPS - PBA SMPS 11-2 Samsung Electronics... - Page 77 2) The fan motor of the indoor unit . Fan motor connector(CN72) is 1. Fan speed(high) doesn't run faulty 2. Continuous Operation 3) The power voltage between terminal #3-#5 of the . PBA is faulty connector(CN72) is 0V Samsung Electronics 11-3...
- Page 78 1) Normal : RED on, GRN blink, YEL o 2) Abnormal . F1,F2 wire wrong wiring Check the LED lamp display - All o check no power . Outdoor PBA is faulty - abnormal display : check error mode 11-4 Samsung Electronics...
-
Page 79: Reference Sheet
0.001341 0.10197 0.73756 4.1868 14.286 0.0056146 0.42693 3.088 1.163 0.27778 3.9683 0.0015596 0.11859 0.85778 0.29307 0.06999 0.252 3.9302x10 0.029885 0.21616 745.7 178.11 641.19 2,544.4 76.04 9.8067 2.3423 8.4322 33.462 0.013151 7.233 1.3558 0.32383 1.0658 4.6262 0.0018182 0.13826 Samsung Electronics 12-1... -
Page 80: Q & A For Non-Trouble
It occurs when the drain pump is plugged out or it is out of order. Check the power of the drain pump and the position of the drain hose, and when the pump is faulty, contact the drain pump manufacturer. Samsung Electronics do not manufacture drain pumps. So, we are not able to correct the drain pump problems. - Page 81 Also, the remote con- troller may mot work under intensive light from a 3-wave length lamp or a neon sign due to the EMI. In this case, take the remote controller closer to the receiver. Samsung Electronics 12-3...
- Page 82 There is a cost table. But, our service engineer needs to visit to total up the cost correctly. When you move in, make sure to contact Samsung Electronics Service Center or Authorized Service Agent in advance to streamline the process.
-
Page 83: Cleaning /Filter Change
Clean the Air lter with a vacuum cleaner or soft brush. If dust is too heavy, rinse it with running water. Insert the air lter back in its original position. Dry the Air lter in a ventilated area. it once a week. Samsung Electronics 12-5... -
Page 84: Installation
Electric and earth work shall meet the "Electric Facility Technology Standard" and the "Internal Wire Regulation" of the Electric Business Laws. ■ Inspection & Trial Run Upon completion of the tests, you shall make a trial run while you explain the main functions of the air conditioner to finish the installation. 12-6 Samsung Electronics... -
Page 85: Installation Diagram Of Indoor Unit And Outdoor Unit
3 way valve. And mount the service port cap to 3 way valve. Valve stem Stem cap 7) Check for gas leakage. (gas) - At this time, especially check for gas leakage from the 3 way valve's stem nuts, and from the service port cap. (liquid) Samsung Electronics 12-7... - Page 86 7) Close the cap of each valve. Relocation of the air conditioner entering. At this time, cover the valve of the outdoor unit and the other pipe using a cap or vinyl plug to avoid foreign material entering. 12-8 Samsung Electronics...
-
Page 87: Reference Sheet
12-7. Reference Sheet Index for Model Name 10th 11th 12th 13th 14th Project Capacity Sell Feature Series Color Export Unit Item 12Year Item Reference 3TH 4TH ITEM Item 13Year Export INVERTER H/P 14Year Export INVERTER C/O 15Year Export 16Year Export 17Year Export 18Year... - Page 88 China http://gspn2.samsungcsportal.com Asia & http://gspn1.samsungcsportal.com This Service Manual is a property of Samsung Electronics Co., Ltd. © Samsung Electronics Co., Ltd. November 2017 Any unauthorized use of Manual can be punished under applicable Code No. AC-00045K_1 International and/or domestic law.
Need help?
Do you have a question about the AR18NSPXBWKNEU and is the answer not in the manual?
Questions and answers