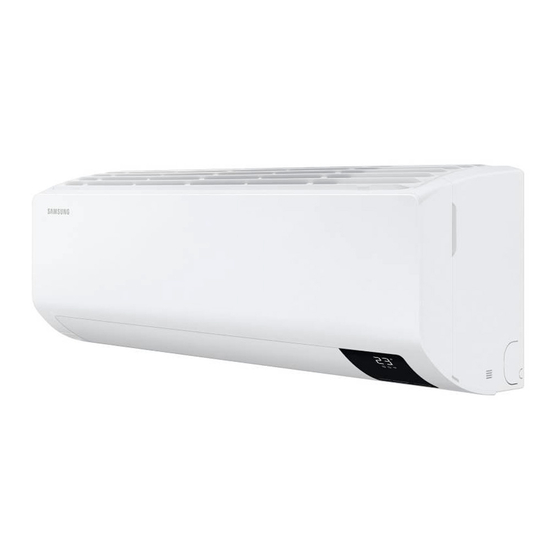
Samsung AR TSFY WKNCV Series Service Manual

Samsung AR TSFY WKNCV Series Service Manual

Indoor/outdoor unit
Table of Contents

Advertisement

AIR CONDITIONER
AR**TSFY*WKNCV
AR09TSF**WKXCV
AR12TSF**WKXCV
AC071RXADKG
AR18TSFACWKXCV
AR18TSFABWKXCV
AR24TSFYBWKXCV
AR**TSFA*WKNCV
AR18TSFYBWKXCV
AR24TSFACWKXCV
AR24TSFABWKXCV
SPLIT-TYPE AIRCONDITIONER
INDOOR UNIT
MODEL CODE
AR09TSFABWKNCV
AR12TSFABWKNCV
AR09TSFYBWKNCV
AR12TSFYBWKNCV
AR18TSFYBWKNCV
AR18TSFABWKNCV
AR24TSFYBWKNCV
AR24TSFABWKNCV
CONTENTS
1. Precautions
2.
3. Alignment and Adjustments
4. Disassembly and Reassembly
5. Assy Control
6. Wiring Diagram
7.
PCB Diagram
8. Operating Instructions
9. Troubleshooting
10. Block Diagram
11. Reference Sheet
OUTDOOR UNIT
AR09TSFACWKXCV
AR09TSFABWKXCV
AR12TSFACWKXCV
AR12TSFABWKXCV
AR09TSFYBWKXCV
AR12TSFYBWKXCV
AR18TSFYBWKXCV
AR18TSFACWKXCV
AR18TSFABWKXCV
AR24TSFYBWKXCV
AR24TSFACWKXCV
AR24TSFABWKXCV

Advertisement

Table of Contents
loading

Summary of Contents for Samsung AR TSFY WKNCV Series

  • Page 1 SPLIT-TYPE AIRCONDITIONER OUTDOOR UNIT INDOOR UNIT MODEL CODE AR09TSFABWKNCV AR09TSFACWKXCV AR12TSFABWKNCV AR09TSFABWKXCV AR09TSFYBWKNCV AR12TSFACWKXCV AR12TSFYBWKNCV AR12TSFABWKXCV AR18TSFYBWKNCV AR09TSFYBWKXCV AR18TSFABWKNCV AR12TSFYBWKXCV AR24TSFYBWKNCV AR18TSFYBWKXCV AR24TSFABWKNCV AR18TSFACWKXCV AR18TSFABWKXCV AR24TSFYBWKXCV AR24TSFACWKXCV AR24TSFABWKXCV AIR CONDITIONER CONTENTS 1. Precautions 3. Alignment and Adjustments AR**TSFY*WKNCV AR**TSFA*WKNCV 4. Disassembly and Reassembly 5.
  • Page 2: Table Of Contents

    Contents 1. Precautions 1-1 Installing the air conditioner 1-2 Power supply and circuit breaker 1-3 During operation 1-4 Disposing of the unit 1-4 Others 2. Product Specications 2-1 The Feature of Product 2-2 Product Specifications 2-3 The comparative specifications of product 2-4 Accessory and option specifications 3.
  • Page 3 Contents 8. Operating Instructions 8-1 Name of Each Part 8-2 Wireless Remote Control-Buttons and Display 9. Troubleshooting 9-1 Items to be checked First 9-2 Communication Error 9-2-1 Communication Error 9-2-2 Indoor temperature sensor Error 9-2-3 Indoor fan motor speed detecting error (BLDC fan) 9-2-4 Outdoor temperature sensor error 9-2-5 Outdoor Cond temperature sensor error 9-2-6 Outdoor Discharge temperature sensor error...
  • Page 4: Precautions

    1. Precautions 1-1 Installing the air conditioner • Uses should not install the air conditioner by themselves. Ask the dealer or authorized company to install the air conditioner except window-type air conditioner in U.S.A and Canada. • If you don't install the air conditioner properly, it may cause a fire, a water leakage or an electric shock. •...
  • Page 5: Disposing Of The Unit

    1-4 Disposing of the unit • Before the throwing out the air conditioner, remove the batteries from the remote control. • When you dispose of the air conditioner, consult your dealer. If pipes are removed incorrectly, refrigerant may blow out and cause air pollution. When it contacts with your skin, it can cause skin injury. •...
  • Page 6: Product Specications

    2. Product Specications 2-1 The Feature of Product Fast cooling If you want the strong and cool air, just select Fast function! It will get you the strongest air! Wind-Free Cooling Motion detection Use the motion detection function to make the air conditioner detect people and blow Easy Filter good’sleep function Smart Install...
  • Page 7 Unit Wall-mounted Wall-mounted Wall-mounted Wall-mounted Capacity T3 Cool Heat Power Input T3 Cool Heat Current T3 Cool Heat Dehumidifying Platform Cond Comp Code Code Expansion type charge Tube Drain hose Power Supply Climate Class IDU UT,T Weight Cooling Operation range Heating...
  • Page 8 Model AR09TSFYBWK/CV AR12TSFYBWK/CV AR18TSFYBWK/CV AR18TSFACWKXCV Rating Mode Unit Wall-mounted Wall-mounted Wall-mounted Wall-mounted T1 Cool Btu/h 9000 12000 18000 18000 Capacity T3 Cool Btu/h Heat Btu/h 11000 12000 21000 20600 T1 Cool 1630 1385 Power Input T3 Cool Heat 1850 1630 T1 Cool Current T3 Cool...
  • Page 9 Unit Wall-mounted Wall-mounted Wall-mounted Wall-mounted Capacity T3 Cool Heat Power Input T3 Cool Heat Current T3 Cool Heat Dehumidifying Platform 4by4 4by4 4by4 Cond Comp Code Code Expansion type charge Tube Drain hose Power Supply Climate Class IDU UT,T Weight Cooling Operation range...
  • Page 10 DEVELOPMENT MODEL Model AR09TSFACWKXCV AR09TSFABWK/CV AR12TSFACWKXCV AR12TSFABWK/CV Indoor Unit Design Outdoor Unit Indoor Unit Outdoor Unit Indoor Unit Outdoor Unit Indoor Unit Outdoor Unit Indoor Display DEVELOPMENT MODEL Model AR09TSFYBWK/CV AR12TSFYBWK/CV AR18TSFYBWK/CV AR18TSFACWKXCV Indoor Unit Design Outdoor Unit AC071RXADKG Indoor Unit Outdoor Unit Indoor Unit Outdoor Unit...
  • Page 11 DEVELOPMENT MODEL Model AR18TSFABWK/CV AR24TSFYBWK/CV AR24TSFACWKXCV AR24TSFABWK/CV Indoor Unit Design Outdoor Unit AC071RXADKG AC071RXADKG Indoor Unit Outdoor Unit Indoor Unit Outdoor Unit Indoor Unit Outdoor Unit Indoor Display...
  • Page 12 Item Descriptions Q’ty Indoor unit case Outdoor unit case...
  • Page 13: Alignment And Adjustments

    3. Alignment and Adjustments 3-1 Test Mode How to Approach Test Mode You can approach the test mode by pressing the on/off switch of indoor unit for 5 seconds. Test mode operation option After installing the air conditioner, check whether each subordinate is normally operated or not by operating the test mode.
  • Page 14: Display Error And Check Method

    3-2 Display Error and Check Method 3-2-1 Indoor Display Error and Check Mathod ERROR MODE TYPE DESCRIPTION INDOOR/ 7-SEG OUTDOOR C101, C102 Communication error C108 Set address error C121 Room TH sensor error C122, C123 INDOOR MID, INDOOR IN EVA-TH sensor error C140 Dust sensor error C142...
  • Page 15 3-2-2 Outdoor Display Error and Check Mathod ERROR MODE DESCRIPTION 7-SEG Power off /VDD NG Power on reset (1sec) Normal operation Abnormal communication (Indoor <-> Outdoor) IPM over current (O.C) error C464 Comp. strating error C461 EEPROM data error (no data) C470 C466 DC-Link voltage under / Over error...
  • Page 16: Setting Option Setup Method

    3-3 Setting Option Setup Method Ex) Option No. : Step 1 Enter the Option Setup mode. 1. Tack out the batteries of remote control. 2. Press the temperatur e button simultaneously and insert the battery again. 3. Make sure the remote control display shown as Step 2 Enter the Options Setup mode and select your options asscording to the following procedure.
  • Page 17 Method Display Press the button to set Cool mode. Setting option SEG5 Press the button the display panel to. Press the button repeatedly to select. … Setting option SEG6 Press the button the display panel to. Press the button repeatedly to select. …...
  • Page 18 Method Display Press the button to set Cool mode. Setting option SEG11 Press the button the display panel to. Press the button repeatedly to select. … Setting option SEG12 Press the button the display panel to. Press the button repeatedly to select. …...
  • Page 19 Method Display Press the button to set Cool mode. Setting option SEG17 Press the button the display panel to. … Press the button repeatedly to select. Setting option SEG18 Press the button the display panel to. … Press the button repeatedly to select. Press the button to set Cool mode.
  • Page 20: Disassembly And Reassembly

    4. Disassembly and Reassembly Necessary Tools Item Remark +SCREW DRIVER Q’ty 1 ea. To assembly and disassembly the screw MONKEY SPANNER Q’ty 1 ea. To assembly and disassembly the Fan motor and Compressor - SCREW DRIVER Q’ty 1 ea. To assembly and disassembly the screw...
  • Page 21: Indoor Unit

    4-1. Indoor Unit Parts Procedure Remark PANEL-FRONT 1) Stop the driving of air conditioner and shut off main power supply. 2) Detach FILTER PRE from the PANEL FRONT. in center and side area.
  • Page 22 Parts Procedure Remark PANEL-FRONT Caution: Assembly of Cover Panel after service end. - Piping and Drain Hose must be careful not to damage and progress must be done with both hands. the main frame before you push to assemble. Caution:...
  • Page 23 Parts Procedure Remark PANEL-FRONT in the center and side area. 7) To detach the PANEL FRONT from the main 8) To detach the PANEL FRONT from the main...
  • Page 24 Parts Procedure Remark PANEL-FRONT 9)Raise the PANEL FRONT upward as shown in CONTROL-IN 10)To open the CONTROL-IN, raise the side 11)To detach the CONTROLIN, unfasten a screw...
  • Page 25 Parts Procedure Remark CONTROL-IN 12)Separate Fan Motor wire as shown in Caution: When you separate the connector, pull 13)Separate Blade Motor wire as shown in Caution: When you separate the connector, pull 14)Cut off the Cable Tie tied up wires.
  • Page 26 Parts Procedure Remark CONTORL IN connectors before detaching CASE-CONTROL. Caution: When you separate the connector, pull 17) Put down of the HOLDER PIPE and push up...
  • Page 27 Parts Procedure Remark TRAY DRAIN 18) To detach the TRAY DRAIN from the main frame, pull the bottom of the TRAY DRAIN and 19) Pull out the Drain Hose.
  • Page 28 Parts Procedure Remark EVAPORATOR 21) To detach the HOLDER PIPE from the 22)Remove the HOLDER PIPE.
  • Page 29 Parts Procedure Remark EVAPORATOR side of the Fan Motor 27) Pull up the EVAPORATOR toward to you. 4-10...
  • Page 30 Parts Procedure Remark FAN MOTOR & CROSS FAN 30)Detach the COVER Motor. 32)Raise up the CROSS FAN of the left side and pull out from the Motor. 4-11...
  • Page 31: Outdoor Unit (N-Si)

    4-2. Outdoor Unit (N-SI) AR09TSF**WKXCV AR12TSF**WKXCV Parts Procedure Remark 1) Loosen each screws and detach the cabi Top cover. 2) Loosen screws of the cabi front and detach it. 4-12...
  • Page 32 Parts Procedure Remark 3) Remove the 4 Cond Bar from the holder of outdoor unit cabinet. * This process is supported by heating models only 4) Loosen screws from the Cabi Front Lh and detach it. Rh and detach it. 4-13...
  • Page 33 Parts Procedure Remark & picture on the right side. Motor screw is left-handed.) 2) Detach the Fan Propeller. the Motor. 4) Disconnect the wire between Ass’y Control Out and Motor. 4-14...
  • Page 34 Parts Procedure Remark Assy Control Out Pull the motor wire to allow sufficient space as shown on the right side and then remove the screw. 2) Detach several connectors from the Assy Control Out. 3) Detach several connectors from the PCB of Assy Control Out. 1) Release the refrigerant at first.
  • Page 35 Parts Procedure Remark Compressor 1) Loosen the nut and detach the Compressor Lead Wire. 2) Loosen the bolts at the bottom of right side. 4-16...
  • Page 36: Outdoor Unit (Q)

    4-3 Outdoor Unit (Q) AR18TSFYBWKXCV Parts Procedure Remark and detach it. 2) Loosen each screws and detach the Cabi Top Cover. cabi side Rh and detach it. 4-17...
  • Page 37 Parts Procedure Remark detach it and Remove the 4 Cond Bar from the holderof outdoor unit cabinet. 4-18...
  • Page 38 Parts Procedure Remark & screw is left-handed.) Motor 2) Detach the Fan Propeller. 4) Disconnect the wire between Assy Control Out and Motor. Motor 4-19...
  • Page 39 Parts Procedure Remark Assy Control Out on the right side and then remove the screw. 2) Detach several connectors from the Assy Control Out. 3) Detach several connectors from the PCB of Assy Control Out. 2) Loosen screw on both sides. 3) Disassemble the pipes in both inlet and outlet with welding torch.
  • Page 40 Parts Procedure Remark Compressor 1) Loosen the nut and detach the Compressor 2) Loosen the bolts at the bottom of 4-21...
  • Page 41: Outdoor Unit (P)

    4-4. Outdoor Unit (P) AR18TSFACWKXCV AR18TSFABWKXCV AR24TSFYBWKXCV Parts Procedure Remark Assy cover control Outdoor and indoor unit’s power cable and communication cable before disassembling. and remove. cable. communication ‘Ring’ cables from terminal 4-22...
  • Page 42 Parts Procedure Remark ASSY CABINET SIDE RH ASSY CABINET FRONT wire from Assy Control Out. 2) Separate Comp wire from each object. motor connector you have to cut the power disconnect BLDC motor connector when the power is on) Control out. 4-23...
  • Page 43 Parts Procedure Remark Fan propeller + Motor ASSY BRACKET MOTOR 3) Separate the pipe from the Entrance and Refrigerant inside the Compressor completely and remove the pipe with a 4-24...
  • Page 44: Outdoor Unit (Ub)

    4-5. Outdoor Unit (UB) AR24TSFACWKXCV AR24TSFABWKXCV Parts Procedure Remark Cabinet Front RH disassembly necessarily. 1) Remove the 2 screws from the Cabinet Front RH and separate it. Cabinet-Installation Front Part Cabinet-Installation Front Part and separate 4-25...
  • Page 45 Parts Procedure Remark Cabinet Rear RH 1) Pull out the sensor from the Cabinet Rear RH and separate it. each side of Cabinet Rear RH and separate Cabinet-Installation Remove the 1 screw from the Cabinet- Rear Part Screw Driver) 4-26...
  • Page 46 Parts Procedure Remark Cabinet Front LF Motor 1) Separate the Fan Propeller. 3) Separate the Motor Wire connector from 4-27...
  • Page 47 Parts Procedure Remark Control Out 1) Disconnect 6 Connecters From Ass’y Control Out. 3) Separate Ass’y Control Out. 4 Way Valve 1) First, discharge the refrigerant. 2) Remove the 2 screws which is 3) Separate the inlet and outlet pipes by welding torch.
  • Page 48 Parts Procedure Remark EEV Valve 1) Remove the 2 screws which is 2)Separate the inlet and outlet pipes by welding torch. Compressor 2) Separate the Felt Compressor. 3) Remove the 3 bolts from the bottom Condenser Connection Part each side of Condenser Connection Part and 4-29...
  • Page 49: Assy Control

    5. ASSY CONTROL 5-1 ASSY KIT (INDOOR UNIT) Model Code AR09TSFYBWKNCV AR12TSFYBWKNCV DB92-04845D AR18TSFYBWKNCV AR24TSFYBWKNCV AR09TSFACWKXCV AR09TSFABWKNCV AR12TSFACWKXCV AR12TSFABWKNCV DB92-04845U AR18TSFACWKXCV AR18TSFABWKNCV AR24TSFACWKXCV AR24TSFABWKNCV 5-1-1 DB92-04845...
  • Page 50 DB92-04845 NAME CODE CASE CONTROL-IN DB61-07432A PLATE CONTROL-LF DB61-07431A PLATE CONTROL-LOW DB61-07428A PLATE CONTROL-UP DB61-07429A PLATE CONTROL-SUB DB61-07427A HOLDER-WIRE DB61-05871A SCREW-TAPPING 6002-001163 SCREW-TAPPING 6002-000213 SCREW-SPECIAL 6009-001001 CABLE TIE 6501-001075 TERMINAL BLOCK_4P_CV DB37-00033B ASSY PCB DISPLAY_88_WIFI DB92-04833B SENSOR PHOTO DB32-00270A SENSOR TEMP DB32-00277A SENSOR HUMIDITY DB32-00272A...
  • Page 51: Assy Kit (Outdoor Unit)

    5-2 ASSY KIT (OUT DOOR UNIT) Model Code AR09TSFYBWKNCV AR12TSFYBWKNCV DB92-04842N AR09TSFABWKNCV AR12TSFABWKNCV AR09TSFACWKXCV DB92-04842P AR12TSFACWKXCV AR24TSFYBWKNCV DB92-04843H AR18TSFABWKNCV AR18TSFACWKXCV DB92-04843J AR24TSFACWKXCV DB92-04843M AR24TSFABWKNCV DB92-04843N AR18TSFYBWKNCV DB92-04849D 5-2-1 PF2 (N-SI)
  • Page 52 DB92-04842 NAME CODE ASSY-THERMAL GREASE 0205-000178 0.002 0.002 SCREW-MACHINE (TB) 6001-000722 SCREW-TAPPING (CLAMP 4EA) 6002-000234 SCREW-TAPPING (CLAMP 2EA, CASE 1EA) 6002-000239 SCREW-TAPPING (PBA) 6002-000630 SCREW-TAPPING (EARTH) 6009-001001 ASSY-SCREW MACHINE (H/S??) DB91-00933A HOLDER-WIRE CLAMP DB61-00250A CASE CONTROL LOW (WW, SI,Q-480) DB61-06722A COVER CONTROL OUT (WW, SI) DB63-04234A PLATE CONTROL(N-SI)
  • Page 53 5-2-2 PF3 (P)
  • Page 54 DB92-04843 NAME CODE ASSY-THERMAL GREASE 0205-000178 0.002 0.002 SCREW-MACHINE (TB) 6001-000722 SCREW-TAPPING 6002-000234 SCREW-TAPPING 6002-000239 SCREW-TAPPING 6002-000536 SCREW-TAPPING 6002-001306 SCREW-SPECIAL 6009-001001 ASSY-SCREW MACHINE DB91-00933A HOLDER-WIRE CLAMP DB61-00250A CASE CONTROL-UPPER DB61-04677A CASE CONTROL DB61-05917A PLATE CONTROL DB61-04698B CABLE TIE DB65-10088D SPRING ETC-SENSOR DB81-00635A LABEL DB98-34030A...
  • Page 55 5-2-3 PF3 (UB)
  • Page 56 NAME CODE DB92-04843M GREASE-SILICON 0205-000178 0.002 SCREW-MACHINE 6001-000722 SCREW-TAPPING 6002-000234 SCREW-TAPPING 6002-000239 SCREW-TAPPING 6002-000536 SCREW-TAPPING 6002-001306 SCREW-SPECIAL 6009-001001 SCREW-SPECIAL 6009-001001 COIL HARMONIC DB27-00043C TERMINAL BLOCK DB37-00036B HOLDER-WIRE CLAMP DB61-00250A SUPPORT-PCB DB61-05796A CASE CONTROL-OUT DB61-07081A PLATE CONTROL-MAIN DB61-07082B SEAL CUTT DB62-11637D 0.179 HEAT SINK DB62-13009A...
  • Page 57 5-2-4 PF3 (UB)
  • Page 58 NAME CODE DB92-04843N GREASE-SILICON 0205-000178 0.002 SCREW-MACHINE 6001-000722 SCREW-TAPPING 6002-000234 SCREW-TAPPING 6002-000239 SCREW-TAPPING 6002-000536 SCREW-TAPPING 6002-001306 SCREW-SPECIAL 6009-001001 SCREW-SPECIAL 6009-001001 COIL HARMONIC DB27-00043C TERMINAL BLOCK DB37-00036B HOLDER-WIRE CLAMP DB61-00250A SUPPORT-PCB DB61-05796A CASE CONTROL-OUT DB61-07081A PLATE CONTROL-MAIN DB61-07082B SEAL CUTT DB62-11637D 0.179 HEAT SINK DB62-13009A...
  • Page 59 5-2-5 PF2 (Q) 5-11...
  • Page 60 NAME CODE DB92-04849D ASSY-THERMAL GREASE 0205-000178 0.002 SCREW-MACHINE 6001-000722 SCREW-TAPPING 6002-000234 SCREW-TAPPING 6002-000239 SCREW-TAPPING 6002-000630 SCREW-SPECIAL 6009-001001 ASSY-SCREW MACHINE DB91-00933A HOLDER-WIRE CLAMP DB61-00250A CASE CONTROL LOW DB61-06722A COVER CONTROL OUT DB63-04234A PLATE CONTROL DB61-04690B SPRING DB81-00635A SEAL DB62-11637T 0.153 SUPPORT-PCB DB61-04398A SCREW-TAPPING 6002-000527...
  • Page 61: Wiring Diagram

    6. Wiring Diagram 6-1 Indoor Unit Diagram code :DB68-08680A (All Models) CODE : DB68-08680A-02...
  • Page 62: Outdoor Unit

    6-2 Outdoor Unit Diagram code :DB68-08682A AR09TSFYBWKXCV AR09TSFABWKXCV AR09TSFACWKXCV AR18TSFYBWKXCV AR12TSFYBWKXCV AR12TSFABWKXCV AR12TSFACWKXCV CODE : DB68-08682A-02...
  • Page 63 Diagram code :DB68-08687A AR24TSFYBWKXCV AR18TSFACWKXCV AR24TSFABWKXCV AR18TSFABWKXCV AR24TSFACWKXCV CODE NO : DB68-08687A-01...
  • Page 64: Pcb Diagram

    7. PCB Diagram 7-1 Indoor Main PCB DB92-04839 CN810 CN800 CN801 CN320 CN390 CN340 CN100 CN900 CNP100 CN230...
  • Page 65: Outdoor Pcb Inverter

    7-2 Outdoor PCB Inverter DB92-04837 CN210 CN320 CNP004 CNP031 CNP002 CN380 CN700 CNP003 CN470 CNP001 CN800 CN810 CNP901 CNP402 CNP051/05 CN551...
  • Page 66 DB92-04838 CNP001 CNP002 CN901 CNP004 CN470 CN810 CN700 CN800 CNP031 CNP003 CN380 CN210 CN320 CNP041/042/043 CNP051 / 052 CN551...
  • Page 67: Display Pcb

    7-3 DISPLAY PCB DB92-04833...
  • Page 68: Wire Connecting The Indoor Unit Terminal Blocks

    7-4 Wire connecting the indoor unit terminal blocks 1. Terminal press of Ring terminal shall be set facing up before connecting wire. 2. There shall be no empty space between Ring terminal and Screw after Clamp. If not, there exists a possibility of fire which can be caused by electric heat in the connecting part.
  • Page 69: Operating Instructions

    8. Operating Instructions 8-1 Name of Each Part 8-1-1 Indoor Unit The design and shape are subject to change according to the model. Main Parts AR**TSFA*WKNCV 01 Air intake 05 Air eft and right) 02 Air ter 06 P te c r receiver 03 Wind-Fr 07 R...
  • Page 70 Display 01 Temperature indicator (numeric) Filter reset indicator ( Electricity consumption indicator (numeric) Auto clean indicator ( Defrost indicator ( 02 AI Auto indicator 03 Timer indicator good'sleep indicator 03 04 04 Wi-Fi indicator...
  • Page 71: Wireless Remote Control-Buttons And Display

    8-2 Wireless Remote control-Buttons and Display DB96-24901B 01 Set temperature indicator 02 Timer option indicator 03 Operation mode indicator 04 Options indicator 05 Low battery indicator 06 Transmit indicator 07 Fan speed indicator 08 Wind-Free indicator 09 Vertical air swing indicator 10 Horizontal air swing indicator 11 Power button 12 Temperature button...
  • Page 72 DB96-24901G 01 Set temperature indicator 02 Timer option indicator 03 Operation mode indicator 04 Options indicator 05 Low battery indicator 06 Transmit indicator 07 Fan speed indicator 08 Vertical air swing indicator 09 Horizontal air swing indicator 10 Power button 11 Temperature button 12 Timer button 13 Fan speed button...
  • Page 73: Troubleshooting

    9. Troubleshooting The input voltage should be rating voltage ±10% range.The air conditioner may not operate properly if the voltage is out of this range. Is the line cable linking the indoor unit and the outdoor unit linked properly? The indoor unit and the outdoor unit shall be linked by 5 cables.
  • Page 74: Communication Error

    9-2 Communication Error 9-2-1 Communication Error Indoor display 7-SEG DISPLAY DESCRIPTION C101/C102 Communication error(Indoor<->outdoor) Outdoor display 1min. Time out Comm. Abnormal Communication LED ON LED OFF LED BLINKING 1. Checklist : 1) Is the cable between the indoor unit and outdoor unit connected correctly? 2) Isn’t the power cable and communication cable cross? 2.
  • Page 75: Indoor Temperature Sensor Error

    9-2-2 Indoor temperature sensor Error Indoor display 7-SEG DISPLAY DESCRIPTION C121 Indoor room temp sensor error LED ON LED OFF LED BLINKING 1. Checklist : 1) Is the indoor units temperature sensor connected correctly? 2) Is the sensor placed correctly? 3) Does the both terminal of sensor satisfy the resistance value in accordance with temperature? 2.
  • Page 76: Indoor Fan Motor Speed Detecting Error (Bldc Fan)

    9-2-3 Indoor fan motor speed detecting error (BLDC fan) Indoor display 7-SEG DISPLAY DESCRIPTION C154 Indoor fan error LED ON LED OFF LED BLINKING 1. Checklist : 1) Is the indoor units fan motor properly connected with the connector(CN72)? 2) Is the AC voltage correct? 2.
  • Page 77: Outdoor Temperature Sensor Error

    9-2-4 Outdoor temperature sensor error Indoor display 7-SEG DISPLAY DESCRIPTION C221 Outdoor temperature sensor error Outdoor display Outdoor temperature sensor error LED ON LED OFF LED BLINKING 1. Checklist : 1) Is the sensor connected correctly? 2) Is the sensor placed correctly? 3) Does the both terminal of sensor satisfy the resistance value in accordance with temperature? 4) Is the resistance value of sensor connection pull-up correct? 2.
  • Page 78: Outdoor Cond Temperature Sensor Error

    9-2-5 Outdoor Cond temperature sensor error Indoor display 7-SEG DISPLAY DESCRIPTION C231 Outdoor Cond temperature sensor error Outdoor display Outdoor Cond temperature sensor error LED ON LED OFF LED BLINKING 1. Checklist : 1) Is the sensor connected correctly? 2) Is the sensor placed correctly? 3) Does the both terminal of sensor satisfy the resistance value in accordance with temperature? 4) Is the resistance value of sensor connection pull-up correct? 2.
  • Page 79: Outdoor Discharge Temperature Sensor Error

    9-2-6 Outdoor Discharge temperature sensor error Indoor display 7-SEG DISPLAY DESCRIPTION C251 Outdoor Discharge temperature sensor error Outdoor display Outdoor Discharge temperature sensor error LED ON LED OFF LED BLINKING 1. Checklist : 1) Is the sensor connected correctly? 2) Is the sensor placed correctly? 3) Does the both terminal of sensor satisfy the resistance value in accordance with temperature? 4) Is the resistance value of sensor connection pull-up correct? 2.
  • Page 80: Operation Condition Secession Error

    9-2-7 Operation condition secession error Indoor display 7-SEG DISPLAY DESCRIPTION C440 Prohibit Operation Condition Error (Heating) C441 Prohibit Operation Condition Error (Cooling) Outdoor display Operation condition secession LED ON LED OFF LED BLINKING 1. Checklist : 1) Check the temperature around the outdoor unit. 2.
  • Page 81: Eeprom Error/Otp Error

    9-2-8 EEPROM error / OTP error Indoor display 7-SEG DISPLAY DESCRIPTION C470 EEPROM Data Error (no data) OTP errorEEPROM Data Error C471 (Main Micom Inv Micom) Outdoor display EEPROM Data Error (no data) OTP errorEEPROM Data Error (Main MicomInv Micom) LED ON LED OFF LED BLINKING...
  • Page 82: Outdoor Fan Motor Error

    9-2-9 Outdoor Fan motor error Indoor display 7-SEG DISPLAY DESCRIPTION C458 Outdoor fan error Outdoor display Outdoor fan error LED ON LED OFF LED BLINKING 1. Checklist : 1) Are the input power voltage and the power connection correct? 2) Is the motor wire connected to the outdoor PBA correctly? 3) Is there no assembly error or non-assembly in the terminal of motor wire connector? 4) Is there no obstacle at the surrounding of motor and propeller? 2.
  • Page 83: Compressor Starting Error

    9-2-10 Compressor starting error Indoor display 7-SEG DISPLAY DESCRIPTION C461 Comp starting error Outdoor display Comp starting error LED ON LED OFF LED BLINKING 1. Checklist : 1) Is the connection of cable for the compressor? 2) Is the compressor wire is connected clockwise? U(RED)-V(BLU)-W(YEL) 3) Is the interphase resistance of compressor normal? 2.
  • Page 84: Compressor Wire Missing Error/Rotation Error

    9-2-11 Compressor wire missing error/rotation error Indoor display 7-SEG DISPLAY DESCRIPTION C467 Compressor wire missing errorr/rotation error Outdoor display Compressor wire missing error/rotation error LED ON LED OFF LED BLINKING 1. Checklist : 1) Is the connection of cable for the compressor? 2) Is the compressor wire is connected clockwise? U(RED)-V(BLU)-W(YEL) 3) Is the interphase resistance of compressor normal? 2.
  • Page 85: Current Sensor Error/Input Current Sensor Error

    10-2-12 Current sensor error/Input current sensor error Indoor display 7-SEG DISPLAY DESCRIPTION C462 AC Input I_Limit Trip Error Outdoor display Current sensor error Input current sensor error LED ON LED OFF LED BLINKING 1. Checklist : 1) Is the PFC Shunt(“A”) resistance value correct? Check the resistor is opened 2) Is the IPM Shunt(“B”) resistance value correct? Check the resistor is opened 3) Is there no short or open around “C”? 2.
  • Page 86: Over Current) Error

    9-2-13 O.C(Over Current) error Indoor display 7-SEG DISPLAY DESCRIPTION C464 IPM Over Current(O.C) Error Outdoor display Current sensor error LED ON LED OFF LED BLINKING 1. Checklist : 1) Is the IPM Shunt resistance value correct? Check the resistor is opened 2) Is the condition of surrounding temperature abnormal overload? 3) Is there any problem as like the temperature sensor separation or measurement value error? 4) Is the interphase resistance of compressor normal?
  • Page 87 Is the position of Correct the sensor position or temperature sensor and sensing exchange the sensor value normal? Is the compressor body Exchange the Outdoor PBA and interphase resistance insulated? Exchange the compressor 9-15...
  • Page 88: No Power Outdoor (Initial Diagnosis) (Not Displayed)

    9-2-14 No power outdoor (Initial Diagnosis) (Not displayed) 1. Checklist : 1) Is input power normal? 2) Is AC power linked correctly? (L,N,E) 3) Is mis-wiring between communication wire and Power wire? 4) Is mis-wiring between Main PBA and SMPS PBA wire? 5) Is input voltage of SMPS AC in Main PBA (CN150) normal? 6) Is the voltage of SMPS DC in Main PBA (CN151,CN152) normal? 2.
  • Page 89: When The Up/Down, Left/Right, Grill Louver Motor Does Not Operate

    9-2-15 When the Up/Down, Left/Right, Grill louver motor does not operate (Initial Diagnosis) (Not displayed) 1. Checklist : 1) Is the input power voltage normal? 2) Is the Up/Down louver motor properly connected with the connector? (CN61, CN62, CN63) 2. Troubleshooting procedure Unplug the power cord and plug it after 30seconds later.
  • Page 90: When The Remote Control Is Not Receiving

    9-2-16 When the remote control is not receiving 1. Checklist : 1) Check if the connector was normally assembled. 2) Check the battery in remote control 3) All the lights out and check again : Change electronic typed to a rescent light 4) Put the set in operation and check the voltage of display PBA 5) Replace the display PBA 2.
  • Page 91: Smart Install Error

    9-2-17 Smart Install error 1. Checklist : 1) Check the leakage region.(Use leakage detection liquid or soapy water) 2) When leakage region is found from service valve and piping connection re nut part : After the related measures to check the refrigerant supplements and operation. 3) If the leakage region is pipe welding part : Weld leakage region after refrigerant gas release.(Brass parts should only apply) 4) If the leakage region is surface area (Heat exchanger or pipe welding region is not) : Replace parts.
  • Page 92: Outdoor Olp Over Temperature Error (One Way Inverter Only)

    9-2-18 Outdoor OLP over temperature error (One way Inverter Only) Indoor display DESCRIPTION No display about the outdoor condition Outdoor display C463 IPM Over Current(O.C) Error LED ON LED OFF LED BLINKING 1. Checklist : 1) Is the sensor placed correctly? 2) Check the service valve is closed 3) Check the compressor locking or gas leak 2.
  • Page 93: Block Diagram

    10. Block Diagram 10-1 Indoor unit [INDOOR] WIRED REMOCON MAIN PBA OUT MODULE MICOM(TMPM3HPFDFG) SENSOR CAP ZERO ROOM SENSOR WiFi MODULE(OPTION) EMI FILTER HUMIDITY SENSOR DISPLAY EVA SENSOR REMOCON RECEIVER BLDC MOTOR DETECT SENSOR SMPS DETECT DC LOAD CONTROL MAIN DC POER (15V,12V,5V) STEP MOTOR(H/V) 485 COMM.
  • Page 94: Outdoor Unit

    10-2 Outdoor unit INVERTER BLOCK MAIN BLOCK SENSOR EEV1 DOWNLOAD MAIN CURRENT INVERTER MICOM SENSING UART COMM MICOM 4WAY V/V COMPRESSOR SMPS DRED HEATER SPEED OTN OPTION HIGH-PRESSURE INDOOR EEPROM 485 COMM SWITCH CURRENT CAPACITOR SENSING POWER PFCM FILTER RAC ONLY 10-2...
  • Page 95 10-2-1 Pre-inspection Notices Check if you pulled out the AC power plug when you eliminate the PCB or front panel. Don’t hold the PCB side not impose excessive force on it to eliminate the PCB. Don’t pull the lead wire but hold the whole housing to connect or disconnect a connector to the PCB. power off.
  • Page 96 10-2-4 Outdoor detailed inspection procedure Procedure Inspection Method Cause Plug out and pull the PCB • Over current out of the control box. Check • AC part and pattern short the PCB fuse (Wait 3 minutes of Outdoor PBA after power off) 1) Is the Compressor wire connected •...
  • Page 97: Reference Sheet

    11. Reference Sheet 11-1 Low Refrigerant Pressure Distribution Note : Please measure the refrigerant pressure after the air conditioner operates on testing cooling mode during more than 10 minutes. Indoor Temp. Variation : 68°F ~ 89.6°F Outdoor Temp. Variation : 23°F ~ 113°F 89.6°F Indoor Temperature 84.2°F...
  • Page 98: Q & A For Non-Trouble

    11-3 Q & A for Non-trouble Classication Class Description Cooling The cooling is weak. When it is hot outside, its cooling capacity decreases due to the increase of the ambient tem- The cooling is good generally. But, it gets weak when it is considerably hot. cooling capability.
  • Page 99 Classication Class Description Smells Whenever the air conditioner is turned on, it stinks. air conditioner is turned on, other smell sources are sucked into the air conditioner and get of them. Whenever the air conditioner is turned on, it smells sour. Whenever the air conditioner is turned on, it smells musty.
  • Page 100 Classication Class Description process. Is it possible to install the outdoor unit outside? It is possible to install it at a designated place in the apartment or on the rooftop installed outside. What can be done to install the outdoor unit facing the road because it is a com- mercial building? to the streets of commercial or residential areas shall bel installed higher than 2 m What about installing a windscreen during installation not to blow hot air directly...
  • Page 101: Cleaning /Filter Change

    11-4 Cleaning /Filter Change Auto clean function Activating Auto clean If the air conditioner is off, Auto clean starts immediately. If the air conditioner is running, Auto clean starts as soon as the air conditioner turns off. NOTE • Select Clean. •...
  • Page 102 Cleaning the outside of the indoor unit WARNING • Soft brush Water entering the unit may result in electric shock or fire that Tepid damp cloth CAUTION • Do not use an alkaline detergent to clean the indoor unit display. •...
  • Page 103 5 Reinstall the filter. In operation Select Filter Reset. CAUTION • Take care not to damage the filter during cleaning. • • Cleaning the Wind-Free panel 2 Hold and pull both sides of the Wind-Free panel until it comes free from the air conditioner. 6 After inserting the Wind-Free panel, press the top 4 places and the bottom 3 places by hand so that there is no gap to the panel.
  • Page 104: Installation

    11-5 Installation 11-5-1 Before Installation Keep the air conditioner outlet and inlet free from its surroundings.In case of installation, keep possible. 11-5-2 Installation Procedure position. on the pipe surface for the leak test. 11-8...
  • Page 105: Installation Diagram Of Indoor Unit And Outdoor Unit

    11-6 Installation Diagram of Indoor Unit and Outdoor Unit 11-6-1 Air-Purge Procedure 1) Connect each assembly pipe to the appropriate valve on Indoor unit Outdoor unit the outdoo Gas pipe side Liquid pipe side 2) Connect the charging hose of low pressure side of manifold gauge to the packed valve having a service port (3/8"...
  • Page 106 11-6-2 "Pump down" Procedure Pump down will be carried out when an evaporator is replaced or when the unit is relocated in another area. 1) Remove the caps from the 3 way valve and the 3 way valve. 2) Turn the 3 way valve clockwise to close and 3 way Valve connect a pressure gauge (low pressure side) to the service valve, and open the 3 way valve...
  • Page 107: Reference Sheet

    11-7. Reference Sheet Index for Model Name 10th 11th 12th 13th 14th Feature Export Item Item Reference Item Item Export INVERTER HP R410A Export Export Export Item Item Item Wind-Free GEO Wind GEO … none Division Sinkeolreo code Division Series Project Color Name Remark...
  • Page 108 GSPN (GLOBAL SERVICE PARTNER NETWORK) Area Web Site North America http://gspn3.samsungcsportal.com Latin America http://gspn3.samsungcsportal.com http://gspn1.samsungcsportal.com Europe http://gspn1.samsungcsportal.com http://china.samsungportal.com China http://gspn2.samsungcsportal.com Asia Middleeast & Africa http://gspn1.samsungcsportal.com...

Table of Contents