Tempur-Pedic EASE 3.0 Manual. Remote Pairing. Adjustable Base
- Owner's manual (56 pages)
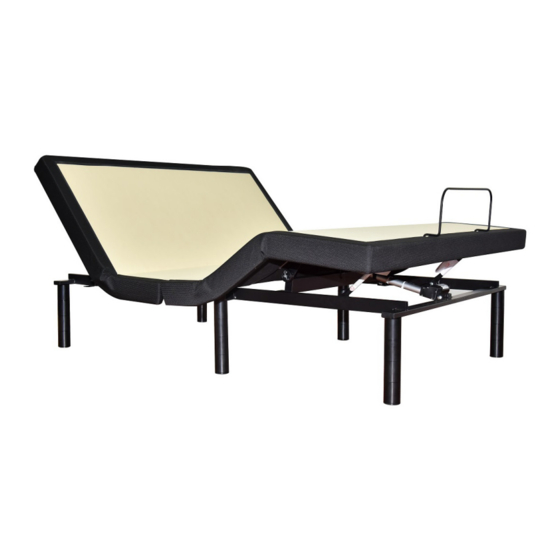
Advertisement
- 1 Safety precautions and usage statements
- 2 Parts list
- 3 Base and remote overview
- 4 Quick reference guide
- 5 Installation guide
- 6 Remote control
- 7 Connecting strap (optional)
- 8 Syncing two bases (optional)
- 9 Headboard bracket installation guide (optional)
- 10 Emergency battery backup
- 11 Troubleshooting
- 12 Warranty information
- 13 Documents / Resources
Safety precautions and usage statements
Attention: Important Safety Disclaimers
Read all instructions before using your EASE®.
SAVE THESE INSTRUCTIONS.
To reduce the risk of shock, burns, fire or injury:Always unplug the base from the electrical outlet before servicing any part of the base. To reduce risk of electric shock, unplug the base before cleaning. To safely disconnect, ensure the base is in a flat position with all motors off, and unplug from power source.
Keep the power cord away from heated surfaces. Never operate the base when the air openings are blocked. Keep air openings free of lint, hair and the like. Do not drop or insert any object into any opening.
Discontinue use of the bed base and contact a qualified service center if: it has a damaged cord or plug, is not working properly, or has been dropped into water.
Only use this bed base for its intended use as described in this manual. Do not use accessories/attachments that are not recommended by the manufacturer.
Close supervision is required when the bed base is used by or near children, convalescents or disabled persons.
Outlet Safety:
For optimal safety and operation, plug bed base into a surge protector (not included).
The bed base should only be plugged directly into a wall outlet or surge protector (recommended). Improper connection of the equipment can result in the risk of electrical shock, electrical fire or faulty operation of this bed base. If the plug does not fit your outlet, contact a qualified electrician to install a suitable outlet. Unauthorized modification or failure to use a wall outlet or surge protector could void the electrical portion of your warranty.
 Warranty Warning:
Do not open or tamper with control box, motors, or remote (with the exception of battery compartments). The warranty will be void if the internal workings of these components are tampered with. For complete warranty information refer to the warranty information section.
In-Home Use and Hospital Disclaimer:
The EASE® bed base is designed solely for in-home use. This base was not designed as a hospital bed and is not designed to meet hospital standards. Do not use this base with TENT TYPE oxygen therapy equipment or near explosive gases.
Pets and Small Children:
Children and pets can be crushed or killed if they become entrapped in moving parts of the bed. Before you reposition the base, check to be sure children and small pets are not near or under the base. Do not teach children to operate the remote. Immediately dispose of all packaging materials as they may pose a smothering risk to small children and pets.
Safety Features:
Manual operation – If something gets caught in the platform when flattened, you can manually raise the platform up by lifting at both the head and foot to relieve pressure and allow for release.
Child-lockout – This remote control is programmed with a childlock safety feature. Information on activation and deactivation of this feature can be found on the Remote Control page(s) and on the back of your remote control.
Emergency stop – Stop the motion of the platform by pressing any button on the remote control or by pushing the button on the Battery Backup Box located underneath the base.
Power outage – Use the "Emergency Battery Backup Box" as a temporary power source to get the base to a desired position. Instructions on how to operate the Battery Backup Box are on the Emergency Battery Backup page(s).
Power Ratings:
INPUT: AC 100–240V 50/60 HZ 1.5A
OUTPUT: DC 29V 1.8A
WATTS: 52.2W
Product Ratings:
The lift motors are not designed to operate continuously for more than two [2] minutes in an eighteen [18] minute time period or approximately 10% duty cycle. Attempting to circumvent or exceed this rating will shorten the life expectancy of the product and may void the warranty.
Weight Limits:
The recommended weight limits on the EASE® are: Twin / Twin Long / Full / Queen / King / Cal King / Cal King Split: 650 pounds
Maximum weight the bed can support per person is 250 pounds with the weight evenly distributed across the head and foot sections. This product is not designed to support or lift this amount of weight in the head or foot sections alone. NOTE: Exceeding the recommended weight restrictions could damage your EASE® and void your warranty. For best performance, you should enter and exit the EASE® while it is in the flat or fully lowered position.
EASE® fits easily inside bed frames, furniture beds and platform beds that are certified to hold a minimum of 850 pounds. If using this adjustable base without the legs and placing directly on a bed frame or platform bed, cross-bed supports (slats) are strongly recommended to ensure EASE® maintains stability during operation.
Exceeding this weight restriction could damage the bed and/or cause injury and will void the warranty.
Acoustics:
In normal base operation the wheels, which allow the bed to maintain its distance from the wall, will make contact with the steel platform supports of the base creating a contact noise. When entering, exiting or shifting weight on the base, this contact noise may be audible as the wheels make contact. This is normal.
Fabric Care:
To prolong the life of your fabric, protect from direct sunlight whenever possible. For spot cleaning, wipe area with a light damp sponge or vacuum with a soft brush attachment to remove particles. Keep at a minimum of 30cm (12 inches) away from direct heat sources.
For deeper cleaning, blot liquid spills with a clean dry cloth. Wipe with a clean cloth dampened with warm water. Do not wet excessively. A soft bristle brush may be used to remove ingrained soil. Avoid scratching by gentle brushing. Wipe with a clean cloth dampened with warm water to remove residues after brushing. Dry in shade away from direct heat.
If persistent marks remain visible after cleaning, seek professional advice.
SAVE THESE INSTRUCTIONS.
FCC Compliance:NOTE: This equipment has been tested and found to comply with the limits for a Class B digital device, pursuant to part 15 of the FCC Rules. These limits are designed to provide reasonable protection against harmful interference in a residential installation. This equipment generates, uses and can radiate radio frequency energy and, if not installed and used in accordance with the instructions, may cause harmful interference to radio communications. However, there is no guarantee that interference will not occur in a particular installation. If this equipment does cause harmful interference to radio or television reception, which can be determined by turning the equipment off and on, the user is encouraged to try to correct the interference by one or more of the following measures:
- Reorient or relocate the receiving antenna.
- Increase the separation between the equipment and receiver.
- Connect the equipment into an outlet on a circuit different from that to which the receiver is connected.
- Consult the dealer or an experienced radio/TV technician for help.
Parts list
Before discarding the packing materials, ensure all the parts are accounted for.
All electronics and components that need to be installed are located in boxes under the base or attached to the frame.
- Wireless Remote Control (1)
AAA Batteries (3)

- Mattress Retainer Bar (1)*

- Legs (6)

- Power Cord (1)

- Power Supply (1)

- Battery Backup Strip **
(9 Volt batteries not included)

- Connecting Strap ↕*

- Sync Cord ↕


Miscellaneous Parts (not included):
- Surge Protector (1)
- 9 Volt Batteries (2)
* These items are attached to the base for shipping purposes. Carefully remove from base and set aside.
** Leave connected to the Power Supply.
↕ Only included in Twin, Twin Long, and Cal King Split
Base and remote overview
Actual product design may vary.

- Head Motor
- Control Box
- Foot Motor

- Lifts and lowers Head portion of the base
- Lifts and lowers Foot portion of the base
- Lowers head and foot portions of the base to FLAT preset position
- Zero G adjusts your legs to relieve pressure off the lower back
Quick reference guide
Not to scale. For illustration purposes only. Read all instructions before beginning installation.
CONTROL BOX OVERVIEW


ELECTRONICS OVERVIEW


Installation guide
Always use two people when setting up the base.
- Place the bed base box in a desired location with the bottom of the box facing up.
Remove the binding straps and packing materials, making sure not to puncture the box with any sharp objects. - Remove the bed base from the box. Unfold the bed making sure to keep the bottom of the bed facing upwards.


- Legs are shipped fully assembled. Alternative heights in 3" increments can be achieved by removing leg segments.
To install the legs, thread the leg into frame, and tighten by hand.
Do not over tighten.


- It is recommended to leave the battery backup strap attached to the power supply for use when needed. 2 9V batteries (not included) will be required for its use.

- Uncoil input Power Cord (connected to Control Box's power port) and plug into Power Supply.

- Uncoil the Power Cord and connect to the Power Supply. Place Power Supply on the ground and extend from the base. Ensure that the Power Supply and all attached cords are directed toward the desired surge protector.

- Carefully flip the base over on to its legs. Important: Two people are required to move the bed base. Do not drag across the floor. Do not rest frame on its side, excessive pressure may damage the legs.
- Plug the Power Cord into a power source. A surge protector is recommended.
- Ensure that batteries are correctly installed in the remote. Quickly test remote functions to verify proper setup before placing mattress on base. Return the base to a FLAT position before placing the mattress on top.
- To install the mattress retainer bar, insert each end of the bar into the holes at the foot of the platform.


Setup is now complete! Test all functions on remote.

Remote control
Remote Control arrives paired to the adjustable base. Three (3) AAA batteries are required to operate the remote.

- HEAD UP button
- HEAD DOWN button
- FOOT UP button
- FOOT DOWN button
- Bed FLAT button
- Zero G

For your safety, read the owner's manual carefully and completely before operating this product. Electric shock may occur if electrical components are not installed or operated according to these guidelines.
ADJUST
")
Head Position Adjustments (A, B)
Use to raise and lower the head section of your adjustable base.
")
Foot Position Adjustments (C, D)
Use to raise and lower the foot section of your adjustable base.
")
Bed FLAT Button (E)
Press down and hold for three (3) seconds to return bed to flat position.
")
Zero Gravity (F)
Use to adjust your legs to relieve pressure off the lower back. For optimal performance, please return the bed to the flat position prior to selecting the Zero Gravity preset position.
Remote Pairing
The original remote that comes in the box is already paired to the adjustable base. No further action is required. In the event that the remote is not paired with the base, follow the steps below.
- Remove rear cover of the remote control by sliding it down to expose the PAIR button. Unplug the Power Cord from your power outlet. Wait 1 minute, then plug it back in to your power outlet. Perform Step 2 within 10 seconds, while the control box light is flashing.

- Press and hold the PAIR button on the back of the remote. The PAIR button will illuminate and start to flash. When the PAIR button stops flashing, the LED light on the control box will stop flashing.

- Test all remote functions. If the remote buttons do not impact the adjustable base movements, please repeat the process again or call customer service: U.S. 1-800-499-1965 | Canada 1-800- 268-4414


Child Lock Feature
Activate Child Lock
Press and hold the HEAD UP and FOOT UP buttons together for 3 seconds until the remote backlight flashes twice.
The remote is now in Child Lock. Pressing any buttons while in Child Lock will yield no movement to your adjustable base.

Deactivate Child Lock
Press and hold the HEAD DOWN and FOOT DOWN buttons together for three (3) seconds, then hold HEAD UP and FOOT UP for three (3) seconds until the remote backlight flashes twice.
The remote is no longer in Child Lock. The remote and adjustable base will work normally.


Connecting strap (optional)
If any split setup is being installed, plastic Connecting Straps are provided (one per base) to secure the bases together.
- With the bases in their desired location, slightly loosen both legs to allow the strap to fit on the leg bolt, between the leg washer and frame.
 Step 1")
- Slide side (a) of the Connecting Strap onto leg bolt. Swing the strap and connect side (b) to the leg bolt. Secure the strap by shifting to the left.
 Step 2")
- Re-tighten legs. Do not over tighten. Use the remaining strap and repeat on other end of the base.
 Step 1")
 Step 2")
Syncing two bases (optional)
A Sync Cord is included with the base. Not available on Queen, Full or King/Cal King size bases.
The Sync Cord connects the two control boxes to a single remote for the synchronization of two bases.
- Unplug bases from power source.
- Connect the Sync Cord to the Multifunction port of each Control Box.
- Plug bases back into the power source.
- Check to ensure all cords are securely attached. Both remotes will now operate both bases simultaneously.
")
The system is now linked. Buttons pressed on either remote will control both bases simultaneously.
PERFORMANCE NOTES
If bases become mismatched, pressing the FLAT button will resync the mechanical positions.
Headboard bracket installation guide (optional)
Headboard Brackets are an optional accessory and are not included.
A hex key is included with the accessory kit to complete installation.
- Align the hole in the bracket to the brass sleeve into which the leg threads. Hold the bracket in place and screw the leg into the base until it is snug. DO NOT OVERTIGHTEN. Too much force may cause the leg to spin freely.
- Align the tab with the hole in the frame (located towards the foot of the base) and use a short bolt, washer and wingnut to secure the bracket. Make sure the bolt is tight.
 Step 1")
- Measure the distance between the mounting holes on the headboard and install the T-Bracket to accommodate the headboard.
- To install the T-Bracket, slide the T-Bracket through the end of the headboard bracket. Align the flat side of the T-Bracket plate to the mounting holes on the headboard.
- Secure T-Bracket in place by inserting two short screws through top of bracket. Use hex key to tighten screws.
 Step 2")
 Step 3")
- Connect your headboard to the attachment plate using the remaining long screws or hardware that came with your headboard. The heads of the bolts will face outward. Use hex key to tighten bolts.
 Step 4")
 Step 1")
 Step 2")
 Step 3")
 Step 4")
Emergency battery backup
Two (2) 9 Volt batteries are required to operate the power down feature and are NOT included.
- Disconnect the Power Supply from the input power cord.
- Connect the Battery Backup Strap to the (2) Alkaline 9 Volt batteries. Do not mix brand name Batteries.

- Connect the end of the Battery Backup Strap to the input power cord that is attached to the control box.

Note: Detach the Battery Backup Strap after the emergency is over, as the system will continue to draw power from the batteries even if not in use. - Use the remote control to lower the base.


Troubleshooting
If one or more functions on the bed base have stopped operating:
ADJUSTABLE BASE
- Check under the bed base to verify that the wired connections are secure and that there are no cords or bedding obstructing the movement of the base.
- Check to ensure the blue LED light is illuminated on the control box. If there is no light, verify that the input and power cords are properly connected.
- Unplug the base for 1 minute to reset the electronic components.
- Plug bed base into a different electrical outlet, or test current outlet with another working appliance (a grounded, electrical surge protector is recommended).
REMOTE CONTROL
- Ensure that your remote batteries are properly installed or do not need replacing.
- Ensure Child Lock feature is not enabled.
- Ensure that the remote control is paired to the bed base.
Warranty information
EASE® Adjustable Base:
SEALY MATTRESS MANUFACTURING COMPANY, LLC. OR TEMPUR-PEDIC NORTH AMERICA, LLC ("TEMPUR SEALY®") WARRANTS THAT IT WILL, AT TEMPUR SEALY'S OPTION, REPLACE OR REPAIR PURCHASER'S EASE® MODEL IF IT IS DEFECTIVE DUE TO FAULTY WORKSMANSHIP OR MATERIALS, SUBJECT TO THE LIMITATIONS DESCRIBED IN THIS WARRANTY.
TEMPUR SEALY® UNDERTAKES NO RESPONSIBILITY FOR THE QUALITY OF THE GOODS EXCEPT AS OTHERWISE PROVIDED IN THIS WARRANTY. THERE ARE NO WARRANTIES THAT EXTEND BEYOND THE DESCRIPTION ON THE FACE THEREOF.
THIS WARRANTY APPLIES ONLY TO EASE® MODEL. THIS MODEL MAY BE IDENTIFIED BY REFERENCE TO THE SERIAL NUMBER ON THE PRODUCT.
YEARS 1 THROUGH 3: FULL COVERAGE OF PARTS AND LABOR
EASE® is warranted against defects in the workmanship or materials for a period of three (3) years from the warranty commencement date. During these first three years of the warranty, the entire product is so covered, including factory supplied electronics, electrical components, drive motors and power supply components. Upon notice during the first through third year from the warranty commencement date, Tempur Sealy® will send replacement parts to the purchaser, at no cost, in order to replace any such defective part. In addition, Tempur Sealy® will pay all authorized labor and transportation costs associated with the repair or replacement of any parts which Tempur Sealy® determines to be defective. This three (3) year warranty shall not apply if the purchaser does not return any and all defective parts to Tempur Sealy® within 15 days of purchaser's receipt of such replacement parts furnished. Return of the frame, however, should it need to be replaced, is not required.
In no instance will this warranty cover any damage attributable to misuse or to normal wear and tear or to excessive weight placed upon the product. Nor will this warranty cover any purchaser other than the original purchaser nor will it cover product purchased from an unauthorized third party. If you are not the original purchaser of this product, you take "as is" and "with all faults." If you did not purchase this EASE® we will require proof of purchase from you demonstrating that you are the original purchaser and are eligible to make a valid claim under this Warranty.
YEARS 4 THOUGH 5: FULL COVERAGE OF PARTS ONLY
Upon notice during the years four (4) and five (5) from the warranty commencement date, Tempur Sealy® will offer replacement parts for any defective parts to the purchaser. Factory supplied electronics, electrical components, drive motors and power supply components are included. This two (2) year Warranty shall not apply if purchaser does not return any and all defective parts to Tempur Sealy® within 15 days of purchaser's receipt of replacement part. Purchaser shall bear all service, transportation, labor and shipping costs related to the delivery and/or replacement of the defective part.
FRAME ONLY - YEARS 1 THROUGH 25 WARRANTY
Notwithstanding the above, Tempur Sealy® extends a 25 Year Warranty on the frame itself used in this product. Specifically, Tempur Sealy® warrants that for a full 25 years, any defect in the workmanship or the materials used in the frame itself shall be covered. In the event of a frame defect, full product replacement will be offered. For purposes of this 25 Year Warranty, the frame consists of the metal structure of the base and specifically excludes its cover, its side rails, decking and legs, actuator lift motors, control box, remote controls, power supply, and any power supply cords.
ADDITIONAL TERMS AND CONDITIONS
In no instance will this warranty cover any damage attributable to misuse or to normal wear and tear or to excessive weight placed upon the product. Nor will this warranty cover any purchaser other than the original purchaser nor will it cover product purchased from an unauthorized third party. If you are not the original purchaser of this product, you take "as is" and "with all faults." If you did not purchase this EASE® directly from Tempur Sealy® we will require proof of purchase from you demonstrating that you are the original purchaser and eligible to make a valid claim under this Warranty.
This Warranty does not include coverage for damage caused by the purchasers or by other users if the product has been used in a manner inconsistent with the operation and maintenance procedures outlined in the Complete Reference Guide, this Warranty, or any other applicable document published or approved by Tempur Sealy®. Nor does it include coverage if the product has been repaired or modified by the purchaser or by an unauthorized third party or if the product has been damaged in transit. This Warranty does not apply to damage to mattresses, fabric, cables, electrical cords or items supplied by Resellers, as defined below. Contact the Reseller or other appropriate party for warranty information on these items. Nor does this Warranty apply to any unnecessary service calls, including costs for in home service calls solely for the purpose of educating the consumer about the unit or finding an unsatisfactory power connection. In addition, if the recommended weight restrictions are not followed (Twin, Twin Long, Double, Queen, King, CA King and Split/Dual CA King bases - up to 650 lbs. each) this Warranty is void.
Replacement parts may be new or reconditioned at Tempur Sealy®'s discretion.
Except for the 25 Year Warranty provided for the frame of this product, there is no warranty at all after five years, dating from commencement of this Limited Warranty.
ADDITIONAL LIMITATIONS ON WARRANTY COVERAGE
In the event a warranty claim is filed and a warranty replacement is deemed necessary, purchaser will be required to surrender the original product, including any components, to Tempur Sealy® at the time of the replacement. Return of the frame, however, should it need to be replaced, is not required.
Repairs to or replacement of the EASE®model or its components under the terms of this Limited Warranty will apply to the original warranty period and will not serve to extend such period. This Warranty begins on the "warranty commencement date" which is the date of purchase for new unused products.
If you did not purchase this EASE® model directly from Tempur Sealy®, proof of purchase will be required to demonstrate that you are the original purchaser and eligible to make a valid claim under this Warranty.
If original proof of purchase is not provided by the purchaser, Tempur Sealy® reserves the right to determine if the unit is covered, or is not covered, by this Warranty and may use the manufacturing date as the warranty commencement date.
The decision to repair or to replace defective parts under this Limited Warranty shall be made by Tempur Sealy® at its option and at its sole discretion. Except for the Warranty provided for the frame of this product, there is no warranty at all after five years, dating from commencement of this Limited Warranty.
TEMPUR SEALY® SHALL NOT BE LIABLE FOR INCIDENTAL OR CONSEQUENTIAL DAMAGES RESULTING FROM THE USE OF THIS PRODUCT OR ARISING OUT OF ANY BREACH OF THIS WARRANTY. THE EXCLUSIVE REMEDY FOR BREACH OF THIS WARRANTY SHALL BE REPLACEMENT OR CREDIT TOWARDS REPLACEMENT AS SET FORTH HEREIN. THERE ARE NO EXPRESS OR IMPLIED WARRANTIES, INCLUDING IMPLIED WARRANTIES OF MERCHANTABILITY AND FITNESS FOR A PARTICULAR PURPOSE, OTHER THAN THE WARRANTY DESCRIBED ON THE FACE OF THIS LIMITED WARRANTY.
Some states do not allow the exclusion or limitation of incidental or consequential damages, so the above limitation or exclusion may not apply to every purchaser. This Warranty gives the purchaser specific legal rights, and the purchaser may also have other legal rights, which may vary from state to state.
If you the purchaser experience any problem with your EASE®during the warranty period, please consult the troubleshooting section of your Reference Guide. "If the problem persists, please contact Tempur Sealy®'s Customer Service Department by calling toll-free 1-800-499-1965 or in Canada 1-800-268-4414.
PLEASE RETAIN THIS WARRANTY PAPERWORK AND ORIGINAL SALES RECEIPT FOR EASY FUTURE REFERENCE AND DOCUMENTATION.
This Warranty is valid in all 50 states, Puerto Rico, Mexico and Canada.
IF YOU HAVE ANY ISSUES WITH YOUR ADJUSTABLE BASE WITHIN THE WARRANTY PERIOD, PLEASE REFER BACK TO THE INSTRUCTIONS IN THIS USER MANUAL. IF YOUR ISSUES PERSIST, PLEASE CALL CUSTOMER SERVICE:
Please have your receipt ready and available.
CUSTOMER SERVICE TOLL FREE NUMBER:
U.S. 1-800-499-1965 | Canada 1-800-268-4414
THANK YOU AND ENJOY YOUR EASE® ADJUSTABLE BASE.
Serial Number:________________________________
(Place your serial number here for ready reference.)
Documents / ResourcesDownload manual
Here you can download full pdf version of manual, it may contain additional safety instructions, warranty information, FCC rules, etc.
Download Tempur-Pedic EASE 3.0 Manual. Remote Pairing. Adjustable Base
Advertisement


Need help?
Do you have a question about the EASE and is the answer not in the manual?
Questions and answers