ActionTec ScreenBeam Pro SBWD100B User Manual
Wireless display receiver
Hide thumbs
Also See for ScreenBeam Pro SBWD100B:
- User manual (70 pages) ,
- User manual (13 pages) ,
- User manual (47 pages)

Related Manuals for ActionTec ScreenBeam Pro SBWD100B


Summary of Contents for ActionTec ScreenBeam Pro SBWD100B
- Page 1 Wireless Display Receiver ScreenBeam Pro Receiver Model # SBWD100B User Guide rev. 2.1...
-
Page 2: Table Of Contents
Table of Contents Introduction Package Contents Getting to Know the Receiver System Requirements Installing the Receiver Connecting to an HDTV Setting Up for the First Time Connecting via Windows 8.1 Connecting via Intel WiDi Connecting via Miracast™ Tips for Optimal Performance Display and Control Options Display Mode Ultra-Low Delay... - Page 3 ScreenBeam Pro Receiver USB over Network Restore Default Settings Troubleshooting and FAQs Troubleshooting Frequently Asked Questions Specifications General Wireless Electrical Environmental Notices Warranty GPL Info EU CE Declaration of Conformity Technical Support...
-
Page 4: Introduction
Introduction Thank you for your purchase of Actiontec’s ScreenBeam Pro Wireless Display Receiver. The Receiver wirelessly streams what’s on a Intel WiDi or Miracast™- compatible device to an HDTV, including movies, videos, photos, music, and more. The Receiver’s features include fast setup, smooth video playback, full 1080p HD support, ultra-low delay, Windows 8.1 optimization, versatile... -
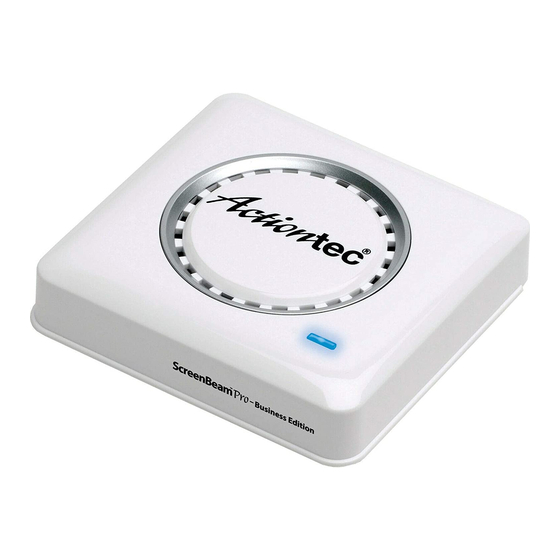
Page 5: Getting To Know The Receiver
ScreenBeam Pro Receiver Getting to Know the Receiver Power Light Indicates power supply status. USB Port Used for software upgrades via a USB flash drive or for USB over network application (UoIP). Reset Button Used to reset the Receiver to default settings. ... -
Page 6: System Requirements
4th Gen Ultrabook with Intel WiDi 4.0 or higher • Laptop or notebook with Intel WiDi 3.5 or higher • Smartphone, tablet, or laptop running Windows 8.1 • Wi-Fi Miracast™-certified smartphones and tablets • Non-WiDi/Miracast-ready computers with Actiontec USB • Transmitter (Windows 7 or higher) ... -
Page 7: Installing The Receiver
Installing the Receiver This chapter explains how to connect the Receiver to an HDTV. Make sure all the contents from the Receiver’s package are available before starting. Connecting to an HDTV To connect the Receiver to an HDTV: Get the Receiver, AC power adapter, and HDMI cable from the Receiver’s package. - Page 8 ScreenBeam Pro Receiver Turn on the HDTV and set it to display the input from the correct HDMI port (the one you have the Receiver plugged into in Step 2). Verify the Ready To Connect screen appears on the HDTV. The Receiver is connected to the HDTV, and is ready for use.
-
Page 9: Setting Up For The First Time
Setting Up for the First Time This chapter explains how to connect the Receiver for the first time to the source device. There are three source device options: Windows 8.1, Intel WiDi, and Miracast™. Connecting via Windows 8.1 This section explains how to connect a device running Windows 8.1 to the Receiver. - Page 10 From the Project screen, select Add a wireless display. Note: If the device is running Windows 8.1 and the screens above do not appear, go to: http://www.actiontec.com/widi81 for the latest software update. Alternatively, update the Windows 8.1 device via the Windows Update application.
- Page 11 Setting Up for the First Time Select the Receiver from the Select a Device list. A Connecting… screen appears. Note: A PIN code may be required to connect to the Receiver.
- Page 12 ScreenBeam Pro Receiver The HDTV displays messages to show the status of the connection. The device connects to the Receiver, and the device’s screen is displayed on the HDTV.
-
Page 13: Connecting Via Intel Widi
Setting Up for the First Time Connecting via Intel WiDi This section explains how to connect a device running Intel's WiDi application to the Receiver. Follow the procedure below to connect the device to the Receiver: 1. Launch the Intel Wireless Display Application on the device. To find the application, go to Windows Search on the device and search for “Intel WiDi. - Page 14 ScreenBeam Pro Receiver 3. Wait until the Receiver displays a PIN on the HDTV, and a PIN entry box is displayed on the screen of the WiDi device. Enter the PIN in the PIN entry box on the WiDi device, then click Continue.
- Page 15 Setting Up for the First Time 4. The HDTV displays messages to show the status of the connection.
- Page 16 ScreenBeam Pro Receiver 5. A Connection Successful screen appears on the device's screen. Click Finished, and the device’s screen is displayed on the HDTV. Adjusting the HDTV Picture If edges of the device screen cannot be seen on the HDTV or black edges are visible, adjust the cropping settings: Go to the Intel WiDi application and click Settings.
- Page 17 Setting Up for the First Time Click Picture and Sound. In the Settings - Picture and Sound screen, select Adjust cropping. Adjust the HDTV picture by clicking “+” (plus) or “-” (minus).
-
Page 18: Connecting Via Miracast
ScreenBeam Pro Receiver WiDi Software Version Support Make sure the device supports Intel Wireless Display (WiDi) software version 3.5 or higher. To find out which version of Intel WiDi the device is running, launch the Intel WiDi application and click Help, then navigate to the About Intel®... -
Page 19: Tips For Optimal Performance
Setting Up for the First Time 2. The Wireless Display Application scans for available devices. Select the Receiver from the device list. Entering a PIN code may be required, which will be displayed on the HDTV screen. 3. Wait for the device to pair with the Receiver. When it does, the device's screen will be displayed on the HDTV. -
Page 20: Display And Control Options
Display and Control Options This chapter describes the display modes and control options supported by the Receiver. Display Mode The Receiver supports three display modes when connected with a compatible wireless display application (Intel WiDi or Windows 8.1 Project, for example). In Windows, press the Windows logo + P keys simultaneously ( + P) to launch the display options and select the desired display mode from the... - Page 21 ScreenBeam Pro Receiver Duplicate Duplicate mode is used to display the same content on both the device's screen and the HDTV simultaneously. Note: There may be minor delay between the content displayed on the HDTV screen compared to the device’s screen. This is due to the current state of wireless display technology.
-
Page 22: Ultra-Low Delay
Display and Control Options Ultra-Low Delay The Receiver also supports Ultra-Low Delay, which helps reduce end-to- end wireless display latency. Real-time applications, such as games, can run without noticeable delay when the Ultra-Low Delay mode is enabled on supported devices. Intel WiDi Ultra-Low Delay can be activated on a device running Intel WiDi 3.5 or higher. -
Page 23: Usb Over Network
ScreenBeam Pro Receiver 3. Select Prioritize Speed in the Quality vs. Speed section of the screen, then click Apply Settings. Refer to Intel's support documentation for more information. USB over Network The Receiver’s USB over Network (UoIP) feature allows the use of USB HID peripheral devices, either from the source device or from the USB device side. -
Page 24: Restore Default Settings
Display and Control Options Restore Default Settings To restore the Receiver's default factory settings: Power on the Receiver, and wait until the Ready to Connect screen appears. Hold down the Receiver's Reset button. When the Resetting to Factory Defaults screen appears on the HDTV, release the Reset button. -
Page 25: Troubleshooting And Faqs
Receiver, or I'm having problems with my connection. Make sure you've followed Intel's instructions after the upgrade. Refer to Intel's WiDi website (http://www.actiontec.com/widi81) for more information. Intel WiDi does not work after upgrading to Windows 8.1 and I can't connect to ScreenBeam Pro. - Page 26 ScreenBeam Pro Receiver In some instances, I can't connect to the Receiver from WiDi after installing antivirus software. To solve this problem, add Intel WiDi to the antivirus-approved whitelist of applications, and then reconnect. I'm seeing artifacts and experiencing a choppy, juddering video stream.
- Page 27 Troubleshooting I'm seeing choppiness and brief pauses while watching local video on my Miracast™ device. Wireless interference may cause the video playback to be choppy. If this occurs, try the following: Make sure you are in the same room as the Receiver is. Set the media player to use the H/W decoder, if available.
- Page 28 ScreenBeam Pro Receiver I encounter connection failure with the Receiver and my device can’t connect to it any more. Reboot the Receiver and try connection again. Or, reboot your device • (laptop/Ultrabook/tablet/smartphone) and try connection again. Reboot both the Receiver and your device and try connection again. •...
- Page 29 If you are running Windows 8.1 and Add a wireless display does not appear, try the following: For Intel WiDi compatible devices, go to • http://www.actiontec.com/widi81 for the latest software update. Update your Windows 8.1 via the Windows Update application. •...
-
Page 30: Frequently Asked Questions
ScreenBeam Pro Receiver Frequently Asked Questions Can my device connect to the Receiver? To connect to the Receiver, your device must be Intel WiDi compatible or Wi-Fi Miracast-capable. For a system to support Intel WiDi 3.5 (or later), it should have most, if not all, of the required Intel chipsets (processor, graphic card, and wireless chipset). - Page 31 Troubleshooting Intel Atom Z3740D Processor Intel Atom Z3770 Processor Intel Atom Z3770D Processor Graphics One of the following graphics solutions is required: Intel Iris Pro Graphics 5200 Intel Iris Graphics 5100 Intel HD Graphics 5000 Intel HD Graphics 4600 Intel HD Graphics 4400 Intel HD Graphics 4200 Intel HD Graphics 4000 Intel HD Graphics 3000 (mobile)
- Page 32 ScreenBeam Pro Receiver Intel Dual Band Wireless-AC 7260 for Desktop Intel Dual Band Wireless-AC 3160 Intel Wireless-N 7260 Broadcom BCM43228 Broadcom BCM43241 Broadcom BCM4352 Operating System One of the following operating systems is required: Microsoft Windows 7 Microsoft Windows 8 Microsoft Windows 8.1 System Requirements for Wi-Fi Miracast™...
- Page 33 Troubleshooting Visit ScreenBeam Pro compatibility page for the recommended Miracast devices. Do I need to install drivers/apps to use the ScreenBeam Pro Receiver? For Windows 7/8, you may need to install the Intel WiDi (3.5 or • higher) application. For Windows 8.1, you only need to install the latest Windows •...
- Page 34 Internet router or data network to view online content. How can I upgrade the Receiver’s firmware? You can upgrade the Receiver's firmware wirelessly by using ScreenBeam Configuration Utility, which is available on Actiontec’s website: http://www.actiontec.com/sbupdate. Windows 8.1 devices, you can also install ScreenBeam Configuration •...
- Page 35 Troubleshooting For Android devices, you can also install ScreenBeam Configuration • Utility (Android) available on Google Play Store (tip: search for “ScreenBeam”). How can I adjust the display to fit properly to my TV screen? Connect your device to the Receiver first, and then adjust the screen size with one of the following methods: Go to the Intel WiDi application, and then select Settings >...
- Page 36 ScreenBeam Pro Receiver Where can I find more information and get support for Intel WiDi? For more information about Intel Wireless Display, go to: http://www.intel.com/p/en_US/support/highlights/wireless/wireless- display. My device can support Intel WiDi. Where can I find Intel WiDi on my device? And where can I obtain the latest Intel WiDi application and graphic drivers for my Intel WiDi device? In Windows, search for “Intel WiDi”...
- Page 37 Troubleshooting Can I connect to the Wi-Fi router and the Receiver simultaneously with my Intel WiDi laptop? Yes. Connect the laptop to an available Wi-Fi router first, and then connect to the Receiver. You can then view online content and beam it to the HDTV.
- Page 38 ScreenBeam Pro Receiver Can I use the Receiver to access online content directly? No. The Receiver does not directly connect to the Internet. You must use a source device (laptop/Utrabook/tablet/smartphone) to wirelessly stream the online content to your Receiver. Does the Receiver support NVIDIA Shield game console? Yes.
- Page 39 Troubleshooting The device does not have Intel WiDi installed, but can run the • program. Download the Intel WiDi (3.5 or higher) application and install it on the device. If it installs correctly, the device supports Intel WiDi. If the application can’t be installed, update the graphic adapter and wireless adapter drivers on the device, then install the application again.
-
Page 40: Specifications
Specifications General Language English, Simplified Chinese, Traditional Chinese, Japanese, French, German, Dutch, Korean, and Spanish A/V Interface HDMI, Type-A male connector Video Output Up to full HD 1080p30 (H.264) Audio Output LPCM & AAC, up to 5.1 channels Firmware Upgrade Via Wireless and USB Dimensions 78 x 75 x 20 mm (3.07 x 2.95 x 0.79 inches) -
Page 41: Wireless
ScreenBeam Pro Receiver Wireless IEEE 802.11a/b/g/n, dual-band 2.4 GHz and 5 GHz Wireless Security WPA2, WPS PIN pairing, AES 128-bit Content Protection HDCP 2.x Electrical Power Input 5V / 2A Power Consumption < 4W LED Indicator Power... -
Page 42: Environmental
Specifications Environmental Operating temperature 0º C to 40º C (32º F to 104º F) Storage temperature 0º C to 70º C (32º F to 158º F) Operating humidity 10% to 85%, non-condensing Storage humidity 5% to 90%, non-condensing... -
Page 43: Notices
Statement shall be deemed modified to be consistent with such local law. Under such local law, certain disclaimers and limitations of this Warranty Statement may not apply to the customer. Go to: http://www.actiontec.com/products/warranty.php for more information. GPL Info For GNU General Public License (GPL) related information, go to... -
Page 44: Eu Ce Declaration Of Conformity
ScreenBeam Pro Receiver EU CE Declaration of Conformity To obtain the complete Declaration of Conformity form in softcopy, go to the Actiontec Electronics Declarations of Conformity EU/EEA website at: http://international.actiontec.com/support/doc. The symbol below is placed in accordance with the European Union Directive 2002/96 on the Waste Electrical and Electronic Equipment (the WEEE Directive).
Need help?
Do you have a question about the ScreenBeam Pro SBWD100B and is the answer not in the manual?
Questions and answers