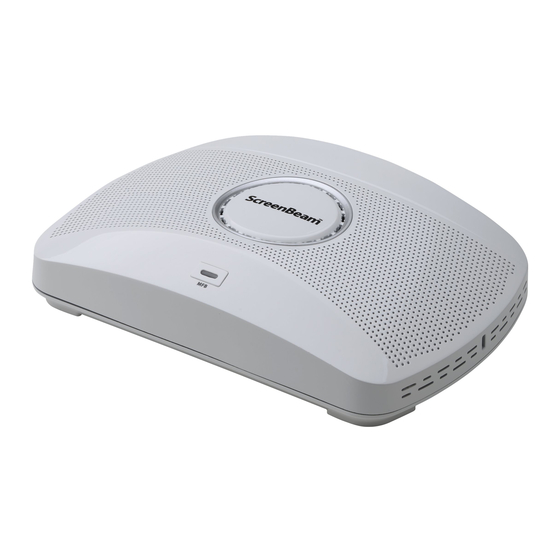
Summary of Contents for ActionTec ScreenBeam 1100
- Page 1 ScreenBeam 1100 Model: SBWD1100 User Manual http://support.screenbeam.com http://support.screenbeam.com/ticket Copyright © 2018 Actiontec Electronics, Inc. Version 1.1...
- Page 2 Consult the dealer or an experienced radio/TV technician for help. To maintain compliance with FCC’s RF Exposure guidelines, This equipment should be installed and operated with minimum distance between 20cm the radiator your body: Use only the supplied antenna. http://support.screenbeam.com http://support.screenbeam.com/ticket Copyright © 2018 Actiontec Electronics, Inc. Version 1.1...
- Page 3 Method 2: Wireless display over existing LAN infrastructure This method requires both the client device and ScreenBeam 1100 receiver to be on the Local Area Network (LAN). It is an ideal solution for Non-Miracast capable client devices; such as device with either Windows 7, MacOS, or iOS.
- Page 4 OS X 10.8 (or later) iOS device § iOS 10.2 (or later) o Windows 10 Miracast over LAN Windows 10 version 1809 (or later) § Recommended Network Requirements • Wireless display over P2P http://support.screenbeam.com http://support.screenbeam.com/ticket Copyright © 2018 Actiontec Electronics, Inc. Version 1.1...
- Page 5 7236, 7250 Multicast support is required for Mac/iOS with Airplay Mirroring to discover the § ScreenBeam receiver. If enabling mDNS is not an option, then use the ScreenBeam App to connect. http://support.screenbeam.com http://support.screenbeam.com/ticket Copyright © 2018 Actiontec Electronics, Inc. Version 1.1...
- Page 6 • Ethernet network connection with DHCP IP (i.e. Wi-Fi router) (Required for wireless display over LAN and access to management console for configuration) • ScreenBeam App (for Non-Miracast capable devices) http://support.screenbeam.com http://support.screenbeam.com/ticket Copyright © 2018 Actiontec Electronics, Inc. Version 1.1...
- Page 7 6. Turn on the TV and switch to the HDMI input to which the receiver is connected to. 7. Wait about 30 seconds, then verify the TV displays the Ready to Connect screen. http://support.screenbeam.com http://support.screenbeam.com/ticket Copyright © 2018 Actiontec Electronics, Inc. Version 1.1...
- Page 8 IT admin could verify the version and perform an update if necessary. ScreenBeam 1100 receiver is now ready to connect for Wi-Fi Miracast client devices via P2P. Go ahead and connect from your Windows 10/8.1 Miracast device. If you need guidance on how to connect from a Miracast device, go to http://www.screenbeam.com/setup.
- Page 9 DHCP. ACCESS SCREENBEAM RECEIVER FOR CONFIGURATION You can configure ScreenBeam 1100 receiver by accessing the receiver web management console or by using the ScreenBeam CMS software. If the ScreenBeam receiver is being managed by ScreenBeam CMS, then you may skip this section.
- Page 10 Enable AirPlay Mirroring for Mac/iOS support if needed. Note that security PIN is not supported for this mode. • Enable Windows 10 Miracast over LAN support if needed. Note that security PIN is only supported by Win10 starting from build 1809 (and later). http://support.screenbeam.com http://support.screenbeam.com/ticket Copyright © 2018 Actiontec Electronics, Inc. Version 1.1...
- Page 11 CONNECTING FROM YOUR DEVICE For the most updated instructions on how to connect, visit http://www.screenbeam.com/setup Congratulations! Your TV/Projector is now enabled with wireless display. For FAQs, troubleshooting tips and support, go to: https://support.screenbeam.com http://support.screenbeam.com http://support.screenbeam.com/ticket Copyright © 2018 Actiontec Electronics, Inc. Version 1.1...
- Page 12 The bottom of the receiver is equipped with four screw holes, with VESA dimensions of 75*75 mm. Firmly secure a VESA mount onto the receiver using four M4 screws (Maximum length: 8 mm, maximum torque: 6 kgf.cm). (figure not in scale) http://support.screenbeam.com http://support.screenbeam.com/ticket Copyright © 2018 Actiontec Electronics, Inc. Version 1.1...


Need help?
Do you have a question about the ScreenBeam 1100 and is the answer not in the manual?
Questions and answers