Active Silicon AS-CAM-23IP4K-A Technical Reference Manual
Hide thumbs
Also See for AS-CAM-23IP4K-A:
- Quick start manual (11 pages) ,
- Quick start manual (10 pages)

Related Manuals for Active Silicon AS-CAM-23IP4K-A


Summary of Contents for Active Silicon AS-CAM-23IP4K-A
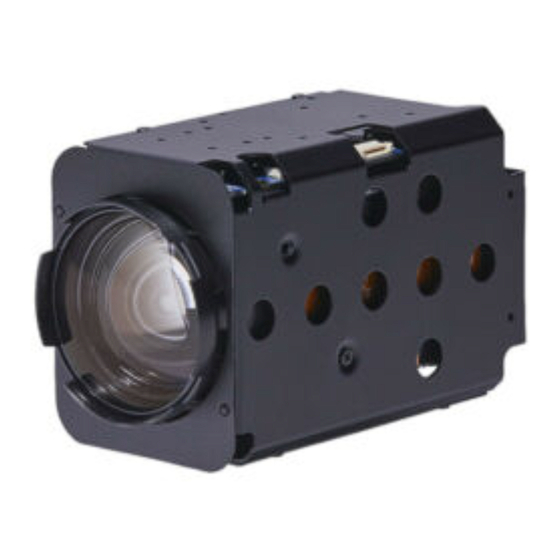
- Page 1 Harrier series camera Harrier 23x Autofocus-Zoom IP 4K Camera (H.264/H.265) AS-CAM-23IP4K-A Technical Reference Manual Edition: v1.01 Issued Date: 05 September 2022...
-
Page 2: Table Of Contents
Harrier series camera Contents SAFETY INSTRUCTIONS ................3 MAINTENANCE .................... 3 CONNECTING TO THE CAMERA ..............6 CONNECTORS ..................... 6 EVALUATION BOARD CONNECTORS ............7 ACESSING THE CAMERA WEB PAGES ............. 8 CHANGING THE PASSWORD .............. -
Page 3: Safety Instructions
If the product does not work properly please contact Active Silicon. Never attempt to disassemble the block camera yourself as this will invalidate the warrantee. Active Silicon shall not assume any responsibility for problems caused by unauthorized repair or maintenance.) September 2022 www.activesilicon.com... - Page 4 Harrier series camera Feature AS-CAM-23IP4K-A Sensor 1/1.8ʺ Progressive CMOS (IMX334) Focal Length 6.7~154.1mm, 23x optical Aperture Range F1.58~F3.95 Shutter 1/25~1/100000 Optical 59.6°~3.5° (Wide-Tele) Min. Distance 10mm-1500mm (Wide-Tele)
- Page 5 Harrier series camera Alarm out, 1ch Audio in, 1ch Audio out, 1ch Power SD card socket Reset Expansion 1x UART, 1x GPIO Working Temp. -10°C~60°C Working Humidity ≤95% (non-condensing) Other Power...
-
Page 6: Connecting To The Camera
Harrier series camera Connecting to the Camera Download and install the ONVIF Device Manager from https://sourceforge.net/projects/onvifdm/ This program can be used to identify the IP address of the camera (e.g. 192.168.1.7). Streaming video can be displayed in the ONVIF device manager or a media player that can display RTSP streams. -
Page 7: Evaluation Board Connectors
Harrier series camera Evaluation Board Connectors J3 - Power Pin No. Name Pin No. Name UART4_TXD RS485_B UART4_RXD RS485_A VIN_12V J4 – Ethernet Pin No. Name Pin No. Name ETH_TX+ ETH_RX−... -
Page 8: Acessing The Camera Web Pages
Harrier series camera Acessing the Camera Web Pages Steps: 1. Power on the camera, and connect the camera to the network. 2. Open the web browser. 3. In the address field, input the IP address of the network camera, e.g., 192.168.1.107 and press the Enter key to enter the login interface. -
Page 9: Changing The Password
Harrier series camera Changing the Password For your privacy and to better protect your system against security risks, we strongly recommend the use of strong passwords for all functions and network devices. The password should be something of your own choosing (using a minimum of 8 characters, including upper case letters, lower case letters, numbers and special characters) in order to increase the security of your product. -
Page 10: Basic Web Page Operation
Harrier series camera Basic Web Page Operation In this and the following chapters, operation of the block camera by the web browser will be described as an example. Figure 1. - Page 11 Harrier series camera Live View Parameters: LOGO Description Login PTZ Control Image Setting Alarm Info Latency Regional Zoom Quick PTZ Zone Focus Main Stream Live View Second Stream Live View Third Stream Live View 1:1 Display Local Record...
-
Page 12: Ptz Control Panel
Harrier series camera PTZ Control Panel PTZ Control: Panning, tilting, focusing and zooming actions of the network. The lighter, wiper, one-touch focus and lens initialization control. Preset/patrol/pattern: Set and call the preset/patrol/pattern for the camera PTZ Control Panel Figure 2. - Page 13 Harrier series camera 1) PTZ Setting Figure 3. PTZ Setting Menu 2) Line Scan: Figure 4. Line Scan. Setting the Left and Right boundary 3) Pattern: Figure 5. Pattern September 2022 www.activesilicon.com Page 13 of 52...
-
Page 14: Osd Setting
Harrier series camera 4) Preset: Figure 6. Preset: You can configure up to 255 presets 5)Patrol: Figure 7. Patrol OSD Setting Figure 8. Image Setting Alarm Info Figure 9. -
Page 15: Playback
Harrier series camera Playback Purpose: This section explains how to view the video files stored in the network disks or memory cards. Figure 10. Playback Description of the buttons: Logo Description The window size is 1:1... - Page 16 Harrier series camera Drag the progress bar with the mouse to locate the exact playback point. The different colors of the video on the progress bar stand for the different video types Search by Date Figure 11.
-
Page 17: Camera Settings
Harrier series camera Camera Settings Click Settings to enter the Configuration Interface Figure 14. Settings tab The configuration interface functions are as follows: System information Figure 15. System information September 2022 www.activesilicon.com Page 17 of 52... - Page 18 Harrier series camera 1) “Version information” Figure 16. Version information View the device's "serial number, MAC, product type, software version, hardware version, WEB version, control version, compilation date, activation status" and other information. 2)...
- Page 19 Harrier series camera 3) “Hard disk information”: Figure 18. Hard disk information View "hard disk serial number", "physical serial number", "disk group", "hard disk status", "properties", "residual capacity", "total capacity", and refresh status information. System setup Figure 19.
- Page 20 Harrier series camera "Date Settings" can set "year", "month", "day", "time", "minute" and "second" separately. Synchronized PC: Time synchronization with PC terminal. "Automatic Synchronization": Automatically synchronize with PC after selecting. "Save time": After setting up, click Save, it will pop up and save successfully.
- Page 21 Harrier series camera “Channel”: Select the appropriate channel for configuration. "Coding mode": Select H265, H264 and MJPEG according to requirements. (The main stream is H265 and H264 only) "Coding Level": Set up High Profile, Main Profile and Baseline Profile according to requirements.
- Page 22 Harrier series camera Image setting Figure 23. Image setting 1)OSD setting Figure 24. OSD setting “Preview Interface”: After saving the parameter settings, you can see the effect. “Display Name”: Enabling Check of Display Name.
- Page 23 Harrier series camera "Text Edge Description": Open Red Edge Description for Web Preview Text (not supported) "Display multiple lines": Enable selected and sets 1-5 lines separately according to requirements.
- Page 24 Harrier series camera 【General Configuration】: Figure 27. General configuration "Distortion Correction": Closing, Manual Options. "Strength Value": Use with manual option of distortion correction (0-100) “Electronic Anti Shake, ": Closing and Automation Options, "Strength Value": Use with Electronic Anti-shake Automation Options (0-100).
- Page 25 Harrier series camera 【Focus Settings】: Focus Settings Figure 29. Focus Mode: Manual, automatic and semi-automatic mode optional. "Near limit" can be selected according to the actual application environment, and "3", "6", "12", "24", "36"...
- Page 26 Harrier series camera 【Exposure】: Figure 31. Exposure adjustment "Exposure mode": automatic, anti-drag, manual, shutter priority, low light priority, high light priority and other options. "Gain": Can be adjusted according to demand (0-100). "Shutter Limit": Can be adjusted according to demand (10-640000 microseconds).
- Page 27 Harrier series camera 【W/B】: Figure 34. W/B Select "automatic", "manual", "sunny", "cloudy", "dusk", "incandescent lamp", "sodium lamp", "fluorescent lamp", "once tracking", "automatic tracking", "special light source", "lock selection".
- Page 28 Harrier series camera Image superimposition Figure 36. Image superimposition Select the picture that meets the requirement, click upload, turn on the enabler, save it and upload it successfully, and you can see the overlapped picture. User management Figure 37.
- Page 29 Harrier series camera PTZ Setting Figure 39. PTZ setting "Protocol": Click on the drop-down menu to pop up a variety of protocols to choose according to needs, and will continue to update. “Address”: Set as needed (0-255).
- Page 30 Harrier series camera “Time period”: Figure 41. Time period Click the Settings button to pop up the Time Period Settings menu. Time settings can be set for 6 time periods per day, synchronization settings can be targeted selection or can be selected for a whole week.
- Page 31 Harrier series camera System maintenance Figure 42. System maintenance "Auto Reboot ": You can click the drop-down selection (never/day/week) and time point settings to complete the save. "Reboot": Click , pop up menu, click confirm device to restart.
-
Page 32: Network Settings
Harrier series camera Network Settings Figure 43. Network setting Figure 44. Network setting options September 2022 www.activesilicon.com Page 32 of 52... - Page 33 Harrier series camera Network Type " DHCP": DHCP can be checked according to the need, and the device can automatically obtain the network address and related network parameters. "NIC Type": Network Card Type can be set, default self-adaptive, optional 10M half-duplex, 10M full-duplex, 100M half-duplex, 100M full-duplex, 1000M full-duplex.
- Page 34 Harrier series camera Figure 46. NTP Enables: Enables are selected and set according to requirements. "Server IP": Set NTP server address, according to the need for appropriate settings. "Port": The default port 123 can be set according to the needs of network settings.
- Page 35 Harrier series camera IP Authorization Figure 48. IP right Enables: Enables are selected and set according to requirements. "Restriction Type" can be selected as( )according to the need. Add IP": Enter the IP you need to add in the left input box first, and click Add IP successfully and it will be displayed in the list below.
- Page 36 Harrier series camera Email Figure 49. Email Enable: click Enable and set according to requirement SMTP Server: Set the address of SMTP Server and make the setting according to requirement Port: The default port is 25, which can be set according to requirement of network settings User Name: input the sender's mailbox username...
- Page 37 Harrier series camera "File type": this can be selected ( ) according to requirement Enable: click Enable and set according to requirement "Anonymity": when the anonymity Enabled, the camera can accesses to the FTP server anonymously, and sets it up according to requirement "Server": Set FTP server address according to requirement Port: The default port 1024, and it can be set according to requirement of network settings...
- Page 38 Harrier series camera PPPOE Figure 52. PPPOE Enable: click Enable and set according to requirement User Name: input the username of PPPOE Password: input the password of PPPOE "IP": After saving, the camera will get a public IP address "Save": click Save after setting, it will pop up and save successfully Refresh: Click to refresh the display...
- Page 39 Harrier series camera Syslog Figure 54. syslog ONVIF Figure 55.ONVIF Enable: click Enable and set according to requirement Port: The default port is 80, which can be set according to requirement Version Information: Display onvif version "discovery mode"...
- Page 40 Harrier series camera RTMP Figure 56. RTMP Enabling: click by default and set it according to requirement "Port" setting port, default 1935, and it can be set accordingly according to requirement "RTMP Push Enable": click to open RTMP Push function "Stream Type": The default main stream can be selected according to requirement Push Address is set according to requirement...
- Page 41 Harrier series camera Alarm Center Figure 58. Alarm Center Enable: click Enable and set according to requirement "Server IP" sets the server IP address, which can be set according to requirement "Port"...
- Page 42 Harrier series camera Refresh: Click to refresh the display All Resets: All settings are restored to default Video Control Figure 61. Video control "Video Control": there are Configuration, Always, Close Control options, and these can be set up according to requirement "Save": click Save after setting, it will pop up and save successfully Refresh: Click to refresh the display...
- Page 43 Harrier series camera Alarm Setting Figure 63. Alarm Setting Video Mask Figure 64. Video Mask "Detection type": The equipment can be selected ( ) according to requirement. Channel: Set up according to requirement.
- Page 44 Harrier series camera "Dejitter": this can be set (0-600 seconds) according to requirement of settings. "Alarm Output": click Enable according to requirement of the settings. "Output Delay": this can be set (10-300 seconds) according to requirement of settings. "Video Channel": click Enable according to requirement of the settings.
- Page 45 Harrier series camera "Alarm Output": click Enable according to requirement of the settings. Set 1 as alarm input #1, set 2 as alarm input #2 "Output Delay": this can be set (10-300 seconds) according to requirement of settings. "Video Channel": click Enable according to requirement of the settings.
- Page 46 Harrier series camera "Video Delay": this can be set (10-300 seconds) according to requirement of settings. "Video Channel": click Enabled and make setting according to requirement "Save": click Save after setting, it will pop up and save successfully. Refresh: Click to refresh the display.
- Page 47 Harrier series camera view the serial number, log time, events, channels, extended content and other information. Log Configuration Figure 70. Log Configuration "Log Full": Stop/overwrite options can be selected according to requirement when the log is full "Save Log Type": Make Single Select or All Select to all the system information you requirement to save.
- Page 48 Harrier series camera Figure 72. Local Setting "Capture Type": Local capture format can be set according to requirement, and "jpg" or "bmp" can be selected according to requirement. "Video Type": local video format can be set according to requirement, and ".dav"...
-
Page 49: Smart Features
Harrier series camera Smart Features Click on the Smart tab to enter the intelligent functions page Figure 73. Intelligent Functions Perimeter Figure 74. Perimeter Detection "Preview Interface": By default, there is an identification box, which can be dragged by the mouse to zoom in and out (4 areas can be set). - Page 50 Harrier series camera range of the left-click drop-down box in the small window, and the same operation can set to the min. click. "Alarm type": make settings according to requirement. There are two options: touch line alarm/cross line alarm.
- Page 51 Harrier series camera Event Type: Default type is Line-crossing. Enable: click Enable and set according to requirement. "Clear the line": Set up the preview interface according to requirement "Clear Shadows": turn on in special environments like in shadow and reflection "Display Rule Line": click Enable and setting according to requirement.
-
Page 52: Contact Details
Harrier series camera CONTACT DETAILS Headquarters: North America: Active Silicon Ltd Active Silicon, Inc. Pinewood Mews, Bond Close, Iver, 479 Jumpers Hole Road, Suite 301, Bucks, SL0 0NA, UK.
Need help?
Do you have a question about the AS-CAM-23IP4K-A and is the answer not in the manual?
Questions and answers